7 Hairstyle Ideas for Girls Explained Step by Step
If you want to try new fashion and style ideas on your daughter, you can choose from different hairstyle options regardless of the length, thickness, or color of her hair. You can recreate these ideas at home, and their new hairstyles will stay in place all day long.
5-Minute Crafts will show you how to create some hairstyles for girls, whether you want them for an event or just for everyday life.
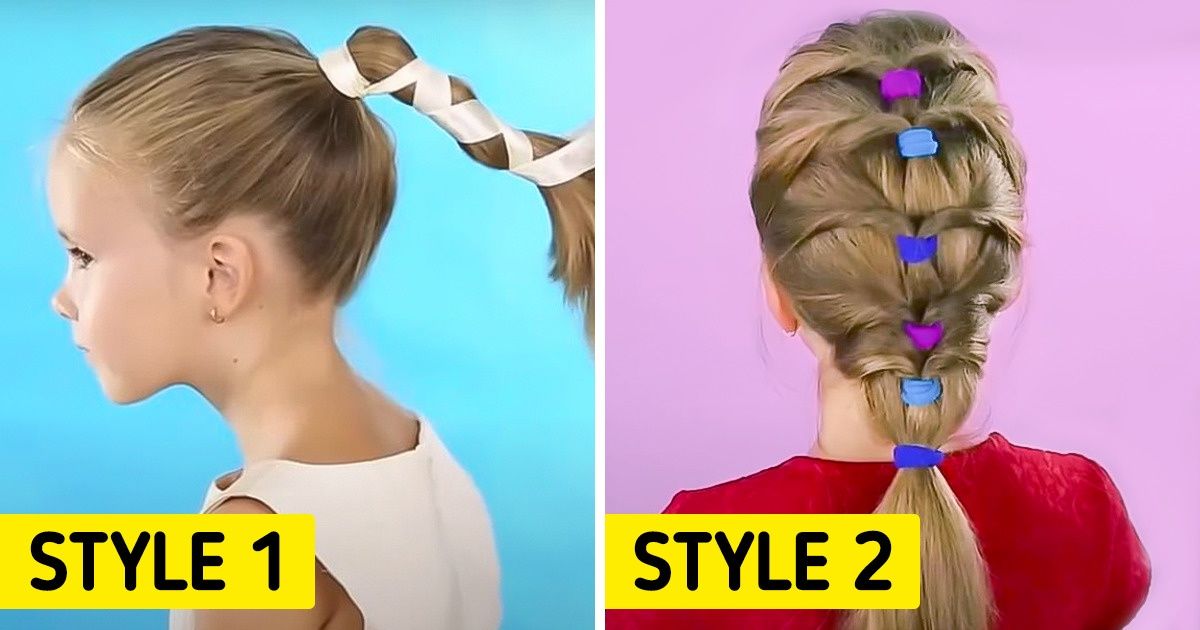
1. A high ponytail with a ribbon
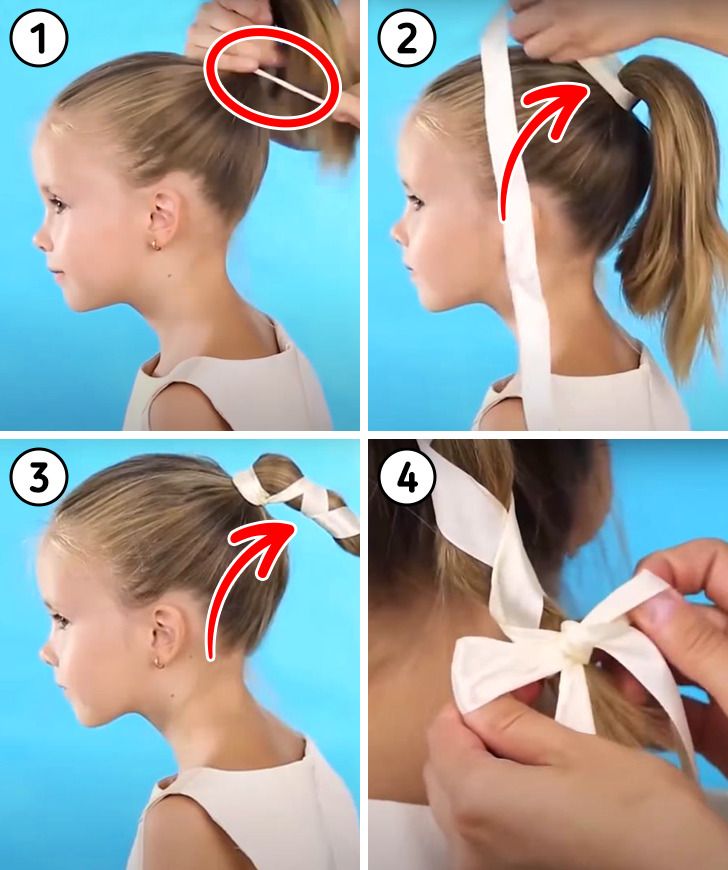
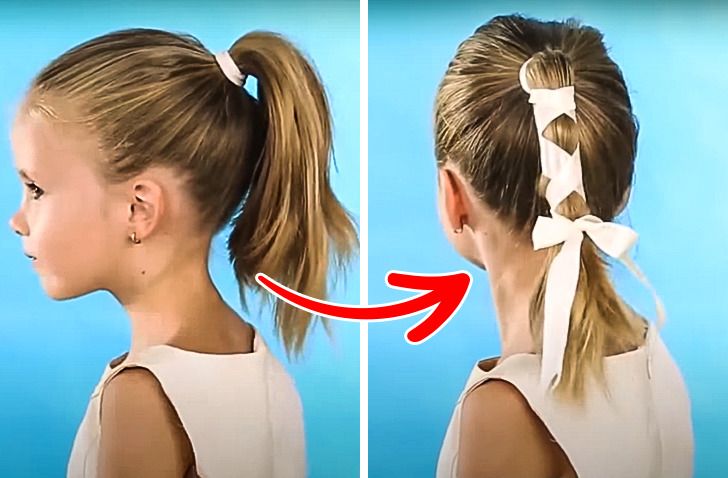
- Make a high ponytail and secure it with a rubber band.
- Take a 12-inch ribbon and tie a knot around the rubber band, leaving the ends evenly spaced.
- Wrap the ends of the ribbon, creating a criss-cross pattern around the ponytail until it’s entirely wrapped.
- Then finish it up with a nice bow-shaped knot.
2. A braid with elastic bands
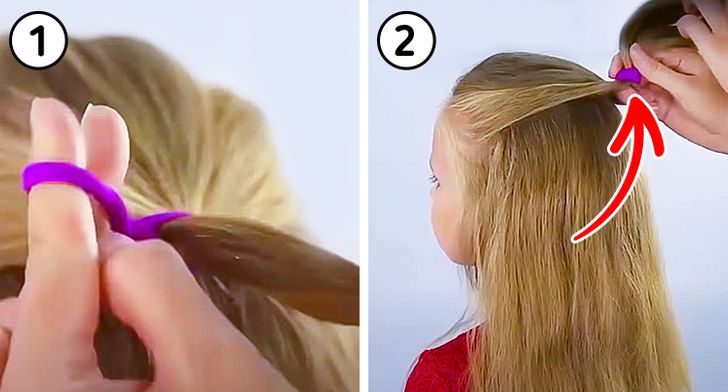
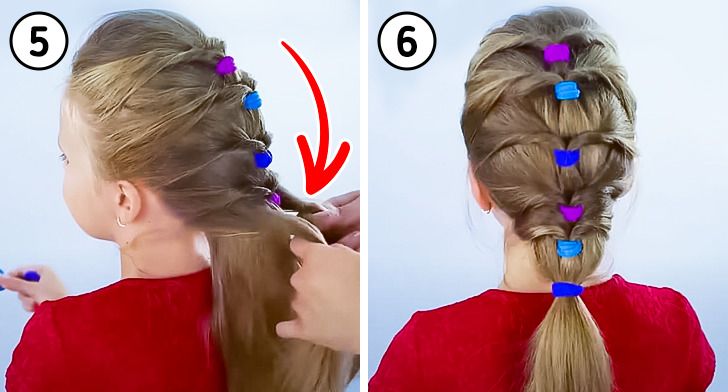
- Pull the top layer of the hair back and hold it in place using an elastic band.
- Make a double knot with the elastic band for it to stay in place.
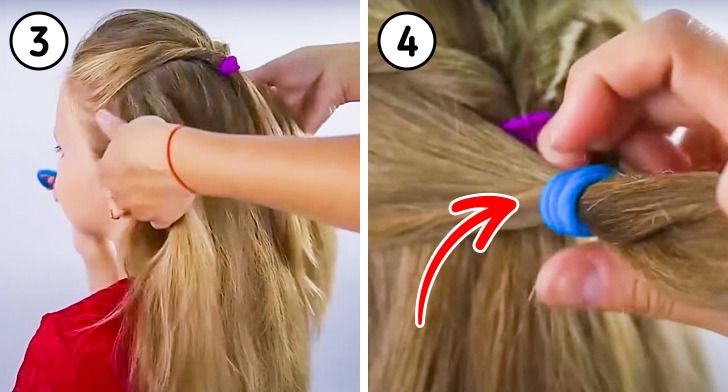
3. Section another 2 strands of hair to the left and right and attach them with another elastic band on top of the previous ponytail.
4. Make a double knot with the elastic band like you did before by passing it over and through the middle of the second section of tied hair.
5. Repeat the same pattern until all the hair is done. You can alternate the colors of the rubber bands to create a cool effect.
6. Tie all the ends together with a final elastic band.
3. A donut bun for long hair
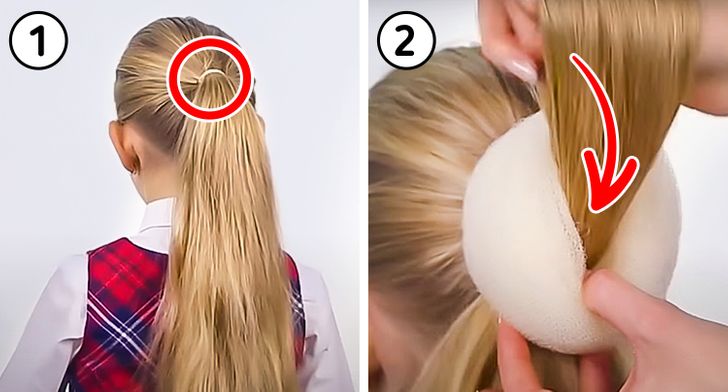
- Make a ponytail and secure it with an elastic band.
- Place the donut over the elastic band of the ponytail.
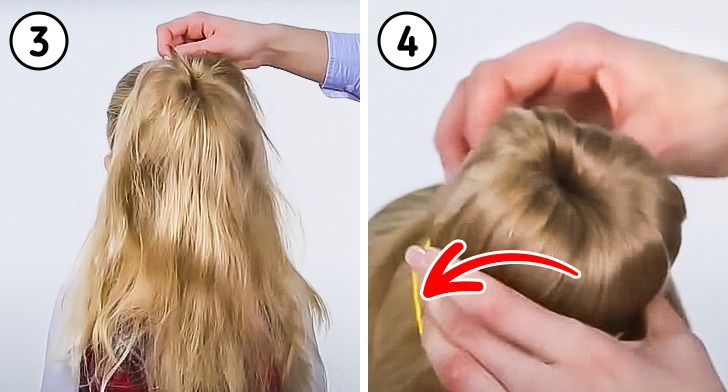
3. Cover the donut completely with the hair.
4. Place an elastic band around the hair-covered donut to secure it.
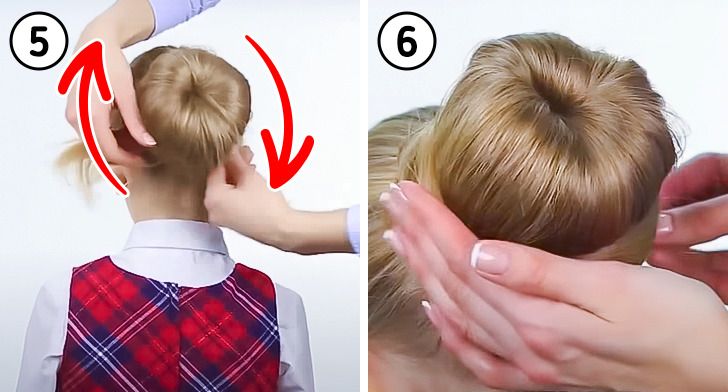
5. Part the remaining hair in 2 and wrap the strands around the elastic band as many times as needed for it to look like a proper donut bun.
6. Secure the ends with bobby pins, and you’re done.
4. A double bun
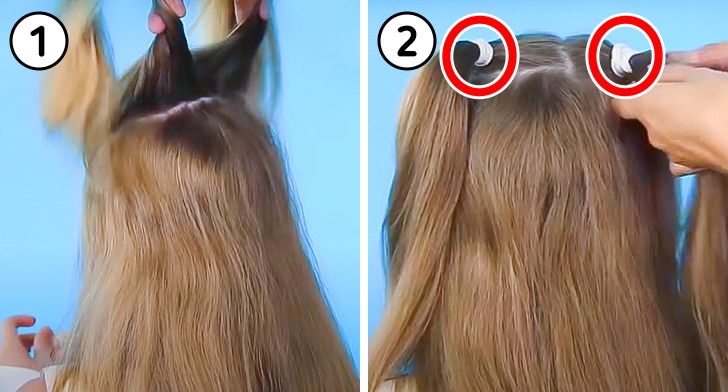
- Part the top layer of hair in 2.
- Secure each of the resulting strands of hair with an elastic band.
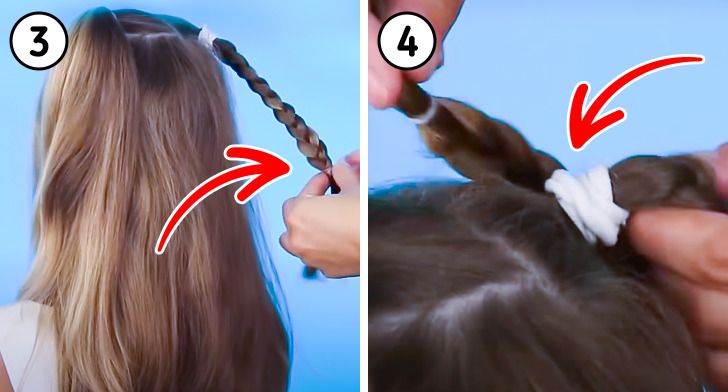
3. Braid one of the ponytails and secure it with an elastic band at the ends.
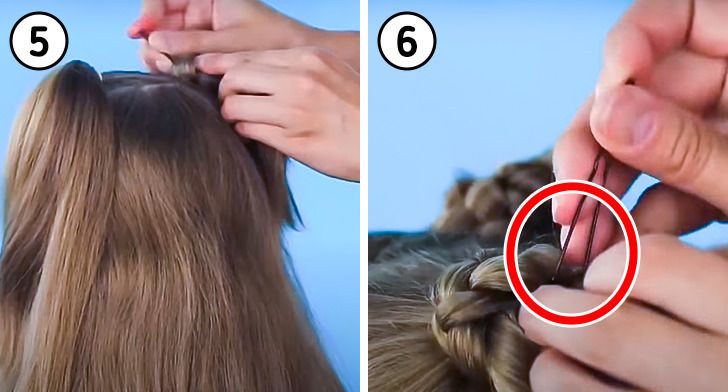
4. Now tie the braid in a knot that will cover the elastic band at the top of the head.
5. Place bobby pins to secure the ends of the hair.
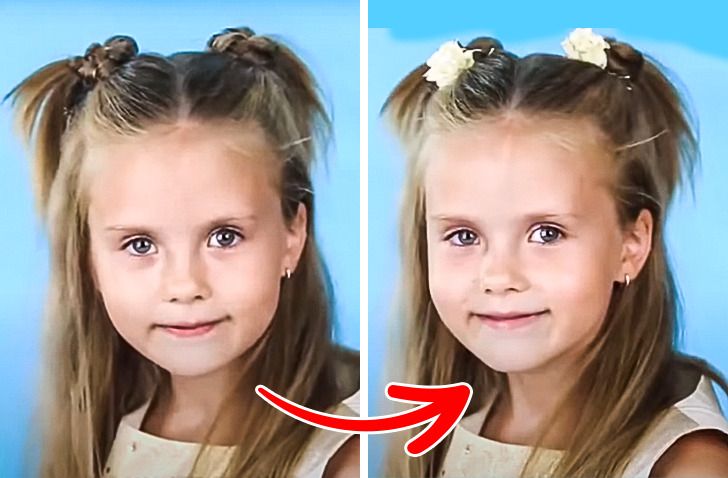
6. Do the same procedure on the second ponytail. You can add a barrette on each side as decoration.
5. Side braid
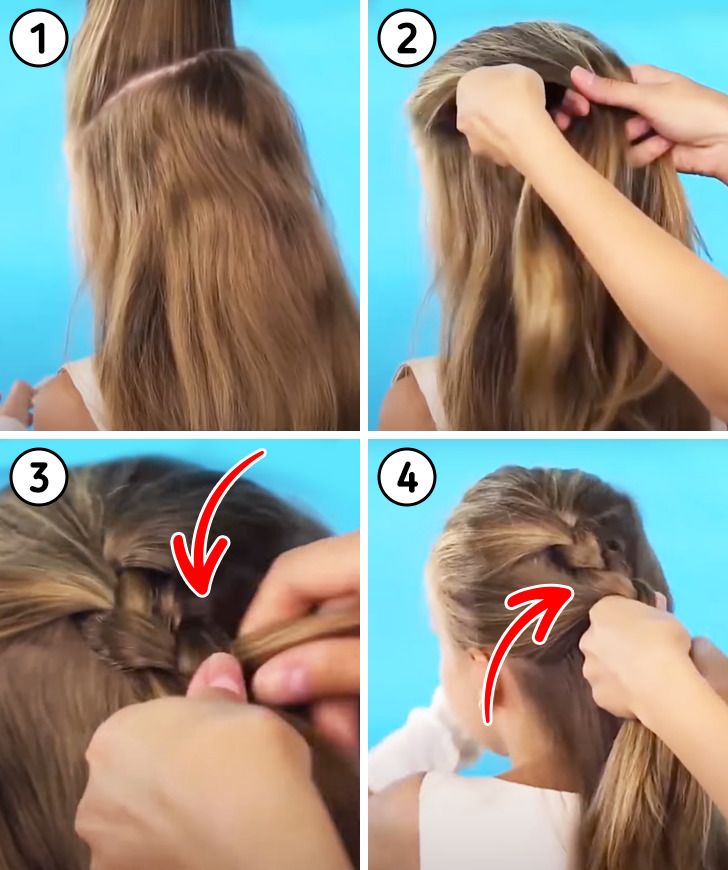
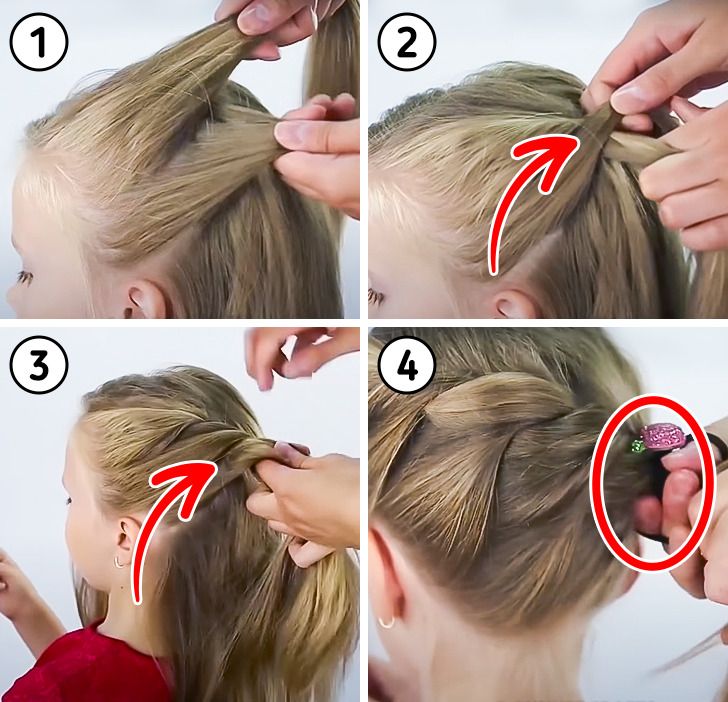
- Start by sectioning off the top layer of hair.
- Divide this strand into 3 equal parts.
- Make a basic side braid.
- Take another strand of hair and add it to the braid.
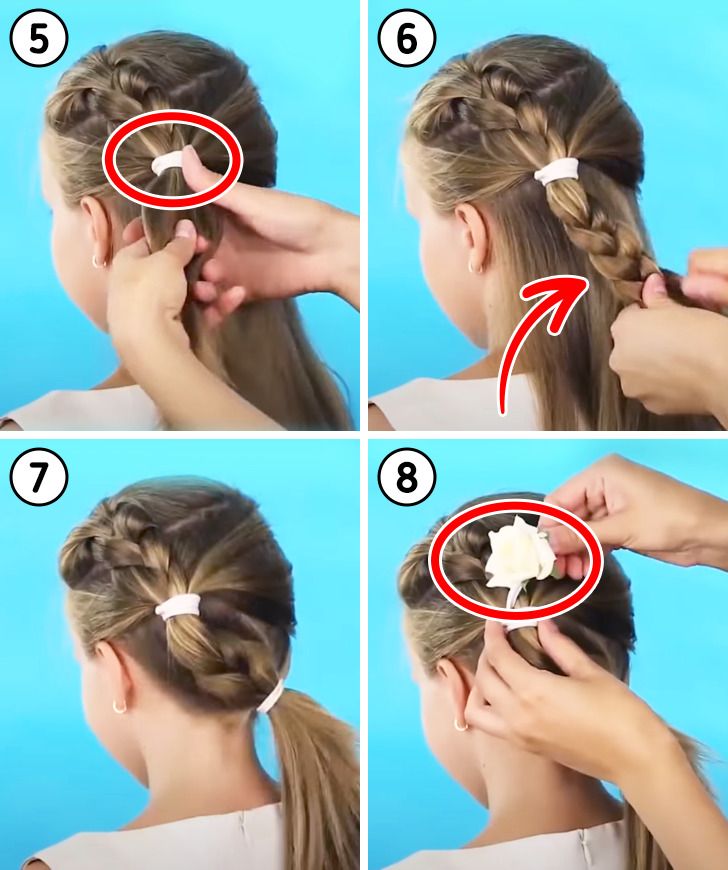
5. Secure the braid with an elastic band.
6. Keep braiding the basic pattern after the first elastic band is in place until you reach the end of that strand of hair.
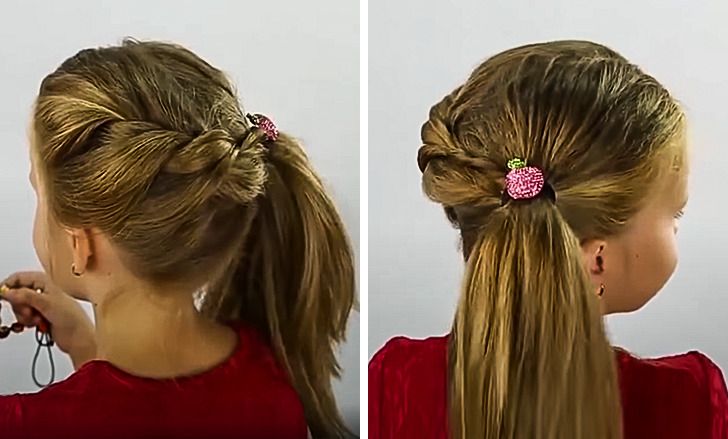
7. Then secure it all with an elastic band, making a ponytail on the opposite side from where you started.
8. You can add a barrette or a bow to decorate the hairstyle.
6. Pencil bun braid
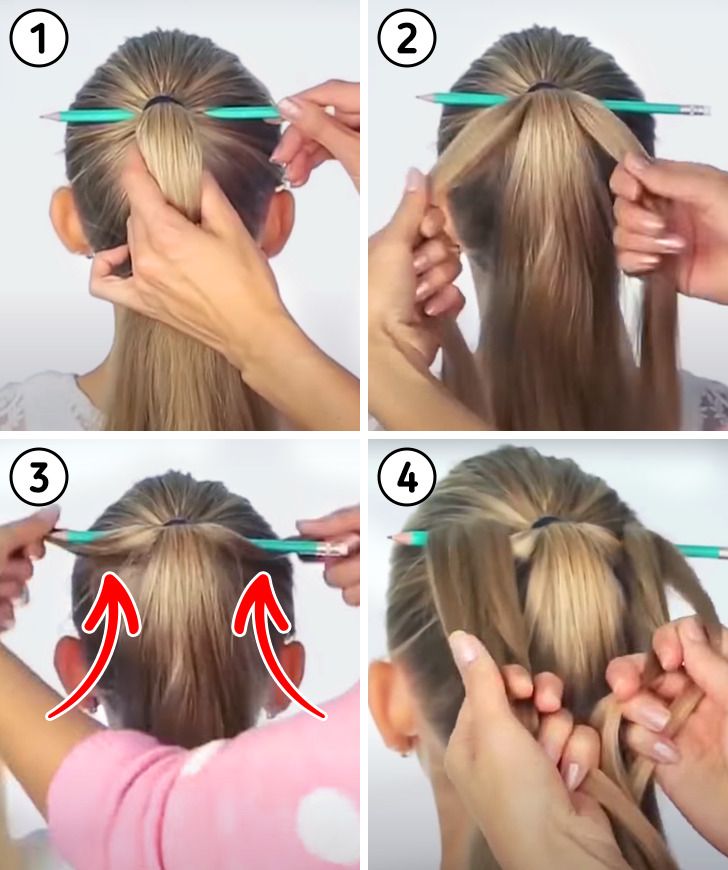
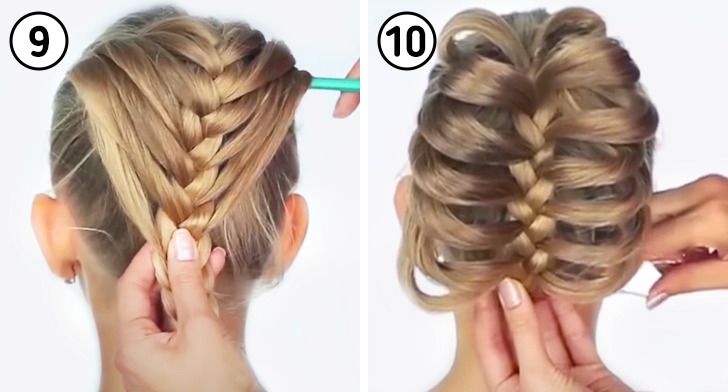
- Make a high ponytail and insert a pencil behind the elastic band that’s holding it together.
- Pull 2 thin strands of hair out of the ponytail.
- Pass the strands behind the pencil.
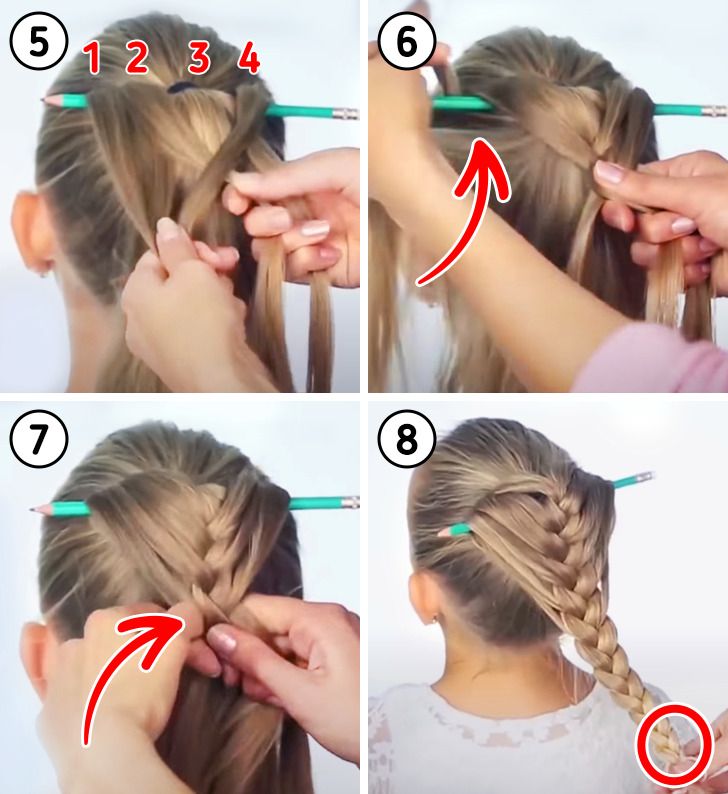
- Divide both strands in 2 like in the picture.
5. Pass the last strand over the second and third strands, and combine it with the first strand.
6. Start braiding by adding strands from the ponytail and passing them behind the pencil.
7. Continue until all the hair is incorporated into the braid.
8. Secure the braid with an elastic band.
9. Hold the braid while removing the pencil from the hair.
10. Hide the excess hair at the back with a bobby pin.
7. French braid
- Section 2 strands of hair from the top side of the head. You can choose if you prefer left or right.
- Cross the strands and start braiding. You should go from the top side to the opposite bottom side.
- Add sections of hair to the center strand as you go.
- When you reach the end, secure all the hair with an elastic band.
