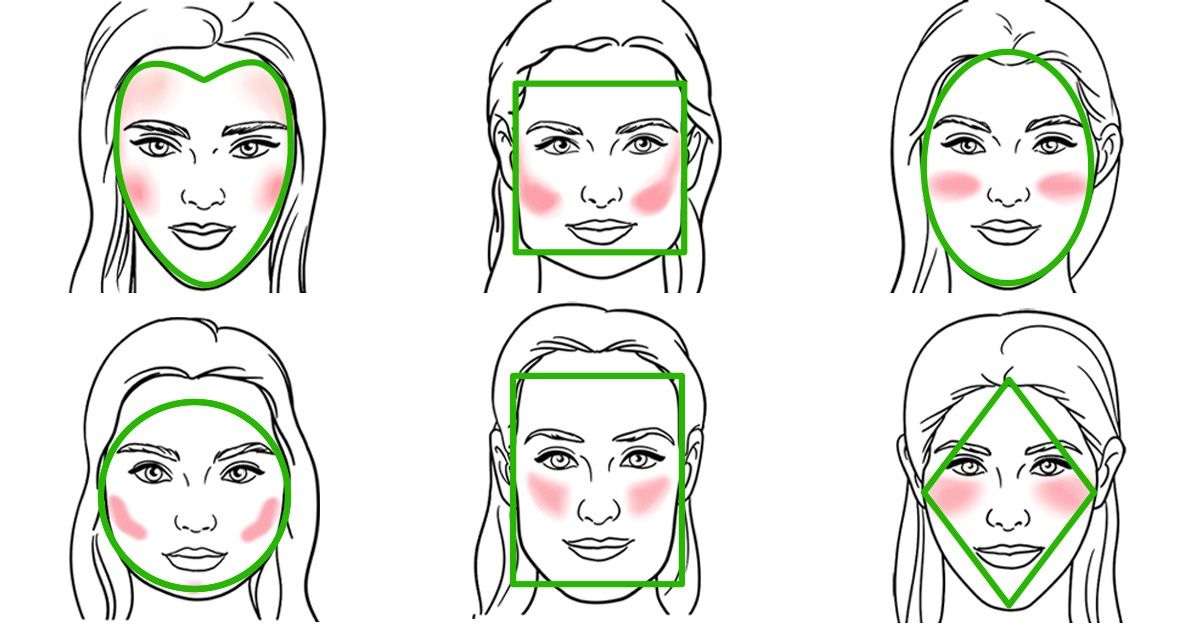
How to Apply Blush According to Your Face Shape

Blushers can enhance your natural complexion. However, it is important to know your face shape to apply it to the right spots. This way, not only will you look stunning, but also it will make you get the most out of your beauty products.
5-Minute Crafts has prepared this guide to help you identify your face shape and apply blush according to your natural features.
1. Heart-shaped face
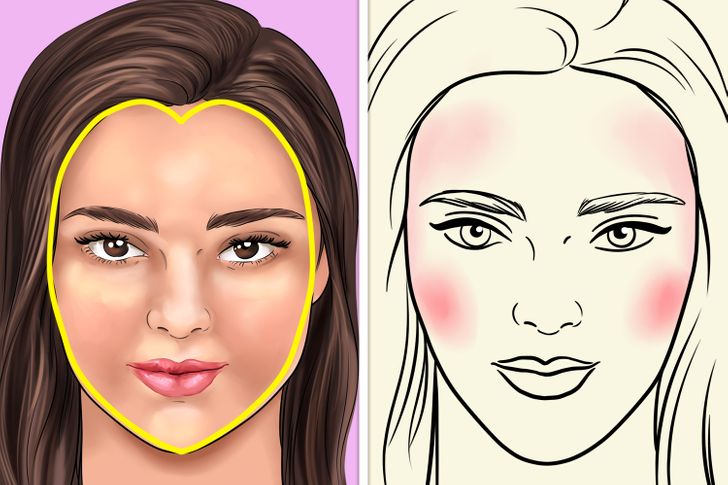
A heart-shaped face has a slightly pointed chin, a wide forehead, and prominent cheeks. Therefore, the aim is to soften the edges to make your face look more like an oval.
How to do it:
- Apply blush to the outer side of your cheekbones. Start by your ears and finish below the outer corner of your eyes.
- Blend some color by your temples, going to the center of your forehead. This will help you balance the width of the upper and lower area of your face.
2. Square face
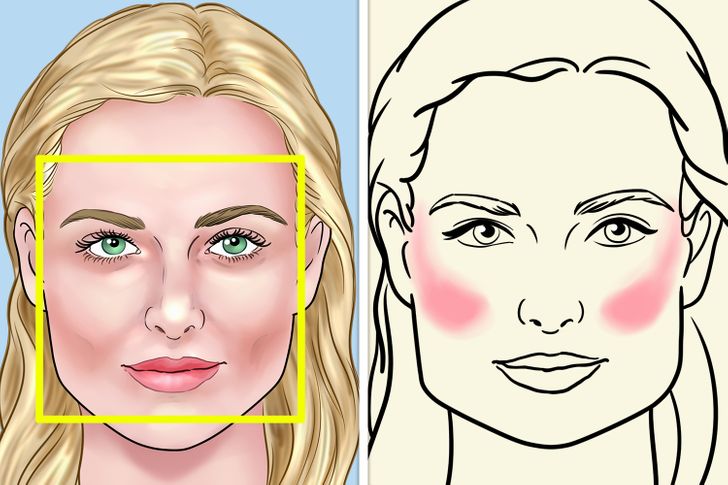
They have a forehead with almost the same dimensions as the cheekbones and chin, along with a prominent jaw. So, the main goal for this face shape is to soften its edges and lengthen your forehead.
How to do it:
1. Apply blush forming half-moon shapes. Start by the apples of your cheeks, tracing your cheekbones all the way up to your temples.
2. Blend the color by drawing a loose 8 with the brush. This will help you get a more natural look.
Note: To identify the apples of your cheeks, smile, and use the pupils of your eyes as a guide. These will be your stopping points to help you avoid applying the blush too close to your nose.
3. Oval face
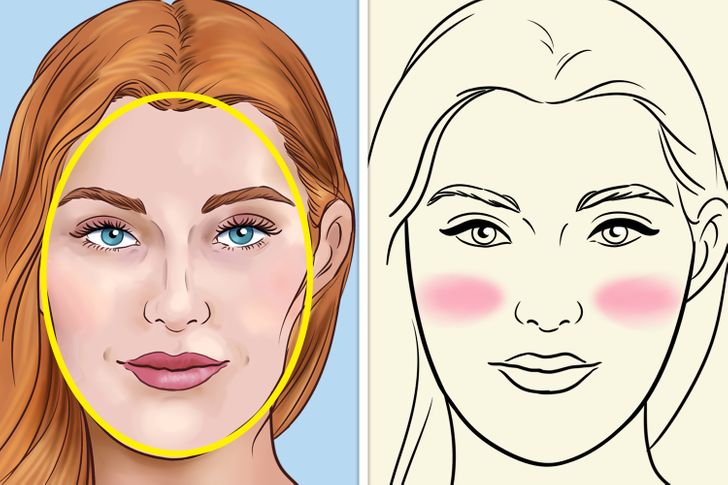
An oval face usually has prominent cheekbones, and the chin is slightly narrower than the forehead. Another noticeable feature is that it seems longer than wider. Due to these traits, the most suitable look for this shape is to make your face appear less elongated.
How to do it:
1. Apply blush in horizontal lines.
2. Blend well by starting on your cheekbones toward your ears.
Although oval faces can look good in any blush technique, make sure to avoid applying it under your cheekbones as this could look more like a windburn instead of a glow.
4. Round face
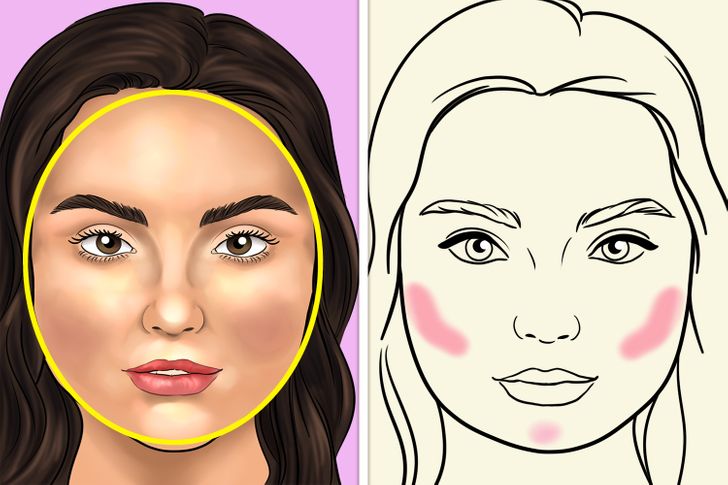
It is very easy to recognize as it has about the same width and length. Also, the cheeks and cheekbones are very prominent. In this case, the goal is to make your face look thinner.
How to do it:
- Identify the natural concave area of your face by sucking in your cheeks. Then, apply blush right above that part.
- If you wish, you can add a bit of color to your chin to finish your look.
Note: Avoid pearlized or reflective blush because it can create the illusion of a rounder appearance.
5. Oblong or rectangular faces
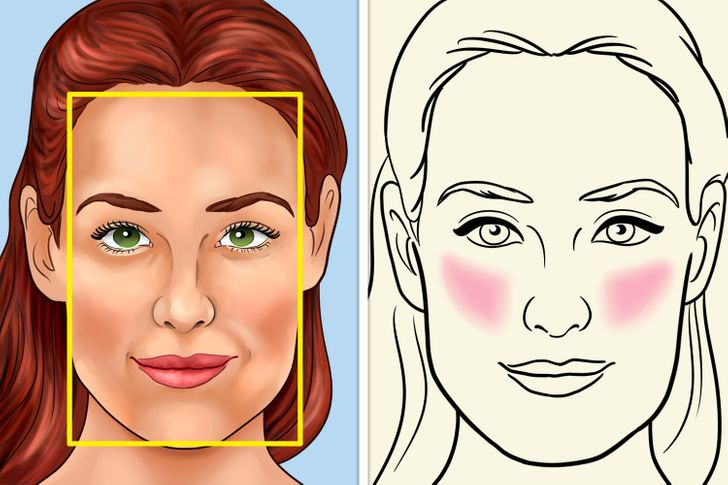
An oblong face can be similar to a square face. However, this shape is not as wide, and it is longer. At the same time, the forehead, cheeks, and jawline are almost the same width. If these characteristics match your complexion, shorten your features to get the most flattering look.
How to do it:
- Apply some blush right on your cheekbones and below the outer corners of the eyes.
- Blend well, making sure that the color never goes lower than the tip of your nose.
6. Diamond-shaped face
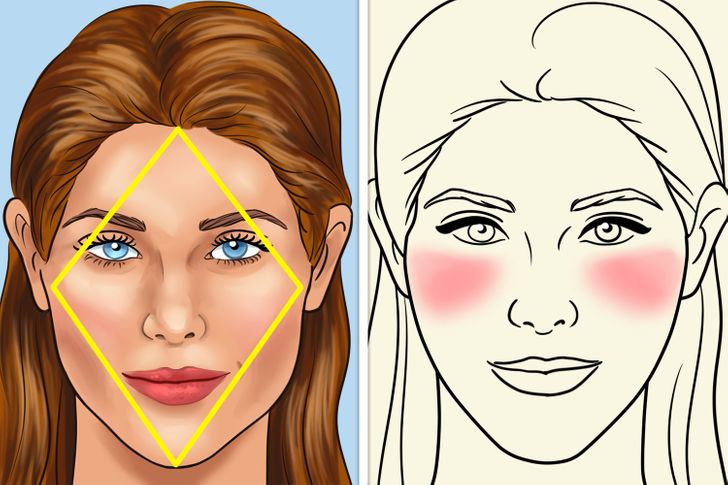
One of its main features is its pointed chin. At the same time, it is narrower towards the jawline and wider at the cheekbones, making the latter more pronounced. For this reason, you may want to draw attention to the bottom part of your face.
How to do it:
- Apply blush to the top of your cheekbones, avoiding the concave area below them.
- Blend the color well, going towards your ears.