How to Cut Men’s Hair at Home
There are an infinite number of techniques to cut a man’s hair and they all differ according to the type of hair you have. 5-Minute Crafts put together a tutorial on how to cut your own hair at home, but we narrowed everything down to a popular cut, the pompadour with a low-fade. We chose this particular cut because it uses the most common techniques to cut a man’s hair.
1. Get everything you’ll need
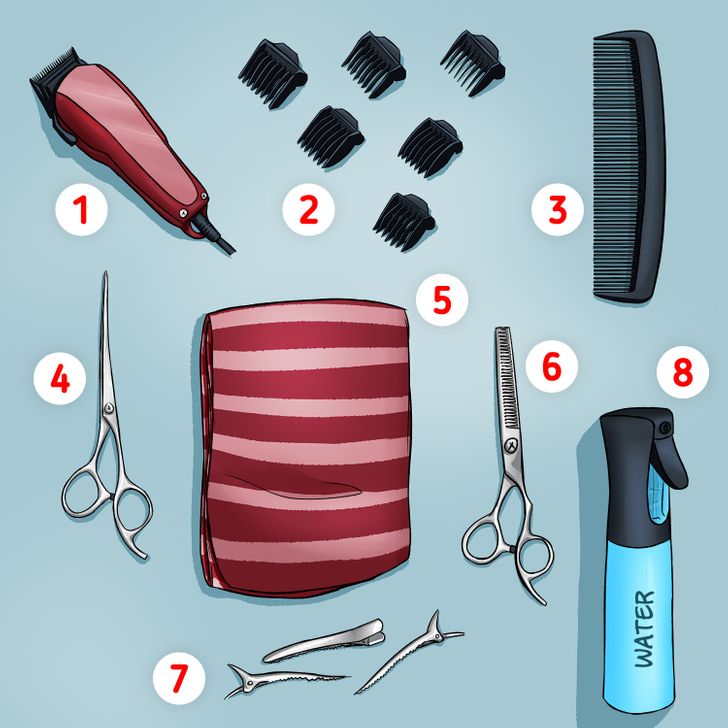
1. Clippers: you can use any type of clippers made for trimming hair and beards.
2. Guards: you will need these to avoid square, very short haircuts
3. Comb: you need this to avoid knots and to section your hair
4. Shears: you will need these to cut hair sections that you want to keep with length
5. Towel (optional): you can wrap it around your neck to keep it cleaner
6. Thinning shears (optional): you can use them to make smoother sections at the end of your cut
7. Metal clips (optional): you might find it easier, especially if you’re a beginner, to section your hair with clips to save time
8. Water bottle (optional): you can use it to spray water before using the shears
- Tip: It’s better to not use office or kitchen scissors. You risk damaging your hair, plus they can be more dangerous. You can get good quality shears on Amazon.
2. Think about what you want
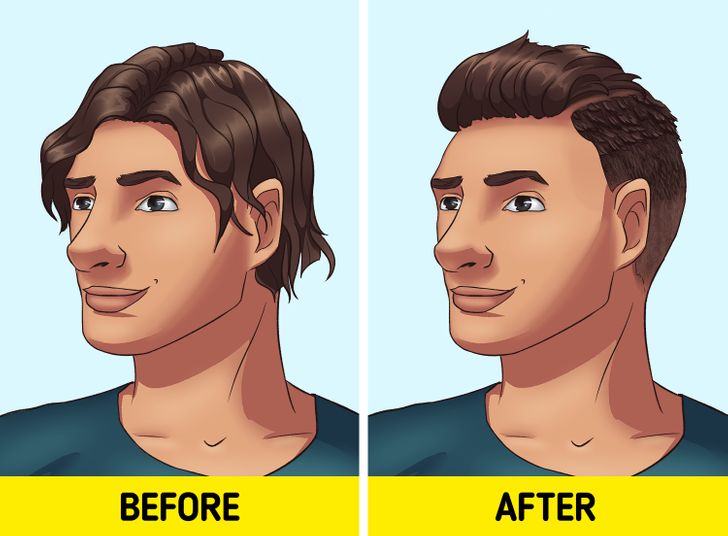
And most importantly, about what you can do. It’s good to try cuts that are not too short so that if you mess something up, your stylist can still fix it. Keep in mind that extreme makeovers are usually better performed by a professional.
3. Comb your hair and section it
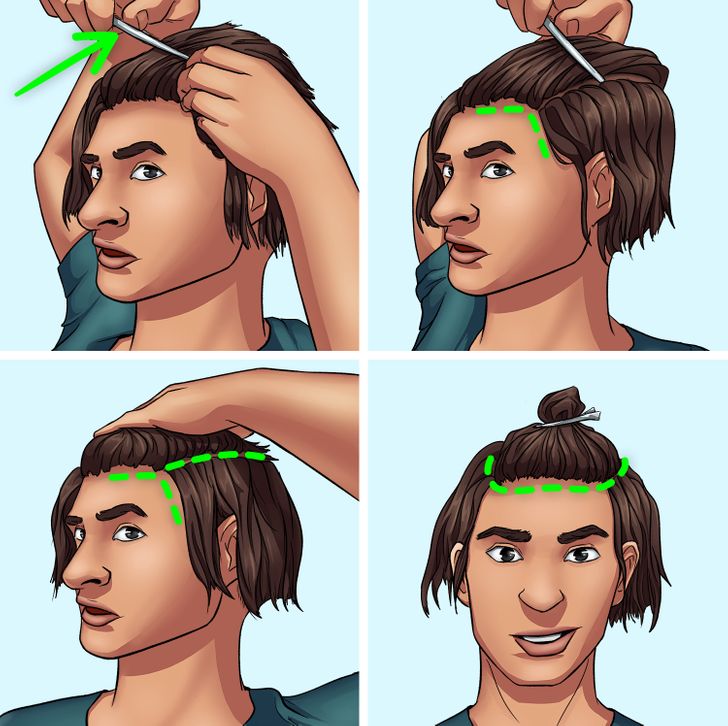
Start by combing your hair to make sure there are no knots. You should comb from the hairline to the back. Then, section your hair according to the cut you want.
In the example, we’ll section the upper part to make a pompadour with a low fade cut. To do that, we’ll set it to the side, and clip it. We’ll do the same on the other side, and in the back. The goal is to create clear lines dividing the hair that will be trimmed (sides and lower back of the head) from the ones that won’t (upper part, clipped).
Tips:
- Don’t go too high when making the lines because it can easily look bad.
- The lower parts that you will trim shouldn’t be wet. The upper part can be moist if you find it easier to comb it like that.
4. Trim the sides with the guards
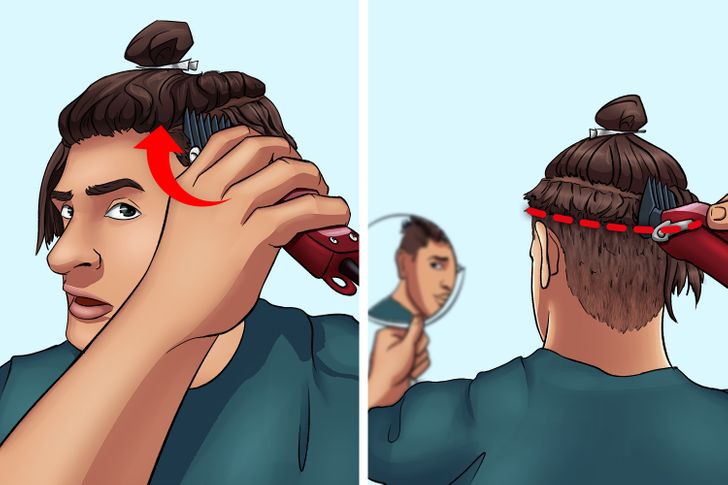
Use a 3 guard to trim the sides. Make sure you’re trimming your hair with the right motion: always move the clipper up the head and rapidly off your head. That way, you can later blend in the top, which will be slightly longer than the lower part. Do the same with the back of your hair. You should obtain a sort of beveled edge around the lines dividing the long hair sections from the now faded sides and back sections.
Tips:
- You can use 2 mirrors in front of each other to gain more visibility.
- For the back, you can use your free hand to protect the parts you want to keep longer.
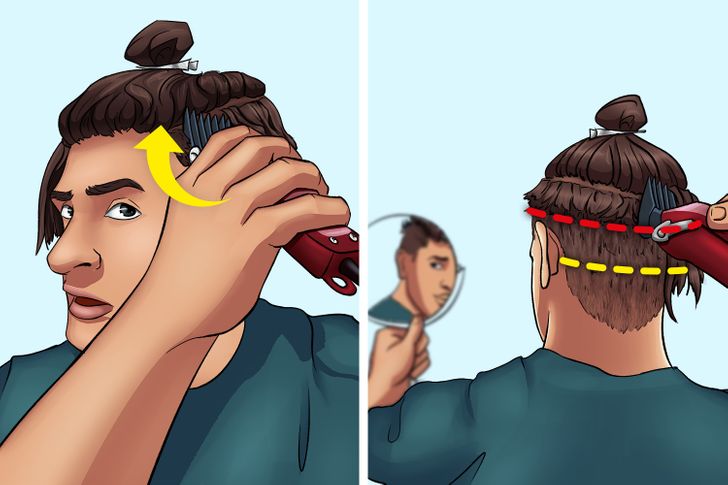
Repeat the same procedure but with a 2 guard. Our goal is to create a smooth gradient. To do that, you’ll have to draw an imaginary line about half an inch lower on the sides and 1 inch lower in the back. Start by performing the same up-and-off motion as before on the sides, but using the imaginary line as a limit. Then do the same in the back.
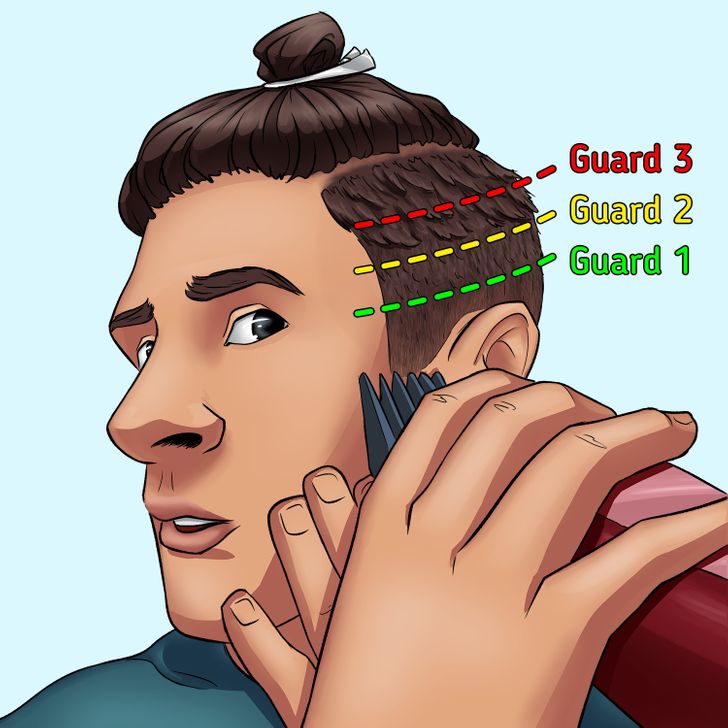
When you’re done, repeat the same procedure, but this time with a 1 guard. The imaginary line will be barely above the first inch of hair.
Tips:
- This guard works best with small strokes, since you’re taking such small amounts of hair.
- Use your ear as a guide, especially when you get to the back. The surface you’ll cut with this guard in the back will be longer than on the sides since there’s more hair there.
5. Trim the hairline without guards
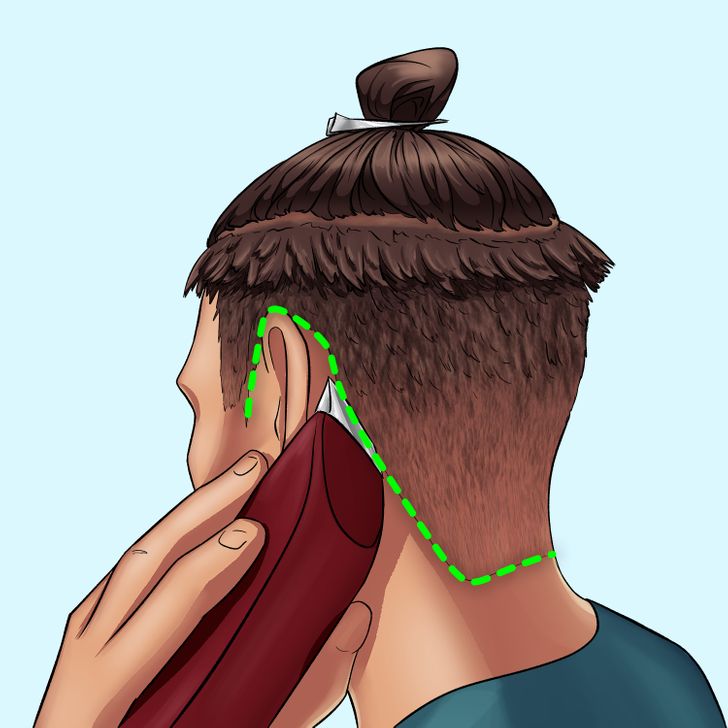
Use your clipper without a guard to get a clear hairline around your ears and back. The goal is just to clean the extra hair that you might have missed in previous steps.
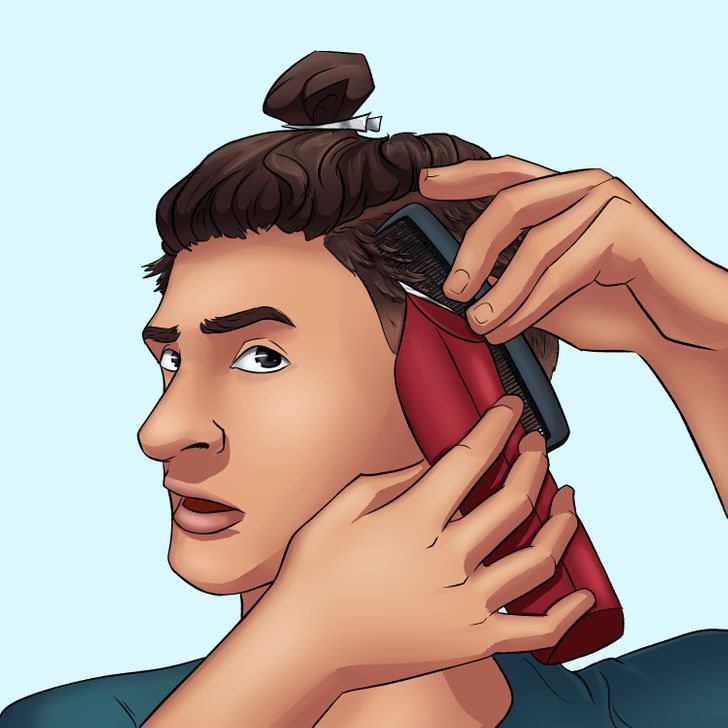
In the front, you can comb the hair forward and then trim over the comb.
Tips:
- Bend the ear as needed to create more space when clearing your hairline
- If you feel this is too risky, you can do the same procedure as in step 4, but without using a guard. In that case, the imaginary line would be half an inch above the start of your hair on the sides and about 1 inch in the back.
6. Clean the sides with the thinning shears
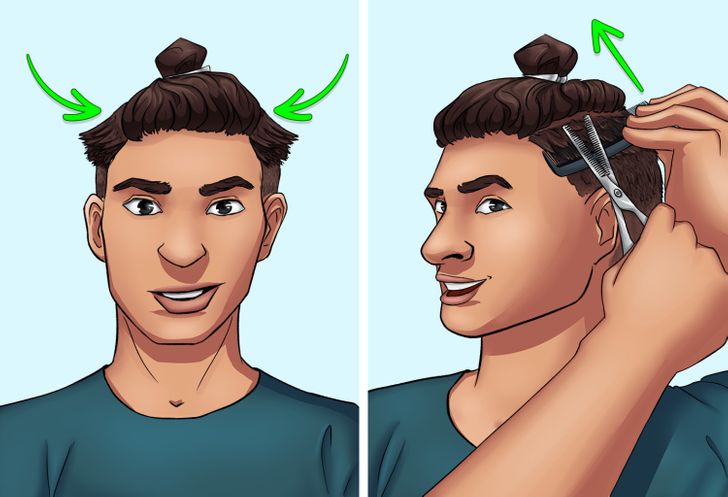
Use the thinning shears and a comb to round the edges of the upper part of the fade. The comb will move along with the shears upward as you cut.
7. Let the top down and cut
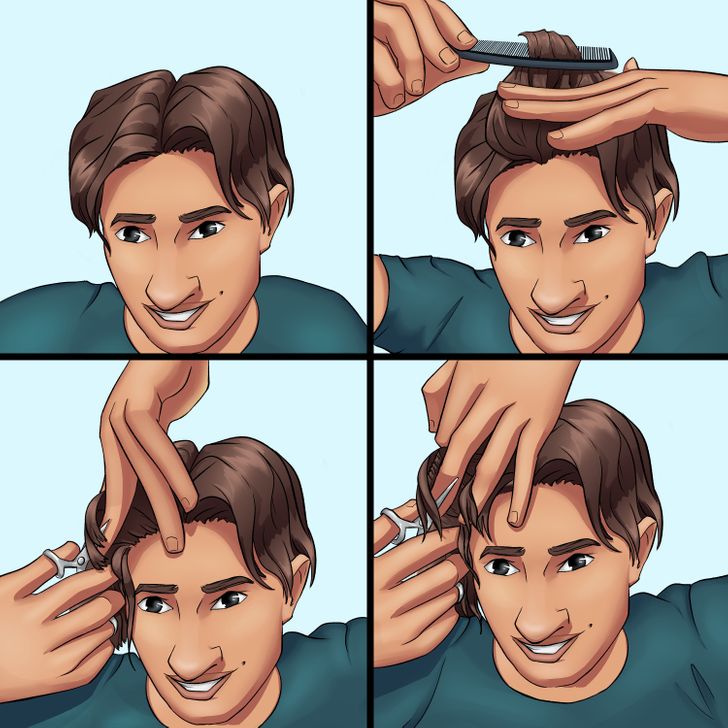
Take off the clip and comb everything back. Then part your hair in the middle and section it to break it into more manageable pieces. Take the first section and cut with a 30-degree angle. That section will be your guide. Move to the rest of the sections using your guide to cut the whole head to the same length. Once you reach the back, repeat the same procedure on the other side, always going from front to back.
Tips:
- Before cutting the second side of your hair, make sure both sections you’re using as a guide are exactly the same length. That way you’ll get a more harmonious result.
- At this point, keep the hair wet at all times to make it easier to handle.
8. Pull your hair straight up and cut the high points in the middle
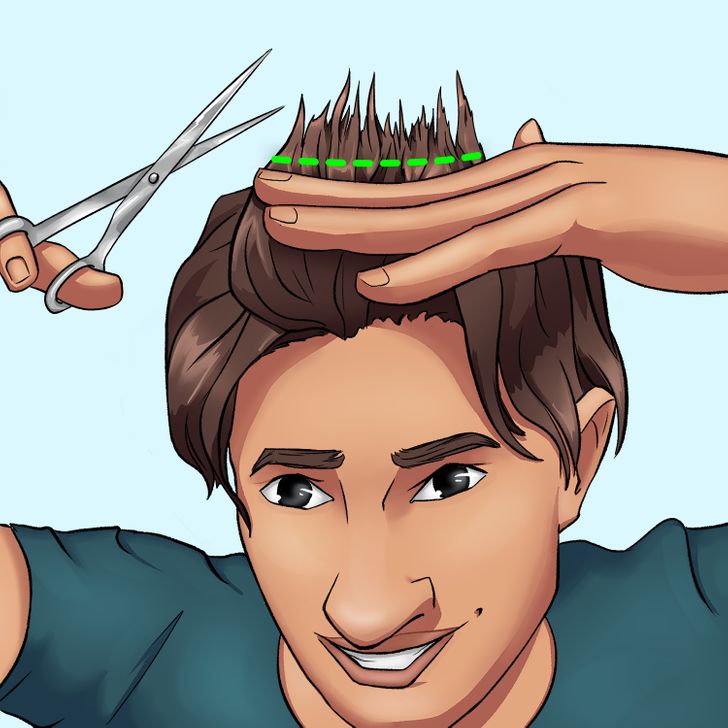
Make sure you keep your hair wet for this step. Start by combing your hair back to get rid of any knots you might have. Then, with your comb, choose a front section around the middle of your hair and pull it up. If you see that there any high points, cut them off horizontally. Repeat the same operation, but with a section slightly more in the back until you get to the back.
9. Style
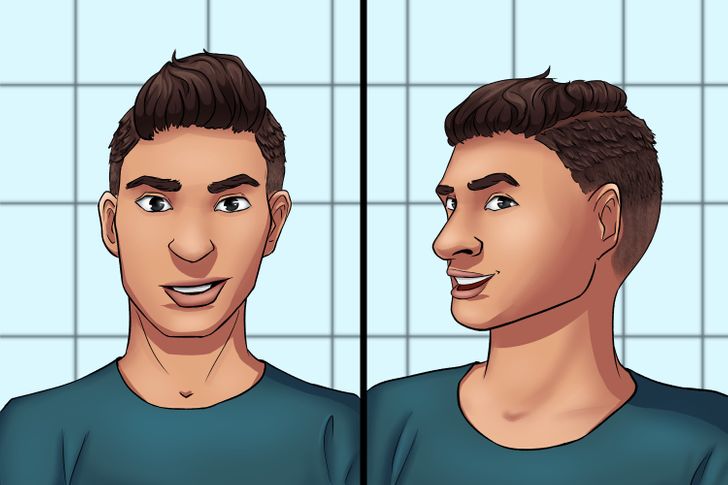
Style using your favorite products and enjoy!