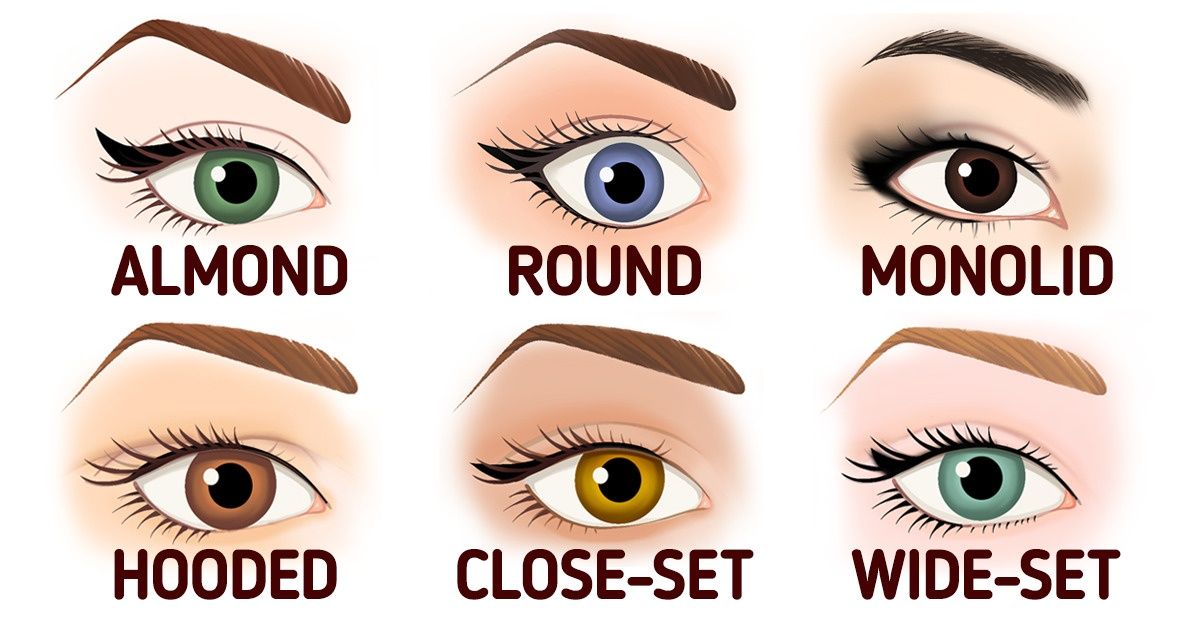
How to Do Your Eyeliner According to Your Eye Shape

Besides using the right colors and keeping your hands steady, applying eyeliner correctly can also depend on your eye’s location, width, and other features. Knowing these characteristics will help you choose the appropriate products and draw the perfect lines to enhance your eyes’ beauty.
5-Minute Crafts will show you different eye shapes and the steps to get the most flattering look.
1. Almond eyes
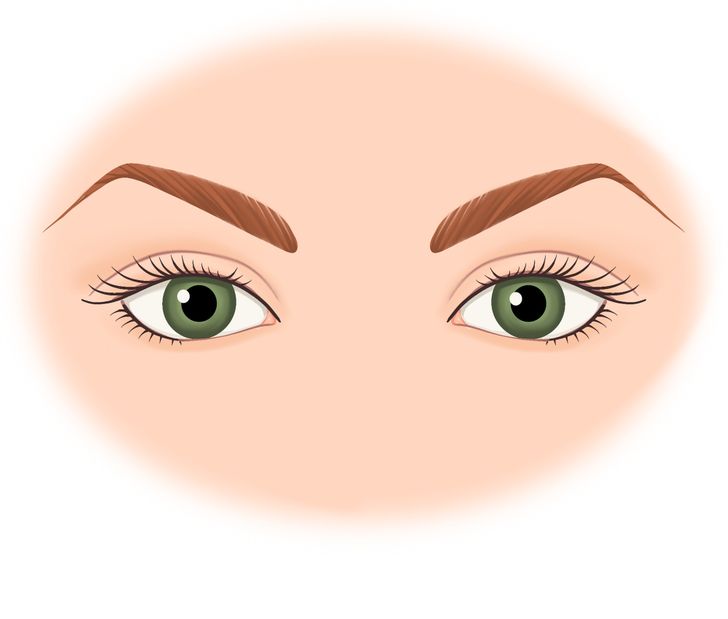
This kind of shape is wider than others. A person with almond eyes has a visible crease on the usually small eyelids. The iris touches the top and bottom lids, and the ends of the eyes are quite sharp on both sides.
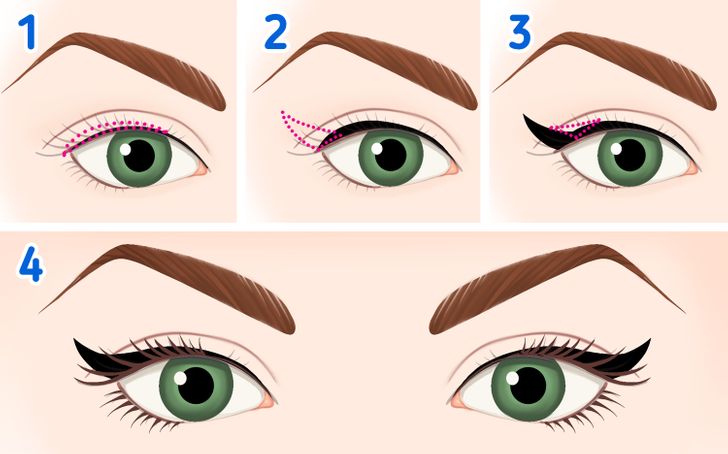
Almond eyes are suitable for almost any eyeliner look. However, you can use a liquid or soft liner, and if you wish, you can smudge it up and down for a more intense appearance.
How to do it:
- Draw a fine line from the inner corner to the outer one, slightly thickening it at the end.
- Add a wing by tracing 2 separate lines upward from the outer corner, as if you were drawing a triangle.
- Fill in the shape and join both sections together by drawing a thin line in between them.
- Repeat the same steps on the other eye and apply mascara to finish.
Note: If you have this shape, avoid running dark-colored eyeliner along the waterline. Doing so can make your eyes look smaller.
2. Round eyes
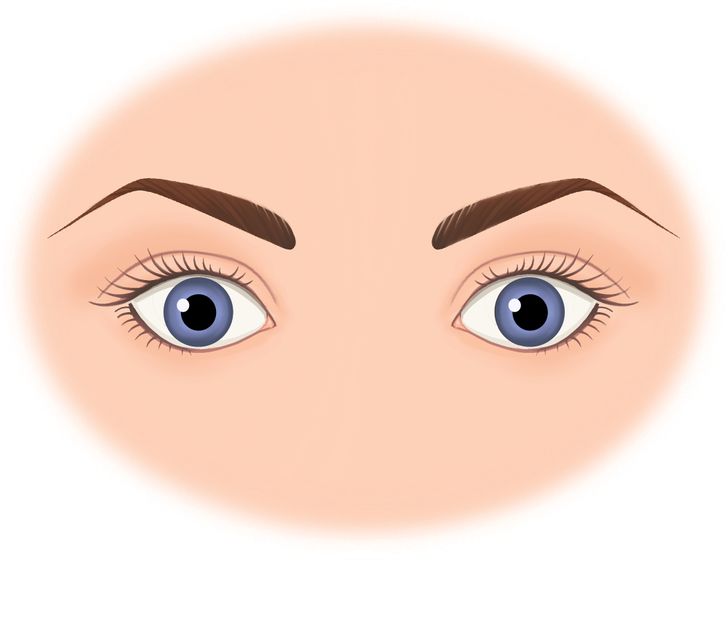
The creases are very noticeable, and the upper and lower whites are visible. The eyes seem to be more circular and prominent, and they don’t taper at the outer and inner corners.
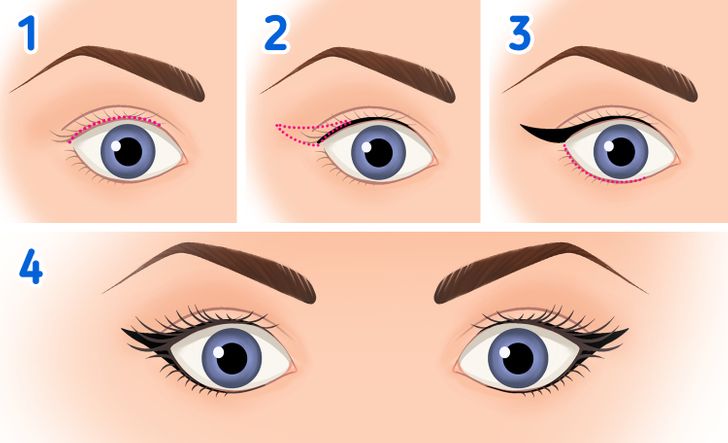
Round eyes are not as wide as almond eyes. Therefore, the idea is to draw attention to the outer area by elongating them toward the end of your eyebrows.
How to do it:
- Trace a thin line on the edge of the upper lid, leaving a small gap on the inner corner.
- Add a wing by tracing 2 separate lines from the outer corner, as if you were drawing a triangle.
- Fill in the shape and draw a fine line on the waterline, leaving the same gap on the inner corner as before. Make sure that the line joins the wing.
- Repeat these steps on the other eye and apply mascara on the upper and lower lashes to finish your look.
3. Monolid eyes
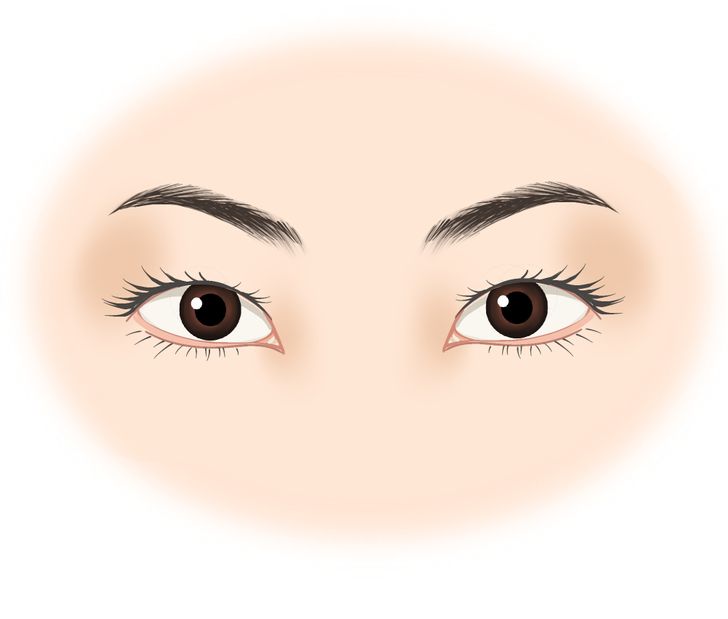
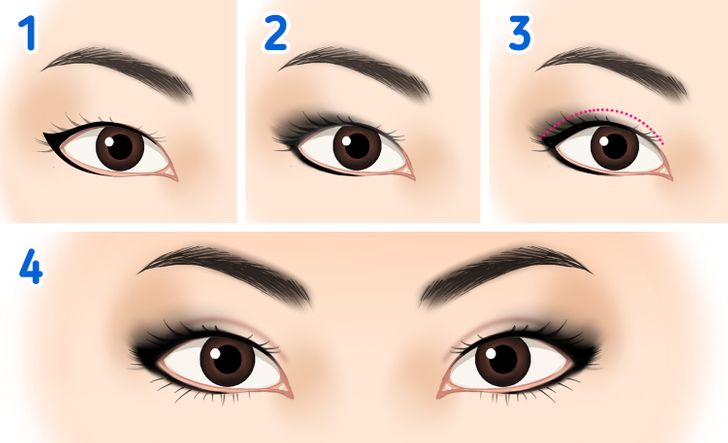
For monolid eyes, the aim is to make the sockets look more defined and deep by using a soft eyeliner pencil from the start.
How to do it:
- Trace a thick winged line on the upper lash line, and another one on the waterline from almost the center of the eye.
- Using one of your fingers or a brush, smudge out the eyeliner to create a smokey look.
- Line the edge of the upper lid again and draw a new wing using a liquid eyeliner. If you wish, trace a line where the crease would be using a soft brown pencil and smudge the line upward.
- Finish your makeup with a bit of mascara.
Note: For better results, go for products that are easy to blend. This will make the first layer look like it’s faded into the second one.
4. Hooded eyes
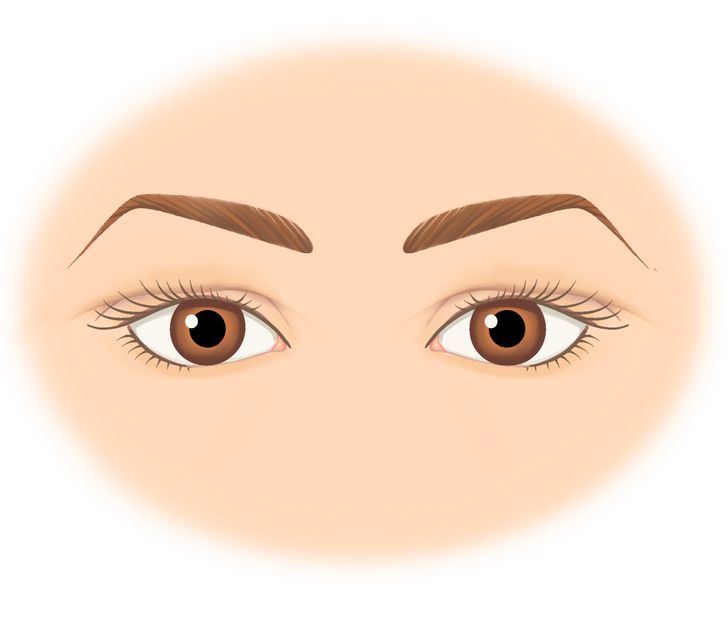
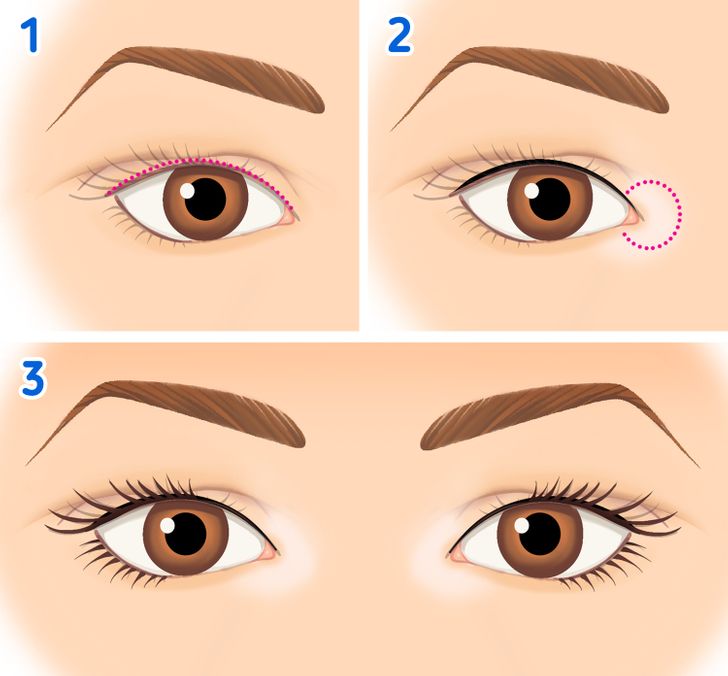
In this case, the idea is to make the eyes look more open. You can achieve this by applying eyeliner on the upper waterline instead of doing so on the eyelid.
How to do it:
- Lift your upper eyelid and draw a line along the waterline, from the outer corner to the inner one. Wiggle the pencil if necessary to get a more intense look.
- Apply a cream-colored or highlighting shadow on the tear duct area and blend it.
- Repeat these steps on the other eye, curl your eyelashes and finish the look by applying some mascara.
Note: For better results, go for a fast-drying liner with a precision tip. This will give you more control, and it will prevent the color from getting transferred to the lower waterline.
5. Close-set eyes
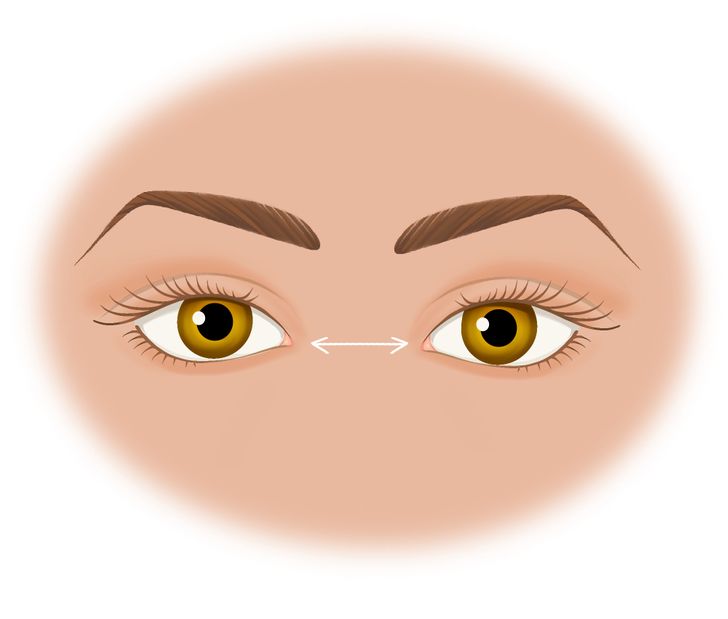
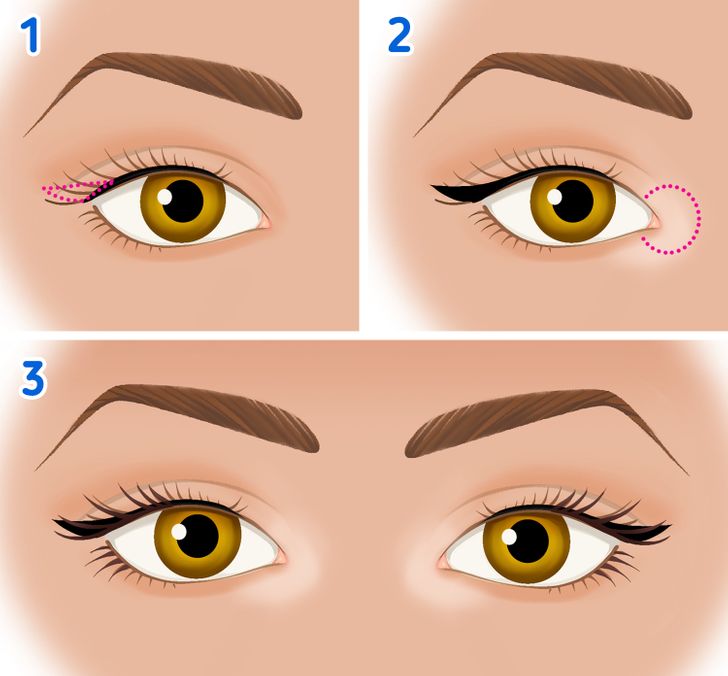
Here, the aim is to emphasize the outer corners, so the eyes appear to be more elongated, which will also give them more width.
How to do it:
- Draw a thin line on the upper lash line, leaving a gap on the inner corner. Then draw a wing to elongate the eye and fill it in with eyeliner.
- Add a cream-colored or highlighting shadow by the tear duct area and blend it.
- Repeat these steps on the other eye and apply mascara to finish.
Note: Avoid dark shades on the tear duct area because they can make your eyes look smaller.
6. Wide-set eyes
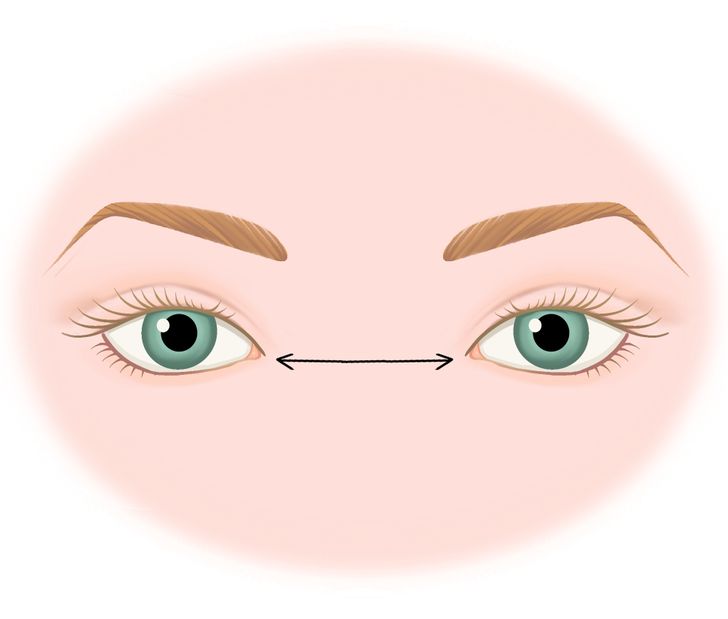
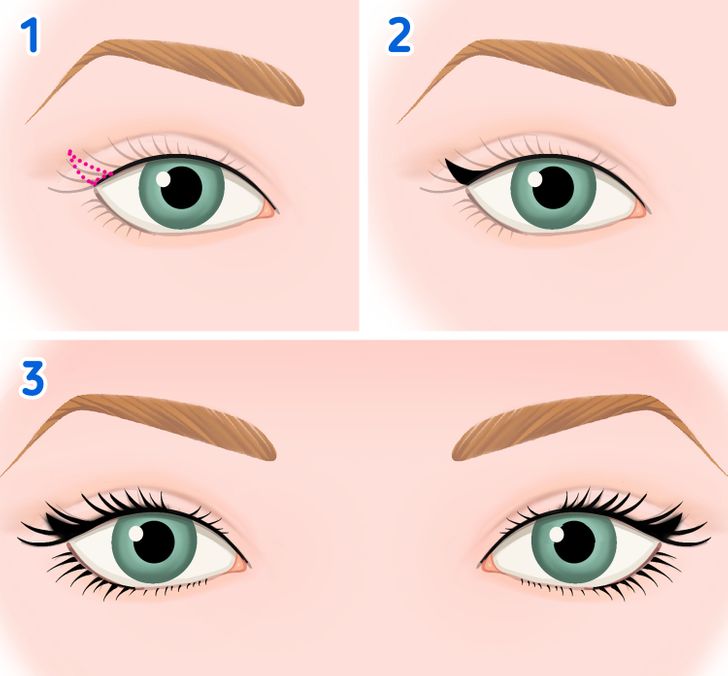
The goal for wide-set eyes is to give the illusion that they are closer together. You can achieve this by using a dark liner all the way across the rim.
How to do it:
- Draw a line of the same thickness from the outer corner to the inner one. Then trace a small wing on the outer side of the eye with its point slightly upward.
- If you wish, you can blend the eyeliner a bit to get a softer appearance.
- Repeat the procedure on the other eye and apply mascara to finish the look. Make sure to focus on the inner lashes.