How to Fix Broken Makeup
Seeing your favorite makeup product fall on the floor and break into a million little pieces may be a heartbreaking experience for some makeup lovers. But luckily, you don’t have to spend a fortune on new makeup and can easily bring the broken one back to life. 5-Minute Crafts knows how to do it quickly, without any additional expenses, and is ready to share these tips with you.
How to fix broken powder makeup: Method 1
What you’ll need:
- A bowl
- A paper towel
- Water
- A spoon
- A makeup container (you can use the one from the broken makeup product or grab a new one)
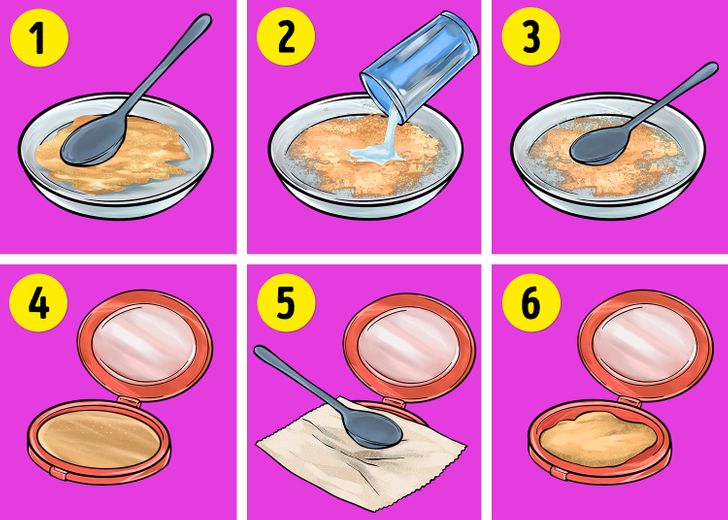
Step 1. Put all of the powdered product in a bowl and crush it with the flat side of a spoon. Your goal is to get rid of all the chunks and make the texture of the product smooth.
Step 2. Add a couple of drops of water to the makeup container.
Step 3. Distribute the water evenly.
Step 4. Put the powder product back in the container.
Step 5. Cover the product with a paper towel and press the powder through it with a spoon. Your goal is to push all the makeup granules together.
Step 6. Let the product dry and your makeup is fixed!
How to fix broken powder makeup: Method 2
What you’ll need:
- Rubbing alcohol (about 70% concentration)
- Plastic wrap
- A spoon
- A makeup container (you can use the one from the broken makeup product or grab a new one)
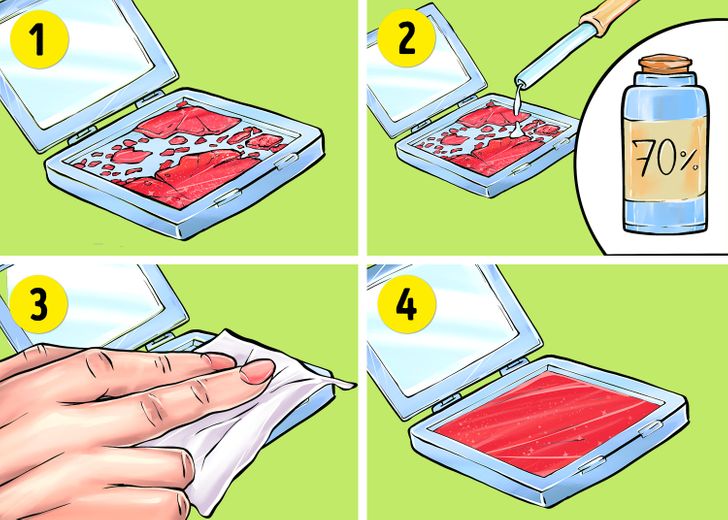
Step 1. Put all of the powdered product into its container and thoroughly crush it. Your goal is to get rid of all chunks and make the texture of the product smooth.
Step 2. Add a couple of drops of rubbing alcohol to the powdered product and let it soak in a bit.
Step 3. Cover the product with plastic wrap and press the powder through it with your fingers. Your goal is to bring all the makeup granules together. You can use a spoon or any other flat object for this as well.
If the texture is too dry and the makeup granules won’t stick back together, add a bit more alcohol.
Step 4. Let the product dry overnight and your makeup is fixed!
How to fix broken lipstick: Method 1
What you’ll need:
- A lighter
- A refrigerator
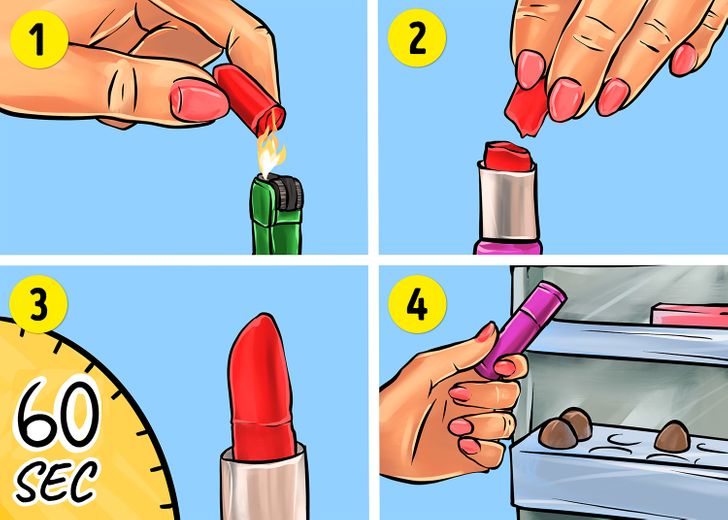
Step 1. Take the broken part of the lipstick and slightly warm it up with a lighter. Don’t hold the lighter too close, about 2 inches away is enough distance. You should make it sticky, but don’t melt it completely.
Step 2. Attach the broken piece back to the base of the lipstick.
Step 3. Wait for about 60 seconds and gently close the lipstick.
Step 4. Put the lipstick in the refrigerator for at least 2 hours so the parts can properly stick back together. Your makeup product is fixed!
How to fix broken lipstick: Method 2
What you’ll need:
- A lighter, a candle, or a stove
- A tiny pan or another container to warm up the lipstick
- A makeup container or an empty tube of lip balm
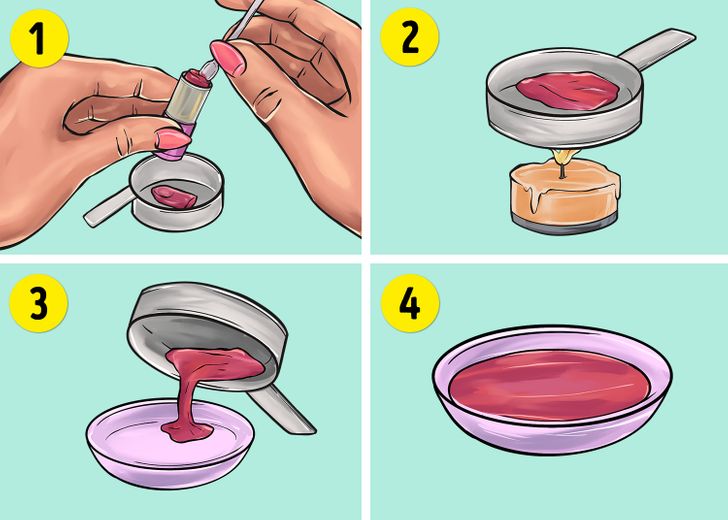
Step 1. Remove all the makeup product from the original container and put it into a tiny pan or any other container you’re going to use to warm the lipstick.
Step 2. Warm the product up over a lighter, a candle, or a stove until it’s turned into a liquid, with a similar consistency to a soup.
Step 3. Pour the melted product into the makeup container of your choice.
Step 4. Let the product dry and your makeup product is fixed!
How to fix dried gel eyeliner
What you’ll need:
- A toothpick
- Saline eyedrops
- Microwave (if your makeup product is very dry)
- A stick or a small brush
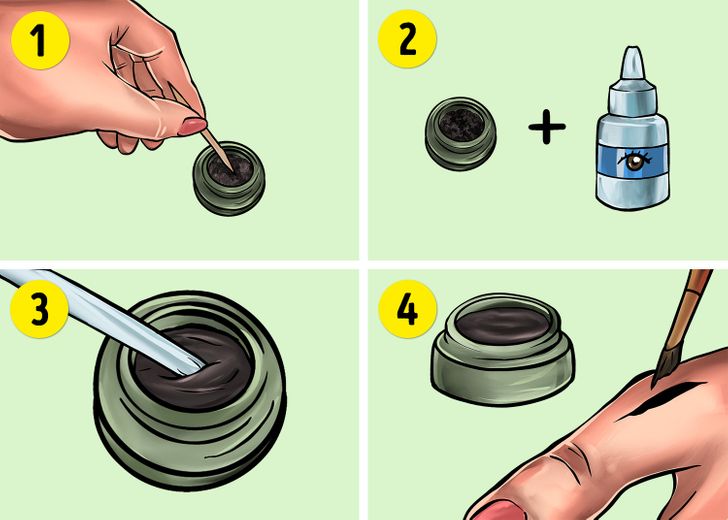
Step 1. Make a few holes in your makeup product with a toothpick.
Step 2. Add some saline eye drops.
Step 3. Mix the eyedrops into the product with a stick or a brush. If you can’t mix the product because it’s too dry, put it in a microwave for about 15 seconds to make it softer.
Step 4. Let the makeup product set for a little bit and it’s fixed!
How to fix dried and clumpy mascara
What you’ll need:
- A glass of hot water
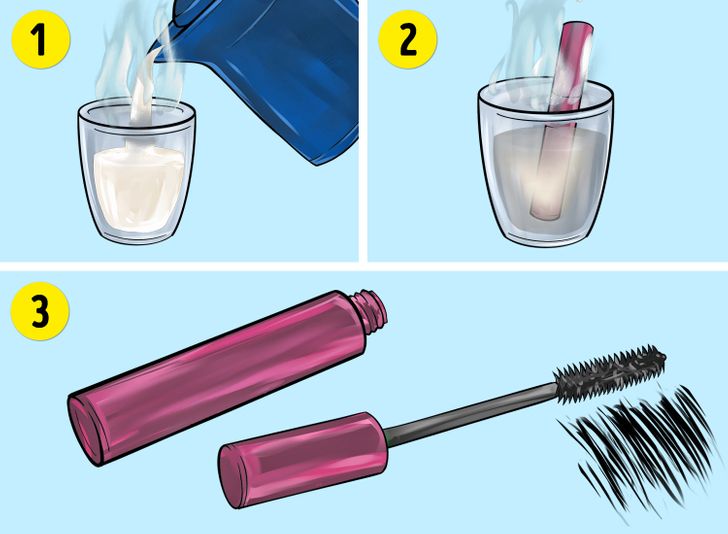
Step 1. Pour hot water into a glass.
Step 2. Place the tube of mascara into the glass and let it sit there for 10-15 minutes.
Step 3. Remove the mascara and your makeup product is fixed!