How to Give Yourself a Perfect Haircut
You don’t need to go to a hair salon whenever your hair gets too long. Investing enough time, patience, and the right tools, you can always give your hair a quick fix at home by yourself. To do so, 5-Minute Crafts rounded up the best tips that’ll work well for women and men with curly or straight hair.
You’ll need:
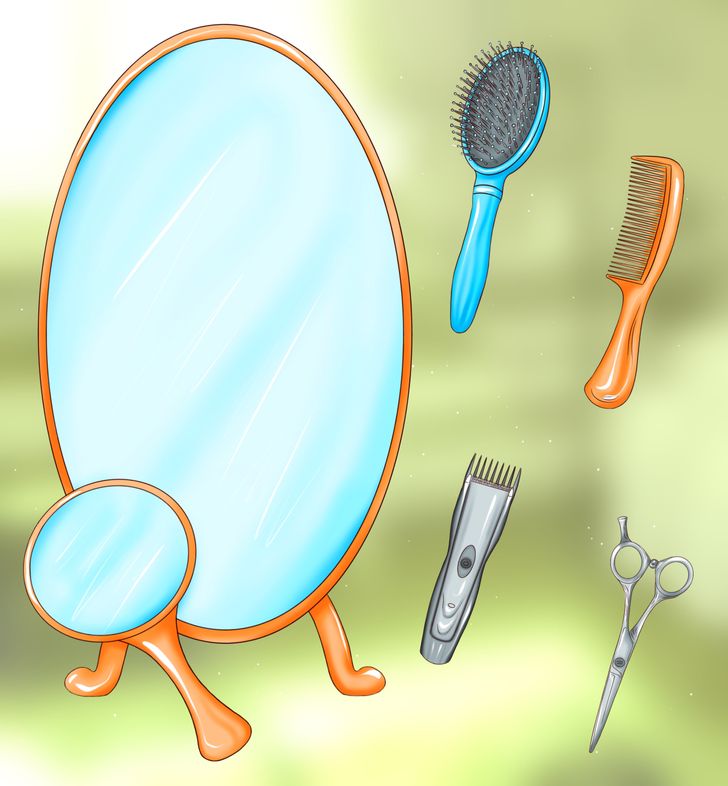
- Invest in good-quality haircutting scissors with precise blades to get clean edges. Don’t use ordinary scissors — if they aren’t sharp enough, you may have a messy cut.
- A comb or brush for your hair
- Hair trimmer with different attachments to cut men’s hair
- Small and large mirrors may help you see your hair from different angles
Before you begin:
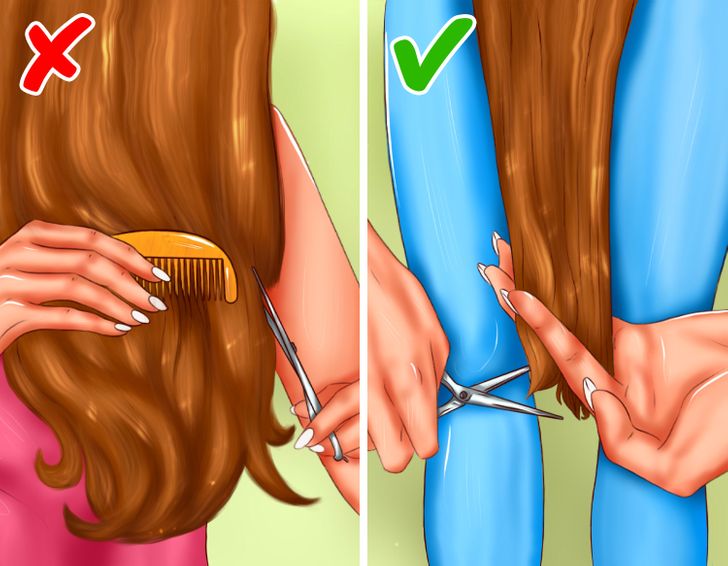
It is important to keep these tips in mind:
- Snip more minor cuts of hair instead of making more significant cuts. Choose the length you want your hair to be, but start longer. Later, you can come back and trim a bit more. If you make a mistake, you can still fix it.
- Work in small sections. Hold your hair spread between your fingers and do the first cuts. Then use this piece as a reference for snipping the next section.
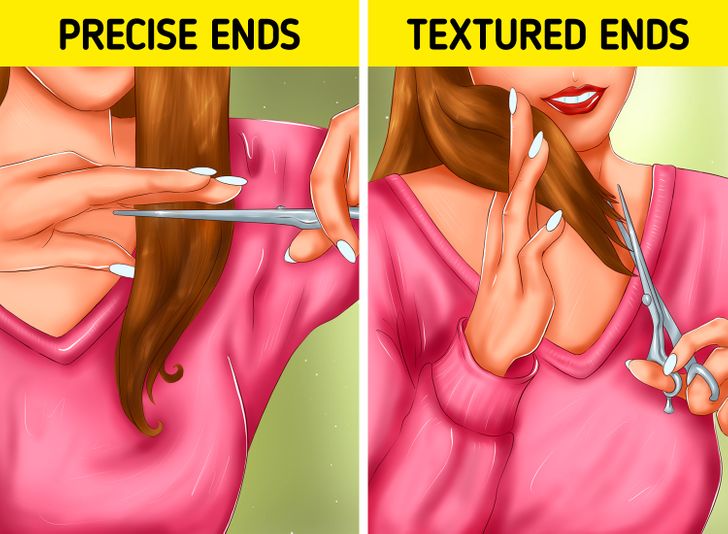
- Always pull your hair straight to make its length even and hold it between your fingers. For precise and solid edges, put your scissors parallel to the hair under your fingers and cut them straight.
- If you want a more textured finish on your ends, pay attention to the position of your scissors. Use a point-cut technique. Put your scissors parallel to the hair under your fingers, then point the ends of the scissors slightly upward. Gently open and close the scissors, cutting the ends of your hair.
Trimming split ends
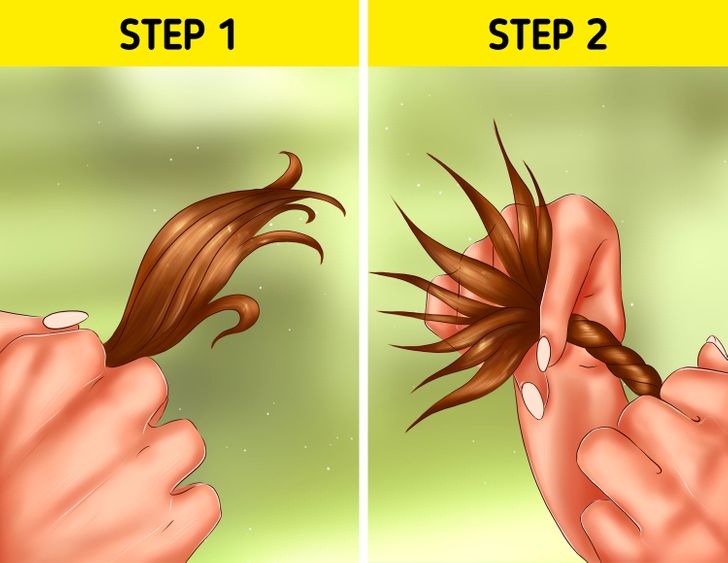
Step 1: Wash your hair, then dry it with a blow dryer. But don’t it dry completely — leave a little moisture to see your hair’s natural texture
Step 2: Take a small section of your hair. Slightly twist it at the bottom and hold the lock with your fingers.
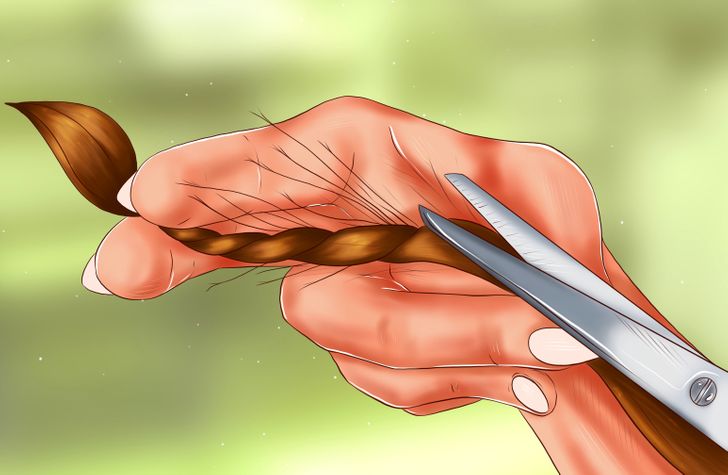
Step 3: Check the hair and find the split ends. Take haircutting scissors and only cut these hairs.
Step 4: You can twist the same lock of hair in another direction, exposing more split ends that you could have missed. Repeat the same with the rest of the hair.
Cutting long hair straight
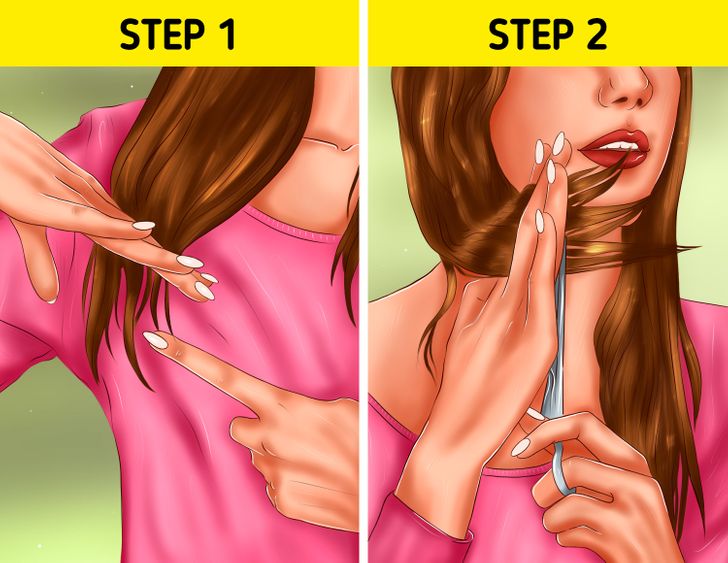
Step 1: Dampen the ends of your hair with water so they are slightly wet. Comb them and then part your hair in 2 sections. Bring one area forward from your shoulder to your chest. Pinch the ends between your fingers.
Step 2: Bring this section to your face, so you can see it better. To ensure your hairline is entirely straight, the hair on the back of your head must be shorter. So you need to cut it in a diagonal line, not a straight one. Position your scissors at an angle and cut your hair, lightly opening and closing the tool.
Getting an angled bob
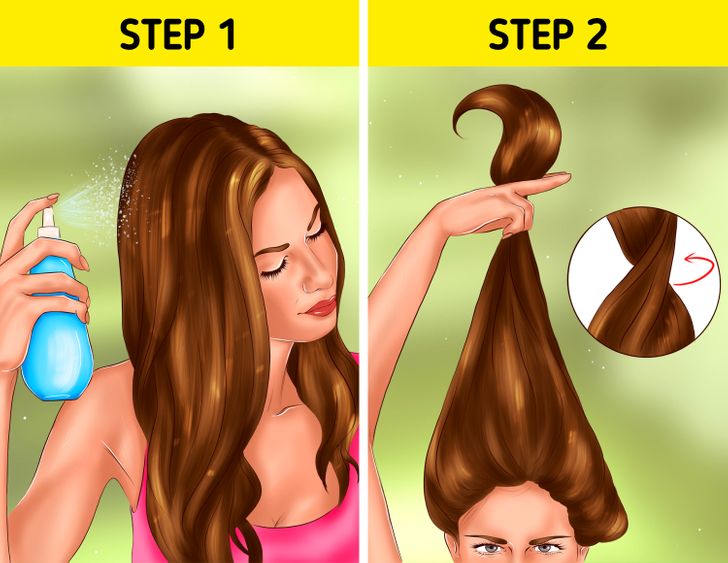
Step 1: To ensure your cut is roughly all one length, slightly dampen your hair with water before snipping. This way, you will achieve clean and precise lines.
Step 2: Brush or comb your hair to the top of your head. Twist your hair and hold it above your head. Pinch your locks between your index and middle fingers.
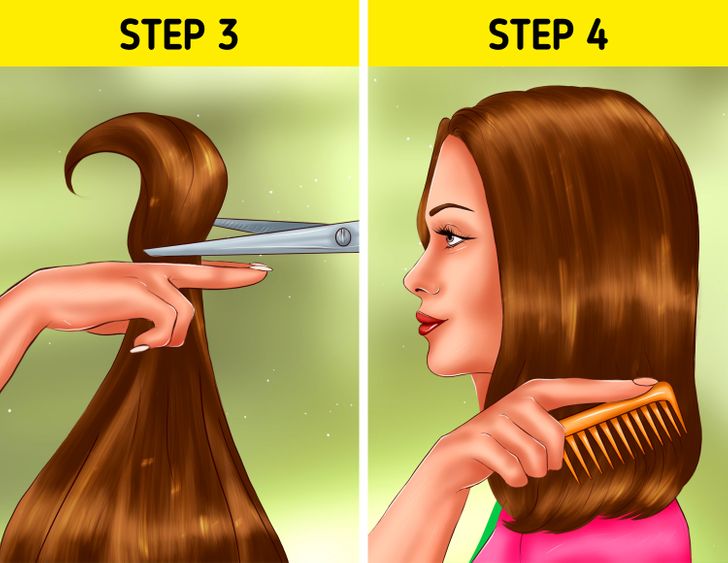
Step 3: Bring scissors to your pinched hair and cut to a length that you find optimal for yourself.
Step 4: Release your locks and brush them out.
Cutting bangs
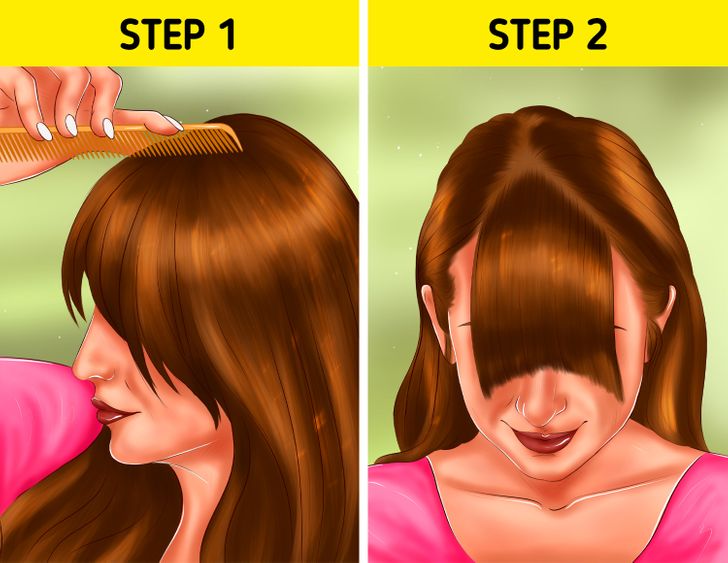
Step 1: Find the beginning of your bangs. Stand sideways next to a mirror and check your head. Find a place where your head starts to round in the front. You can pinpoint it with a comb.
Step 2: With your comb, separate your bangs into a triangle-like shape.
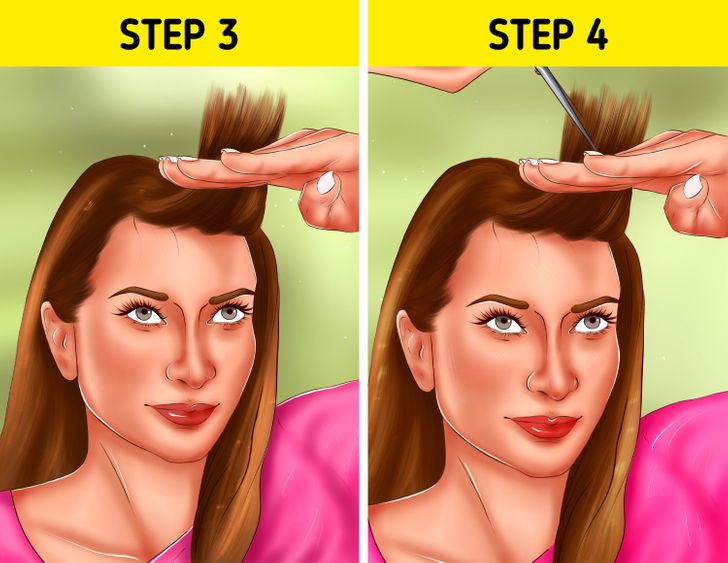
Step 3: Pinch your bangs with your fingers and bring them in front of you. Use your fingers as a line where you want the length of your trimmed bangs to be. You can always leave some more length for yourself to return and fix your mistakes.
Step 4: Bring the ends that you’re about to cut upward — don’t cut your hair straight. Instead, bring your scissors at a slight angle. You can imagine that your scissors are like a clock arrow, pointing at 7. After positioning your tool correctly, softly trim across your hair.
Cutting curly hair
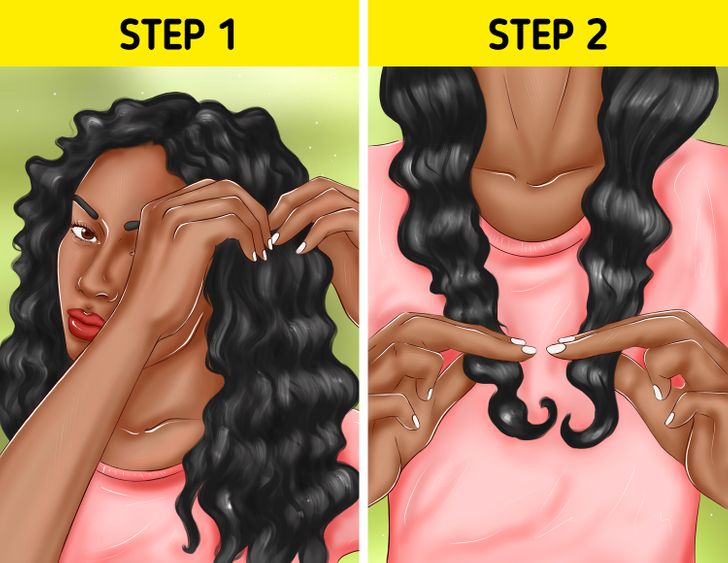
Step 1: Make sure your hair is dry. It’s also good to cut it on the second or third day after you’ve washed it. Pay attention to your locks, how they fall and what shape they take.
Step 2: Slightly tilt your head and let your locks get into their natural position. Pinch the ends of your hair from both sides and bring them in front of your shoulders. Check the ends and decide how much you need to cut off. Since your hair is curly, it is better to not trim a lot, as you might end up with a shorter length than you planned.
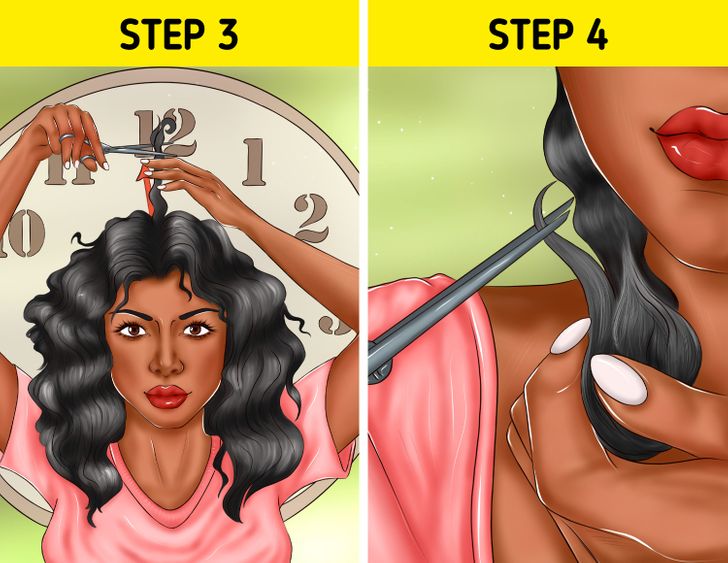
Step 3: Use the imaginary clock rule to make sure your final cut looks even and neat. From the top of your head, pinch a lock between your index and middle finger. Then, pull it upward as if it’s aligned with the 12 o’clock position. Snip the end of the lock. Then do the same with the strand next to it — which would take 1 o’clock position — and snip. Use all the necessary neighboring angles and place each new strand next to the previous one to adjust the length.
Step 4: When you are done trimming, gently shake your hair with the help of your fingers. This will help you to see the final shape and also see if there are any split ends left. You can then return to those locks and trim them.
Helpful tips:
- Use the tip of your scissor blades to cut. Do not open the scissors too wide, because this way you risk snipping off too much.
- Do not trim your hair after you straightened or curled it with heat tools. This can affect the final look of your hairstyle and make it look messy.
Cutting men’s hair
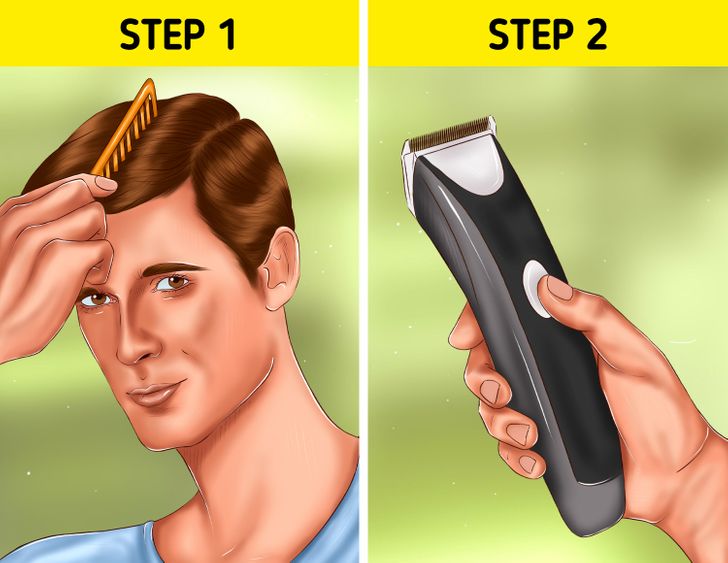
Step 1: Dampen your hair with water to make it slightly wet. Then use a comb to section your hair, dividing the top and the sides.
Step 2: When choosing a trimmer attachment, opt for the one that will give you a slightly longer length than you normally go for. This way you will have a chance to fix mistakes if you make any during the process.
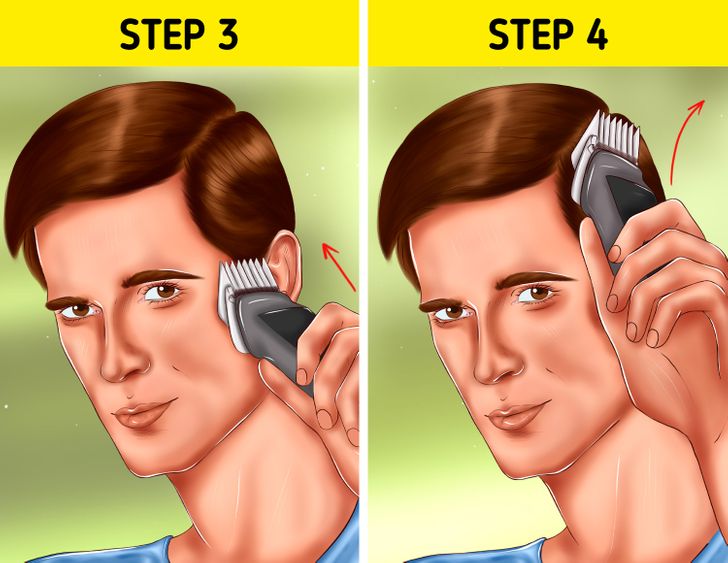
Step 3: Start from the side section. Begin the trimming at the front of the ear, at the temple, then moving up your head. When you get to the part where you sectioned your hair, put your wrist up. Do this until you are done with one side, then proceed to the next side.
Step 4: To create a fade effect on the sides, replace your current attachment with a shorter one. Repeat the process, starting from the front of your head, and trim just halfway up on the hair.
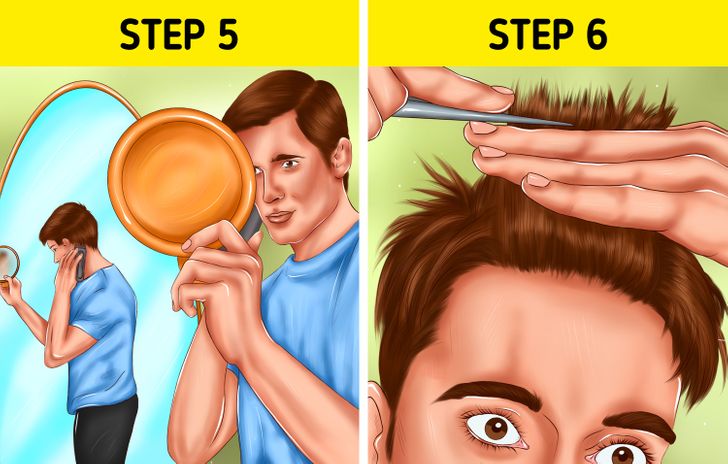
Step 5: To trim your hair from the back, grab a small mirror and stand with your back toward a more oversized mirror. Use this small mirror to see your reflection. Then trim the hair on the back of your head, starting from the bottom and moving up.
Step 6: Ensure your hair is still a bit wet. Comb it once more, then pick up a section of your hair. Use your fingers to hold it vertically. Position your scissors parallel to your fingers. With straight cuts, trim the ends of your hair and proceed to the next section. Put a little of the previously cut hair into the new area to reference for an even length.
Bonus: Medium graduation haircut
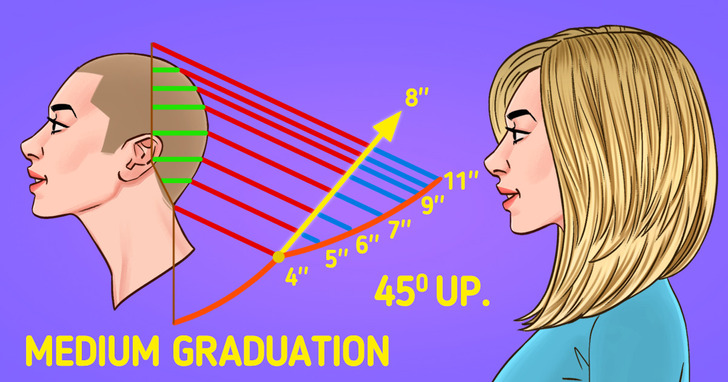
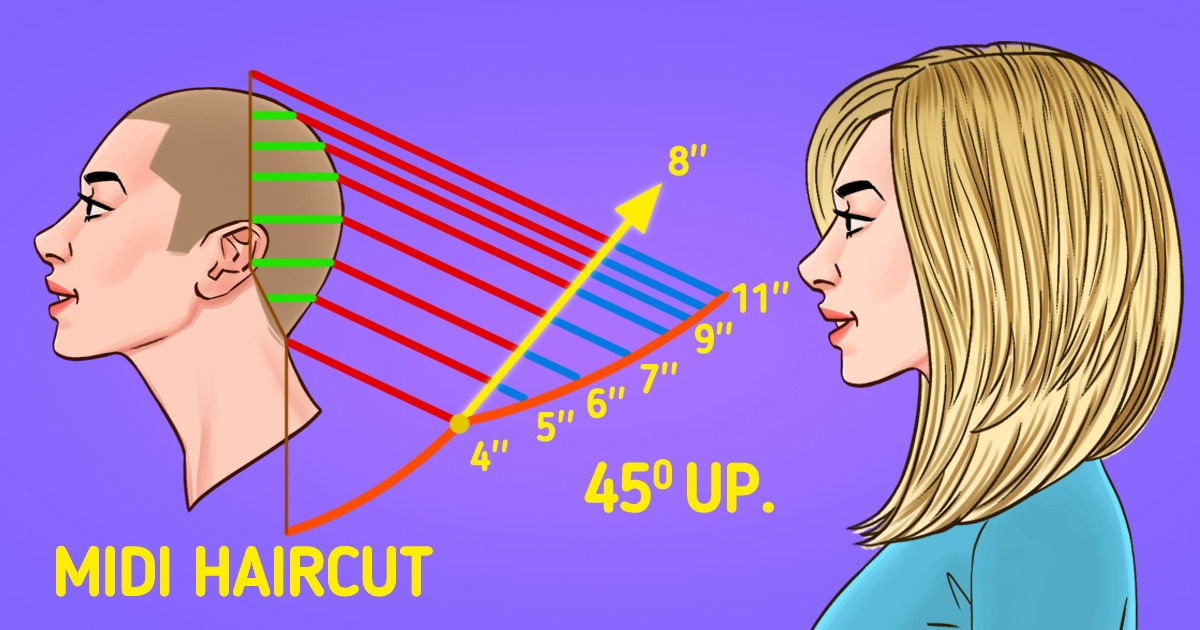
A graduated haircut is a cut that builds up more weight within the shape or external line for short to long hair. You can achieve low, medium, or high graduation by tuning the angle or height. Not only that, but your body position and the tension on your comb and fingers also affects the result.
Separating the hair into 5 sections:
- Start from the center of the eyebrows.
- Then, find the apex and part from the peak to the back of the ear, and fix it with a hairpin. Repeat the same on the opposite side. Be sure to go a bit beyond the ear.
- The next part is the middle section. Now that you have 2 sections made on both sides, behind the ears, fixing the middle part becomes easy.
- Split the back part now into 2, ensuring both sides are even.
- Begin at the nape and take a quarter to a half-inch section, ensuring the parts are straight and visible. Start cutting it at 0 degrees of elevation to establish the length.
- Take another section down and begin cutting it at 45 degrees elevation. Keep doing this. Aligning the head down a bit makes it easier.
- Note that with this type of cutting, the bottom part toward the neck is shorter and gradually gets longer, which is what 45 degrees of elevation is all about.
- Then, cut the hair at an angle upward and section-by-section until you trim all the sections.