How to Shape Your Eyebrows
One of the most important things to keep in mind when shaping your eyebrows is that before starting you should cleanse your face properly. 5-Minute Crafts has written an article how to do that. Once you’re done, below you’ll find a guide with everything you need to know to understand the art of shaping your eyebrows like a pro.
What types of eyebrows are there and which one should you choose
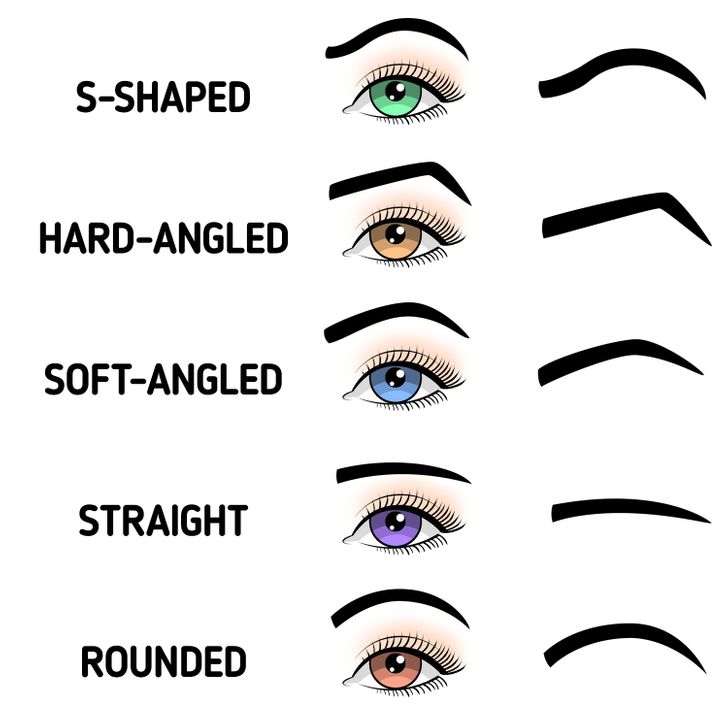
Before removing any unwanted eyebrow hairs, it’s essential to decide what shape you want your eyebrows to have but also what suits your face best. Typically, the way to go is to choose the shape that most closely resembles the natural contours of your eyebrows. While everyone’s eyebrows are unique, broadly speaking, you can divide them into 5 categories that you can find in the picture above.
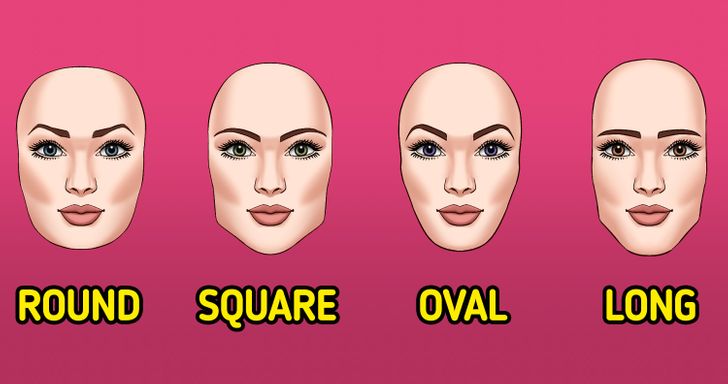
Another important fact that you should take into account is the shape of your face. Generally speaking, face shapes are as follows:
- Round: With this shape, the beginning and end of your brows are in line with an arch in between. You’ll also want to make sure that your eyebrows aren’t too thin or too thick.
- Square: In this case, try to balance your look by shaping your brows to give a softer finishing to your face with a smooth arch.
- Oval: If you have this type of face, most eyebrow shapes will suit you. Still, it is better to avoid styles that are too arched as well as those that are overly straight.
- Long: If your face is long, aim for slightly thick eyebrows that aren’t too long or arched.
Shaping your eyebrows
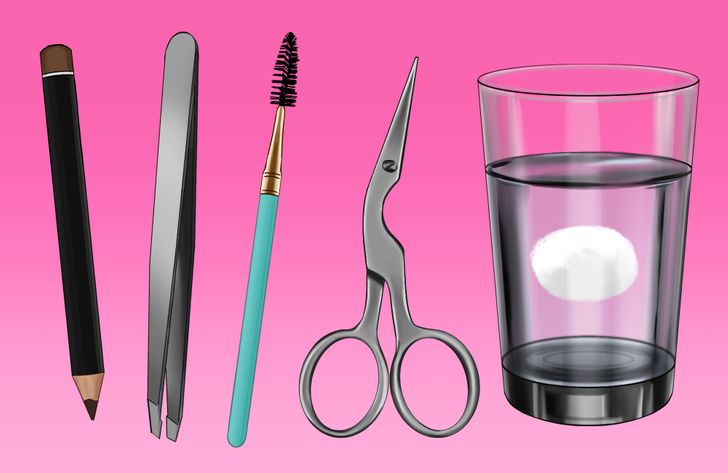
What you’ll need:
- Brow pencil
- Slanted stainless steel tweezers
- A mascara brush
- A pair of small, sharp brow scissors
- A clear brow gel
- Cold compresses (see note)
Notes:
- The compresses are made simply by soaking cotton rounds or soft paper towels in water and chilling them in the fridge.
- Also, the place where you shape your eyebrows is important. You should find a calm place with lots of natural light and a mirror that isn’t too magnifying. Experts recommend doing it in the car.
1. Create a “brow map.”
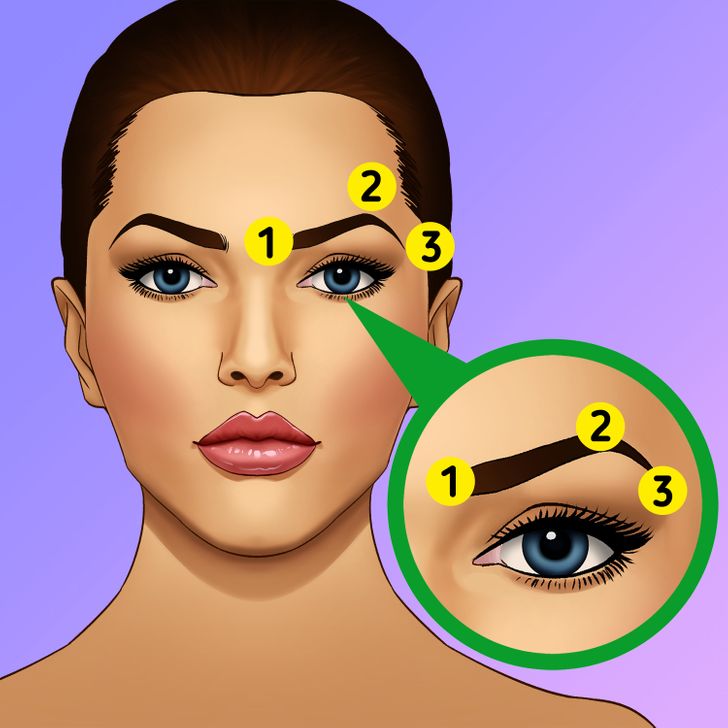
Eyebrows generally have 3 key parts:
- Head: This is the part closest to your nose.
- Arch: This is where your brow is naturally the highest.
- End of the tail: This is the part nearest to the outer corner of your eye.
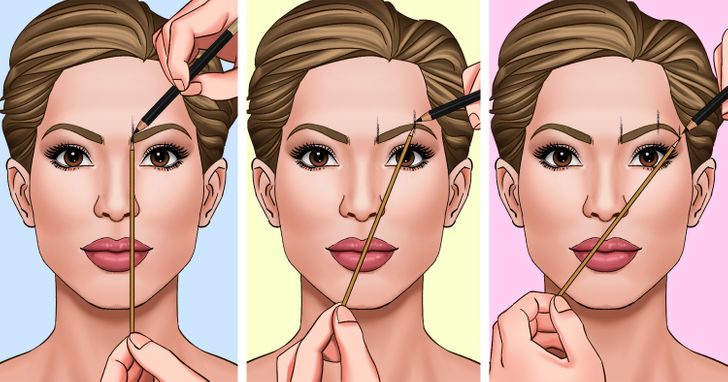
- To find the exact head of the brow, rest a thin pencil vertically against your nose bridge. The part where it touches your brow is the head and where your brows should start. Mark this spot with a brow pencil.
- Then rotate the pencil outward like it’s one of the hands on a clock. Stop at the outer edge of your iris. This is where the brow would naturally arch, and it’s typically found two-thirds of the way from the head to the end of the tail. Mark this spot too.
- Finally, move the pencil further. Stop at the outer corner of your eye: this is the end of the tail. Mark this spot too.
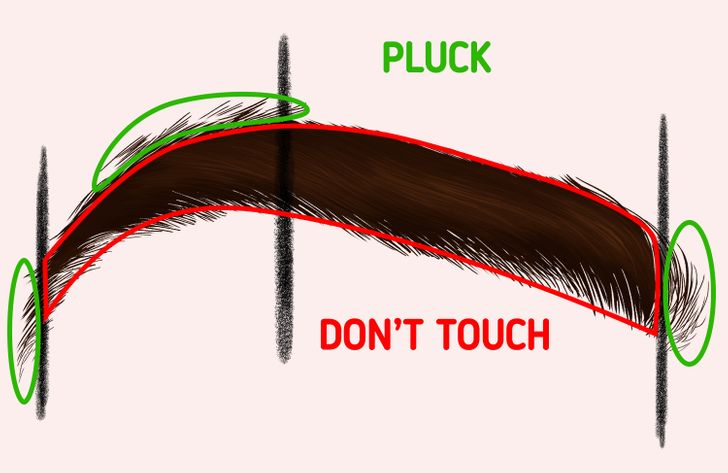
Repeat this process on both eyebrows and connect the 3 markings with straight lines both just above and just below your brow. Anything outside the lines has to be tweezed and anything inside, just leave it alone.
2. Tweeze.
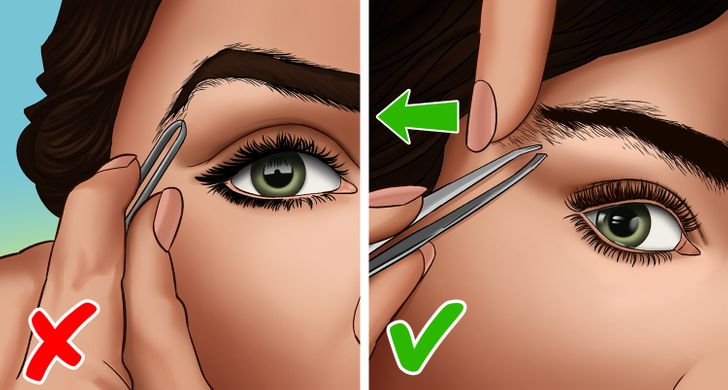
Use both hands to tweeze properly. One of them will hold the skin and the other one will gently remove one hair at a time with the tweezers. Always do so in the direction of growth to protect the follicle so the hair will grow back. Other cleanup areas include the space between the heads of both eyebrows, the forehead area just above the temples and just below the arches. Groom with caution.
- Tip: Set a timer for 15 minutes. Once the alarm sounds, stop tweezing. This is a good way to stop and not tweeze compulsively. Then, apply the cold compress to the area to help calm any redness or irritation from the plucking.
3. Trim with scissors.
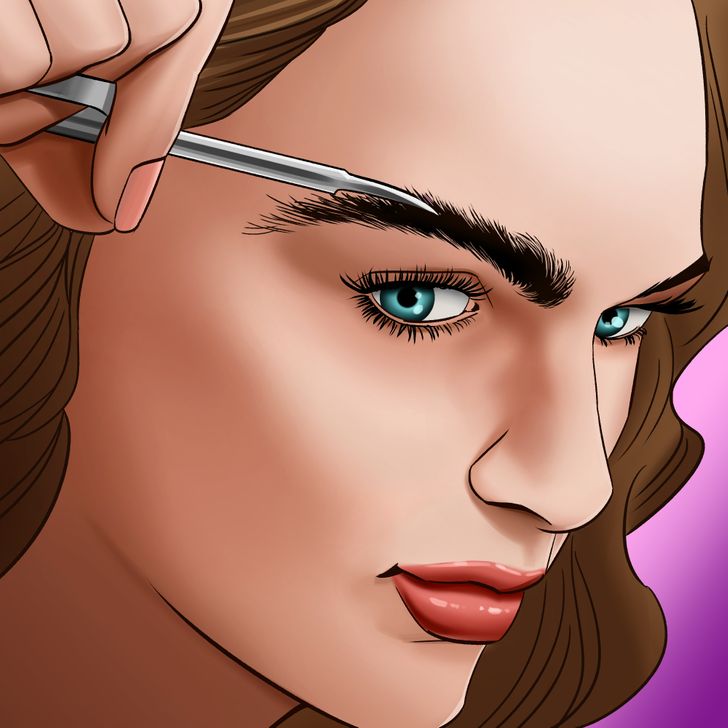
Comb your brows upward using the mascara brush or clear brow gel. The latter will help keep hairs in place and make them easier to cut, but wait for it to fully dry. Look for hairs jumping out of the brow and snip one hair at a time with the scissors.
- Tip: Always do so at a downward angle so you don’t obstruct your view of your eyebrow.
⚠️ DO NOT trim every hair. Hairs falling back into place after combing should be left alone. Same goes for anything in the tail section as you can end up with gaps since these parts are naturally more sparse.
4. Fill in with a pencil.
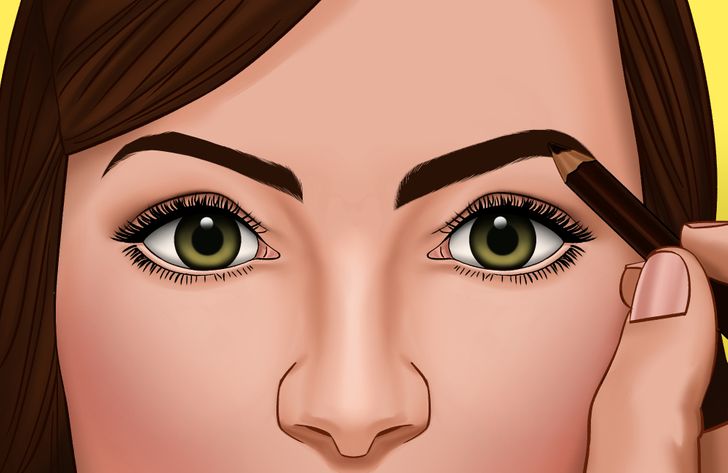
Once you’ve cleaned up the area you can use a pencil to fill in any sparse spots with short, hair-like strokes. Just always keep in mind that eyebrows are naturally thicker at the head and thinner by the tail. Run a mascara brush through your brows to blend the pencil and you’re done.
- Tip: Always use a sharp pencil. If the tip has rounded, it will deposit too much color and the finished look may appear too bold.