How to Use Makeup: A Beginner’s Guide
We typically know how to apply eye shadow, mascara, and lipstick, but we’re not always so sure about when and how to apply foundation, concealer, and highlighter.
We at 5-Minute Crafts would like to share some tips for your basic routine to help you know the right way to apply all the products and understand how to include them in your daily makeup routine. We’ll also give you some tips to optimize the steps that you already know.
Step 1: facial cleanser
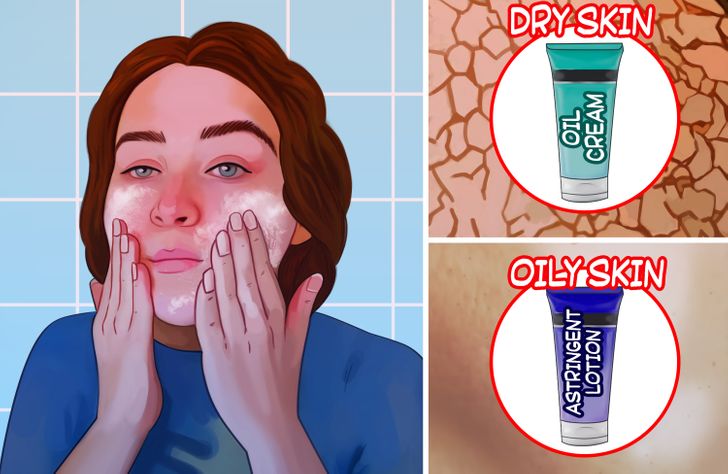
Before you even start applying your makeup, it’s important to keep in mind that your face has to be cleansed systematically first. Cleansing the skin removes excess sebum, and this, in turn, ensures that the makeup you apply doesn’t run off easily. To choose the right facial cleanser, you need to know your skin type and test different kinds until you find the right one. Generally speaking, you can use the following cheat sheet:
- If you have dry skin, it’s best to choose traditional creams with moisturizing ingredients, such as oatmeal, shea butter, or oil. These ingredients, in addition to discarding impurities, keep your skin hydrated.
- If you have oily or combination skin, use cleansers with astringent ingredients and avoid all those containing oil.
Step 2: moisturizer
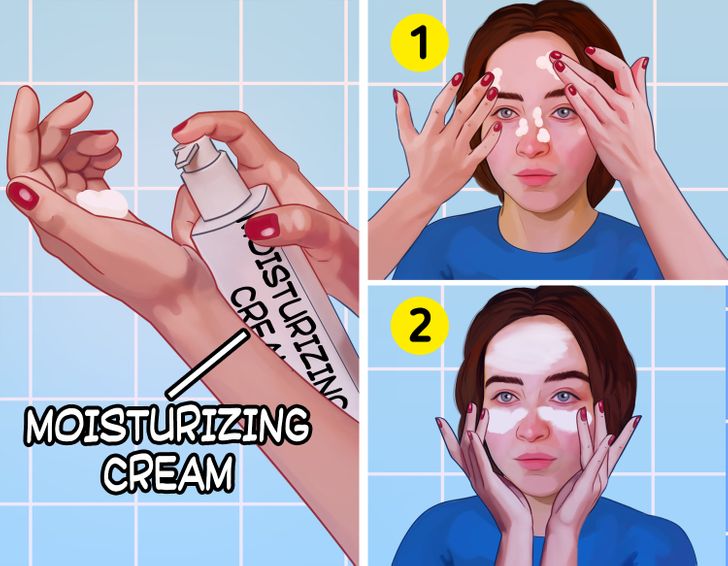
It’s best if you choose a light moisturizer if you’re going to apply makeup. This way, your skin will stay moisturized throughout the day, but it won’t look shiny or greasy. Moisturizer is something you should apply even if you have oily skin, especially if you’re about to wear makeup. However, in this case, just choose a gel or lotion instead of a cream. The latter tends to be heavier. When applying it, be sure to rub it evenly all over your face to avoid clogging your pores. Then wait for it to dry for a few minutes before moving on to the next step.
Step 3: a liquid base
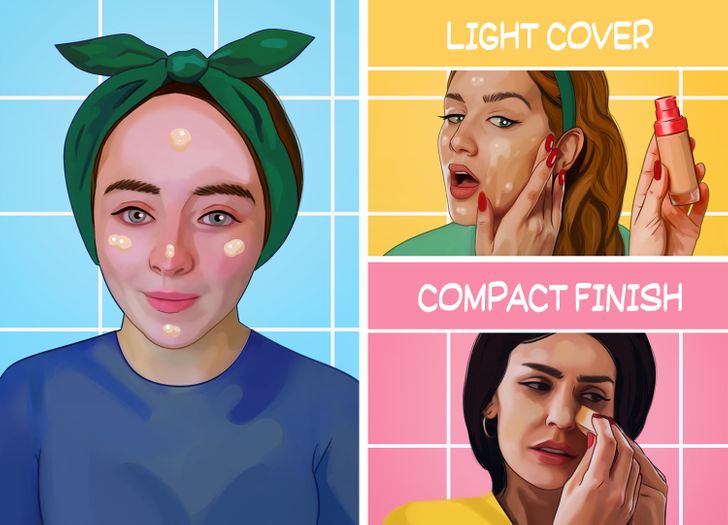
Foundation is the only part of your makeup that should remain basically unnoticeable. It should only make your skin look naturally smooth but somewhat embellished. To make it look as natural as possible, you have to choose a shade similar to that of your own skin. If you don’t have a chance to try the product on beforehand and you’re in doubt, always choose a shade that’s slightly lighter instead of a darker one.
- With your fingers, apply the foundation to your forehead, cheeks, nose, and chin, and sweep outward from there in all directions.
- You can keep on applying it with your fingers if you want very light coverage, or you can opt for a sponge for a more compact finish.
- If you have oily skin, you can use a matte finish foundation.
- If you have dry skin, go for a radiant finish foundation so it will stay hydrated for the rest of the day.
Step 4: creamy concealer
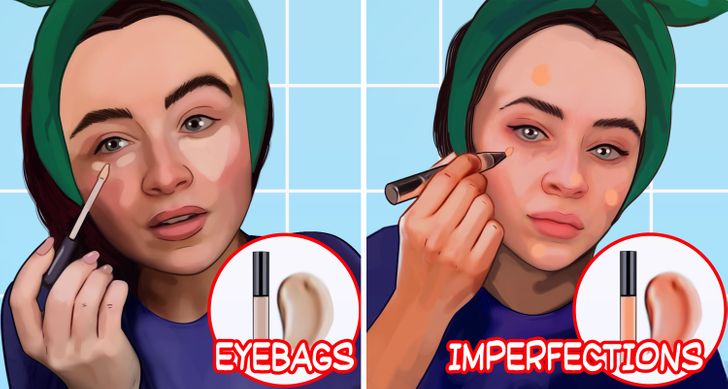
Typically, concealer is meant to cover dark circles under your eyes and correct other small imperfections that haven’t been covered in the previous step with foundation.
- For the area under your eyes, look for a color that’s just one shade lighter than your skin. Just keep in mind that a color that’s too light will look very artificial. The secret to good makeup application is to make sure the results look as natural as possible.
- It’s convenient to have another shade of concealer to apply on areas of your face where you notice dark spots, pimples, or other imperfections. In this case, the ideal shade will be the one closest to your skin color.
- For dark circles under your eyes, use a small pointed brush and apply the concealer in a triangle shape. Pay special attention to the areas where dark circles under the eyes are the darkest. These are usually located in the inner and outer parts of the eye. Then blend it in with your thumb.
Step 5: highlighter
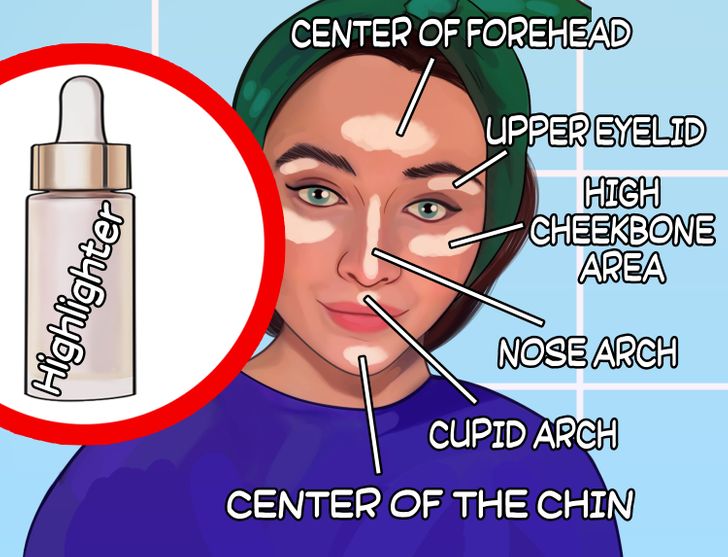
As the name suggests, you should apply highlighter to the parts of your face that are to be highlighted. As a rule of thumb, these are the places hit by direct sunlight.
- Apply it on the high cheekbone area, the arch of the nose, the Cupid’s bow, the arch of the eyebrow, the center of the forehead, the upper part of the eyelid, and the center of the chin.
- Blend it in with your fingertips, using as little pressure as possible to avoid smudging the foundation.
Step 6: translucent powder
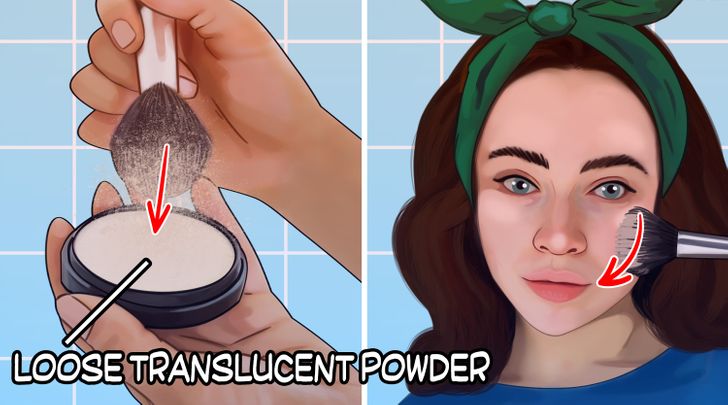
Translucent powder is a colorless powder used to help set foundation, concealer, and highlighter, and it makes them all last longer on your skin. You can also use it after applying eye shadow and eyeliner for the same purpose. As we mentioned earlier, its main function is to help your makeup last longer. To apply translucent powder, you’ll need to use a large, fluffy brush.
- Before applying, lightly press the bristles of the brush into the powder base and then tap lightly against the container to discard excess powder.
- Dust a light amount all over your face in long, arching motions.
- You can use more powder on the areas of your face that need more coverage, such as reddish or oilier parts.
Step 7: bronzer
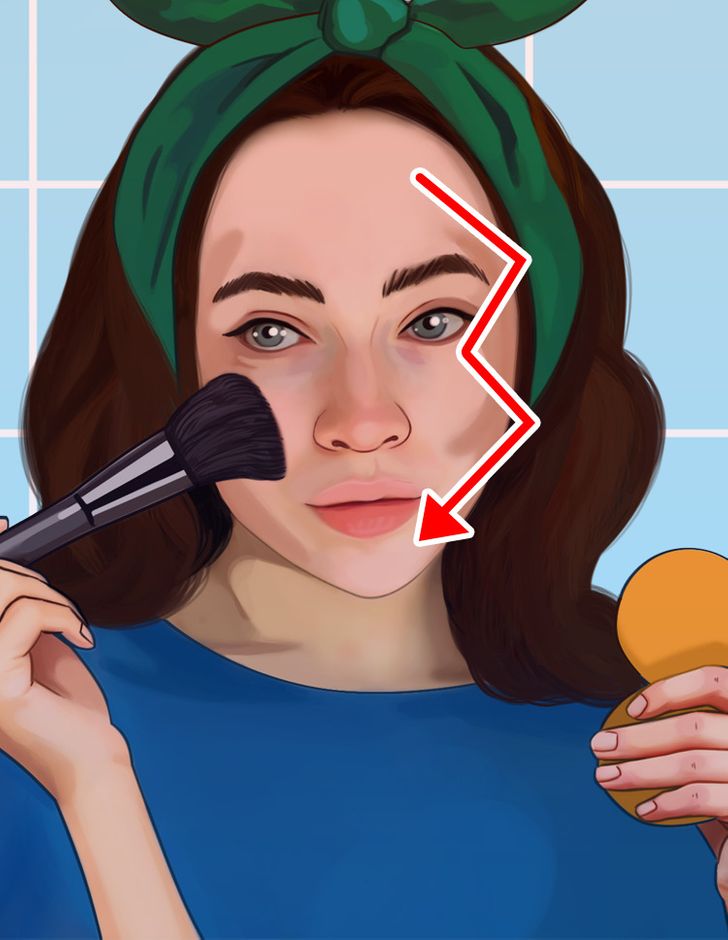
- It’s better if you use a specific bronzing brush when applying it, as these have a particular shape that is different from the rest of the brushes you’ll be using.
- To avoid obtaining a very artificial result, choose a bronzer that is a maximum of 2 shades darker than your natural skin tone.
- Apply in the shape of a number “3” on both sides of your face. Start from the forehead, go over the cheek, and end at the chin.
Step 8: blush
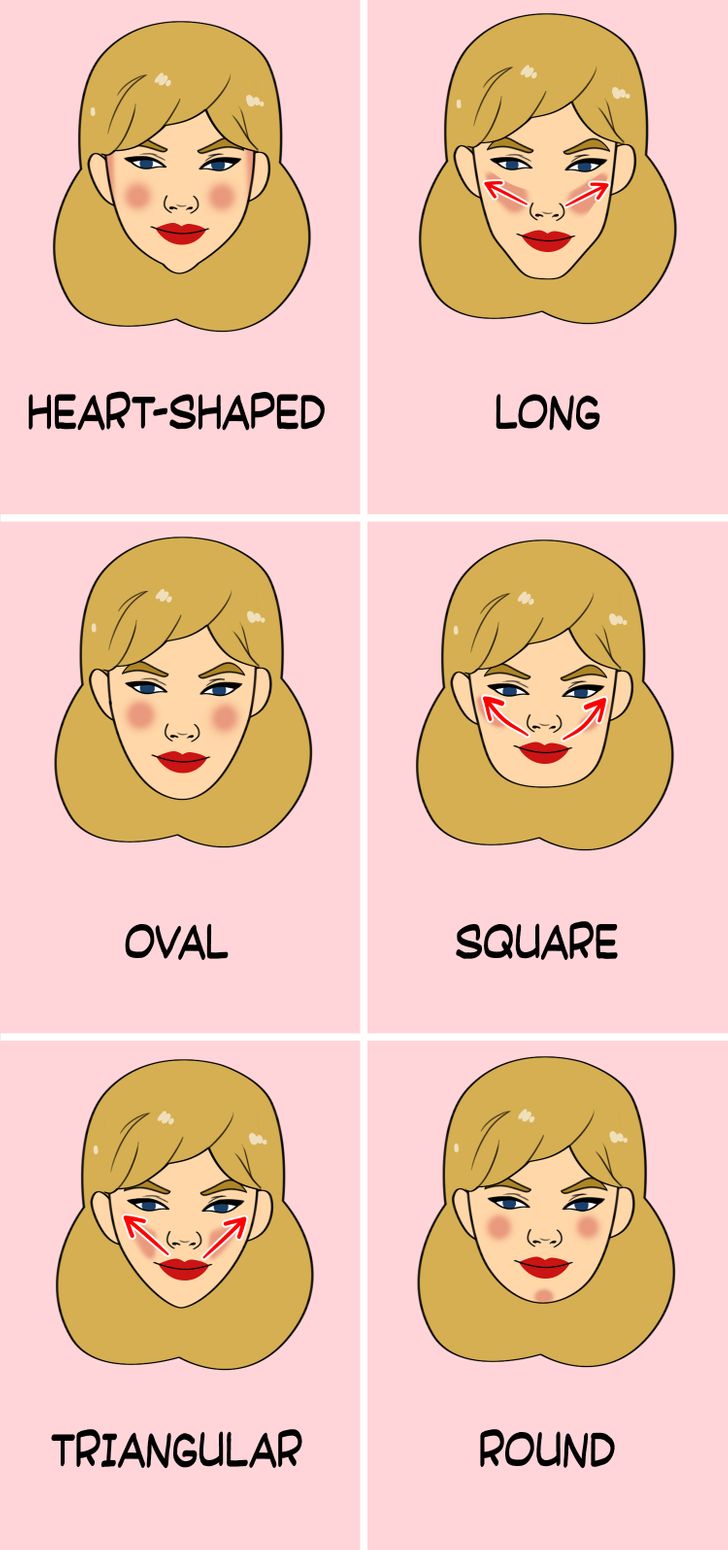
Blush is ideal to give a little more color and vitality to your face in general. Regardless of the shade of blush you choose, liquid formulas are always recommended by experts. Creamy blush adapts more easily to any skin type, even the most aged, and the result tends to be a natural color, which is great. Remember that the key in these first steps of your makeup routine is to make sure that whatever you’re applying is as natural as possible. It should highlight your natural beauty and make you look better, but without making the layers of makeup noticeable.
The interesting thing about blush is that, depending on how you apply it, you will be changing the shape of your face. So you won’t use the same type of technique on round or heart-shaped faces as you would on oval, elongated, square, or triangular-shaped ones.
Step 9: eye shadow shade
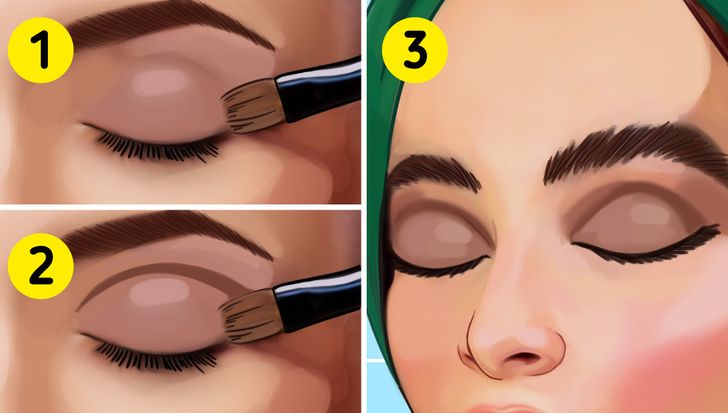
It’s recommended to choose 2 complementary shades of eye shadow: one that tends to be considered a neutral color and one that’s a darker shade. Make sure they are in the same chromatic range. You can apply them using your fingertips or with a small eyeshadow brush if you prefer.
- Use the neutral color as a base to cover the entire eyelid, from the lash line to just above the crease.
- Then apply the dark shade.
- Blend them well with a clean brush so you can combine the 2 shades and obtain a natural result.
Step 10: eyeliner
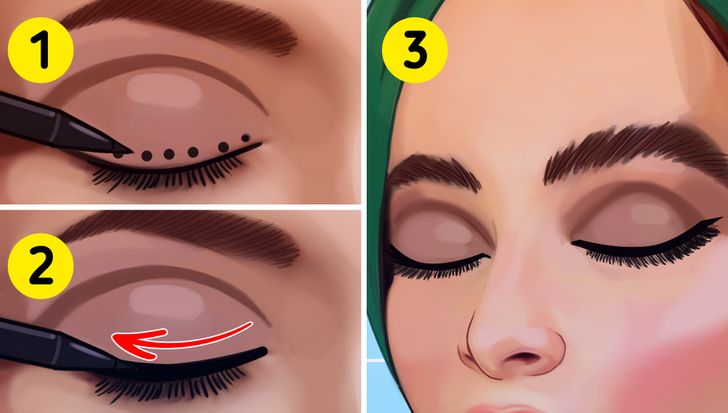
When it comes to eyeliner, it’s always best to opt for classic shades, such as black or brown. Keep in mind that a liquid eyeliner will color bleed much more easily than a regular pencil, but its line will be much more precise. If you prefer a thin line that sticks to the lashes, choose the former.
- If you want a firm and even line, make small dots on the lash line and then join them with the same brush.
Step 11: mascara
When it comes to mascara, it’s also a good idea to stick to more traditional colors.
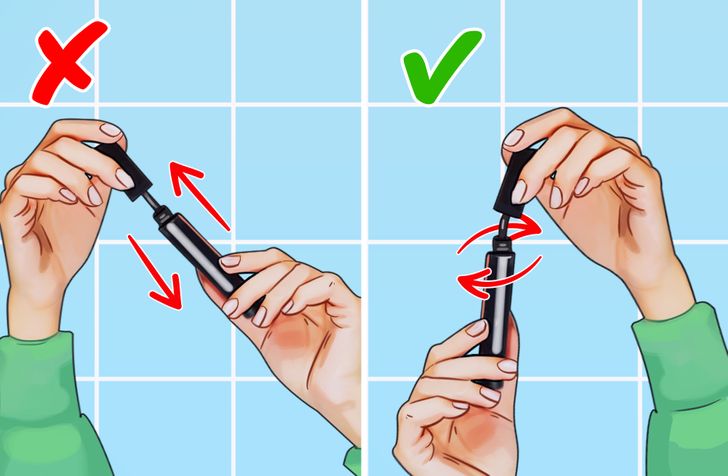
- Before applying, gently twist the wand inside the tube to make sure all the bristles are covered.
- Don’t move it up and down because this will cause air to enter the container and the mascara to dry out or clump; instead, make circular motions to get all the product out of the tube.
Step 12: lipstick or lip gloss
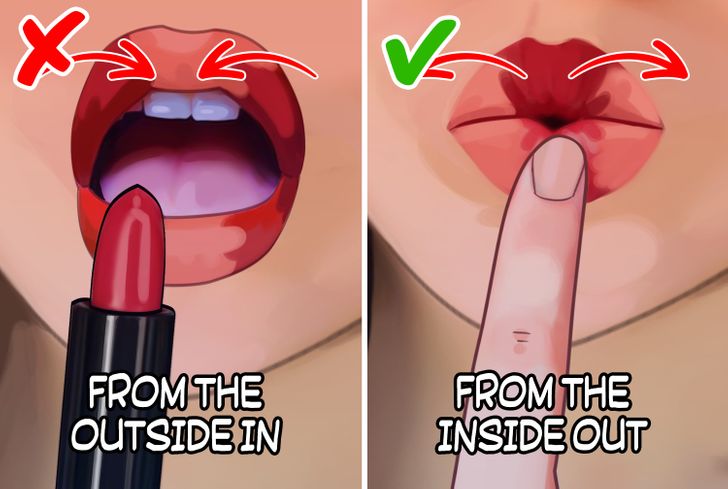
Lipstick is a basic makeup product that can totally change your look in just a few seconds. However, for this to happen, it is very important to choose the right shade and apply it in the right way.
- Pucker your lips and apply it to the top and bottom center, then blend outward with your fingertips. This way, you can avoid smudging or smearing.
- If you have very thin lips, keep in mind that intense or dark shades can make them look even thinner. To avoid this, finish with a gloss.
- If you have chapped lips, you can prep them before painting by applying a damp cloth and then a layer of lip balm. Let it absorb before moving on to the next step.
- To help your color last all day, run a piece of ice over your lips before applying any color.
Bonus

- You can also try and use your lipstick, or lip liner, as eye shadow. Depending on its shade, it might give you a unique and sparkly look.