How to Explain to Children What Time Is and How to Read a Clock
Humanity took thousands of years to understand what time is and learn to measure it. So don’t be disappointed if it’s hard for your child to memorize what years, months, days of the week, hours, and minutes are. It’s better to learn all these concepts gradually.
5-Minute Crafts is going to tell you about the tips and tricks that might be useful to explain the concept of time to children and teach them to use calendars and clocks.
The concept of time, years, seasons, and months
In our everyday lives, we use time to measure and compare the duration of some events, the intervals between them, and even the sequence of events. For example, winter is before spring, spring is before summer, fall is after summer, and winter is after fall. These are seasons that, together, make 1 year. Every season has its own characteristics and each lasts 3 months.
Take a sheet of paper, draw a big circle on it and cut it out. Fold it in half and then fold it in half again. Open it: the fold lines will split the circle into 4 equal parts — one for each season. Now, together with your child, write down the names of the seasons and paint them.
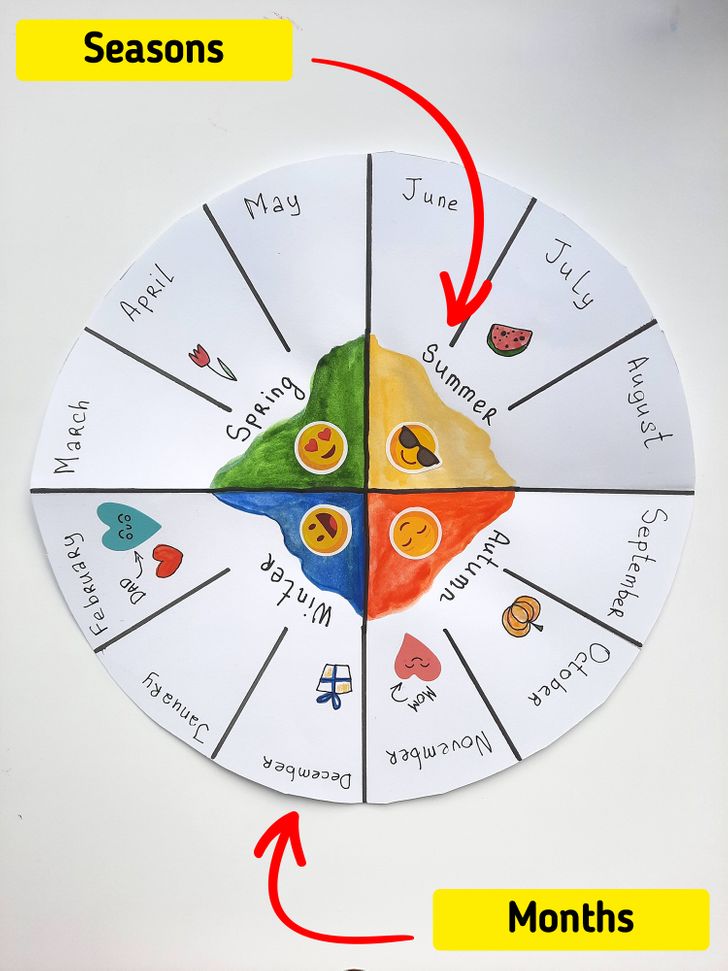
Separate each of the 4 sections into 3 even parts — they will be the months that seasons consist of. Write down the names in the correct order.
Talk to your child and find out what they can remember about certain months (events and processes). For example, in December we celebrate Christmas, in April we have flowers, and in July we eat watermelons.
For each month, draw a picture of what the child can say about it. This will help them memorize the cycles and the order of the months.
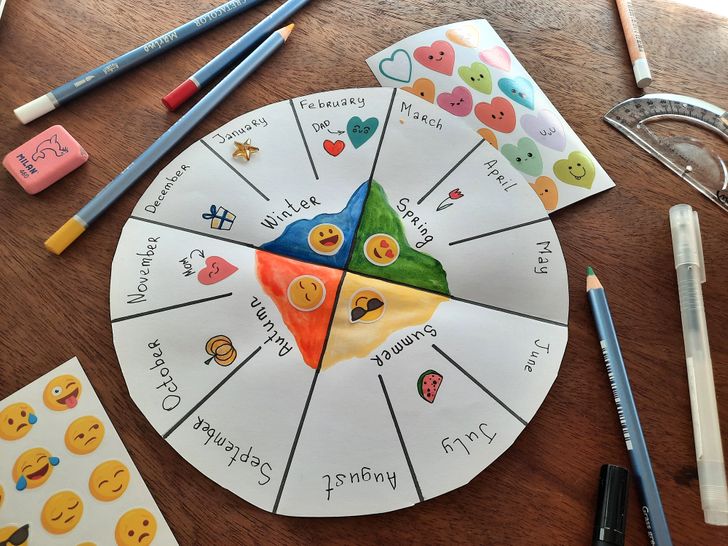
Suggest that your child marks the months when their relatives and friends have birthdays: add writing, funny stickers, and photos of family members. Put the calendar somewhere the child can see it.
Also, at the beginning of each month, you can ask your child to mark their name in the calendar and add new stickers and drawings.
What months, weeks, and days consist of
When your child understands what 1 year is (4 seasons and 12 months), take a regular calendar where each month is on its separate sheet.
Show it to your child and draw their attention to these things:
- 1 year is always 12 different months.
- Any month is 4 full weeks. But it might have a different number of days: from 28 to 31.
- Any week is 7 different days. Each day of the week has its own name.
In order to better imagine these periods of time, find a calendar page of the current month. Together, count the number of days in the month. Say the names of the weekdays in the correct order. Also, explain that holidays and weekends are different from weekdays because the font is red.
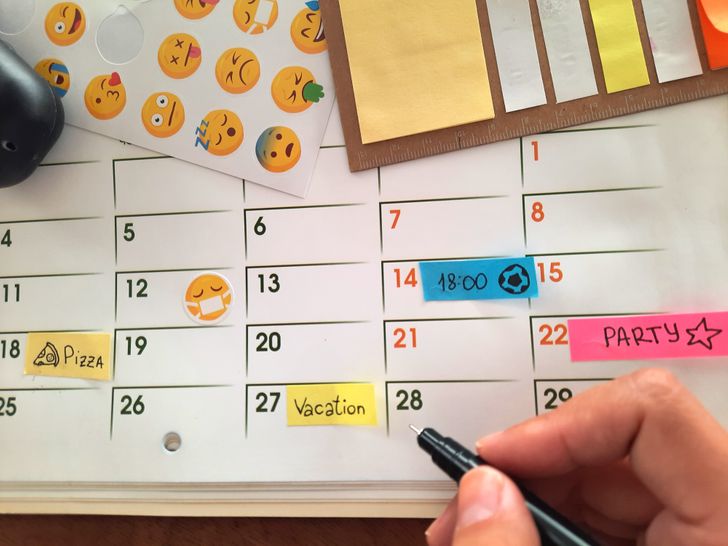
Using stickers and markers, suggest that your child marks some significant events in the current month, like, for example, going to the pizza place, seeing a soccer game, celebrating someone’s birthday, and so on. When marking a certain day, say its name and state its position relative to the present moment, like, for example, “Next Wednesday, we’re going to the pizza place,” or “Last Saturday, you played with your friends.” Throughout the month, add new stickers with new events.
At the beginning of the next month, go to the next page and mark the events that have already been planned and then add new ones. If you want, you can suggest your child mark days with a circle.
This way, the child will learn to use the calendar, compare months, learn the days of the week, plan events, and compare the past events with the upcoming ones.
When children should be taught to read a clock
The process of learning time can be divided into several parts and introduced to a child slowly, depending on their age.
- 5-6 years old: A child can understand hours and half-hours on regular analog clocks and can also draw them.
- 6-7 years old: A child already knows how many minutes there are in 1 hour and how many hours there are in 1 day, and they also know what a quarter-hour is and can read a clock.
- 7-8 years old: Children can read clocks in 12 and 24-hour formats and understand Roman numerals. They can compare the time and use certain words and terms that are connected with time.
Useful exercises
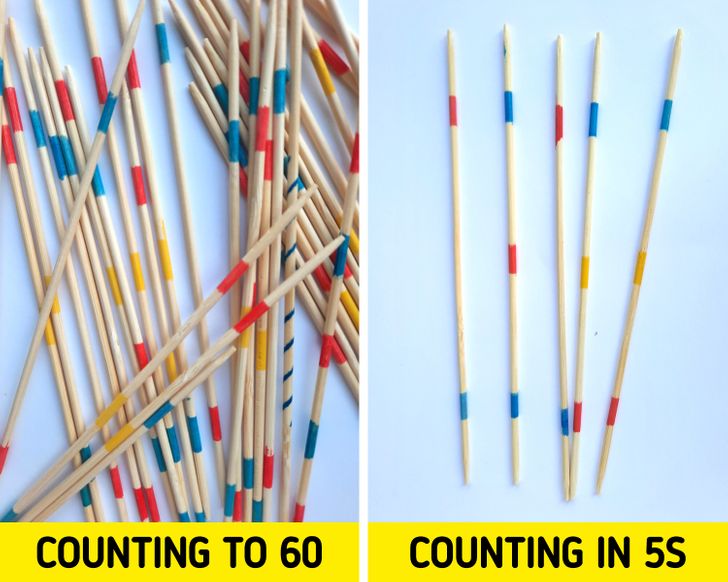
- Teach your child to count. In order to read a clock, children should know all the numbers up to 60 and count them in the correct order. They should also be able to understand how to imagine 1 hour as 5-minute periods or 1 minute as 5-second periods. Try counting to 60 in fives: 60: 5, 10, 15, 20, 25, 30, 35, 40, 45, 50, 55, and 60.
- Introduce your child to the concepts of day and night. Discuss what your child usually does in the morning, during the day, in the evening, and at night to connect different times of the day with their activities.
What days consist of, and what 1 hour and 1 minute are
1 part of every 24 hours is during the day and the other is during the night. It’s connected with the appearance of the sun and the moon. But day and night last quite a long time and can be filled with different events, so every day is divided into shorter periods of time.
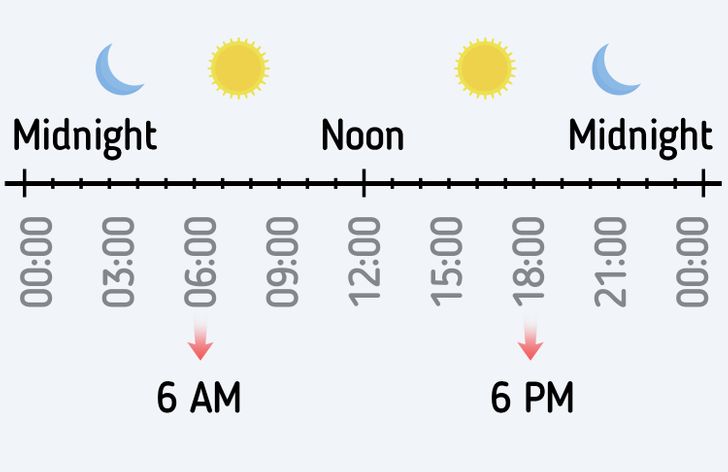
Together with your child, look at the picture above. It’s 1 day in different formats:
- In 24 hours, every hour has a unique number from 0 to 24.
- In 12 hours, specifically in this case, we divide 1 day into 2 cycles, 12 hours each. When you say the name of the hour, you need to state which part of the day you mean: 6 AM or 6 PM.
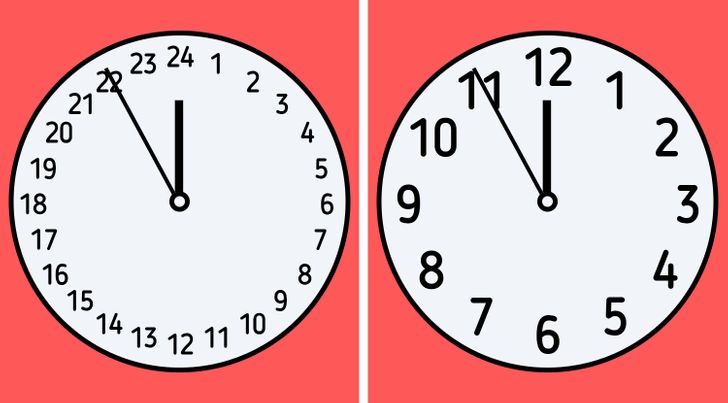
Most of the time, digital clocks show a 24-hour format and analog clocks — 12 hours. You can find clocks that have 24 hours on them. So it’s important to learn to read a regular analog clock.
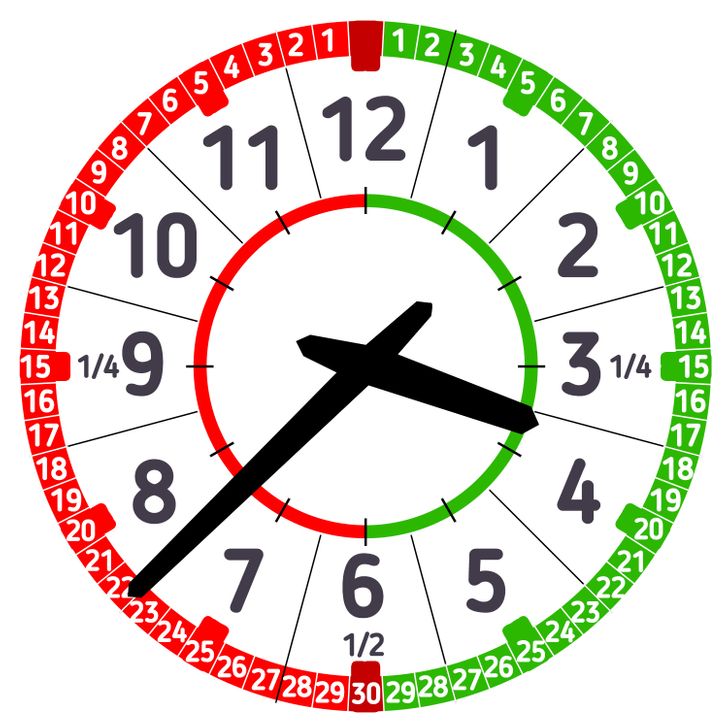
Show the picture of the clock above. You can see not only the hours but also the minutes. And there are hints of what we call a half-hour and a quarter-hour.
Explain to your child what each of the hands point at, what direction they go in, and how fast. Make it clear that the hour hand points at the number for hours and the minute hand points at the same number but it means other numbers. For example:
- The hour hand pointing at 2 tells us it’s 2 o’clock.
- The minute hand pointing at 2 tells us it’s 10 minutes past some hour.
Explain how the hour hand points at each hour during the day. After that, explain the minute hand. The child might need some time to memorize the numbers for minutes.
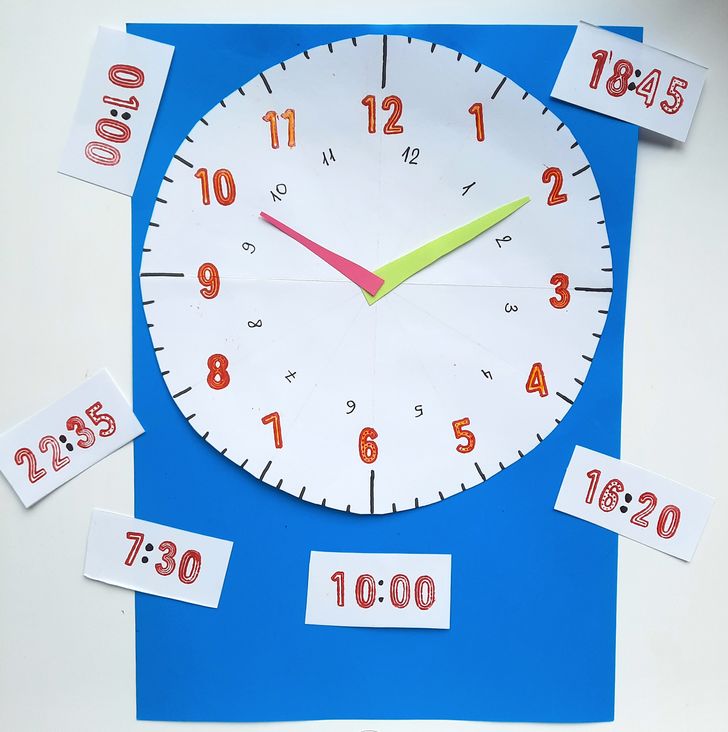
Exercise № 1. To make it easier to memorize, take a sheet of paper, draw a big circle, and cut it out. Fold it in half and fold it again. Unfold it: the folds will divide the circle into 4 equal parts. Now divide each of the 4 parts into 3 equal parts, making marks with a pencil. So there should be 12 equal parts. After that, write down the marks and the numbers. Cut out 2 strips, a short one and a longer one, for the hands.
Now on small pieces of paper, write down different times and ask your children to place the pieces on the clock correctly.
✅ Tip. Explain the duration of 1 hour. As soon as the small hand points to 10, until it reaches 11, it will be 10 full hours and a certain number of minutes.
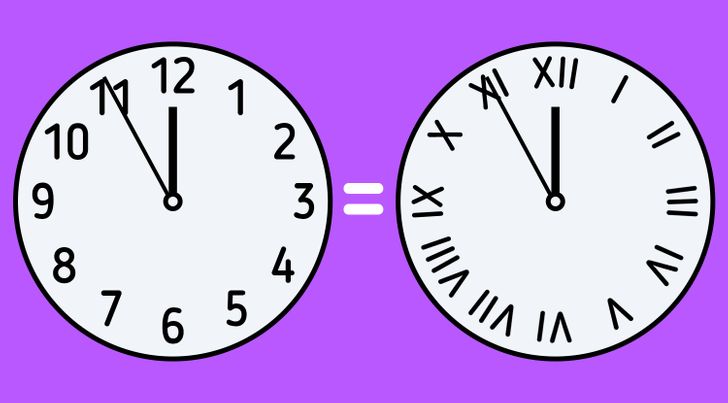
If you want, you can teach your children to read Roman numerals. Use the picture above for help. On some clocks, 4 can be written as IIII instead of IV, and 9 as VIIII instead of IX.
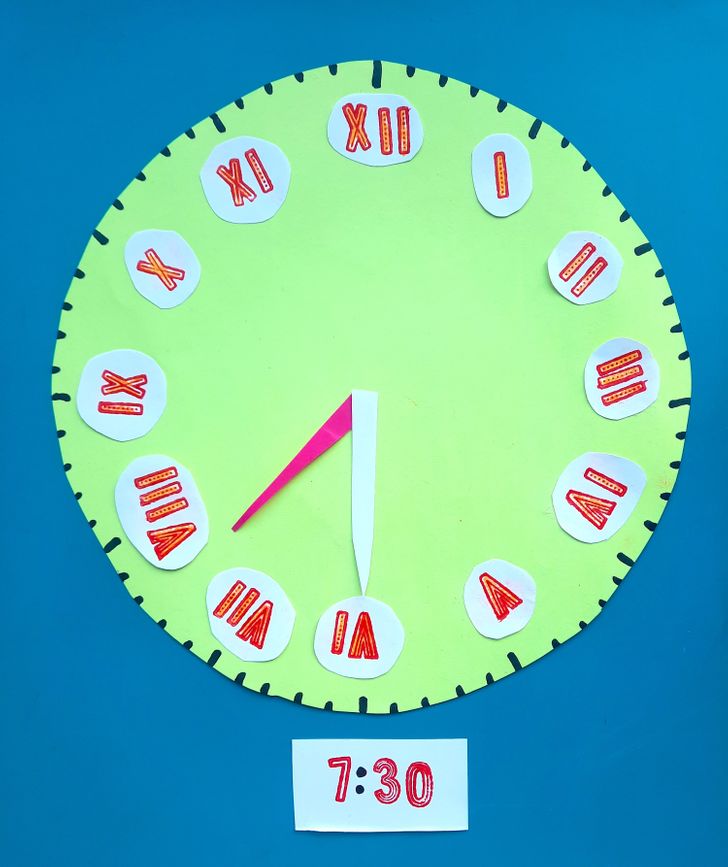
Exercise № 2. Make another clock but use Roman numbers. Like in exercise № 1, ask your child to put the hands correctly depending on the time they see on a piece of paper.
Don’t expect your child to do everything correctly from the first attempt. Practice bit by bit every day until it stops being a problem.