10 Yoga Postures You Can Adjust According to Your Flexibility Level
If you think you should start exercising, but your body feels a little rusty, you can start from scratch with basic yoga postures. This ancient practice will not only help you maintain your figure, but it will also improve your flexibility.
5-Minute Crafts has put together some exercises from the beginner to the advanced levels so that you can build your own routine according to your abilities.
1. Warrior Pose
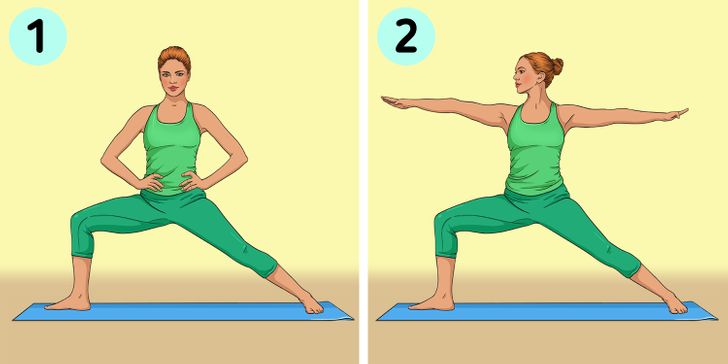
1. Standing with your legs apart and hands on your hips, bend your right knee at a 90° angle and straighten your left leg out to the side.
2. Raise your arms to shoulder height and face the right. Hold this posture for 30 seconds and repeat on the other side.
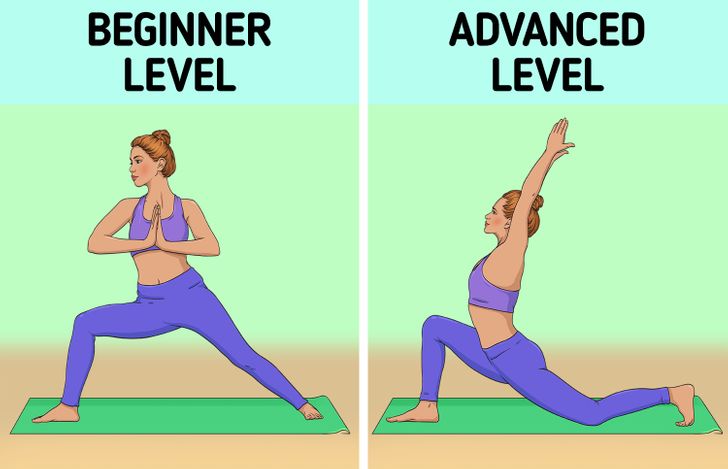
Beginner level: Start by practicing the position of the legs, bending the right knee, and stretching the left leg backward, without lowering the body too much. You can place your hands together in front of your chest.
Advanced level: Once you achieve stability, you can move forward by keeping your right knee bent at a right angle and lowering your left knee until it touches the floor. Raise your arms above your head and keep them straight, pressing your shoulders down.
2. Tree Pose
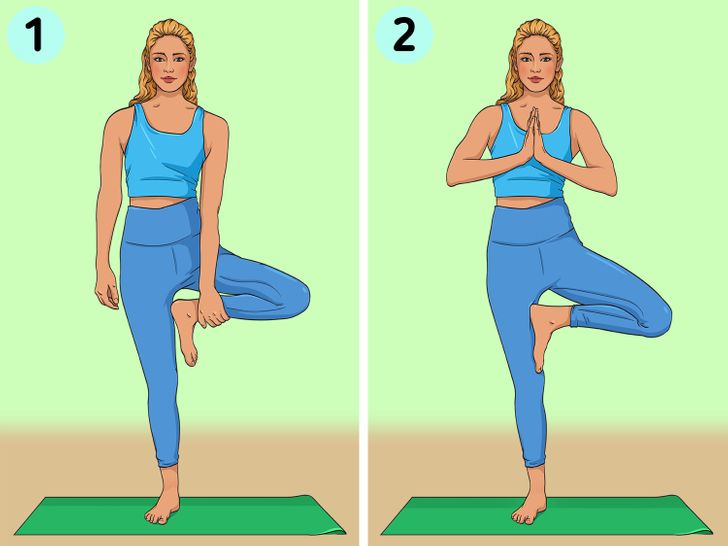
1. Standing with your back straight, face forward and put all the weight of your body onto your left leg. Lift your right knee. Take your right foot and place it on the inside of your left thigh.
2. Bring both palms together at the center of your chest. Hold the posture for 10 to 20 seconds while breathing deeply through your nose. Return to the original position and repeat with the other leg.
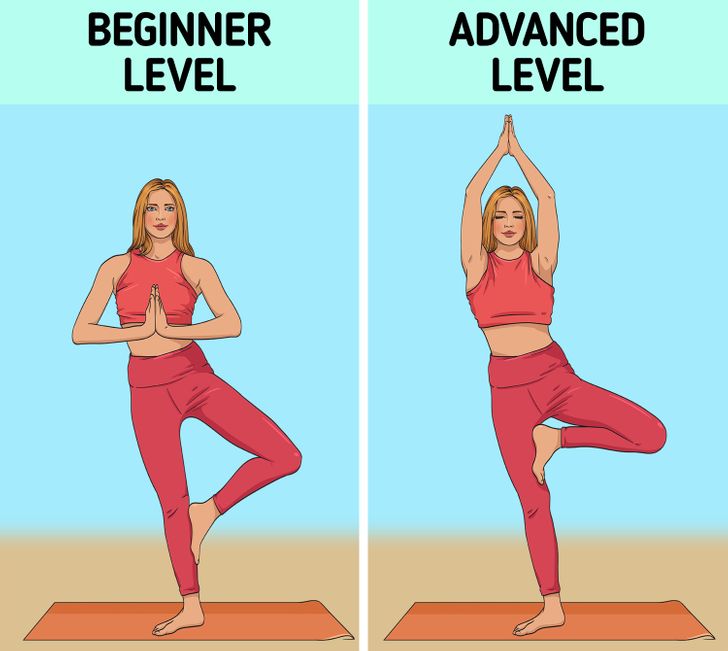
Beginner level: At first, you can place your foot below the knee, until your body gets used to maintaining the balance.
Advanced level: When you master the basic posture, you can perform it at an advanced level by closing your eyes and raising your hands together above your head.
3. Cat and Cow Poses
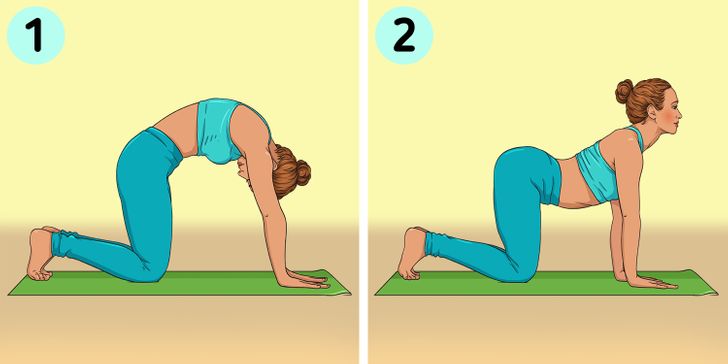
1. Position yourself with your knees and hands flat on the floor, without bending your elbows and with your back straight. Gently bring your head back, pushing your abdomen down. Hold the posture for 10 seconds and return to the neutral position.
2. Arch your back up, bringing your head down between your shoulders. Retract your abdomen. Hold the posture for 10 seconds and return to the neutral position. You can do 6 repetitions.
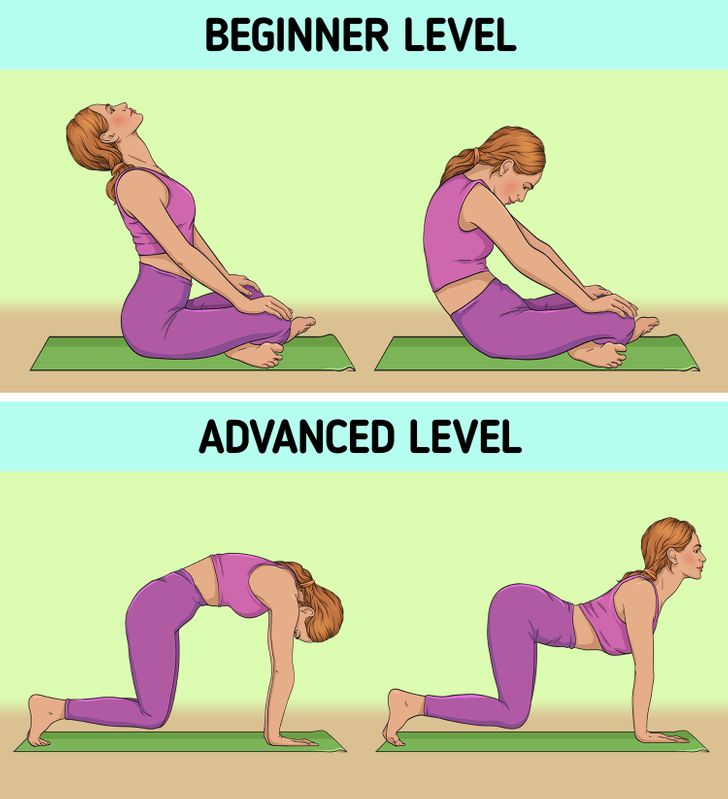
Beginner level: Before executing the basic posture, you can try slouching and arching your back while sitting cross-legged on the floor.
Advanced level: For a more advanced level of this posture, try raising your knees a few centimeters, resting only the tips of your toes on the floor.
4. Downward Facing Dog Pose
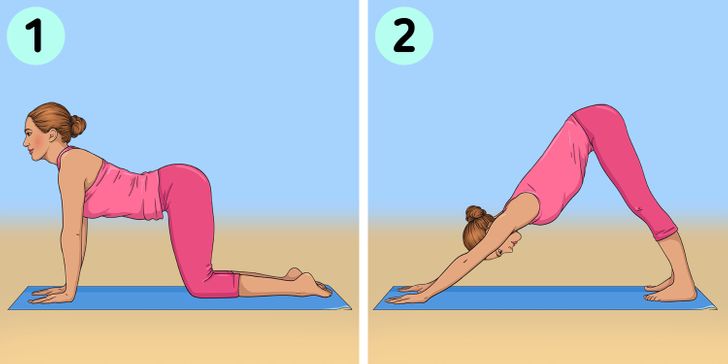
1. Position yourself with your knees and hands flat on the floor without bending your elbows and with your back straight.
2. Gently lift your knees, resting your heels on the floor. Raise your hips and lower your head without bending your elbows. Your body should be in the shape of a triangle. Hold the posture for 1 to 3 minutes and then return to the original position.
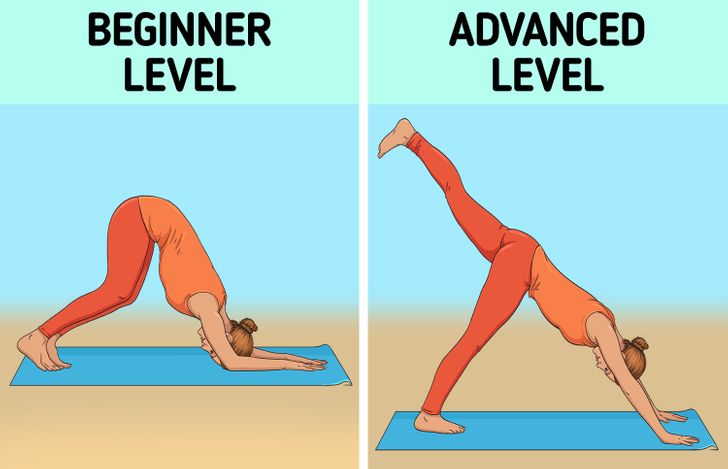
Beginner level: If, at first, you can’t stretch your legs, try leaving them slightly bent. You can also rest your forearms on the floor.
Advanced level: Once you have mastered the basic posture, you can move forward by raising one leg and leaning on the palms of your hands and the toes of your feet that are on the floor.
5. Reverse Table Pose
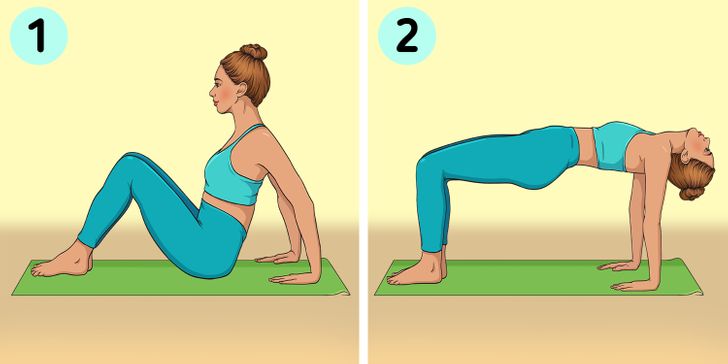
1. Sit on the floor, bend your knees, and place the palms of your hands behind your hips.
2. Raise your hips to form a straight line from your head to your knees. Hold the posture while taking 5 deep breaths. Return to the original position.
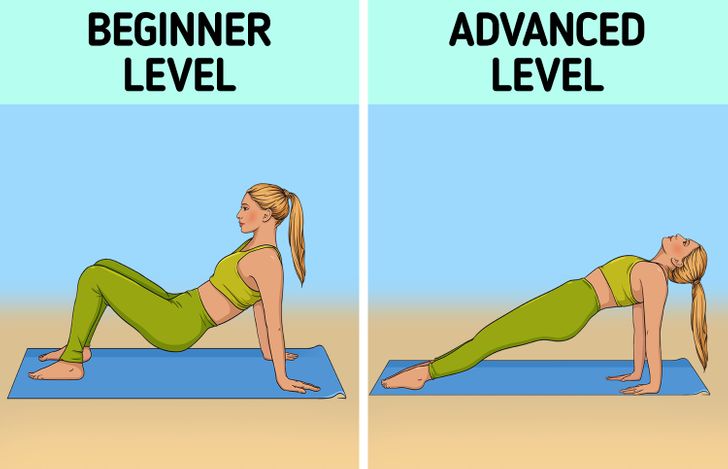
Beginner level: At first, you can perform this pose by slightly raising your hips off the floor.
Advanced level: Once your arms and shoulders can support you smoothly, you can stretch your legs forward without bending your knees, leaning on the back of your heels to lift up your hips and torso.
6. Cobra Pose
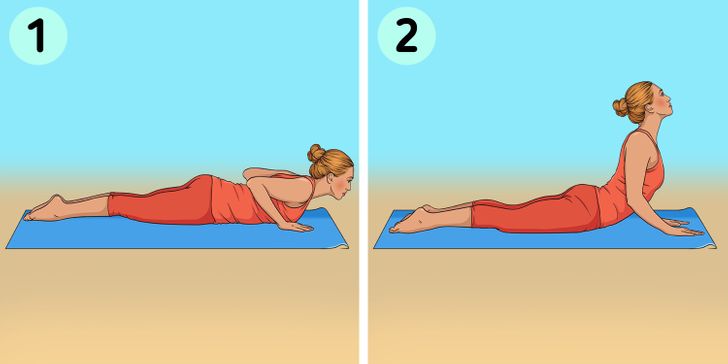
1. Lie face down on the floor and place the palms of your hands on the floor at shoulder level.
2. Gently stretch your arms, raise your head and then your trunk, gently arching your back. Hold the posture for 30 seconds and return to the original position.
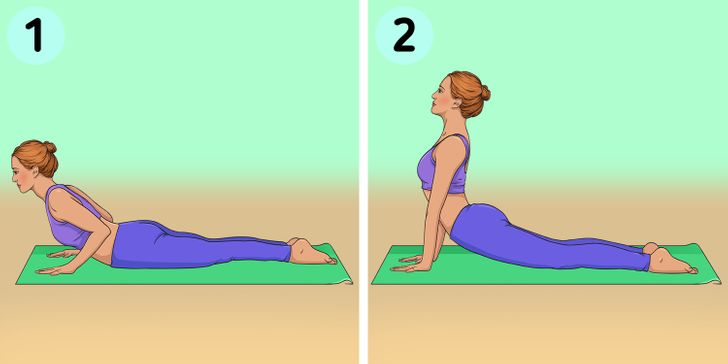
Beginner level: To start, you can rest your forearms on the floor and arch your back slightly.
Advanced level: To perform the posture at an advanced level, stretch your arms without bending your elbows, arch your back as much as possible, and look straight ahead, keeping your neck straight.
7. Revolved Side Angle Pose
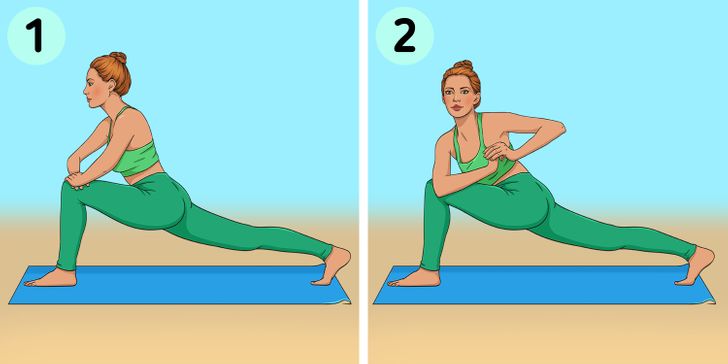
1. Standing, take a big step forward with your right leg and bend your knee. Lower the body, keeping the left leg straight back.
2. Interlock your hands and turn your torso to the right. Press the right knee with the left elbow, without separating the hands. Hold the posture for 30 seconds to 1 minute and repeat on the other side.
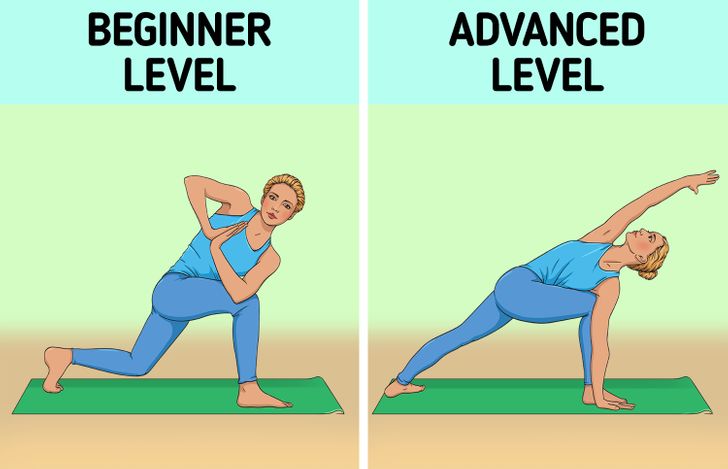
Beginner level: Before you master the basic posture, you can leave the left leg bent with the knee resting on the floor.
Advanced level: As you advance and gain flexibility, you can now stretch both arms, passing the left arm in front of the bent leg, resting the palm of the hand on the floor, and raising the right arm up and forward with the right leg stretched backward.
8. Revolved Abdomen Pose
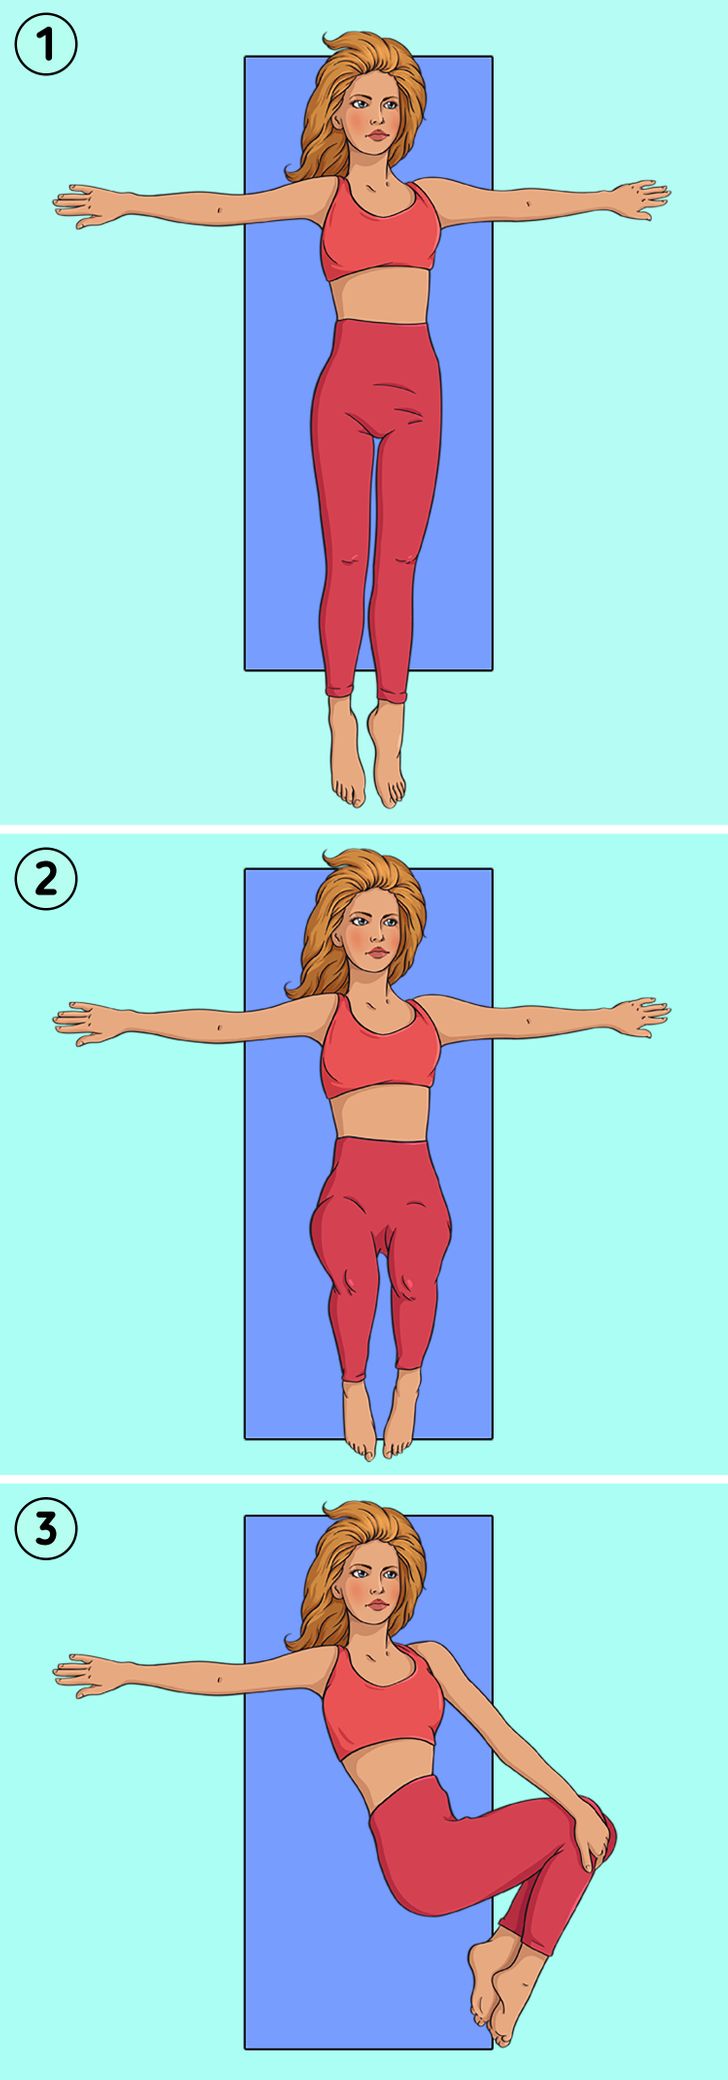
1. Lie face up on the floor. Open your arms at right angles to your body.
2. Bend your knees and raise your legs so that they are at a right angle.
3. Bring your knees to the left, without moving your upper body. Hold your knees with your left hand. Hold for 10 seconds and repeat on the other side.
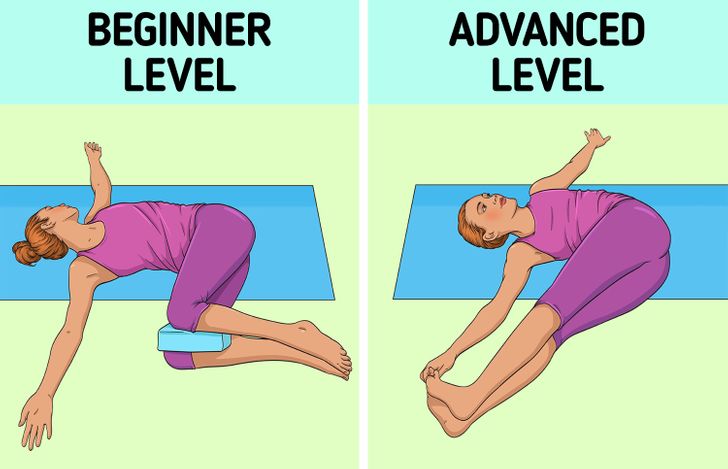
Beginner level: If at first, you find it difficult to bring your knees together, you can place a cushion or a folded blanket between them, while keeping your arms outstretched.
Advanced level: When you master the posture, you can move forward by extending your legs to the side, bringing them toward your shoulders, and holding your toes with one of your hands.
9. Child’s Pose
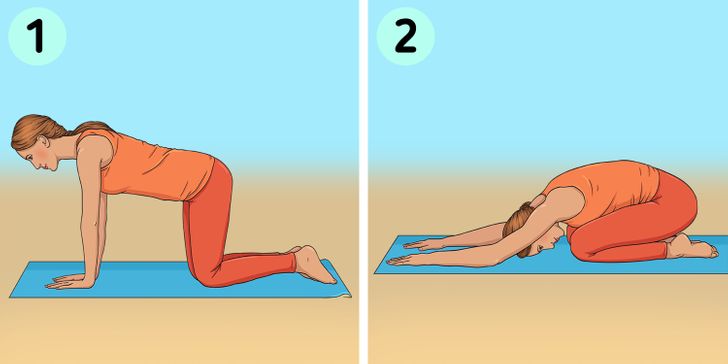
1. Position yourself with your knees and hands flat on the floor, without bending your elbows and keeping your back straight.
2. Slowly bring your torso down, resting your buttocks on your heels, leaving your arms stretched forward. Rest your forehead on the floor. Hold this posture for 30 seconds and return to the original position.
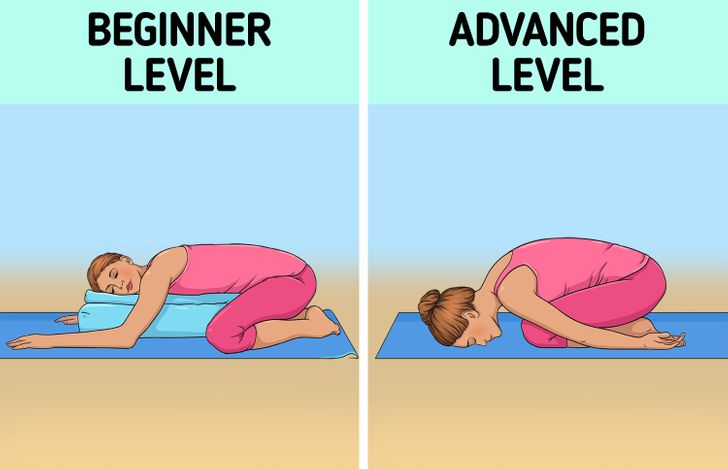
Beginner level: To make the pose easier, you can place a folded blanket or a cushion on your mat and rest your torso and head there, with your forearms on the floor.
Advanced level: Once you gain flexibility, you can perform the posture with your buttocks resting on your thighs and your arms extended backward with your palms facing upward. Lean your torso down, resting your forehead on the floor.
10. Camel Pose
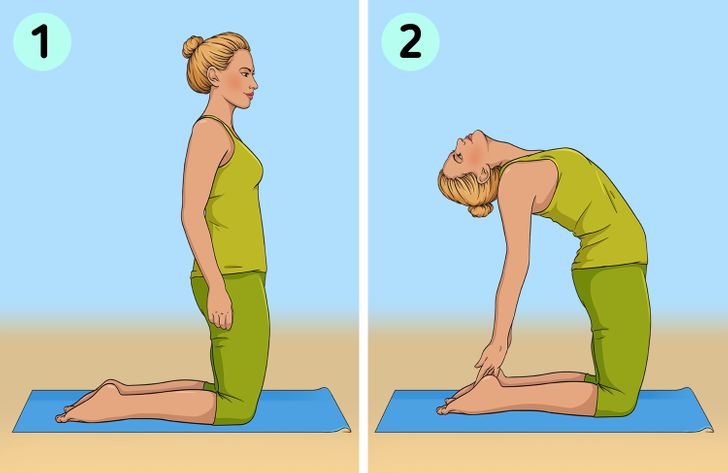
1. Place yourself on your knees on the floor, with your back straight and your arms at the sides of your body.
2. Then, bring your right arm back and touch your right ankle, while arching your back and looking up. Bring your left arm back and touch your left ankle. Hold the posture for 20-30 seconds.
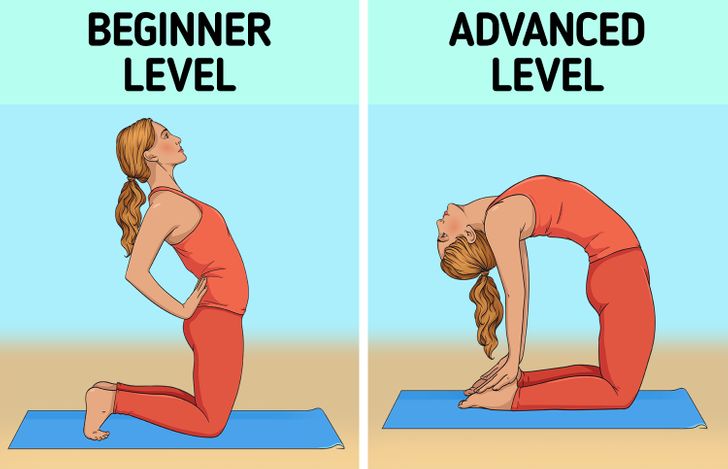
Beginner level: On your knees, bend your back backward, arching it as far as you can. Place your hands on your lower back and bring your elbows together. You can look up, without throwing your head back so much.
Advanced level: When you have mastered the posture without difficulty, you can place your hands on your heels, pushing your thighs forward and pulling your head back so that your back forms an arch.