How to Do a Perfect Push-up
Push-ups are a great compound exercise that works your whole body, and you don’t need any equipment to perform them. But to get all the benefits and not to injure yourself, it’s important to perform the exercise with the proper technique, and 5-Minute Crafts will show you how to do it right.
If you have any health issues, consult a specialist before performing this exercise to avoid any possible injuries.
Step 1. Start with the proper body position.
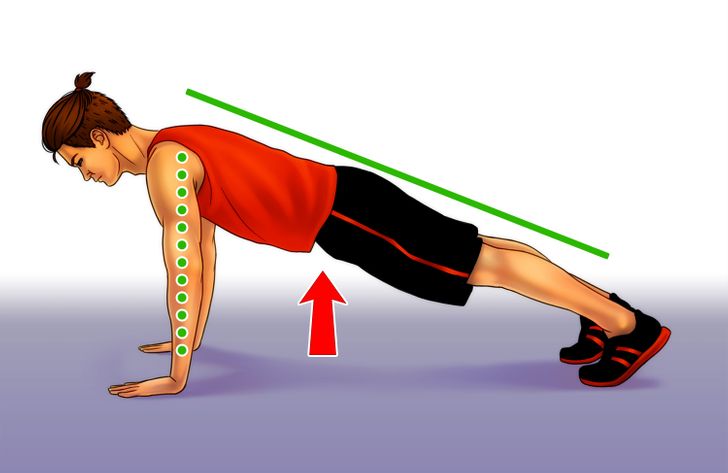
It might be easier to do a push-up if you think of it as of a moving plank. To get into a proper starting position, you should:
- Place your hands exactly shoulder-width apart. Your middle finger should point forward at about 12 o’clock. The palms of your hands should be pressed tightly to the floor.
- Your legs should be placed close to each other, and your toes should be flat and grounded on the floor to keep your body position stable.
- Keep your neck in a neutral position and avoid bringing your chin in or out.
- Engage your core and make sure your back is flat. Your body should resemble a straight line from head to toe.
Note: How to engage your core muscles
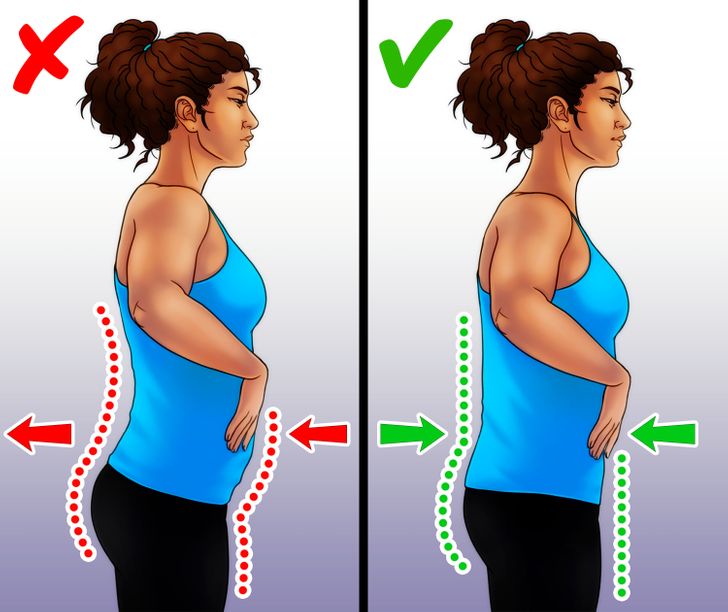
To check and see if your core is engaged, stand straight with your thumbs on your bottom ribs and your middle finger on your hip bones. Now, try to bring your fingers closer to each other. You should feel your lower back become flatter and your abs flex. You can engage your glute muscles to feel the movement better.
Step 2. Lower your body to the floor.
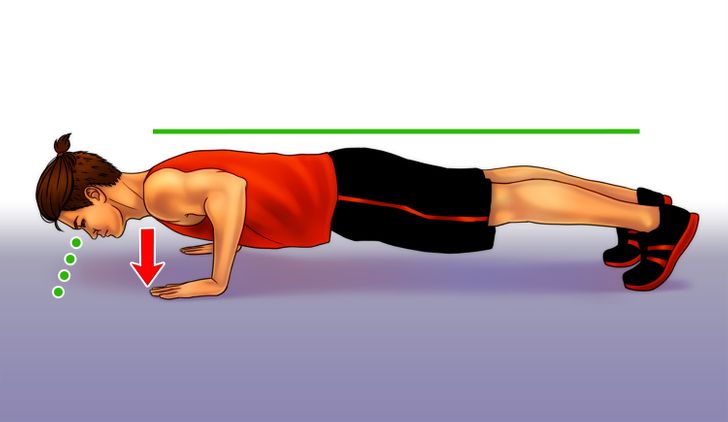
- Inhale, bend your elbows, and lower your body until your chest almost touches the floor. Make sure that when bending, your elbows are placed at about a 45-degree angle to your body.
- Make sure you maintain the proper position of your body as described in Step 1. Your back should be straight, muscles engaged, and your neck in a neutral position. When you do a push-up, your eyes should be focused at the point on the floor that’s about 3 feet in front of you.
- To make doing push-ups easier and to not hollow your back, imagine that you’re squeezing a walnut between your shoulder blades as you’re going down.
Note: Pay attention to the position of your elbows.
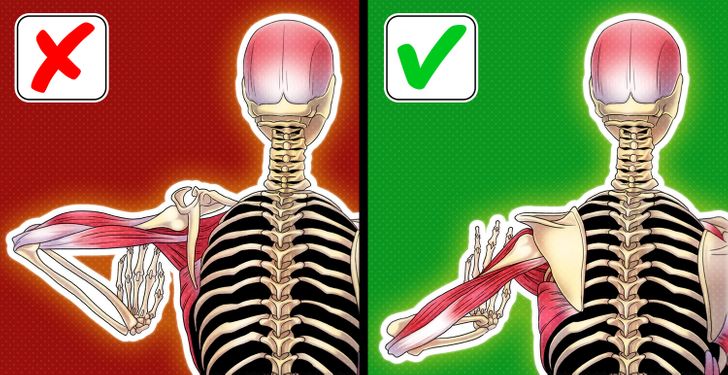
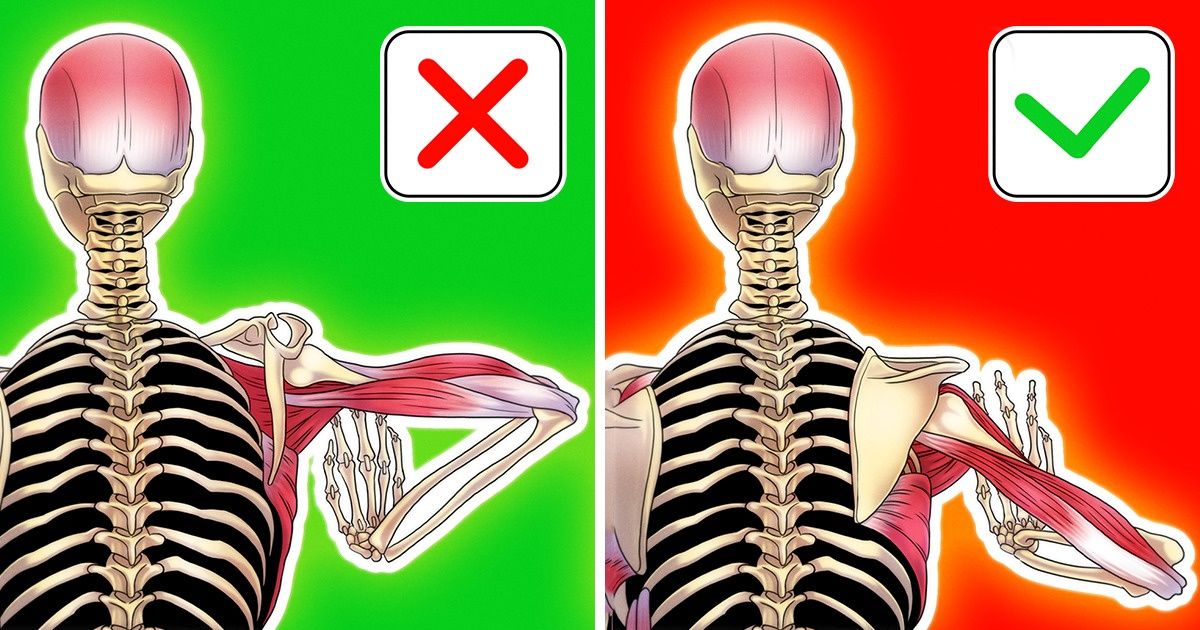
Don’t place your elbows too far away from your torso — they should not form a letter “T.” Otherwise, you’ll overload your shoulders which might lead to an injury in the long run.
Step 3. Push your body back up and do as many push-ups as you can.
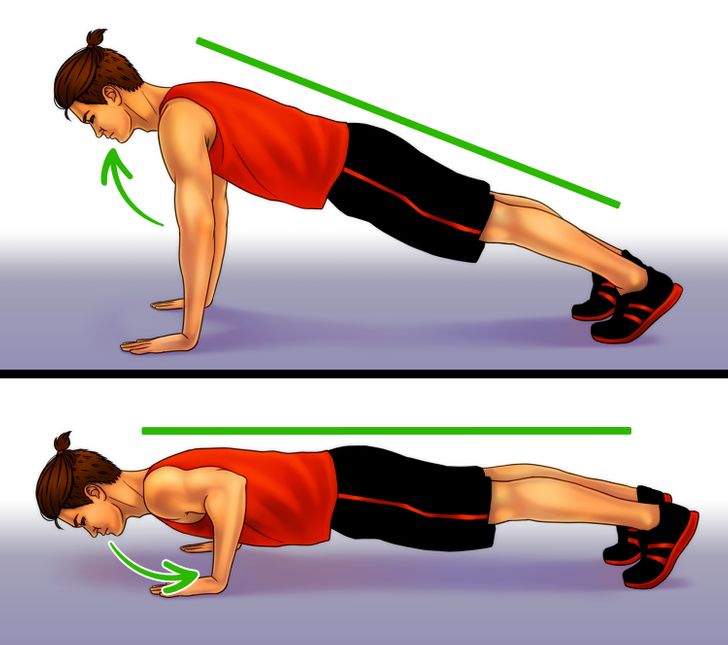
- Exhale and return to the starting position. Keep your body straight and muscles engaged.
- Repeat the exercise maintaining the proper form. Don’t forget to breathe!
Note: What to do if you can’t do a proper push-up.
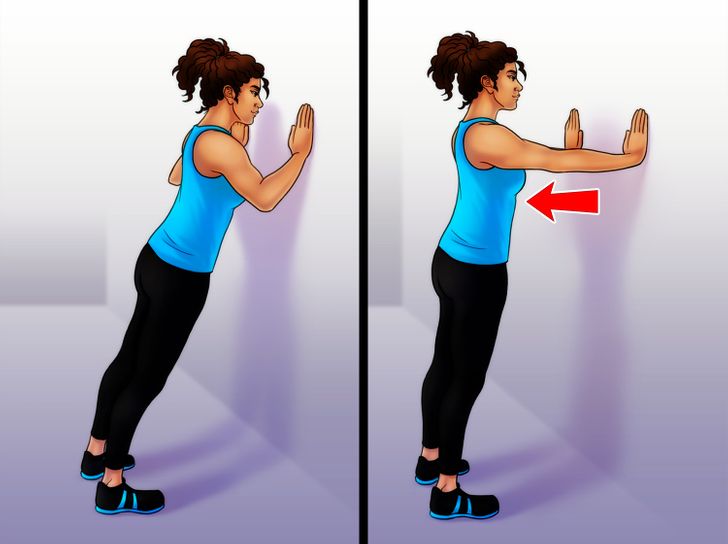
If you find it difficult to maintain the proper form and push your body up, you can start with incline push-ups. Incline push-ups remove some load from the arms and shoulders, making it easier to focus on your chest muscles.
You still need to do a basic push-up, but the only difference is that first, you need to elevate your upper body by placing your hands on a bench, a table, a wall, or any other firm and stable surface. The bigger the angle between your body and the floor is, the easier it’ll be to do a push-up. Your goal is to gradually progress from higher surfaces to lower ones until you are able to do a push-up from the floor.
Mistake 1. You don’t keep your back straight.
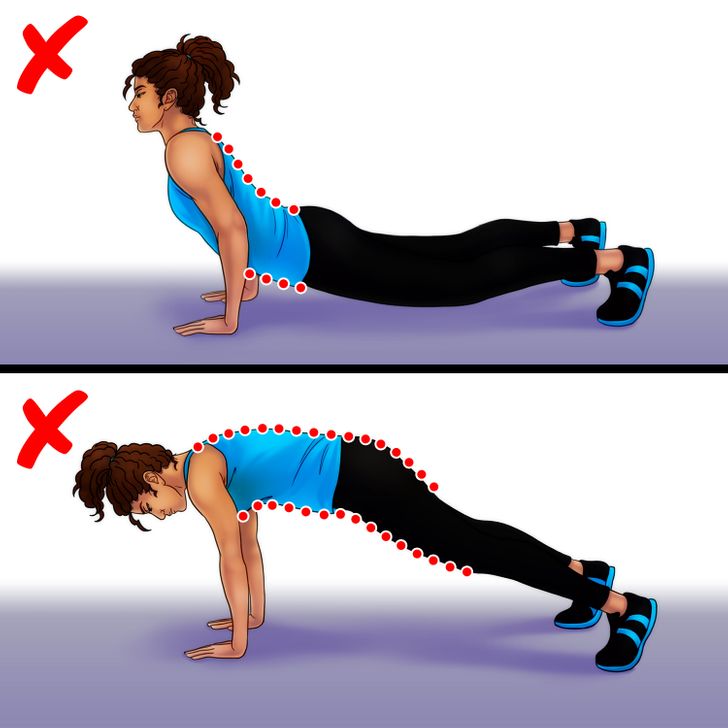
You should remember that a push-up is a compound full-body exercise. So instead of focusing only on your chest muscles, don’t forget to engage and tighten your glutes and your leg muscles to keep your body position more stable.
When you bend your elbows, focus on bringing your chest to the floor and not your hips.
Mistake 2. You don’t maintain a neutral neck position.
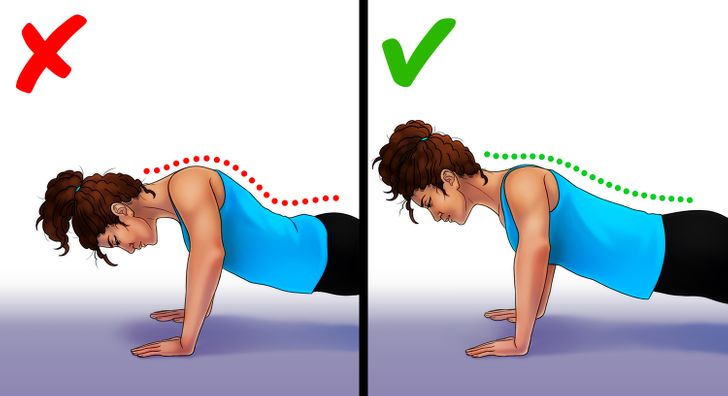
You may tilt your head forward because your body may lack shoulder stability at this point, and your neck is trying to compensate for it with this movement. This mistake may lead to problems with your neck and shoulders, so focus on keeping your neck straight and your neck muscles engaged. Concentrate on bringing your chest closer to the floor and not your head.
Mistake 3. You place your hands too high.
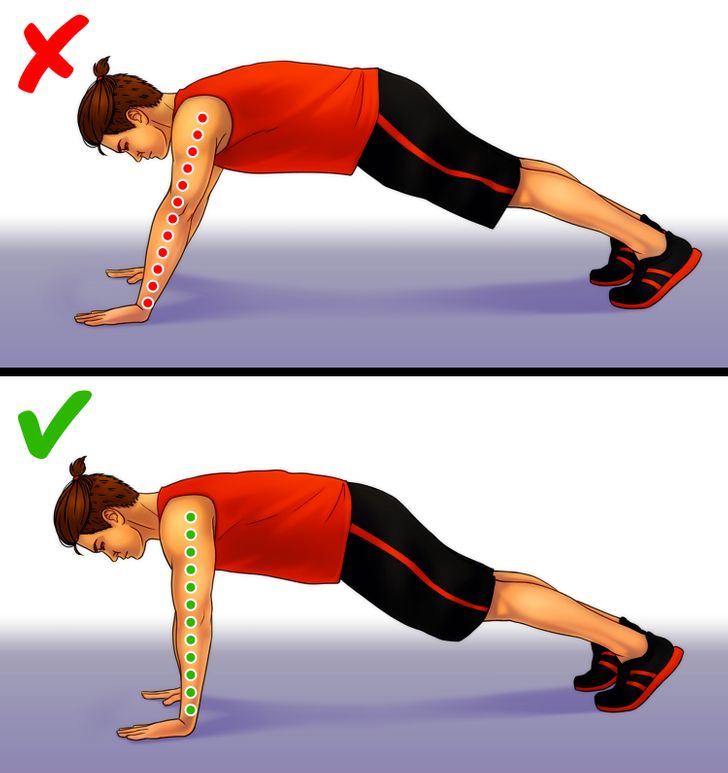
You might place your hands too high above your shoulders because your muscles aren’t strong enough to maintain the correct body position and do push-ups at the same time. This way, you switch the load from your arms and chest muscles to the front parts of your shoulders and your neck muscles, which may lead to an injury in the future. It also makes you spread your elbows too wide causing excessive stress on the wrists and elbows.
If you find it challenging to place your hands in the proper position, start the exercise from the floor: lie with your chest on the floor and put your hands to the sides of your shoulders with your thumb under your armpits. Push your body up to the plank position.
Mistake 4. You don’t go all the way down.
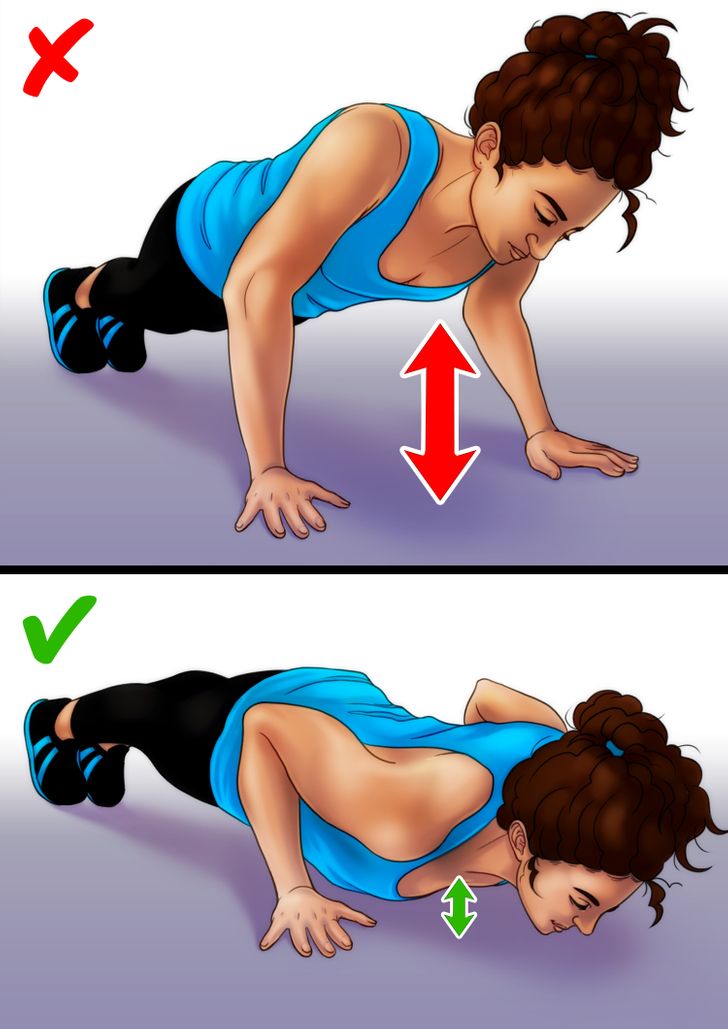
You need to move in a full range of motion to exercise all the targeted muscles. Make sure you lower your chest close enough to the floor. If you can’t bend your elbows, start with lighter push-up modifications.
Step 4. Try other push-up variations.
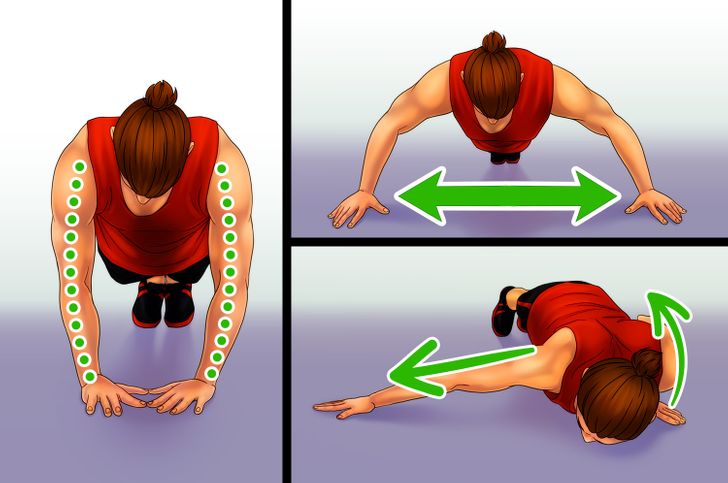
After you master basic push-ups, you can try other push-up variations to target different muscle groups better:
- A diamond push-up to work your triceps. Your body position and technique will be the same as for a basic push-up, but you should place your hands close together, so your thumbs and index fingers touch each other forming a “diamond.”
- A wide push-up to target the pectoral muscles. Place your hands wider than shoulder-width apart. The wider you place your hands, the more difficult the exercise will be. Make sure that when you bend your elbows, they face back and not to the sides.
- An archer push-up to add more load to the biceps and chest. In the starting position, place your hands wider than shoulder-width apart. Bring the body down on one side, bending the elbow of one arm. The other arm is straight and stretched to the side. Then return to the starting position and repeat on the other side.