How to Do Surya Namaskar Yoga Correctly
Surya Namaskar is a widespread set of yoga exercises that’s name literally means “Salute to the Sun” in Sanskrit. It is very important to the culture of India and even the Delhi airport has a sculpture depicting 12 main asanas of this set of exercises.
We at 5-Minute Crafts created detailed instructions for those who want to learn to do Surya Namaskar correctly.
❗This article is based on the author’s experience.
An important note: Make sure to consult with your doctor before you start practicing yoga, and Surya Namaskar in particular, because there are contraindications to performing these exercises. If you feel dizziness or another malaise while performing the exercises, stop doing them right away.
Glossary
- Yoga stands for physical, psychological, and spiritual practices that have their origins in the culture of Ancient India. In today’s society, yoga is more popular as a system of exercises that sometimes go together with breathing exercises and end with relaxation in Shavasana or meditation.
- Asana — initially this word was used for indicating a pose for sitting meditation, but today any pose that a person takes while practicing yoga is called an asana.
- Pranayama is a breathing control practice in yoga, aimed at managing life energy (prana). In many practices, breathing synchronizes with performing asanas. Sometimes those can be independent practices as well.
Surya Namaskar
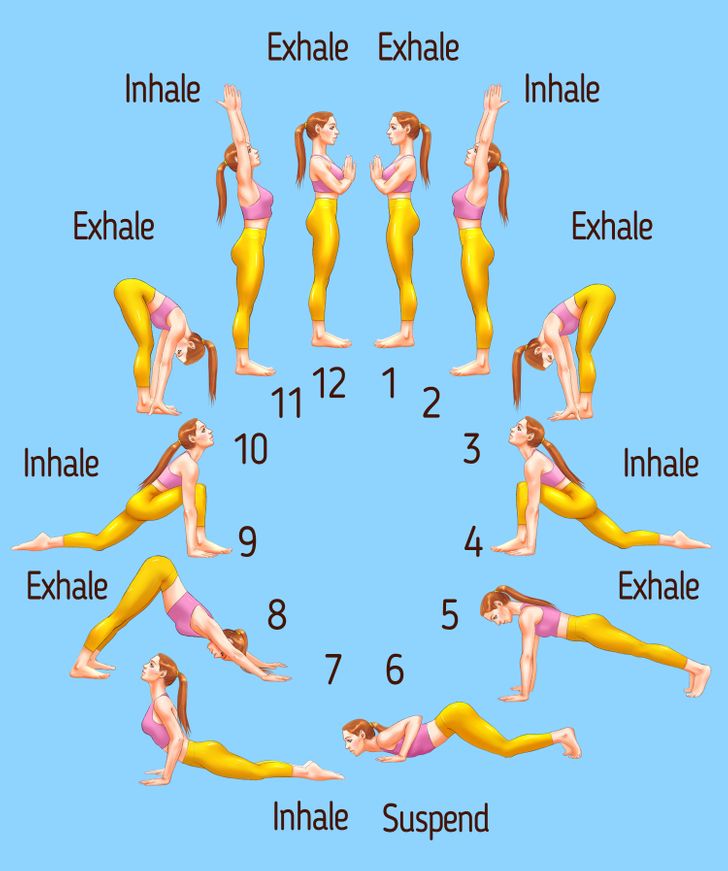
Surya Namaskar is a combo of 12 asanas that a yoga practice usually starts with. Asanas can vary depending on the direction of yoga. According to some yoga schools, Surya Namaskar awakens a person’s sunny side.
Sometimes doing asanas goes along with singing certain mantras. Normally, the number of repetitions starts with 2-3 and then increases to 12 and to any number that is a multiple of 12. The maximum amount of circles is 108.
1. Pranamasana
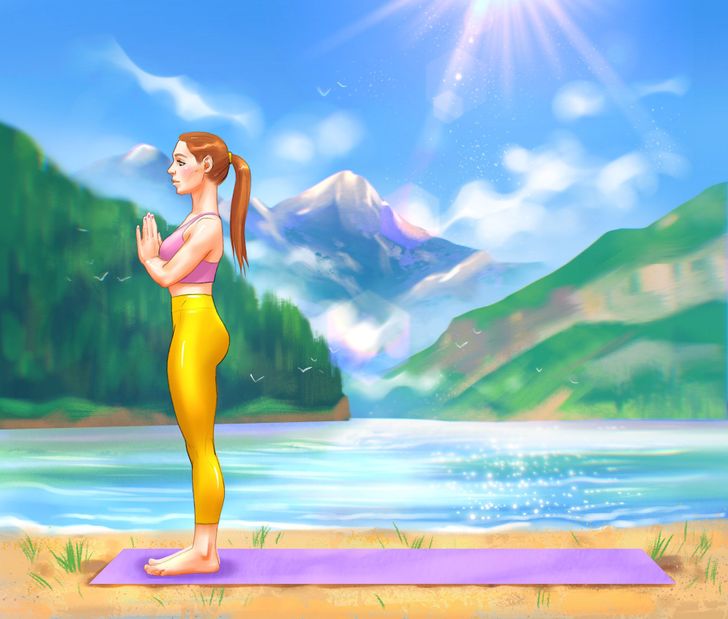
Pranamasana is the pose of a praying person. It starts and finishes the Surya Namaskar cycle. You can take a deep inhale and exhale during pranamasana if you repeat the same cycle of “salutation to the sun” exercises you can go with an exhale only.
- Stand with your face turned toward the sun if possible.
- Place your hands in a “namaste” position (which means “bowing to you”): keep your palms together and your thumbs should be touching the middle of your chest.
- Put your feet together.
- Straighten your toes and press them into the floor.
- Pull the top of your head straight up.
- Expand your shoulders back and down.
- Mentally stretch the spine from the top of your head to your tailbone.
2. Hasta Uttanasana
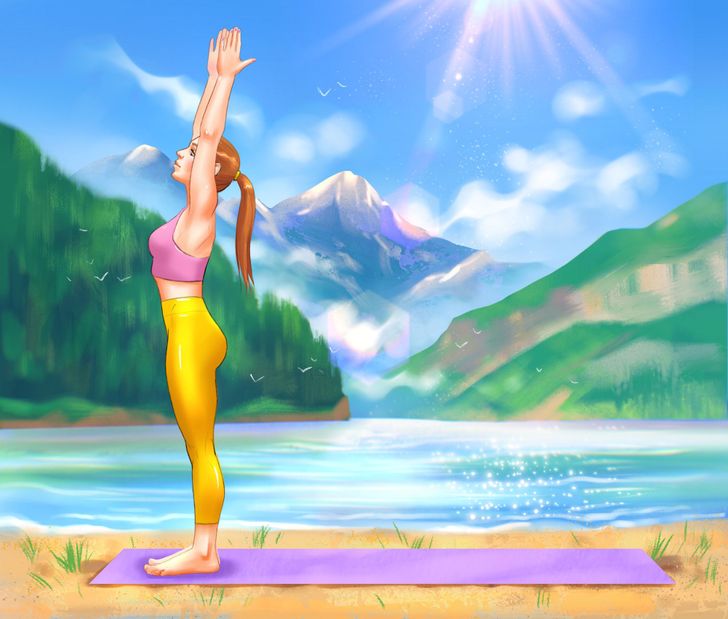
Hasta Uttanasana — the word “hasta” means “hand” in Sanskrit, “uttana” means “intense stretch.” The body stretches and fills up with energy, the chest area opens up.
- Palms are in the namaste pose.
- As you take a deep inhale, lift your arms straight up.
- Spread your arms shoulder-width apart. Palms should be facing each other.
- Stretch your whole body up to your hands.
- In a more complex version of the exercise, you can make a bend in the thoracic spine and move your head backward. Be mindful that it’s not recommended for newbies to do the bend. If you still decide to do it, make sure to do it under the supervision of a coach or teacher.
3. Uttanasana
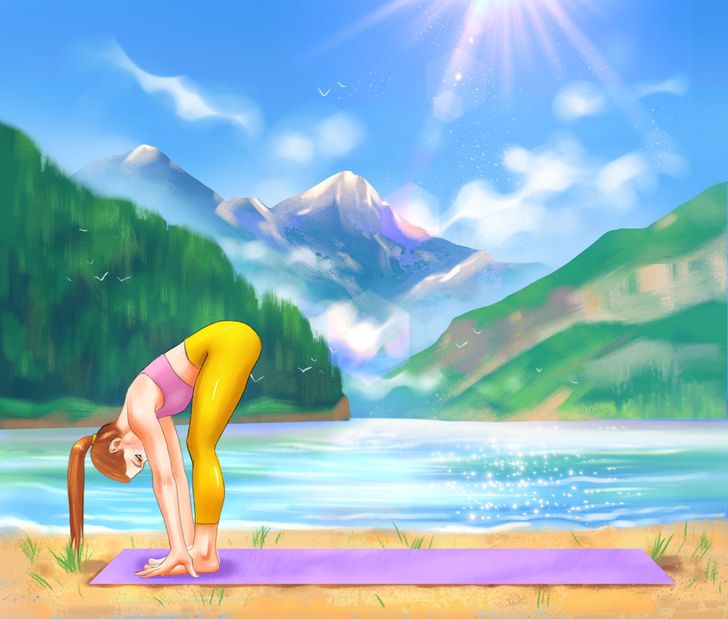
Uttanasana means “stretched pose” in Sanskrit. The goal of this asana is to stretch the spine and back muscles of the thighs.
- As you exhale, lean forward with your arms raised up. Don’t make any sudden movements.
- Try to touch the floor with your hands.
- If you are not an expert or if the level of your stretching is not advanced enough, slightly bend your knees or wrap your hands around your shins.
- Keep your back straight.
- Your leg muscles should be tense and stretched.
4. Ashwa Sanchalanasana
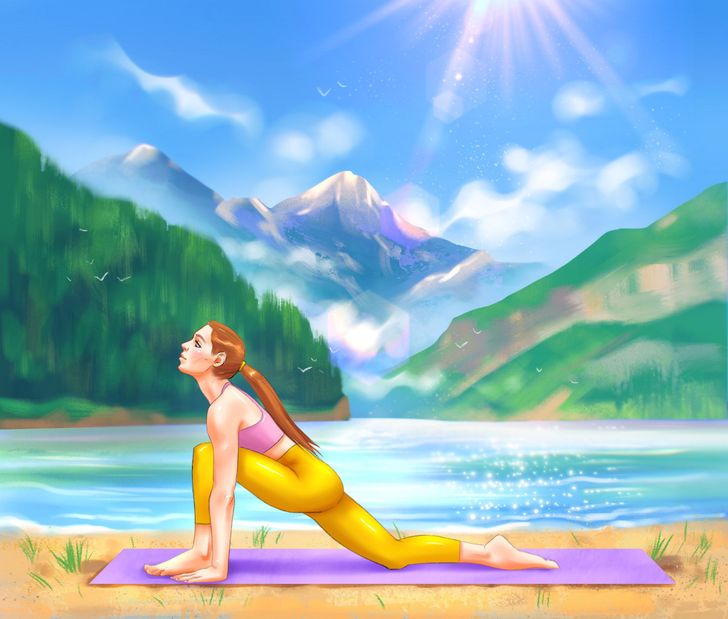
Ashwa Sanchalanasana is the equestrian pose. The goal is to open the hip joints. At first, it is performed with the right leg, and then on the left leg when the exercise repeats.
- Sit down on your left leg as you take a full inhale.
- Move your right leg back as far as you can.
- You can lean the leg on your toes or on the inside of your foot.
- Lean on your palms. Newbies are allowed to lean on their fingers.
- Keep your left leg bent between your arms.
- Push your chest forward.
- Look up, stretching the front part of your body.
- Relax your muscles that are being stretched.
5. Plank
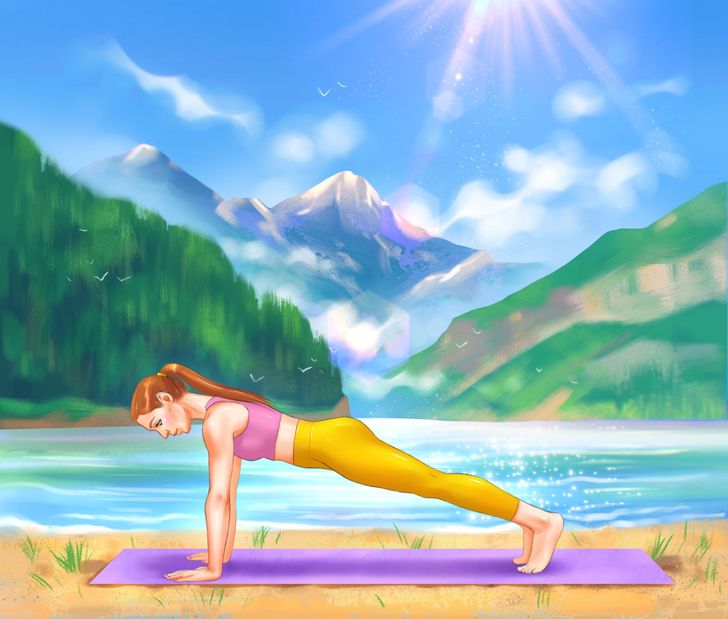
Kumbhakasana, or plank pose, is not there in all variations of this combo of exercises, but it is there in the sculpture composition in the Delhi airport. This asana strengthens the arms, wrists, spine, belly muscles, and thighs.
- Rest your palms on the rug, straighten your arms.
- As you exhale move your left leg backward, then your right leg.
- Put both of your feet on your toes, hip-width apart.
- Tighten your abs and glutes.
- Direct your heels backward, and the center of your chest — forward.
- Make sure that your waist doesn’t bend and that your body stays straight.
6. Ashtanga Namaskara
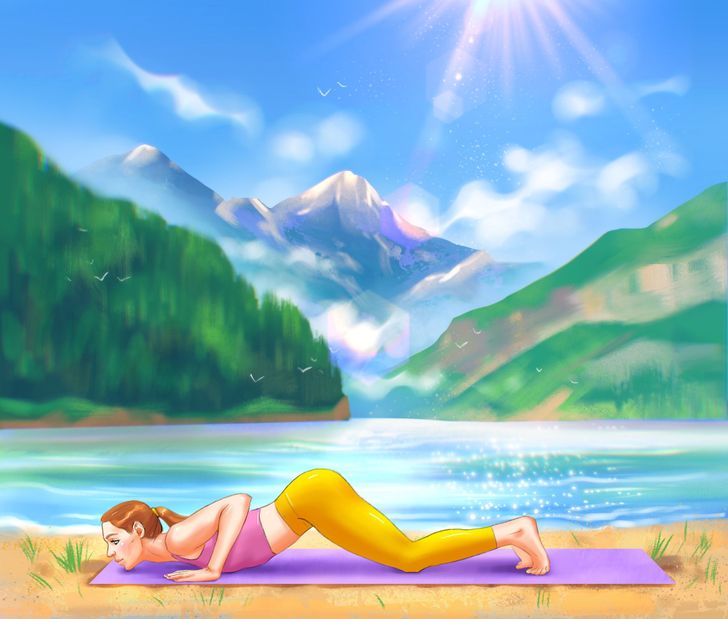
Ashtanga Namaskara means “8-Limbed Pose.”
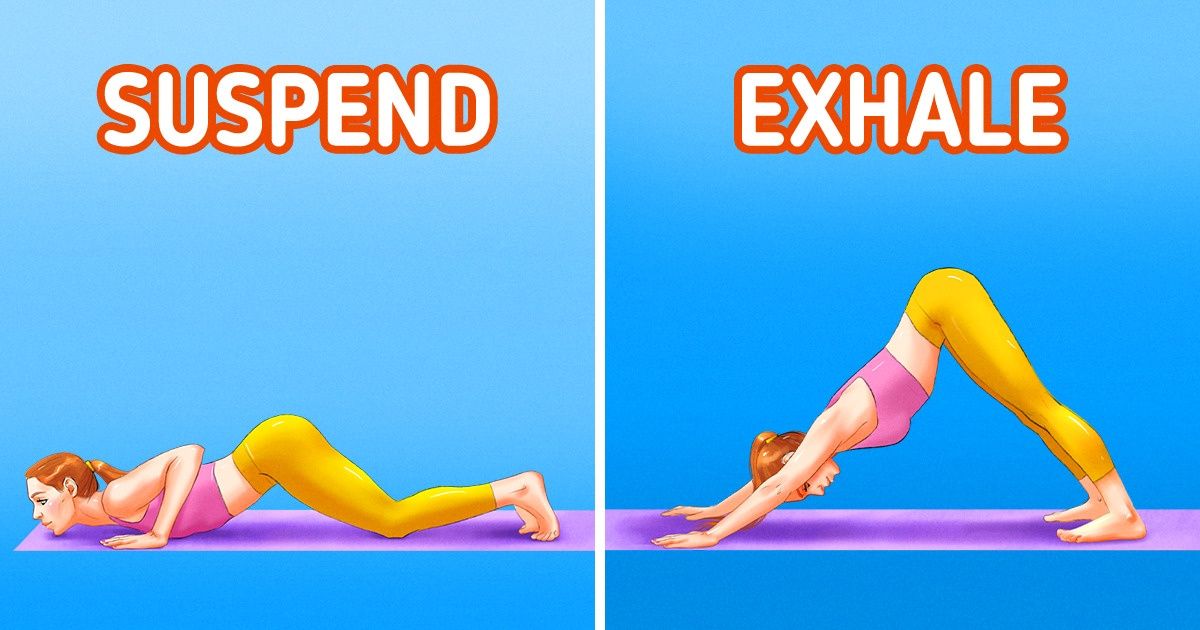
- As you suspend your breath, bend your arms at the elbows the way you do when performing push-ups. At the same time make sure your elbows are placed along the body, not to the sides.
- Bend your legs at your knees.
- Bend in your back.
- Lift your buttocks.
- Arch your neck, throwing your head forward.
- Lower your torso to the floor.
- Touch the floor with your chest, knees, and chin. Thus, you’ll be leaning on 8 different spots: the toes of both feet, both knees, the chest, the chin, and both palms.
- Stretch up with your coccyx.
7. Urdhva Mukha Shvanasana
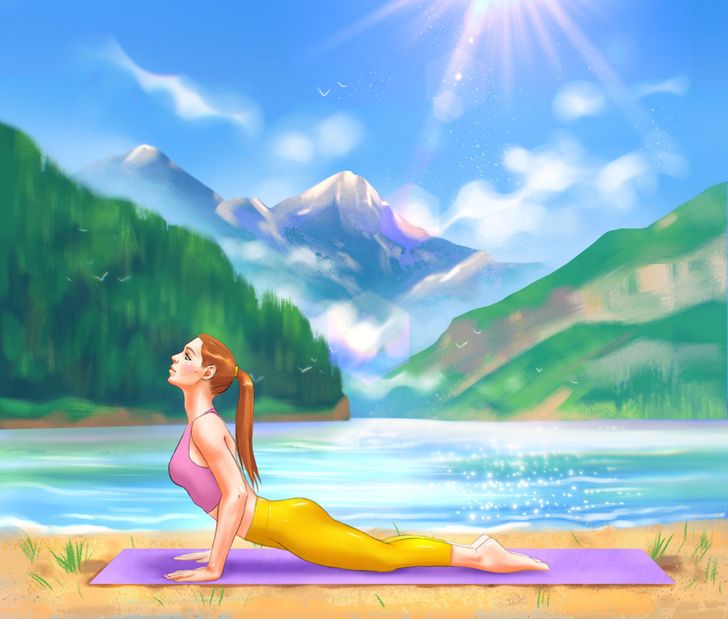
Urdhva Mukha Shvanasana is the “Upward Facing Dog Pose.” The goal of this asana is to stretch the front surface of the body as much as possible.
- As you inhale, push up on your arms from the Ashtanga Namaskara pose and move your body forward.
- Slightly lift your hips and keep them in this position.
- Slightly bend your head backward.
- Bend your back as much as you can.
- Push yourself up with the help of your arms, lean on your arm muscles, moving your body weight onto the arms as well.
8. Adho Mukha Shvanasana
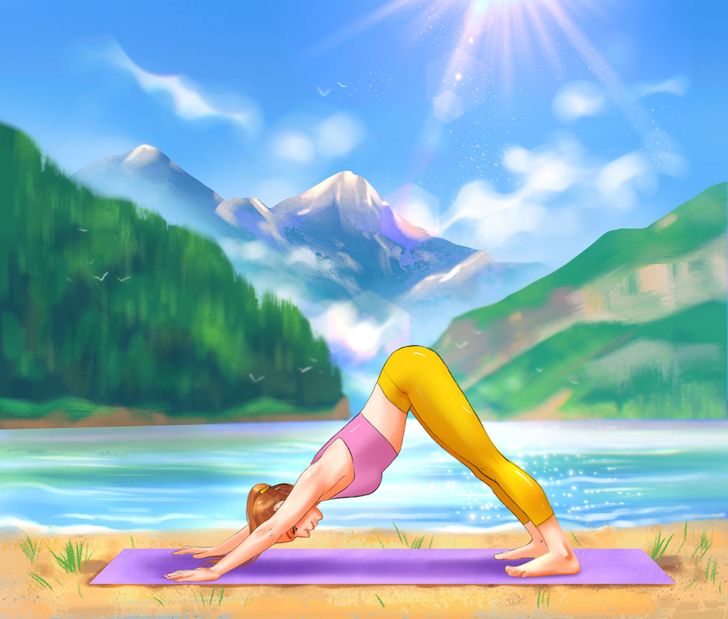
Adho Mukha Shvanasana — “Downward Dog Pose.” This asana looks like a stretching dog — that’s how it got its name.
- As you exhale, get into the Downward Dog Pose from Urdhva Mukha Shvanasana. Don’t move your palms or feet.
- Straighten your arms.
- Straighten your legs.
- Lift up your hips.
- Direct the top of your head to the floor.
- Stretch your head to your feet.
- Keep your knees straight.
- Try to place the heels on the floor.
- Stretch with your coccyx up.
- Stretch your chest toward your legs.
9. Ashwa Sanchalanasana
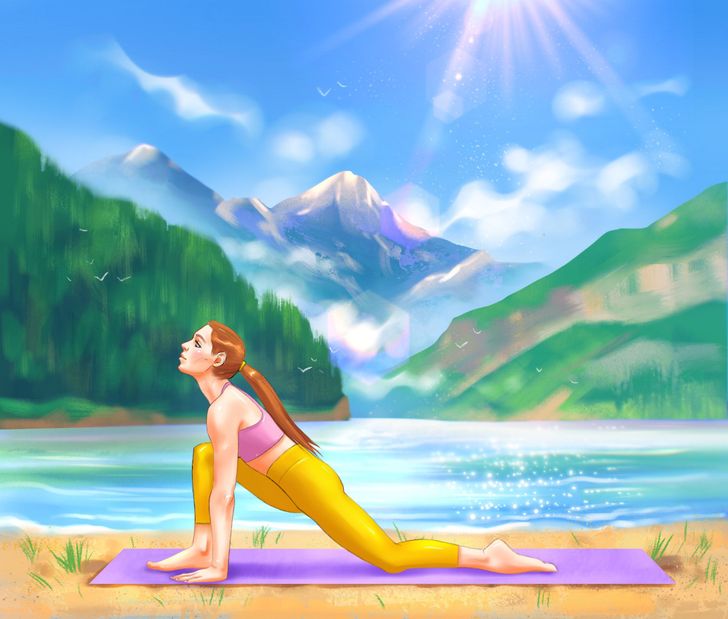
Ashwa Sanchalanasana repeats. Keep in mind that this asana is first done with the right leg and then the leg alternates as you repeat the exercise.
- As you inhale, step with your right leg forward from Adho Mukha Shvanasana so that your foot is located between your palms.
- Your left leg should stay behind you.
- You can lean the leg on your toes or on its inward side.
- Lean on your palms. Newbies are allowed to lean on their fingers.
- Keep your right leg bent.
- Push your chest forward.
- Look up, stretching the front surface of your body.
- Relax the muscles that you stretch.
10. Uttanasana
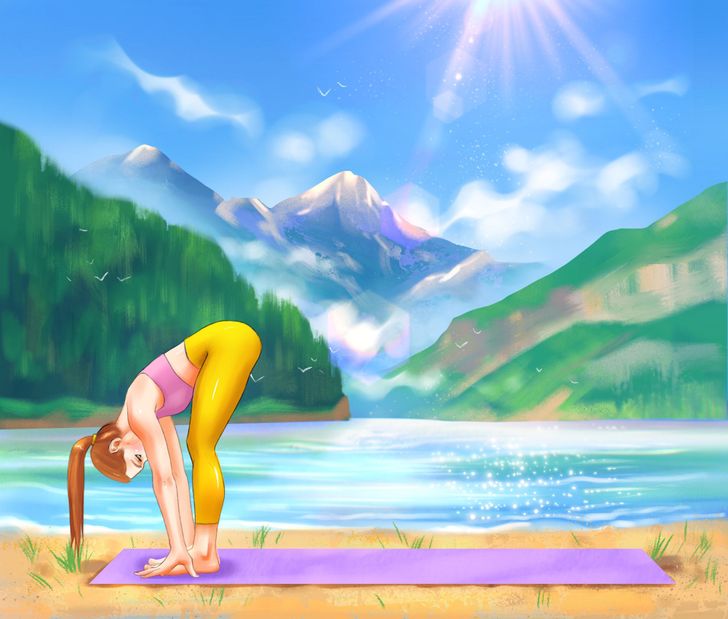
Uttanasana, or intense stretch, is another pose that repeats.
- As you exhale, place your left leg next to your right leg.
- Lift up your hips.
- Straighten your legs as much as you can.
- Fingers (or palms if possible) should stay on the ground.
- If you are not an expert or if the level of your stretching is not advanced enough, slightly bend your knees or wrap your hands around your shins.
- Keep your back straight.
- Your leg muscles should be tense and stretched.
11. Hasta Uttanasana
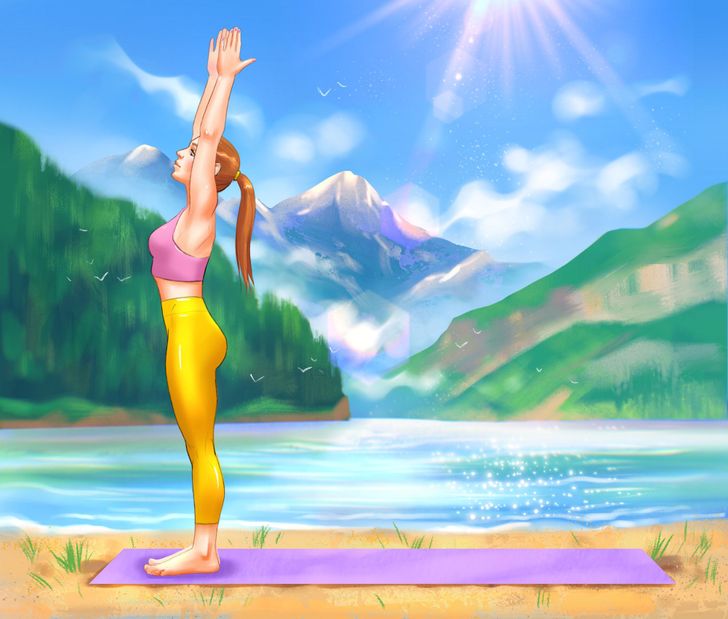
Hasta Uttanasana repeats.
-
As you inhale deeply, gently stand up, feeling how each of your vertebrae is straightening.
-
Lift your arms straight up.
-
Spread your arms shoulder-width apart. Palms should be facing each other.
-
Stretch your whole body up to your hands.
-
In a more complex version of the exercise, you can make a bend in the thoracic spine and move your head backward. Be mindful that it’s not recommended for newbies to do the bend. If you still decide to do it, make sure to do it under the supervision of a coach.
12. Pranamasana
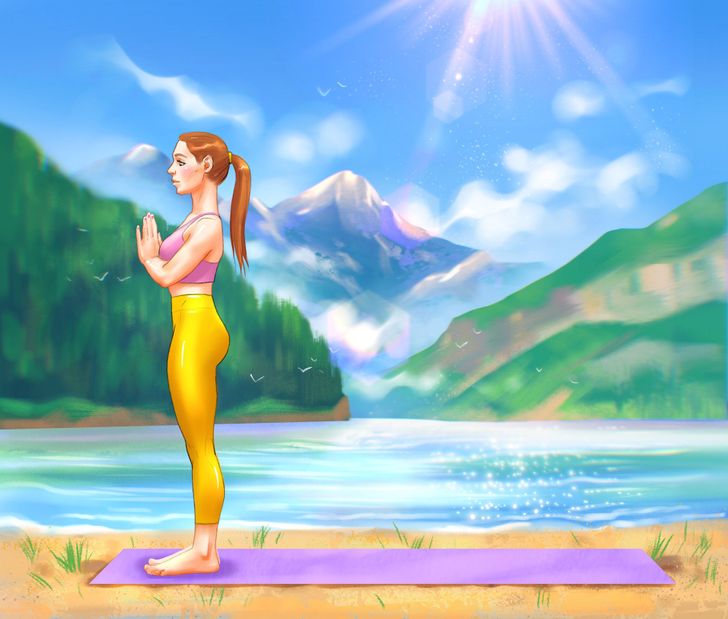
Pranamasana is the pose that starts the cycle and finishes it.
-
Put your arms down.
-
Place your hands in the “namaste” position (which means “bowing to you”): keep your palms together and your thumbs should be touching the middle of your chest.
-
Put your feet together.
-
Straighten your toes and press them into the floor.
-
Pull the top of your head straight up.
-
Expand your shoulders back and down.
-
Mentally stretch the spine from the top of your head to your tailbone.