How to Get Rid of Flat Feet at Home
5-Minute Crafts created a set of exercises that can be good for people suffering from flat feet.
❗ This article is for informational purposes only. Always consult a specialist if you have any health problems.
What flat feet are
The significant feature of flat feet is when the arches on the insides of your feet are flattened. It means the entire soles of the feet are touching the floor when a person is standing, and there is no visible arch in the foot. This structure of the feet can be inherited or it can appear in adults due to natural wear and tear or as a result of injury.
All people have flat feet in infancy because the arch of the foot isn’t fully developed until the age of about 6. But on average, the full development may not happen in 2 out of every 10 children.
For most people, this condition is not an issue and doesn’t cause any unpleasant sensations.
The exercises for correcting flat feet have been around for over 100 years. They can help reduce potential discomfort and improve posture. However, it cannot be said that there is one universal solution for everyone. Therefore, an individual approach is required in each case.
Exercises for flat feet
It’s better to start with stretching and foot massages, then proceed with exercises. Depending on the severity of the case, these exercises may be sufficient for mildly flat feet, or they may need to be combined with specially selected footwear.
Exercise #1
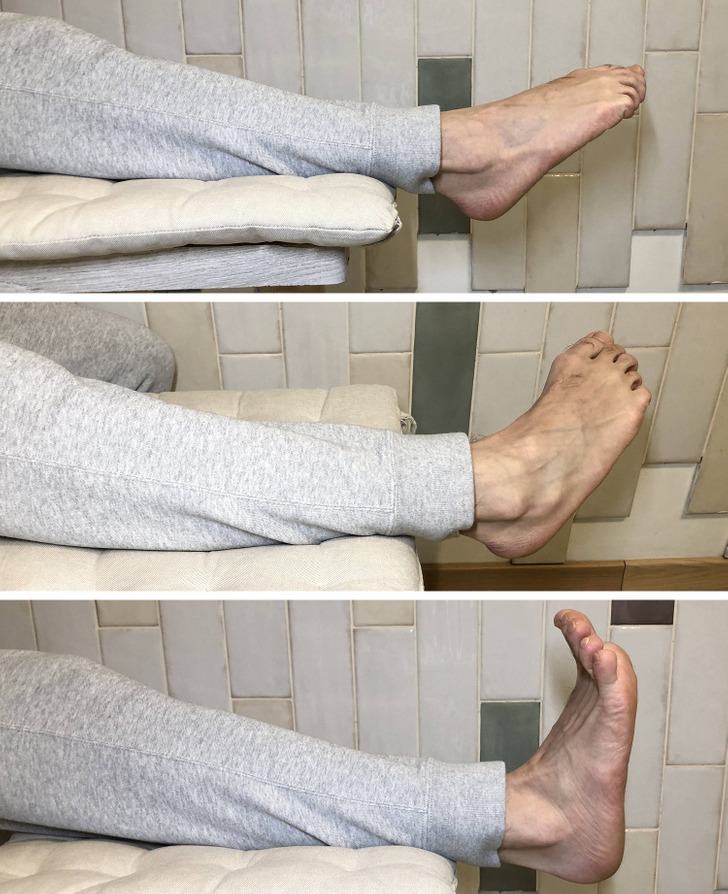
Initial position: Extend your leg and provide support for it above the ankle.
Step #1: Extend your foot as if you are stretching out your toes.
Step #2: Turn the foot inward, that is, the left foot should be turned to the right, and the right foot should be inverted to the left.
Step #3: Bend the foot as if you were pulling the toes toward yourself.
Reps: Do this up to 30 times.
A side note: During the first few repetitions, a distinct pause is necessary between each step — after this, you can start rotating the feet more actively. When performing the exercise, apply enough strength so that it doesn’t cause pain.
Exercise #2
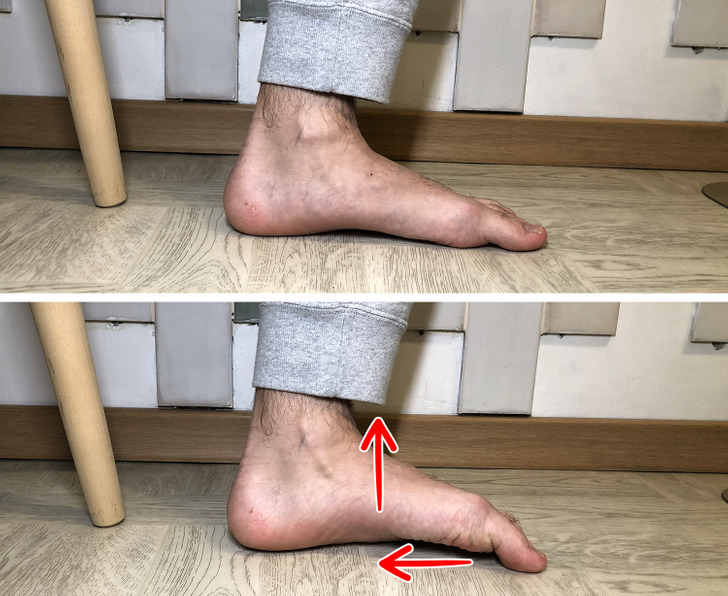
Initial position: Sit on a chair with the feet on the floor. The toes should be pointed forward.
Step #1: Without bending your toes or taking them off the floor, pull the arch upward. Try to slide the front of the foot back along the floor toward the heel.
Step #2: Keep the foot in this position for 5-10 seconds.
Step #3: Relax the foot.
Reps: Do this 8-12 times with each foot.
Exercise #3
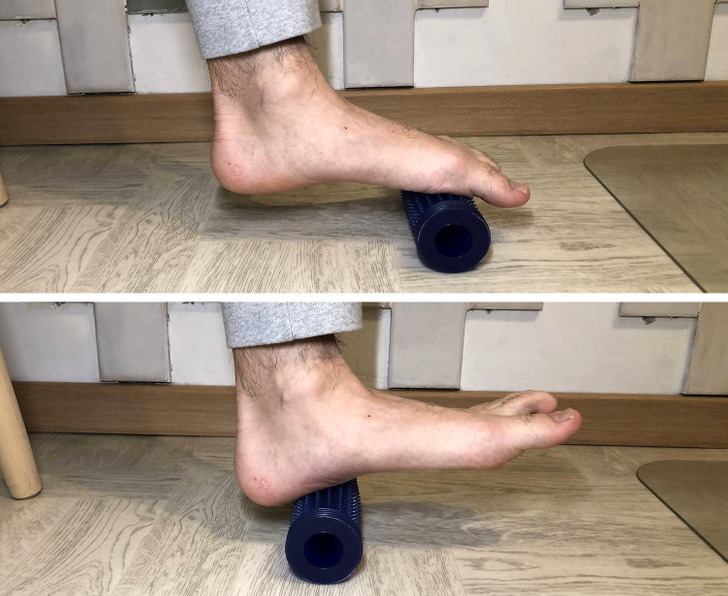
Initial position: Sit on a chair. You’ll need a cylindric object, such as a can.
Step #1: Place the ball of your foot on the object and slightly press it.
Step #2: Roll the object to the heel and back.
Reps: Do this several times.
Exercise #4
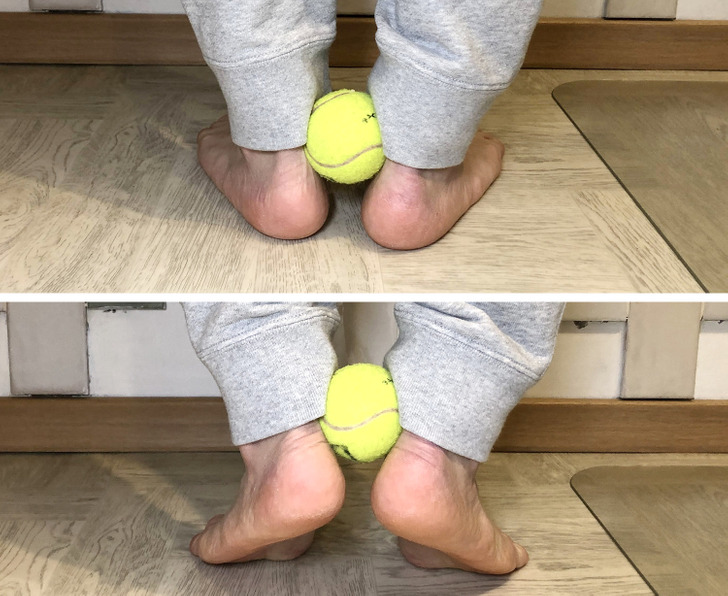
Initial position: Sit or stand, and you’ll need a small ball.
Step #1: Squeeze the ball with your ankles.
Step #2: Slowly take both feet off of the floor and get on your tiptoes, squeezing the ball between the ankles.
Step #3: Remain in the upper position for a couple of seconds.
Step #4: Slowly (for about 4 seconds) put your feet back on the floor.
Reps: Complete 3 sets with 10 reps each.
Exercise #5
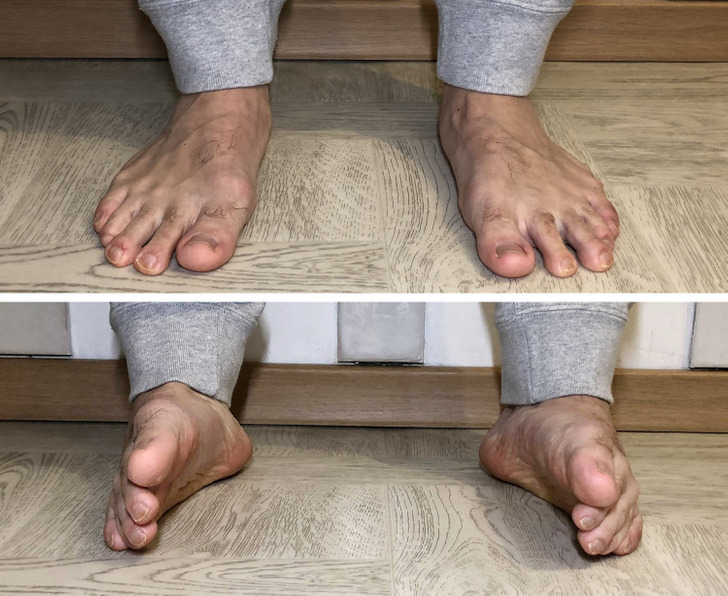
Initial position: Stand up with the feet parallel to each other. The distance between the feet should be 6 inches.
Step #1: Lift the inner side of your feet, moving your body weight to the outer side.
Step #2: Get back to the initial position.
Reps: Do this 50 times.
Exercise #6
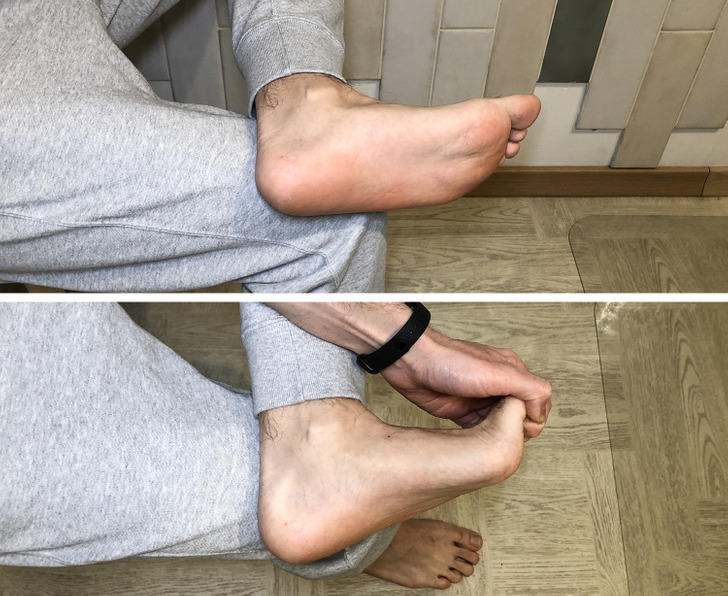
Initial position: Sit down and place your left foot on the right knee.
Step #1: Carefully bring the toes of the left foot back with the help of your hand, stretching the bottom part of the foot.
Step #2: Remain in this position for 30 seconds.
Step #3: Alternate the feet and repeat the exercise.
Reps: Perform this 3 times with each foot.
Exercise #7
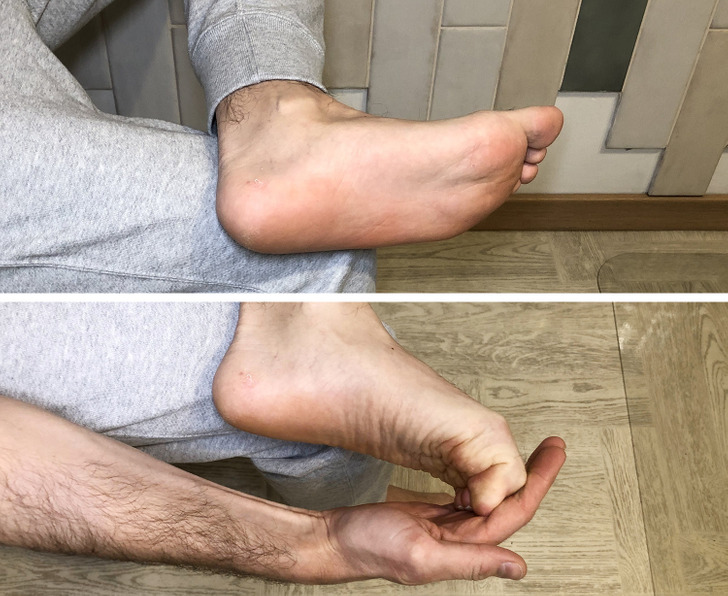
Initial position: Sit down and place the left foot on your right lap.
Step #1: Carefully press the toes so that they bend, and do it until the knuckles become prominent.
Step #2: Remain in this position for 20 seconds.
Step #3: Alternate the feet and repeat the exercise.
Reps: Do this 3-4 times on each foot.
Exercise #8
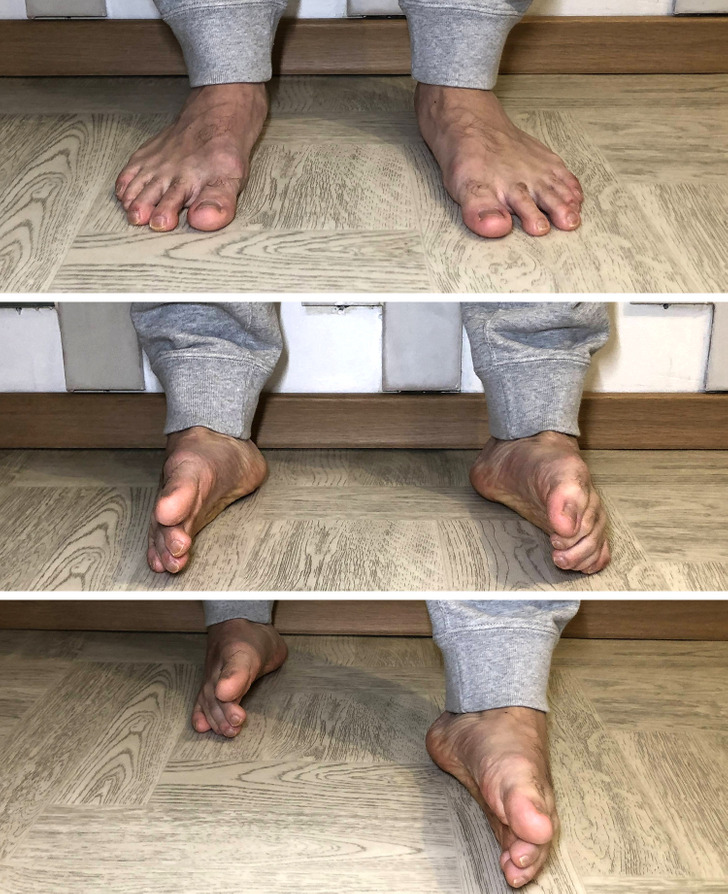
Initial position: Stand up with the feet parallel to each other.
Step #1: Move the body weight to the outer sides of your feet.
Step #2: Go back and forth in this position, keeping your feet parallel.
Reps: Do 50 steps.
Exercise #9
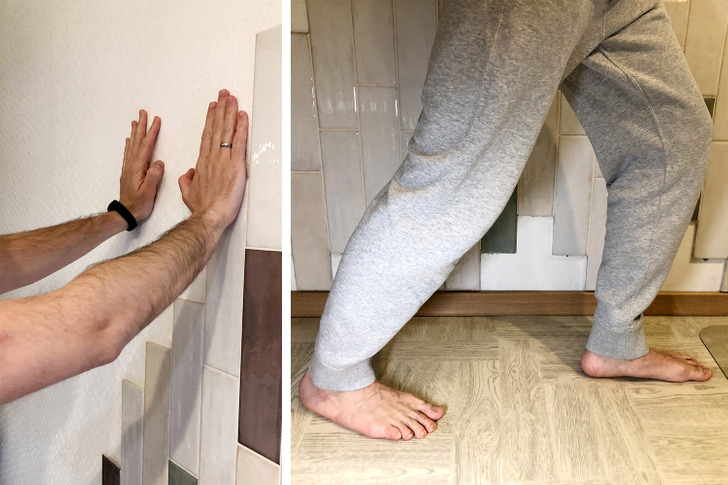
Initial position: Stand up facing a wall while resting your hands on the wall — this will help maintain balance.
Step #1: Extend one leg backward, keeping your knee straight, with the toes parallel to the floor and your heel firmly planted on the ground.
Step #2: Bend the other leg at the knee.
Step #3: Carefully bend forward until you feel the stretch in the calf muscle of your back leg. Don’t lift your heels off the floor.
Step #4: Remain in this position and in the stretch for 30-60 seconds.
Step #5: Alternate the leg and repeat the exercise.
Reps: Do this 4 times with each leg.
A side note: Keep the immobility of the foot extended back to make the exercise more efficient. Don’t let it slip or roll inward.
Exercise #10
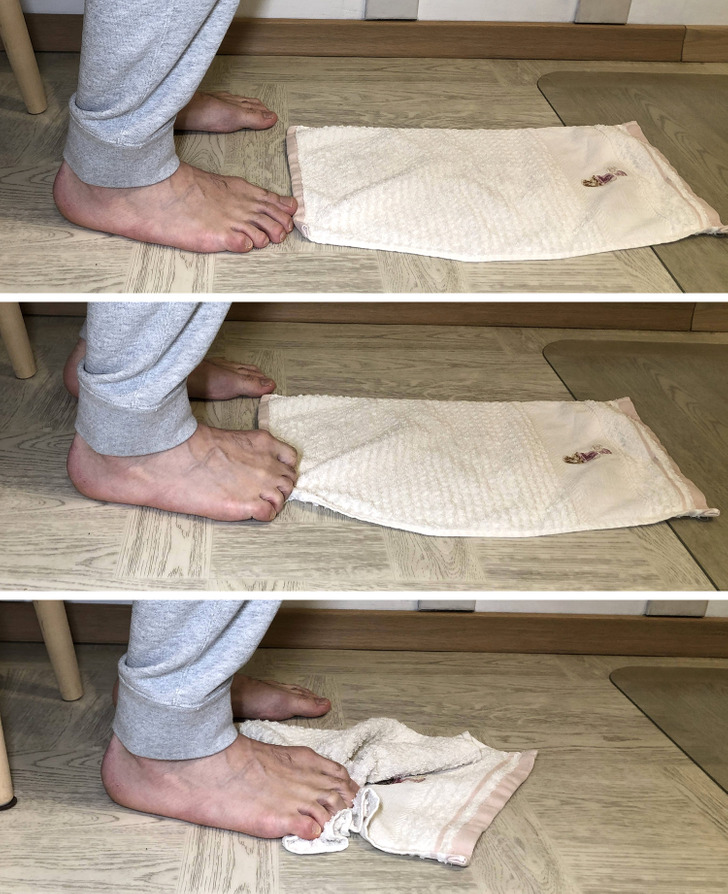
Initial position: Sit down and spread a towel in front of your feet.
Step #1: Use only your toes. Stretch them and grab the towel until you can’t pull the towel anymore under your foot. Your heels should stay in the same place.
Reps: Do this 2 times with each foot.
Exercise #11
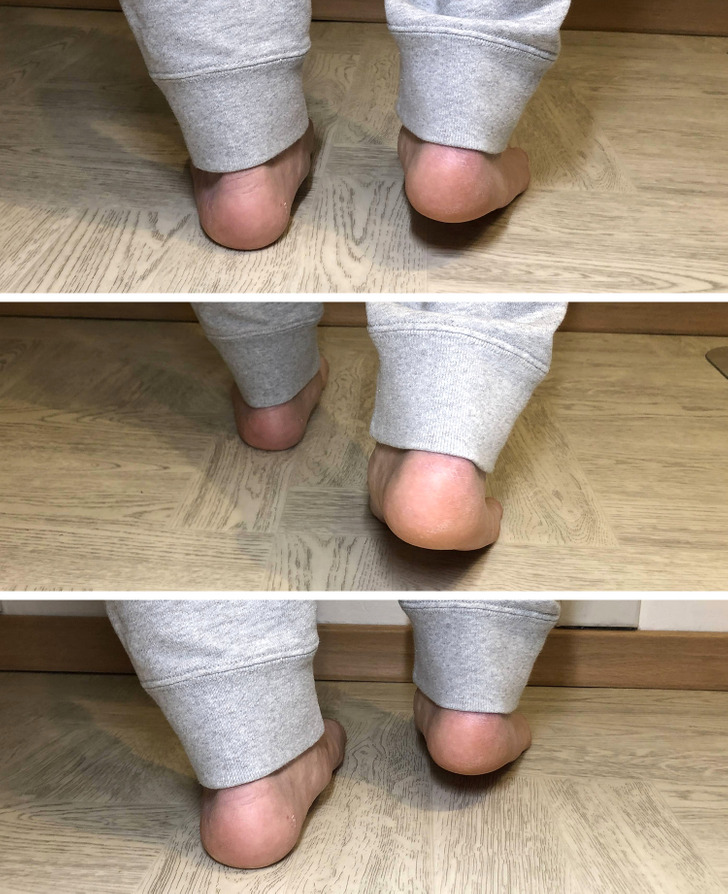
Initial position: Lift the heel of one leg 1 inch to 1.2 inches off the floor.
Step #1: Walk while keeping this position.
Step #2: Put the heel back.
Step #3: Lift the foot of the other leg 1 inch to 1.2 inches off the floor.
Step #4: Walk while keeping this position.
Reps: Do this every day anywhere from 3 to 12 months, depending on the case. The distance you should walk in this exercise is not limited.
A side note: The exercise can also be performed on the street, like when crossing the road or while walking.
Exercise #12
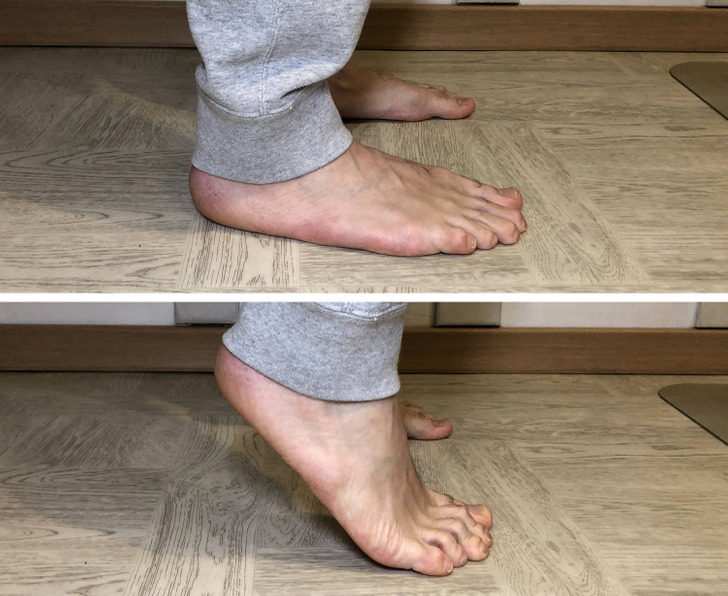
Initial position: Stand up with the feet shoulder-width apart.
Step #1: Raise your heels off the floor and lift them as high as you can by gently pressing on the front of your feet.
Step #2: Remain in this position at the top of the movement for 1-2 seconds.
Step #3: Slowly get back to the initial position.
Reps: Do 2 sets of 10 to 20 reps.
A side note: The exercise has several variations: see exercise #13.
Exercise #13
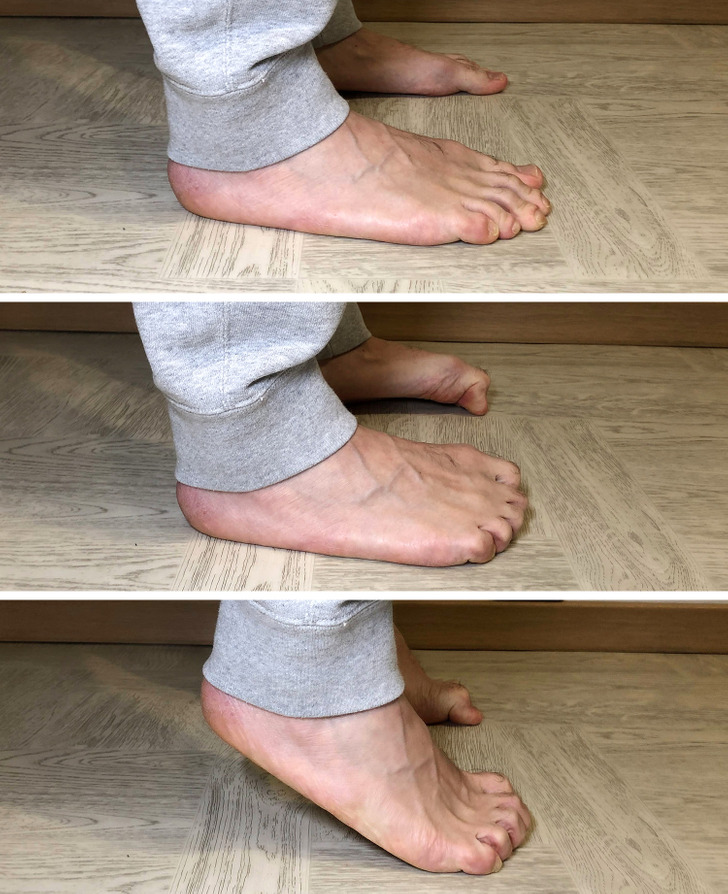
Initial position: Stand up and bend your toes. The heels should be about 12 inches apart.
Step #1: Get on the balls of your feet, slowly pressing on them.
Step #2: Get back to the floor.
Reps: Do this 50 times.
Exercise #14
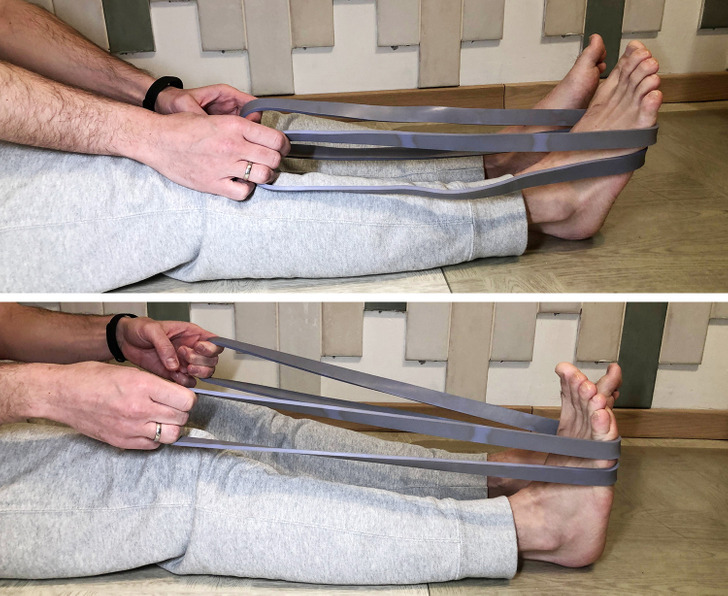
Initial position: Sit on the floor. Your legs should be extended forward, and the knees and back should be straight. You’ll need something long, like a towel or a belt.
Step #1: Hold the towel on the sides and press your feet in the middle of it, keeping your knees and back straight.
Step #2: Gently pull the towel toward yourself until you can feel the Achilles tendon stretching.
Step #3: Hold this position for 30 seconds.
Step #4: Release the foot and the towel.
Step #5: Repeat the exercise with the other foot.
Reps: Do this 10 times.
Exercise #15
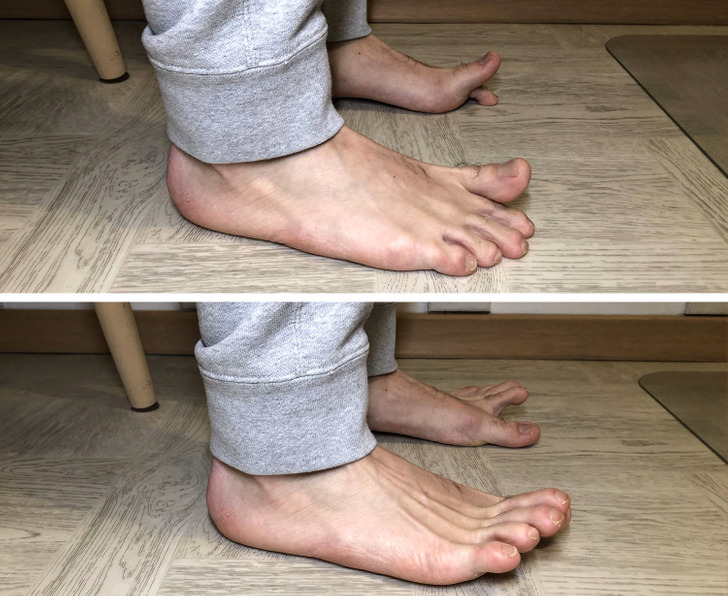
Initial position: Sit down or stand up with your toes relaxed.
Step #1: Lift up the big toe up while pressing the other 4 toes down.
Step #2: Hold this position for 5 seconds.
Step #3: Alternating the toes, press the big toe down while lifting the other 4 toes up.
Step #4: Hold this position for 5 seconds.
Reps: Do this 10 times on each foot.