How to Secure a Band-Aid on a Finger
Securing a regular Band-Aid on a finger can be quite problematic. It might keep unsticking, cling to other objects, and even prevent the finger from bending and unbending. The good thing is that, recently, special Band-Aids for fingers have appeared on the market but it’s still pretty hard to find them.
Fortunately, there are several techniques that can help secure a standard Band-Aid reliably and comfortably. We at 5-Minute Crafts recommend saving these instructions so you have a go-to resource for when you need to figure out how to properly put on a Band-Aid.
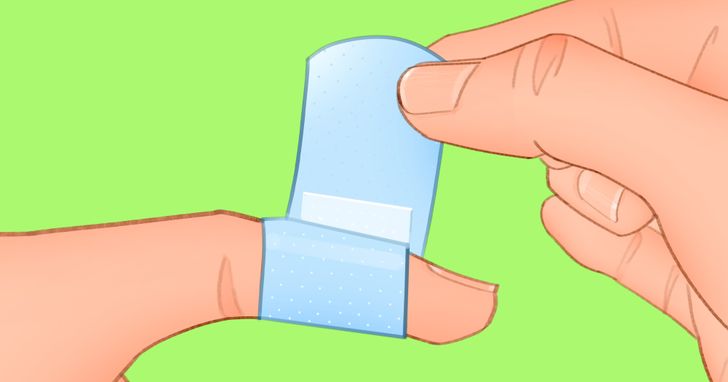
If the wound is located on the skin between the joints, it seems that it might be enough to just cover the finger with the Band-Aid. However, in reality, its edges can cause discomfort when bending joints, while the Band-Aid itself will unstick easily and slide around, exposing the wound. That’s why in order to secure it reliably and comfortably on the skin, it’s recommended to crop it correctly.
An important note:
? To prevent any possible contact with dirt and bacteria, make sure to always use only new Band-Aids, so that the surface (the part that is attached to the wound) is covered with a protective film.
? When applying the Band-Aid, don’t apply it so tightly that you prevent normal blood circulation. The Band-Aid should wrap around your finger, but not squeeze it too tightly.
How to crop and secure a standard Band-Aid
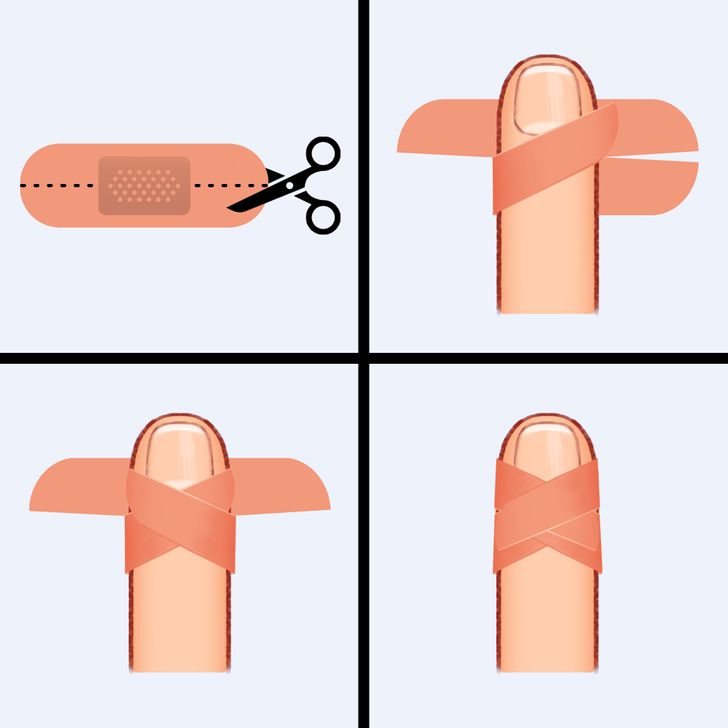
- Cut the edges of the Band-Aid into 2 parts from each side with the help of scissors, like shown in the picture above.
- Remove the film in the middle and attach the soft part of the Band-Aid (the pad) to the wound.
- Stick the ends of the Band-Aid at a slight angle so that they form the X letter together. It’s ready to go!
This type of attaching fixes the Band-Aid on the finger securely and allows it to move more freely.
An important note: If you have injured your nail or an area at the tip of your finger, it’s better to use a wide Band-Aid instead of the standard one, following the instructions below.
How to crop and secure a wide Band-Aid
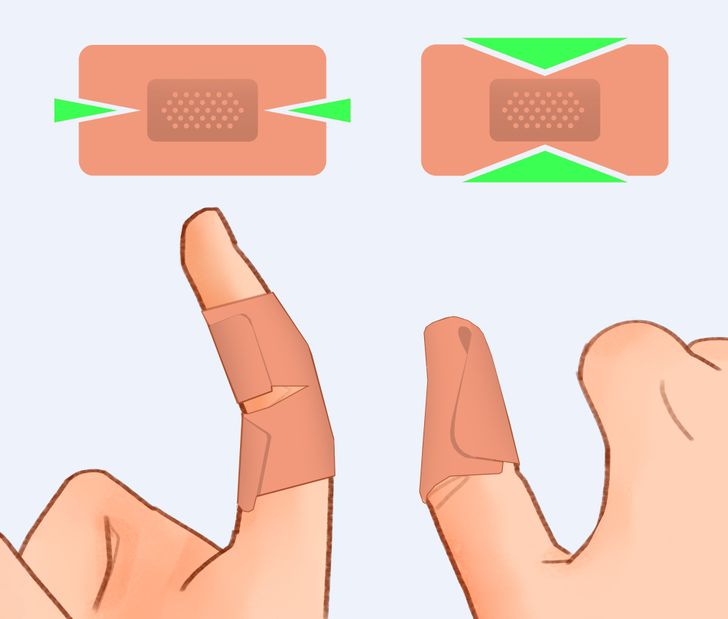
Opt for different types of Band-Aid cropping depending on the type of wound or injury you have (you can see them in the pic above).
? If you need to apply a Band-Aid to the nail or to the tip of the finger, make triangle-shaped cuts on the Band-Aid from the top and the bottom.
? For other cases, simply making cuts on the Band-Aid from the left and right edges is enough. Pay attention that when you attach to the Band-Aid—you should get a cut that will be located right on the part of the finger that bends. Keeping that in mind you’ll need to crop the edges accordingly.
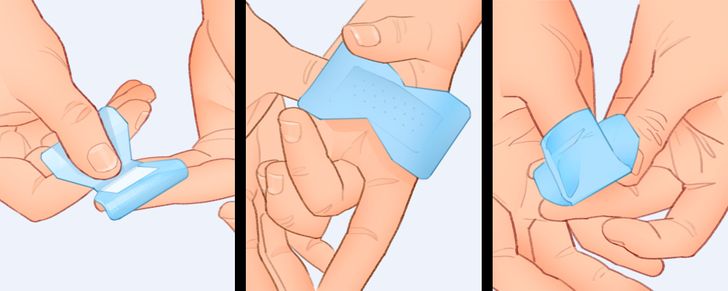
In order to cover the tip of the finger with the help of a Band-Aid do the following:
- Keep the Band-Aid with the pad facing up. Put your injured finger onto it. Remove the protective film on the second half of the Band-Aid.
- Cover the finger with the second half of the Band-Aid so that the pad closes the nail. Wrap the edges of the Band-Aid around the finger and stick them to the skin.
- Remove the protective film from the second half of the Band-Aid. Place it on the pad of your finger. Wrap the ends around your finger and secure them so that they overlay the ends that you had attached to the finger previously. It’s ready to go!
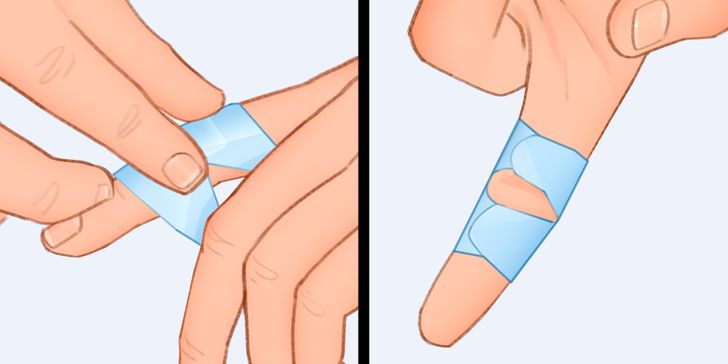
In order to cover the finger with a cropped Band-Aid:
- Remove the protective film and place the Band-Aid’s pad on the wound.
- Wrap the ends of the Band-Aid around the finger and secure it so that there is a cut that will help your joints move freely. It’s ready!