How to Start Practicing Yoga at Home
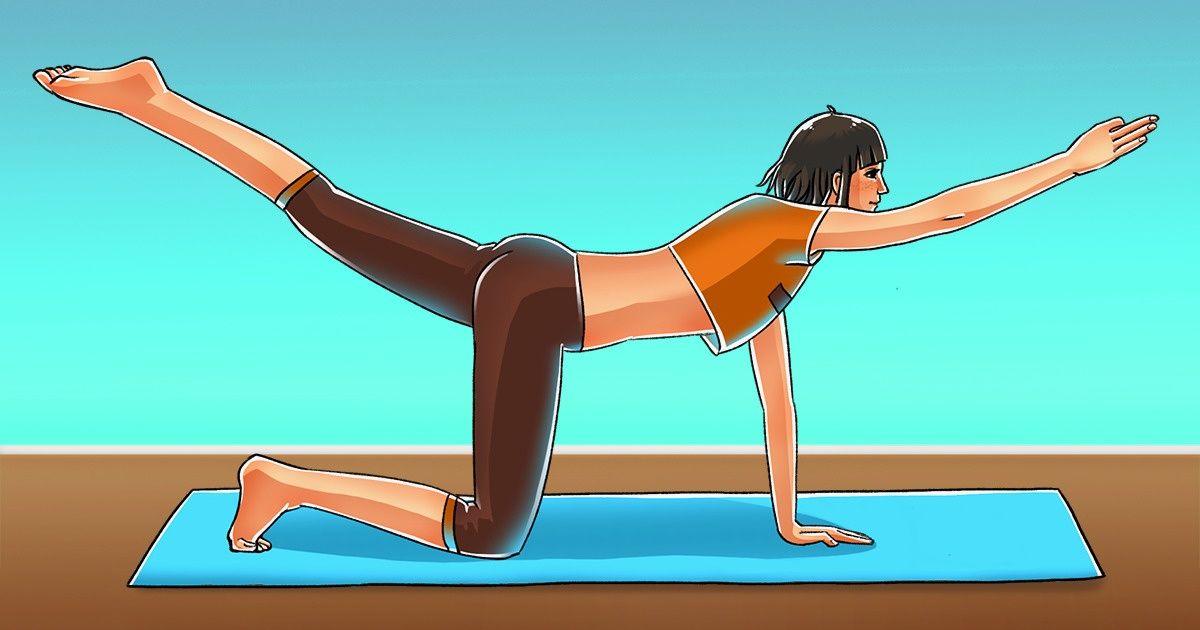
In a broad sense, yoga is a variety of spiritual and physical practices used for the all-around development and unity of the body and the mind. In a narrow sense, it’s a set of poses that can help you increase physical endurance, develop flexibility, and improve coordination.
5-Minute Crafts studied experts’ recommendations and is going to tell you about the rules of doing yoga and the safety precautions, as well as 9 poses that beginners will be able to do.
Basic rules
-
For yoga training, you’ll need a special mat that can be bought at any sporting equipment store and comfortable clothes. This can be soft athletic pants and a T-shirt.
-
Choose a place for training where no one will interrupt you, where no additional sounds will disturb you, and where you’ll have enough space to do exercises.
-
Start doing yoga by performing simple poses — or asanas (as they are traditionally called). Hold each of them for several slow inhales before you move on to the next one.
-
Experts recommend practicing yoga 3 times a week or more. It will help you feel the effect of your workouts faster, you’ll notice better flexibility, more strength, and better balance.
Safety precautions
-
Consult with your doctor before starting yoga. Make sure there are no contraindications.
-
Before you start to do asanas at home, it’s better to have a teaching session with a qualified coach who will show you how to do these postures correctly, as well as show you some typical mistakes.
-
Start your workouts 1-2 hours after a meal. Performing postures on a full stomach can cause discomfort and unpleasant symptoms to arise in your digestive tract.
-
Do a short warm-up before each session. This will prevent muscle strain caused by sudden tension.
-
Perform each pose slowly, breathing while moving. Pause after any pose, especially if shortness of breath occurs. Start the next pose when your breathing returns to normal.
№ 1. Triangle pose
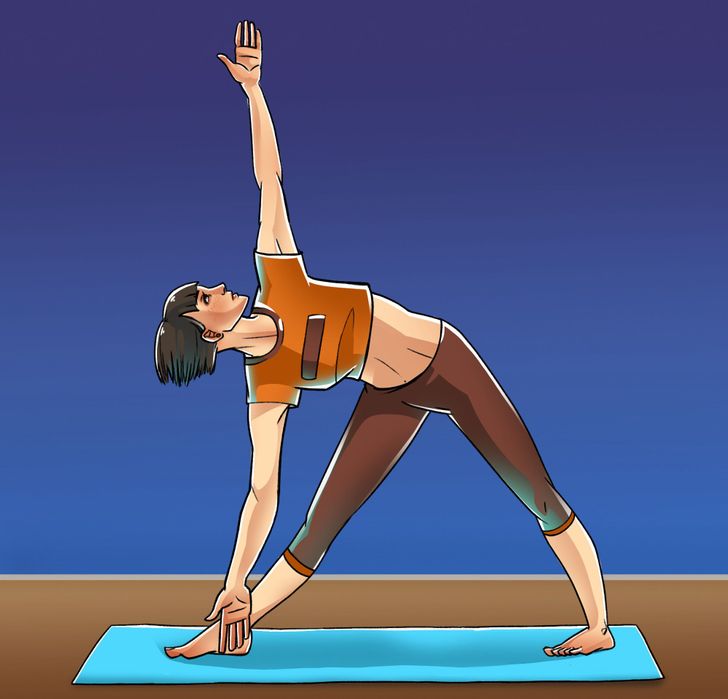
This pose helps strengthen the legs and stretches the hips, spine, chest, shoulders, hamstrings, and calves. It also helps to increase the mobility of the hips and neck.
- Put your legs shoulder-width apart. Place your left foot slightly inward, turn your right foot 90° to the right. Make sure your feet are flat on the surface and your legs stay straight.
- Inhale and spread your arms out to the sides.
-
Exhale and stretch your right arm to your right foot — stretching the torso and moving your hips to the left.
-
Place your right hand on your shin, ankle, or next to your right foot. Keep your torso extended.
-
Stretch your left arm to the ceiling. Keep your head in a neutral position.
-
Hold the triangle asana for a minute, then go back to the initial position and repeat the pose on the opposite side.
№ 2. Downward-facing dog pose
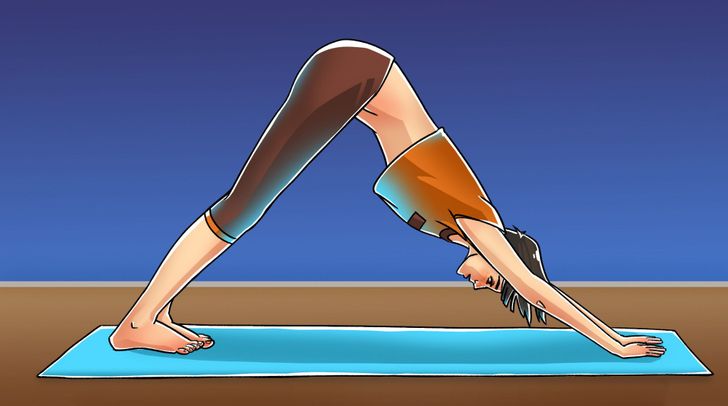
This pose strengthens the arms, shoulders, and back, as well as stretches the hamstrings, calves, and arch of the foot. It can also help relieve back pain.
- Get on all fours, place your hands shoulder-width apart, and rest your toes on the floor.
-
Inhale and evenly transfer your body weight to your palms, lift your knees and hips up, and stretch your back. Try to press your feet fully down to the floor.
-
Move your shoulders backward and press your shoulder blades against your back. Turn your forearms toward the floor. Pull your hips toward the center.
-
Keep inhaling and exhaling evenly, holding the pose for as long as you can.
-
Slowly return to the initial position and relax.
№ 3. Warrior pose
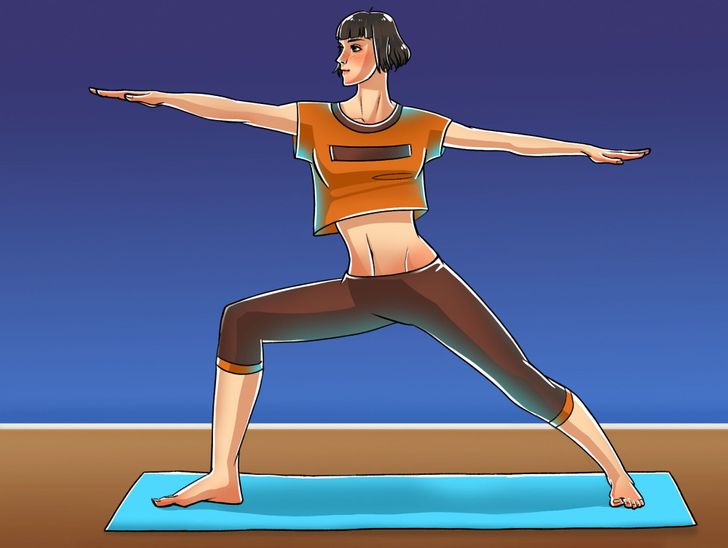
This pose strengthens the legs, and develops concentration and a sense of balance. It also improves blood circulation and stabilizes breathing.
-
Put your feet wider than shoulders. Slightly turn your left foot inward, turn your right foot 90° to the right. Make sure your feet are flat on the surface and your legs are straight.
-
Inhale and spread your arms to the sides.
-
Exhale and bend your right knee 90° — transferring your weight to your feet.
-
Turn your hips and shoulders forward, stretching your arms and the tips of your fingers to different sides. Keep your back straight, turn your head to the right, and look at the fingers of your right hand.
-
Hold this pose for 3-6 inhales and exhales.
-
Straighten your legs and turn your feet forward, returning back to the initial position.
№ 4. Cow pose
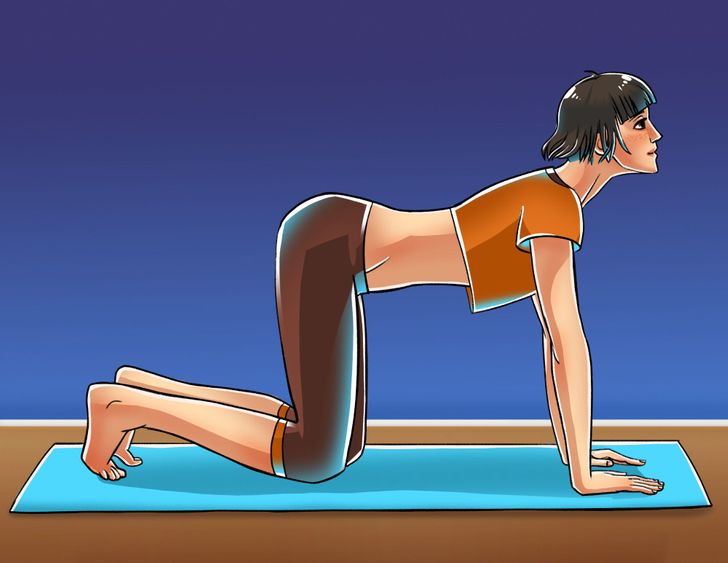
Cow pose elongates the spine, and stretches the middle of the back, waist, and hips.
- Get on all fours, place your hands shoulder-width apart, and press your palms to the floor.
-
Inhale and lift your tailbone up toward the ceiling, arching your spine and lowering your belly down.
-
Slightly move your head backward and look as high as possible at the ceiling, but without tension.
-
Hold this pose for 4-8 inhales and exhales.
-
Straighten your back and go back to the initial position.
№ 5. Cat tilt pose
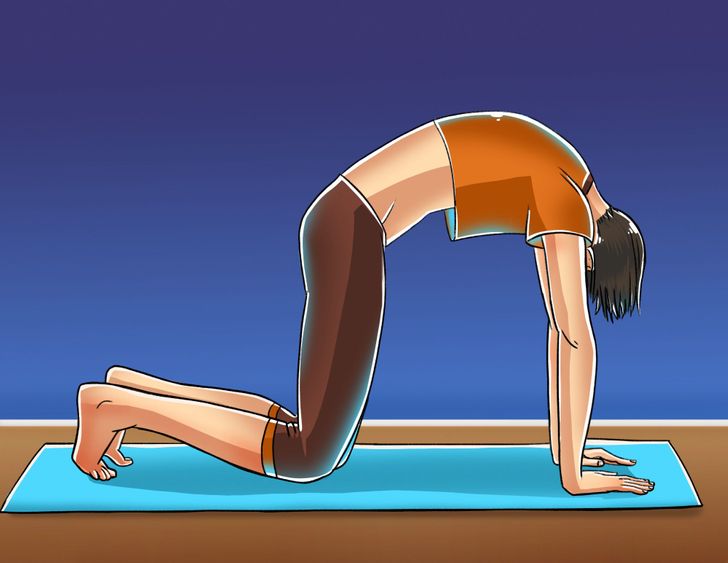
The cat pose stretches the shoulders and the mid and upper back. It can be done alone or alternated with cow pose.
- Get on all fours, place your hands shoulder-width apart, and press your palms to the floor.
-
Inhale, arch your spine, lower your head, and move your tailbone closer to your belly.
-
Stay in this pose for 4-8 inhales and exhales.
-
Straighten the back and go back to the initial position.
№ 6. Balancing table pose
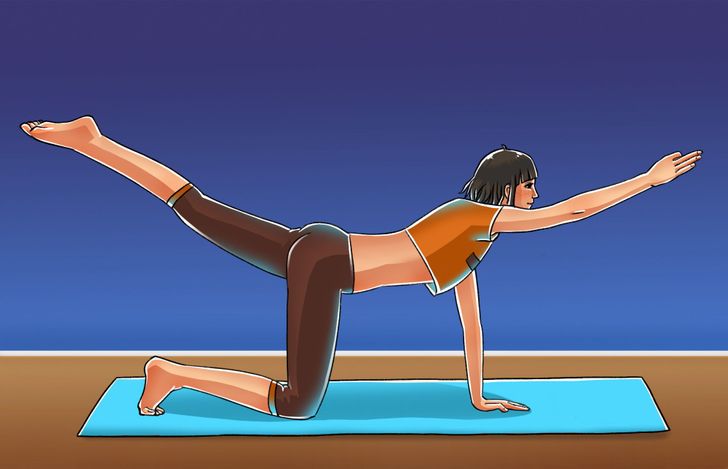
The balancing table pose improves balance, concentration, and the coordination of movements. It also evenly strengthens the body and lengthens the spine.
- Get on all fours, place your hands shoulder-width apart, and press your palms to the floor.
-
Inhale, reach your left arm forward, and stretch your right leg backward. Make sure your arm and leg are straight and make one line.
-
Hold this pose for 3-6 inhales and exhales.
-
Slowly put down your arm first and then your leg. Go back to the initial position and repeat the pose with your right arm and your left leg.
№ 7. Cobra pose
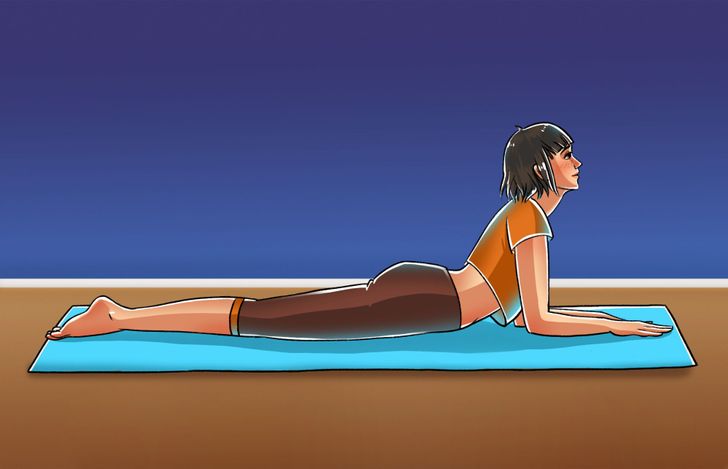
This pose helps to strengthen the back muscles and increase the flexibility of the spine. It also gently stretches the pectoral muscles, shoulders, and abdomen.
- Lie down on your tummy, put your head on the mat, and rest your toes on the floor.
-
Place your palms under your shoulders by keeping your elbows tight against your body. Move your body up.
-
Take a deep inhale, straighten your arms, and lift your chest and head up. Move your head a bit backward. Exhale.
-
Hold this pose for 1 or 2 inhales.
-
When exhaling, put your head, neck, and chest down.
№ 8. Seated forward bend
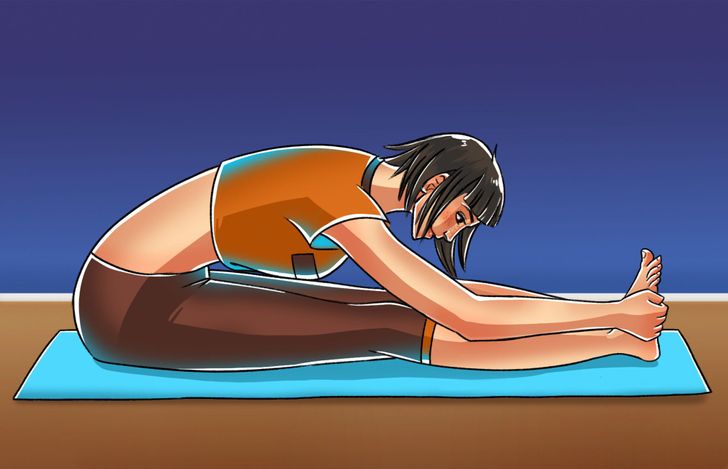
This pose deeply stretches the entire back of the body, from your heels to your neck.
- Sit up straight and stretch your legs forward.
-
Stretch your arms and the top of your head up.
-
Exhale and slowly bend your body toward your feet, transferring your bodyweight to your hips. Reach for your toes, feet, or ankles with your hands.
-
Hold this pose for 3-8 inhales and exhales.
-
Slowly go back to the initial position.
№ 9. Child’s pose
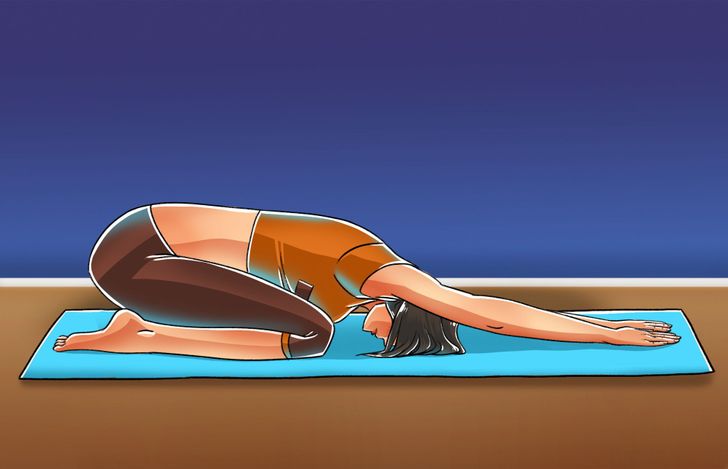
This pose is good for relaxing after a workout. It softly stretches the waist, hips, knees, and ankles. It also relaxes the spine, shoulders, and neck.
- Get on all fours, place your palms shoulder-width apart, keep your arms straight, and put your knees hip-width apart. Bring your feet together so that your big toes touch each other.
- As you exhale, lower your buttocks to your heels, transferring your body weight to your hips. Put your head on the mat.
- Relax your spine and hip muscles and take a few slow breaths.
-
Go back to the initial position.