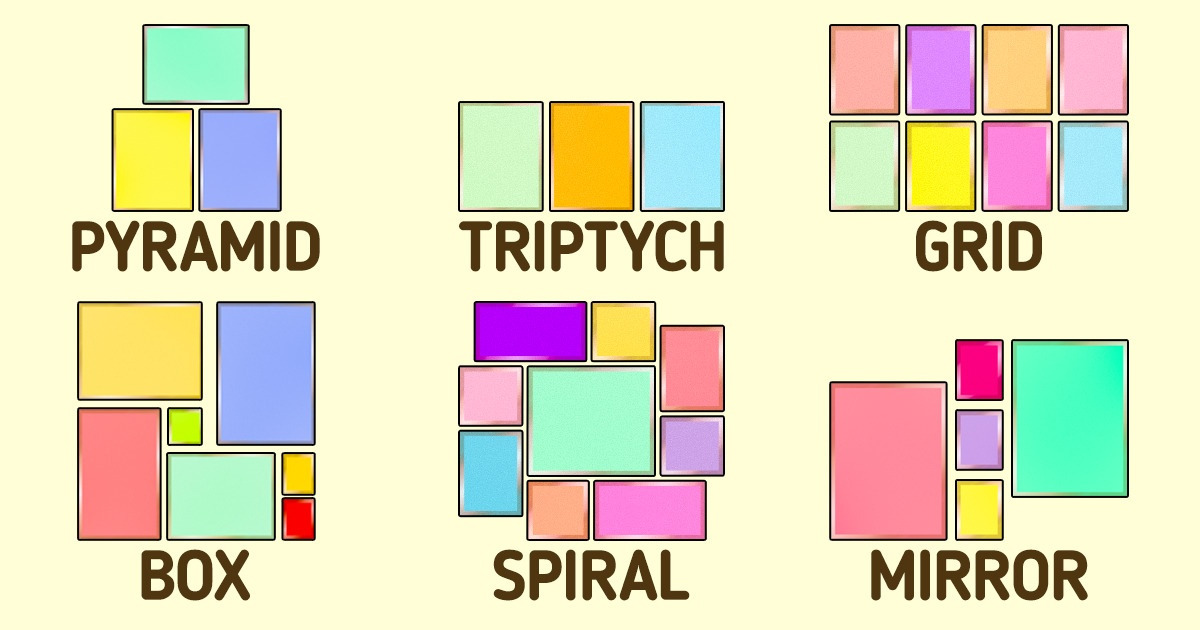
A Guide to Gallery Wall Layout Styles
Decorating a blank wall can sometimes be intimidating. But if you know how to do it right, you can transform those boring walls into a statement. So, if you are unsure how and where to begin, let 5-Minute Crafts be your guide.
1. Baseline
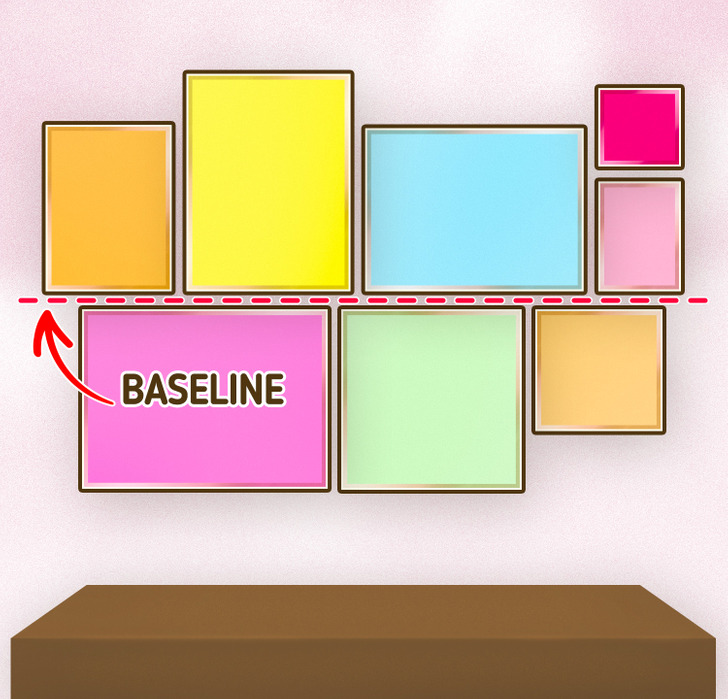
In the baseline layout, you tape off a straight line in the middle — it can be horizontal or vertical. And you put up frames above and below or on the left and right side of the line, respectively. This style is ideal when you have frames of different varieties and sizes. You can try this style over the sofa, in the living room, or in a hallway.
2. Box
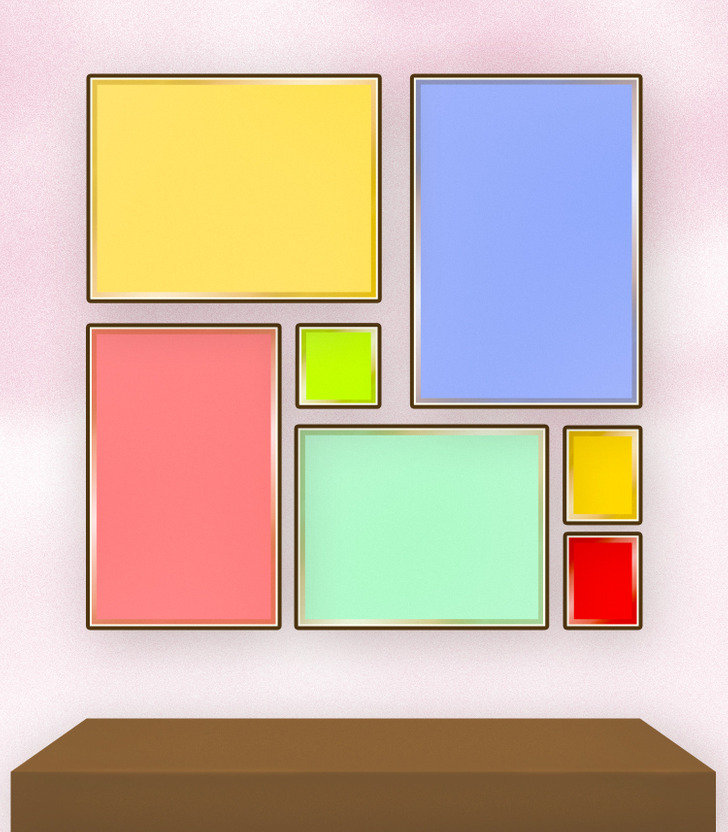
This arrangement needs a lot of patience because you’ll need to be measuring many different shapes in order to make it look like a box pattern. Begin with the biggest art piece, place it in the top right corner, then try building the remaining boxes around it. Before you begin working with this layout, it is highly recommended to plan the placement on the floor before you put any nails in the wall.
This layout is ideal when you have black and white photos or frames in one color. You can try this style in the formal dining room, entryway, foyer, or hallway.
3. Eclectic
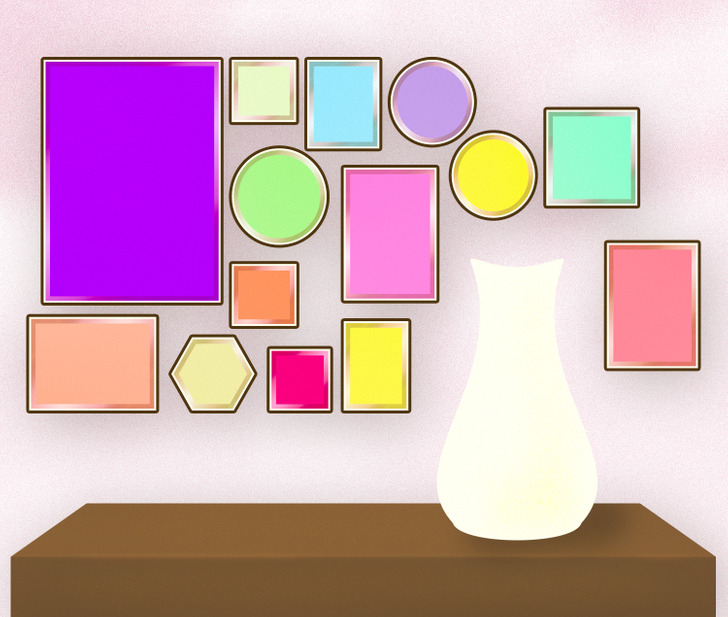
This layout is more informal and mixes various art genres, techniques, frames, and sometimes 3D objects too. An eclectic style layout is also referred to as “salon style.” Here, no matter what style you go for, spacing between the objects is the most important aspect. Consider how you’ll feel when the design is finished. Here, the arrangement of the objects also matters more than what they try to showcase.
This style is ideal when you have art, frames, and shapes in a wide variety, mismatched art pieces, or if you have floor-to-ceiling gallery walls. You can try this layout in a hallway, living room, or a large feature wall.
4. Grid
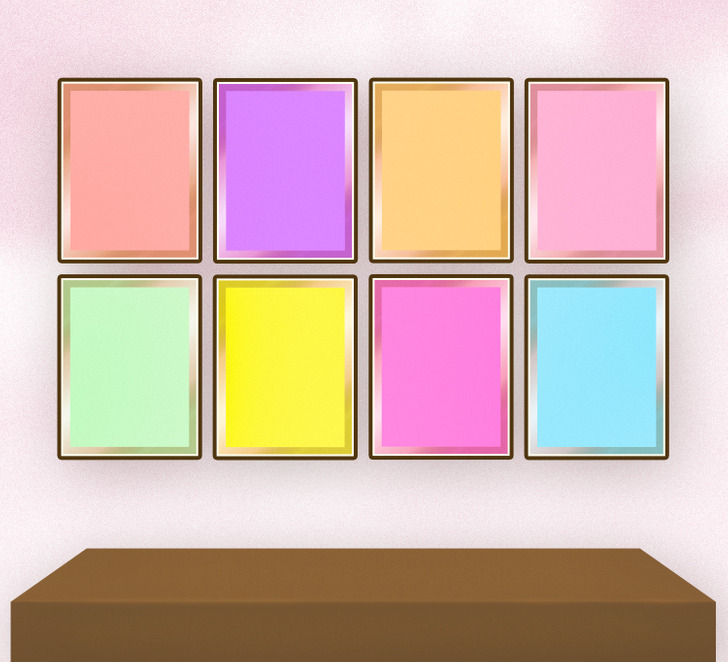
This layout focuses a lot on symmetry, proportions, and balance. The most important thing you need to focus on here is having precise and equal space between the frames so that it looks like a grid. You can use a level here to get accurate measurements. To add more to the scene, hang a sconce above the layout so that it shines a light on your photos and makes it look like an art gallery.
And it’s ideal for modern interiors that bear straight lines or spaces to focus on neat, formal, or minimalistic styles. You can work out this layout with family photos, concert photos, album covers, and frames with one color.
5. Lean
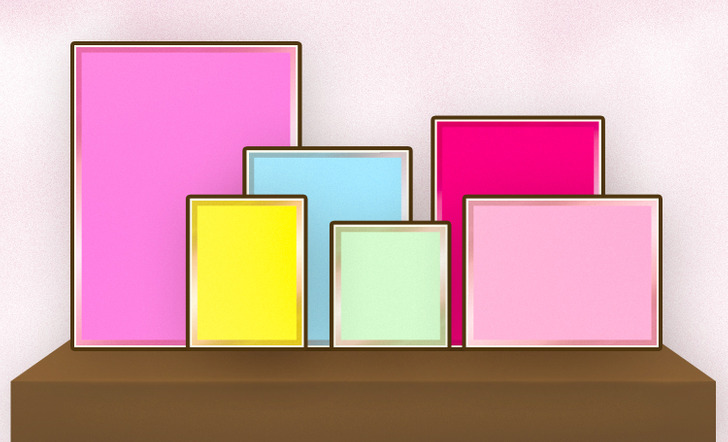
If you’re not that savvy about art, then you can try this layout style. All you have to do is frame the art, lean it on a wall, some shelves, or a credenza, and admire it. But avoid this style if you live in an earthquake-prone area. The leaning style is ideal for varieties of frames, art, sizes, and seasonal or transitional art as well. You can experiment with it in your living room, children’s room, and hallways.
6. Crown
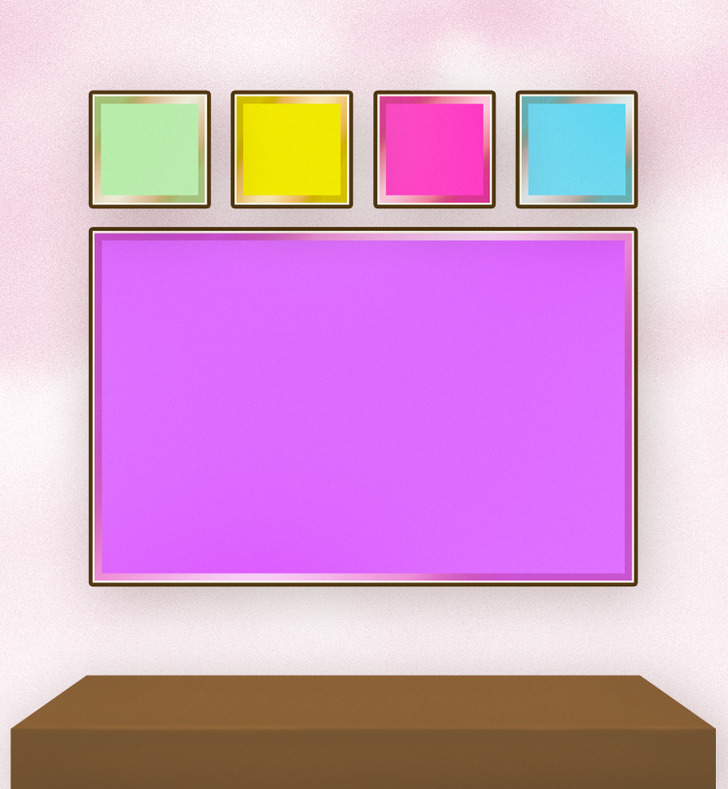
Here, all you need is a big art piece and a few smaller pieces that will feel like you’re placing diamonds on a crown. It’s highly recommended that you use matching frames, and if you wish to go a little extra, go with gold frames. This style is ideal if you have a painting that you don’t wish to replace, plus 3 to 5 smaller art pieces that can be replaced often, seasonally, or even just because. You can experiment with this style in your living room, entryway, foyer, bedrooms, and children’s rooms.
7. Triptych
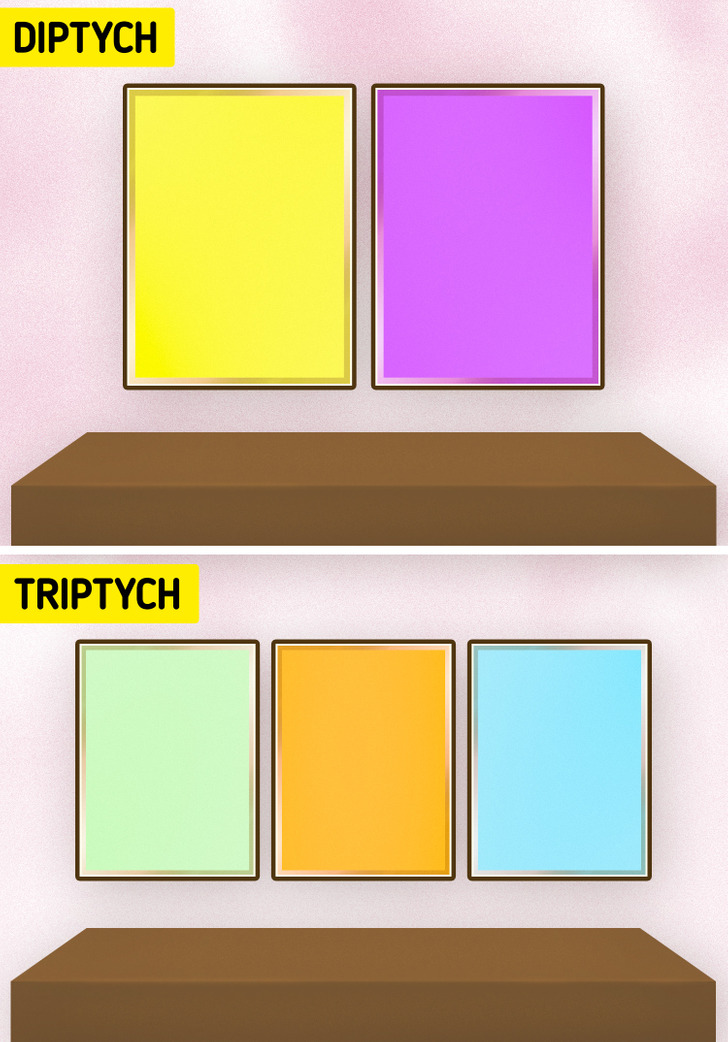
If you’re seeking structure, like a grid layout but want to go a bit simpler, then triptych style is a good choice. It comes with 3 matching or coordinating art pieces. And when it comes to arranging this style, it follows the same rules as the grid — precision and the same distance between the art pieces are the key. You can try this style in a bedroom over the bed, a foyer, or a formal living or dining room.
- If 3 seems like a crowd to you, you can also choose to put up only 2 cohesive art pieces. This layout will then be called a diptych.
8. Pyramid
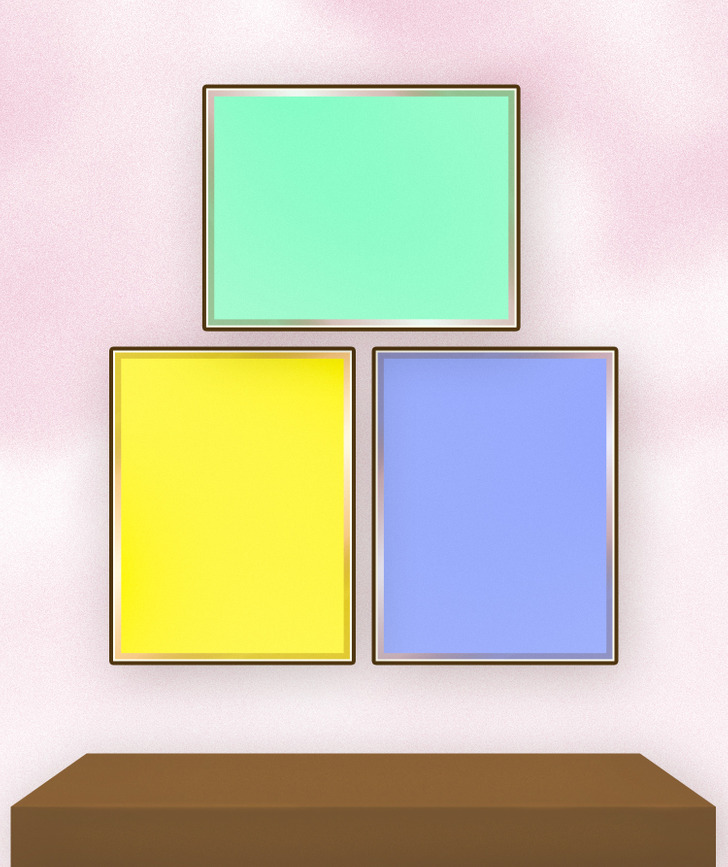
The pyramid layout is ideal when you have a small collection of similar pictures or art from the same photo shoot. This style works best with one frame color and a cohesive art collection. You can experiment with this style in your bedroom, dining or living room, or foyer.
9. Mirror
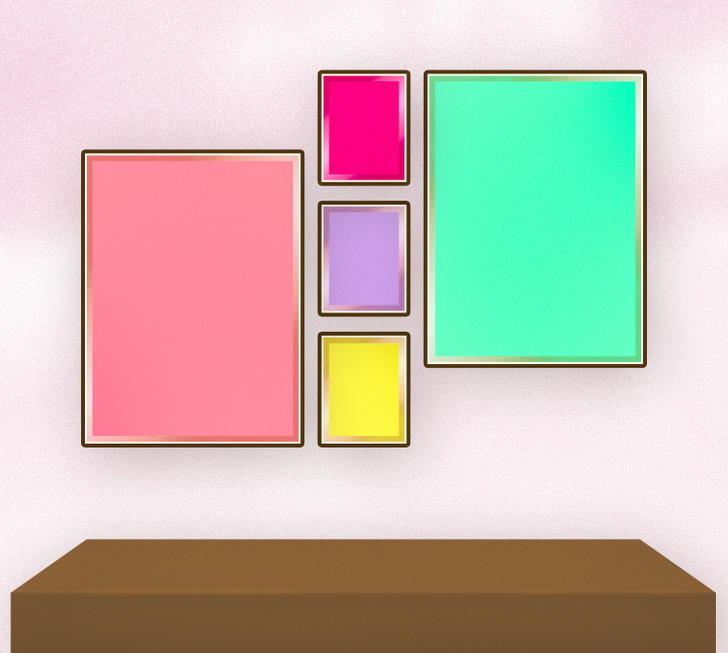
If you wish to try an asymmetrical style and give away avant-garde vibes, you should give the mirror layout a try. Begin by placing smaller art pieces in the middle and then place mirror image shapes on either side as shown in the image above. This style goes well with paintings or on frame colors. You can give this layout a try in your dining or living room, or above a bedroom dresser.
10. Spiral
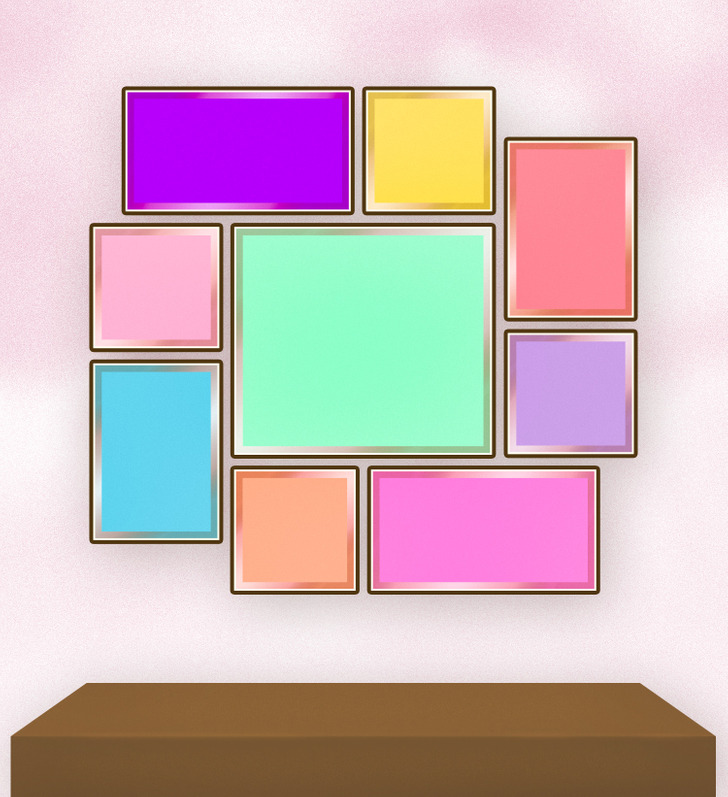
Here, you take one art piece and then wrap other art pieces around it in a circular manner. Remember to keep the spaces precise and frame sizes equal so that you achieve the symmetry you’re looking for. This layout works best with frames of a single color and if you have a variety of art. This style can be experimented with in the living room, kids’ bedrooms, big open walls, and hallways.