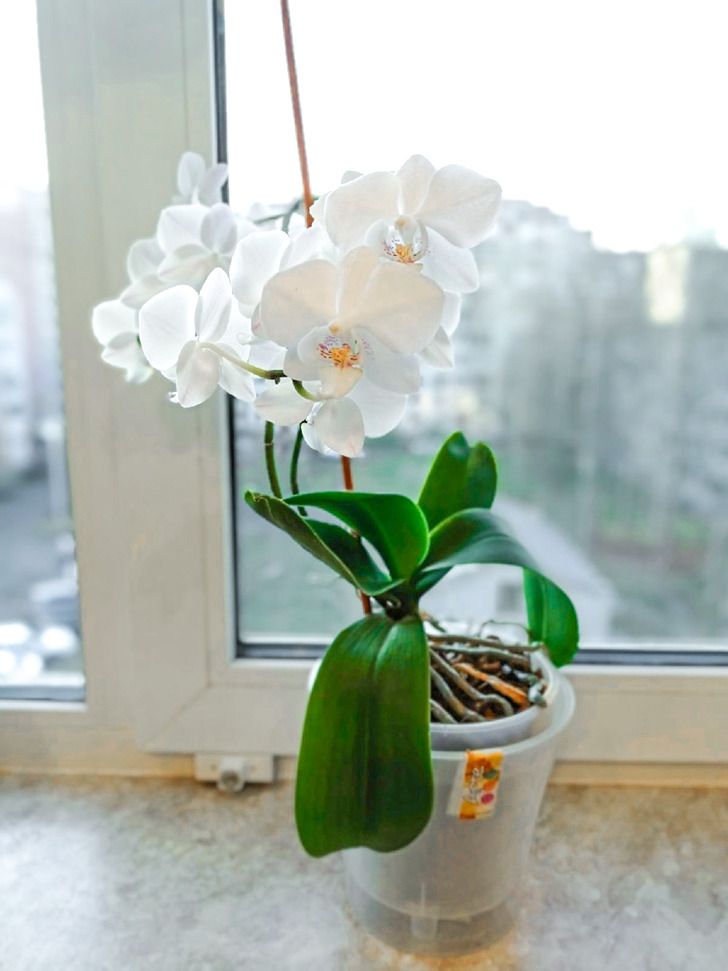
How to Care for Orchids
Indoor orchids are among the most beautiful flowers you can grow on your window sill. Some types of orchids don’t require special attention, while others, on the contrary, are quite whimsical plants. However, if you manage to create suitable conditions for them, they will delight you with their flowering more than once.
5-Minute Crafts would like to tell you what you should pay attention to when growing orchids.
What type of light an orchid needs
Orchids love light, but direct sunlight is dangerous for them — too much of it causes the leaves to sunburn. It’s best to place these plants in the areas with diffused light or on windows that face east or south.

If you are not sure whether the light from your window suits the orchid, do a simple test. In the daytime, when the sun shines brightest, place your hand a couple of inches above the plant and look at the shadow it casts. If there is almost no shadow on the plant, then the light intensity is too low; if you can see a dark clear shadow, the light is too bright and harsh. If a small shadow of a light gray color falls on the orchid from your hand, the light is perfect for the plant.
How to water orchids correctly
Despite the fact that the natural environment for orchids is tropical forests, these plants don’t need abundant watering at home. Their roots can rot from too much water.
To prevent this from happening, use one of the 3 most popular watering methods.
- Submerging
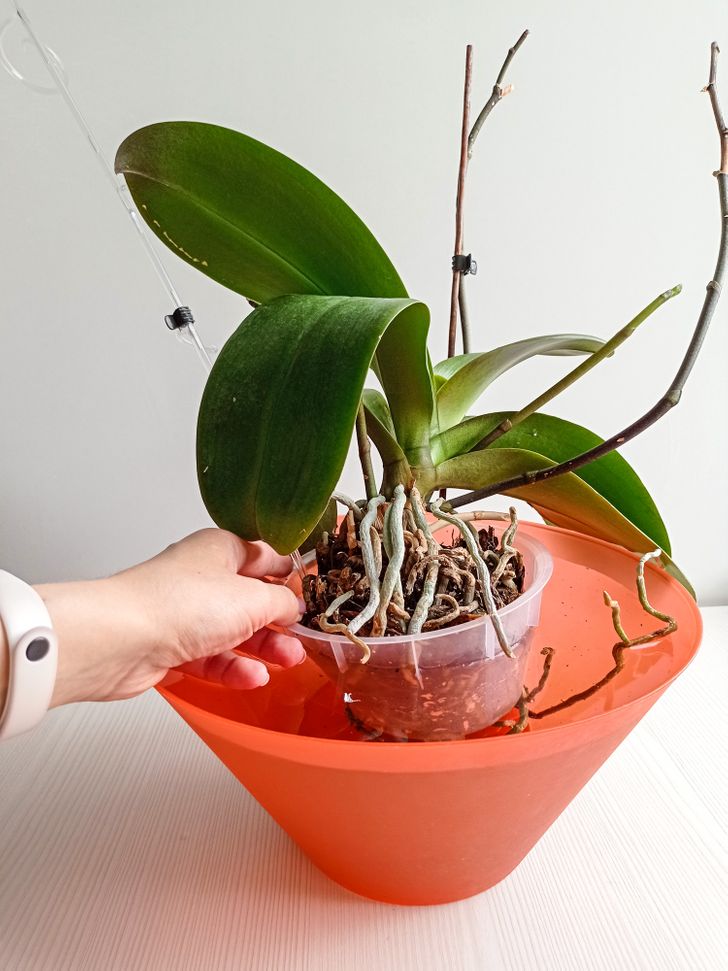
1. Take a bowl, bucket, or any other deep container. Place the pot with the orchid into it (make sure that the pot has drainage holes).
2. Pour water at room temperature into the deep container so that the level of water is slightly lower than the brim of the orchid pot.
3. After 10-15 minutes, remove the orchid from the water and allow it to drain for 5 minutes. Then return it to its home.
4. Depending on where the orchid is placed and the time of year, submerge it once a week.
- Pouring
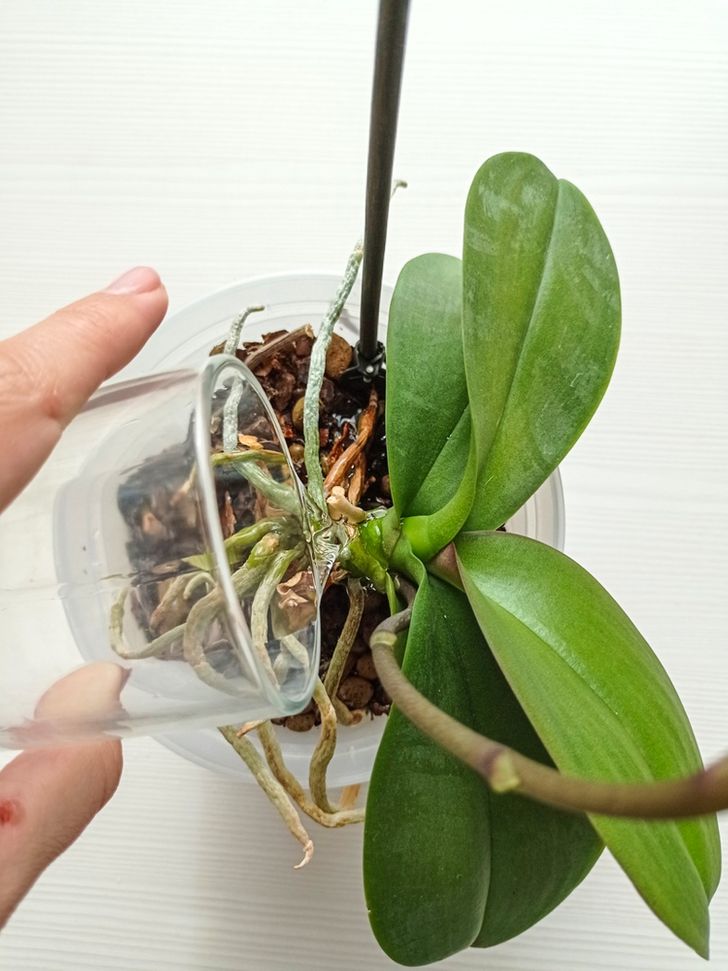
1. Make sure that your orchid pots have drainage holes through which excess water can leave the pot. If there are no drainage holes, consider a different watering method or think of changing the pot.
2. Pour approximately one cup of water into each orchid pot weekly.
3. Avoid getting water into the crevices of the leaves. If this happens, grab a towel and dab any excess moisture away to prevent rot.
- Ice cubes
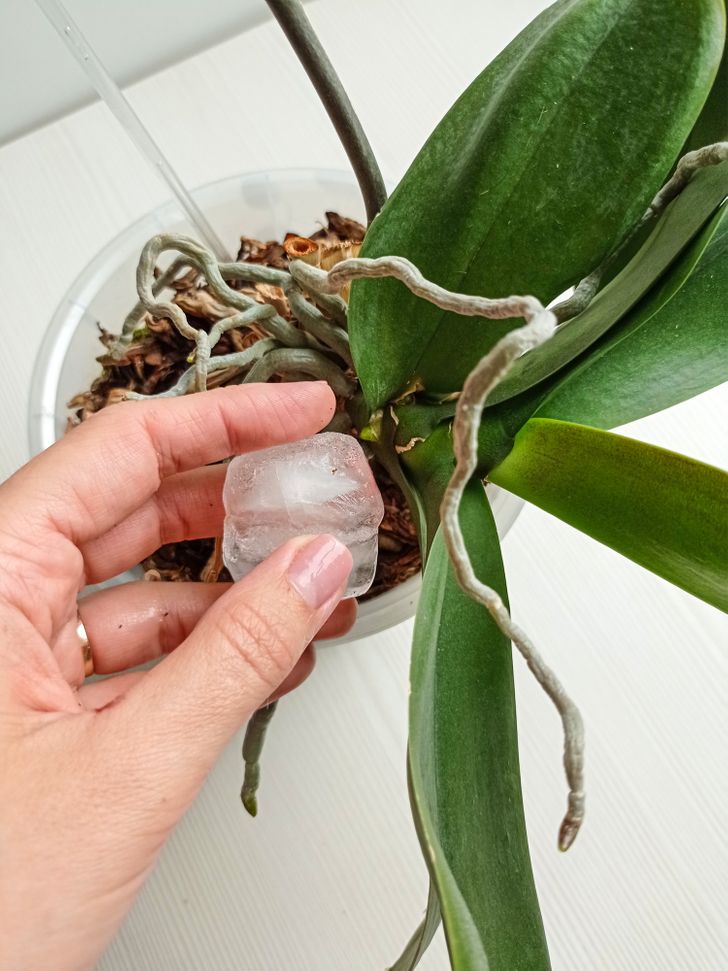
Ice cubes straight from a small or medium-sized ice cube tray are a great way to water orchids. They improve absorption, help to avoid overwatering, and prevent root rot.
Pop in one cube twice a week on top of the potting medium underneath the leaves.
Look at the orchid’s roots to find out whether the plant needs watering. Roots that are green are getting just the right amount of water. If the roots are soggy and brown, the plant is getting too much water. If the roots are grey or white, the plant needs more water.
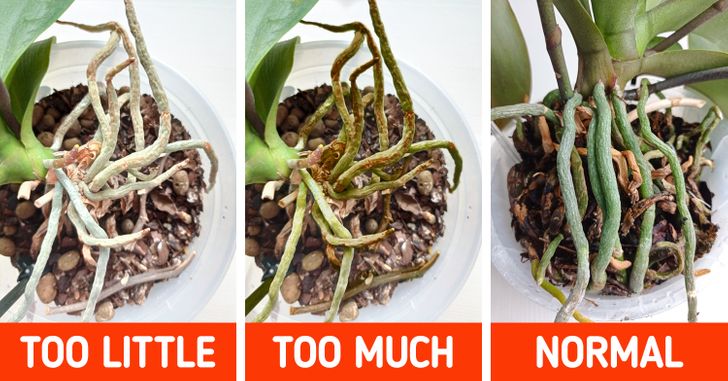
To tell if it’s time for watering, stick your finger in the potting mix, pull it out, and rub your fingers together. You should easily be able to feel if there’s any moisture. If you don’t feel any, it’s time to water your orchid, and if your fingers feel moist, check again another day.
How to maintain humidity
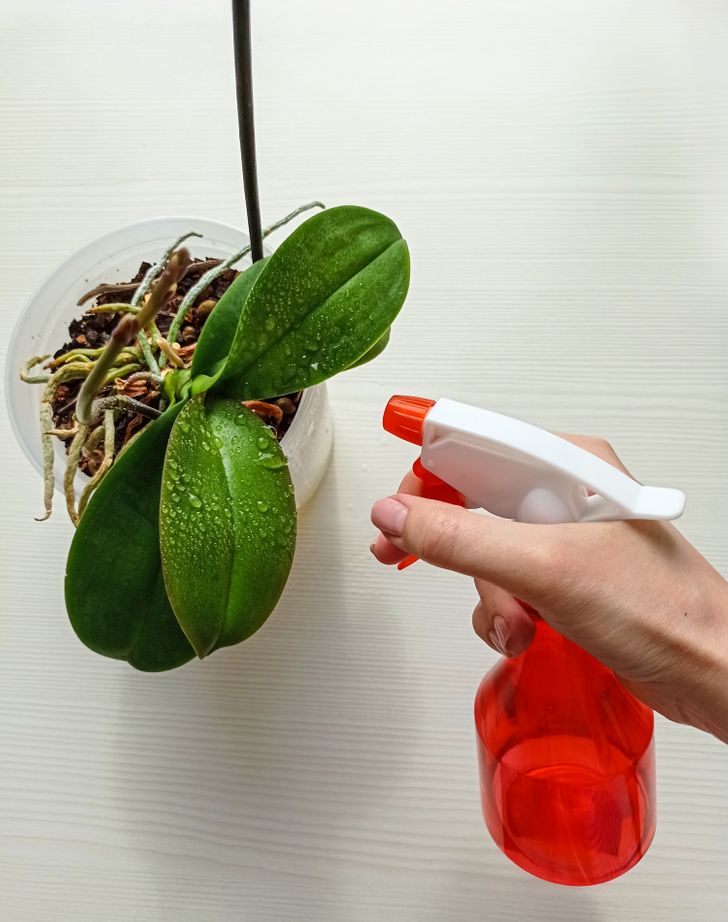
Apart from watering, orchids also need regular moistening of the leaves and aerial roots. To maintain a favorable environment, it’s necessary to spray the plants with water a couple of times a day.
If possible, don’t use tap water, which may contain impurities harmful to the plant. It’s better to spray it with boiled or settled water.
How to feed an orchid
Experts recommend feeding orchids regularly and using complex fertilizers that don’t contain urea. You can use either a fertilizer designed specifically for orchids or a universal fertilizer for indoor plants.

Orchids will do far better with too little fertilizer than with too much. Many growers recommend the weakly approach, applying a dilute fertilizer each time they water it, rather than applying a full dose once a month.
Pay attention to the state your plant is in before feeding it. When you notice the orchid is actively growing, fertilize it. If you spot that the orchid is in poor condition, avoid fertilizing. Also, if you’re using liquid food, don’t pour it over the plant’s leaves, as this will burn them.
How often you need to repot an orchid, and how to do it right
You should not transplant orchids without a serious reason to avoid excess stress to the plant. It’s worth changing the potting mix every 1 to 2 years on average. During this time, soil particles get destroyed and a sufficient number of dead roots are formed, which need to be removed during transplantation. Also, the orchid needs to be transplanted when the pot becomes too small for it. When the flower seems to begin to crawl out of the pot, it’s time to transplant it.
Important: It’s better to transplant an orchid after the flowering period, but before it has a dormant period.
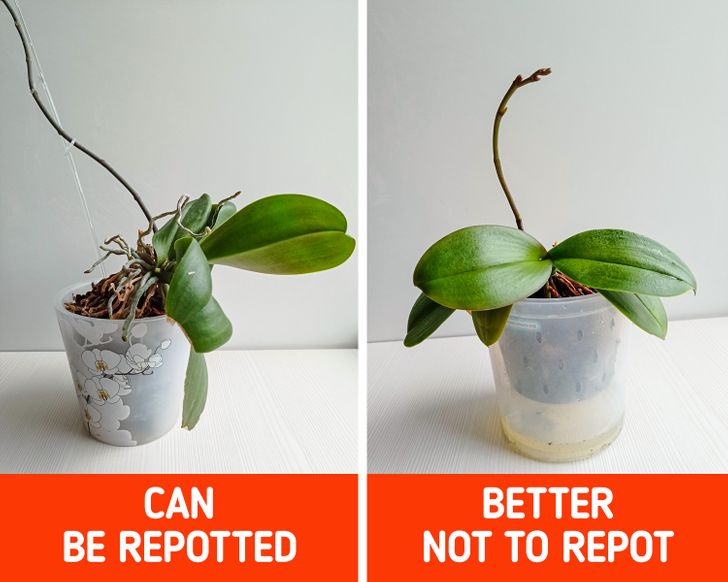
When repotting a plant, follow this scheme:
1. Choose the potting mix and pot for the orchid. If you’re repotting a plant into a bigger container, keep in mind that the plant will have to stay in this pot for about 2 years.
2. If the new mix is dry, moisten it by soaking it in water for 1 to 2 hours before transplanting. You can also remove excess dust from the mix by using a fine-mesh strainer and rinsing it under running water.
3. Disinfect the tool with which you will be pruning the orchid roots. You can heat it on the stove, boil it, or soak it in a disinfectant solution for 20 minutes. Orchids are very susceptible to viruses, so a sterile tool should always be used when transplanting and pruning.

4. Carefully remove the orchid from the pot. When necessary, cut only the stems or roots if you can’t loosen the orchid from the pot. Or you can cut the plastic pot which has become too small for your orchid to remove the root system with minimal damage.
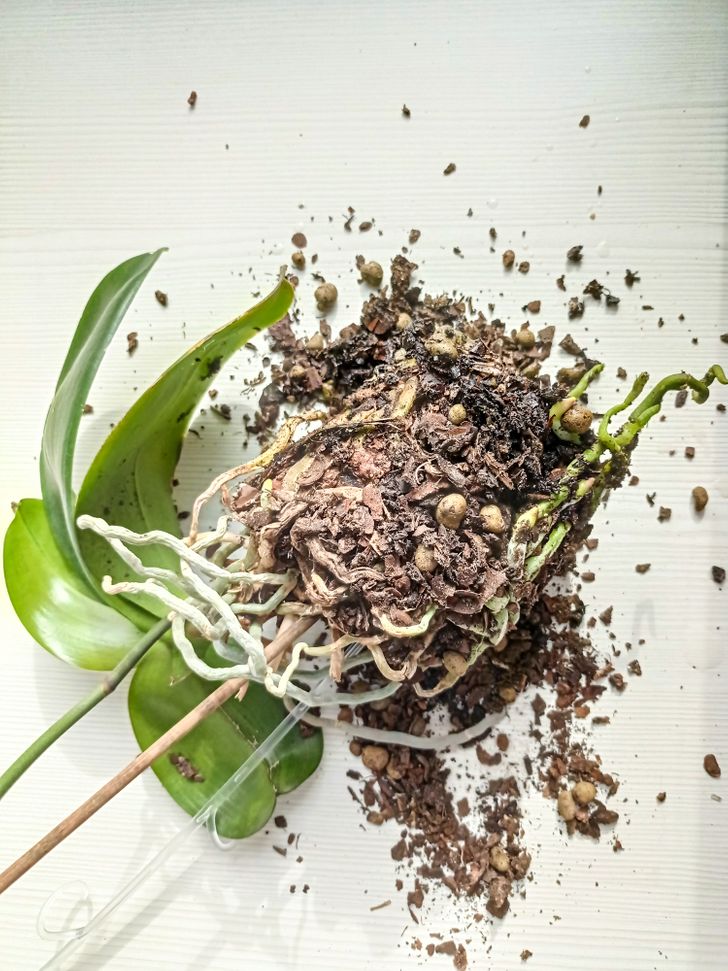
5. Rinse the roots with warm water to remove any remaining medium.
6. Use only a sterilized cutting tool when trimming. Only trim soft and brown roots, yellow leaves, and shriveled pseudobulbs.
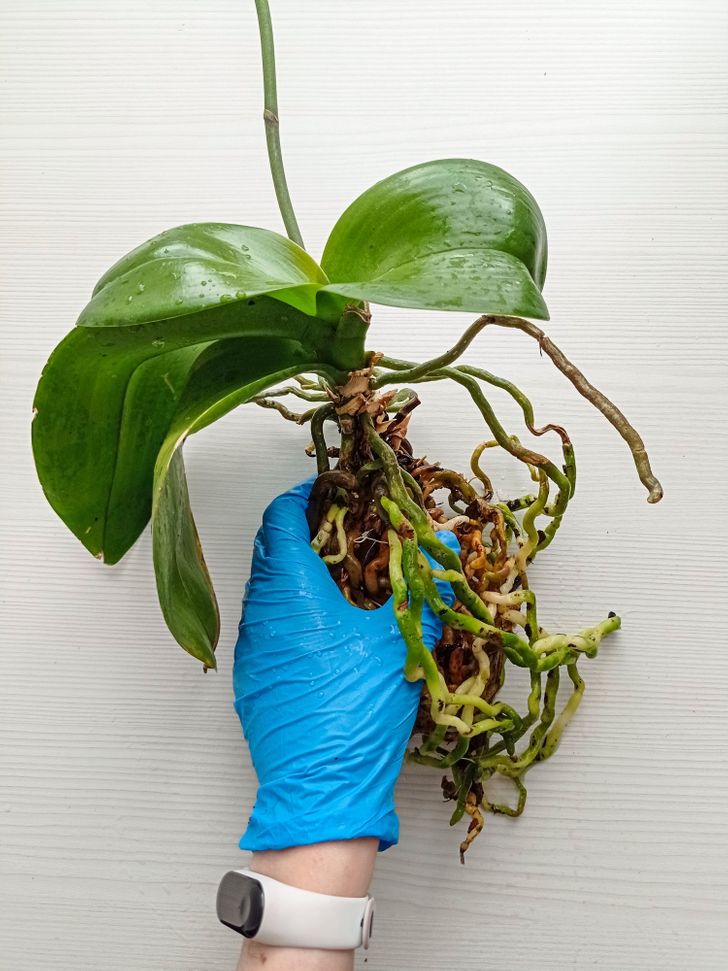
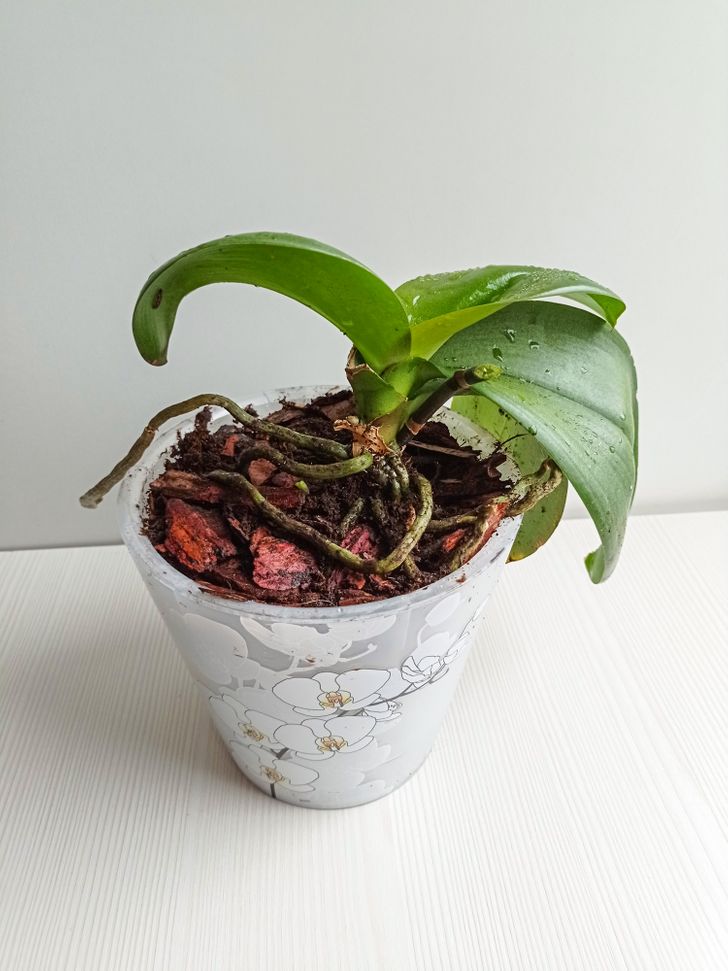
7. Gently place the roots inside the new pot and make sure it’s of the same depth as the old pot. Put enough potting mix into the pot so that it reaches the base of the orchid.
8. Gently press the potting mix in and around the roots with the use of your fingers. Tilt the pot carefully from side to side to ensure the plant won’t flop around.
How to choose potting mix for transplanting
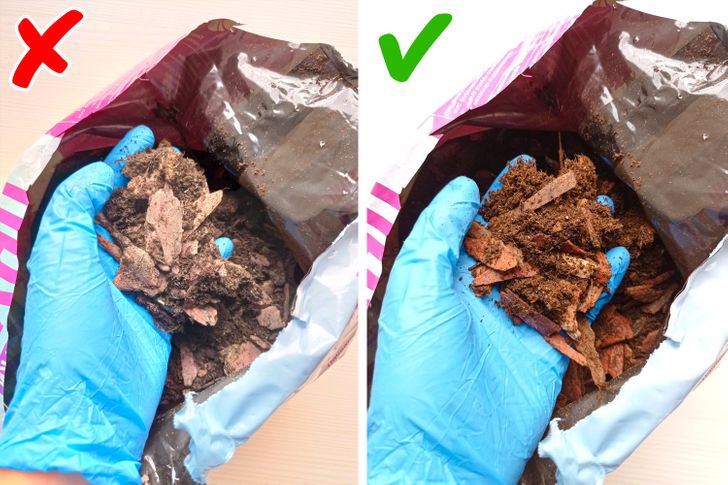
A fresh, fast-draining but water-retentive potting mix is essential to the healthy root system necessary for good growth. It can be a bark-based mix, a peat-based mix, or some inorganic, basic hydroponic method.
When choosing potting mix, keep in mind the orchid species you have. Bark doesn’t hold much water and drains quickly, which makes it a good choice for orchids like Phalaenopsis and Cattleya that need to dry out between waterings. Other orchids, such as lady’s slippers and nun’s orchids, like more dampness and will do better if you don’t let them dry out. Moss is a good choice for these species because it’ll supply them with moisture for a longer period of time between waterings.
How to cut an orchid
Spikes of the majority of orchids (excluding Phalaenopsis) don’t re-bloom and require cutting. Phalaenopsis will generally re-bloom given a little extra care. When the last flower fades, you can leave the spike (stem) on and it will still continue flowering, but the stem gets very ungainly and the flowers get smaller.
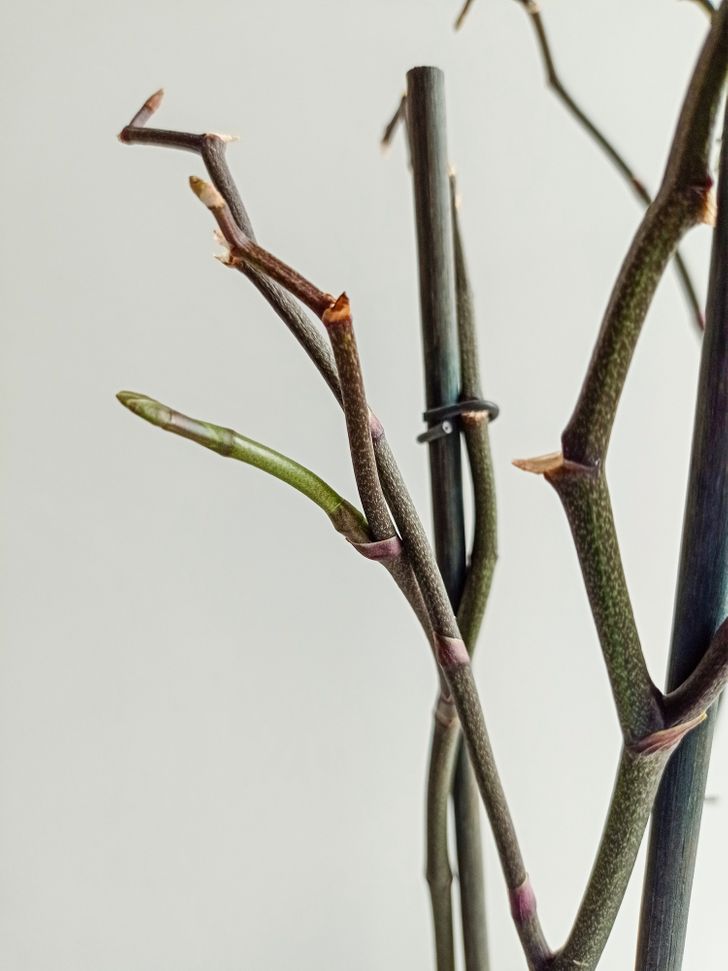
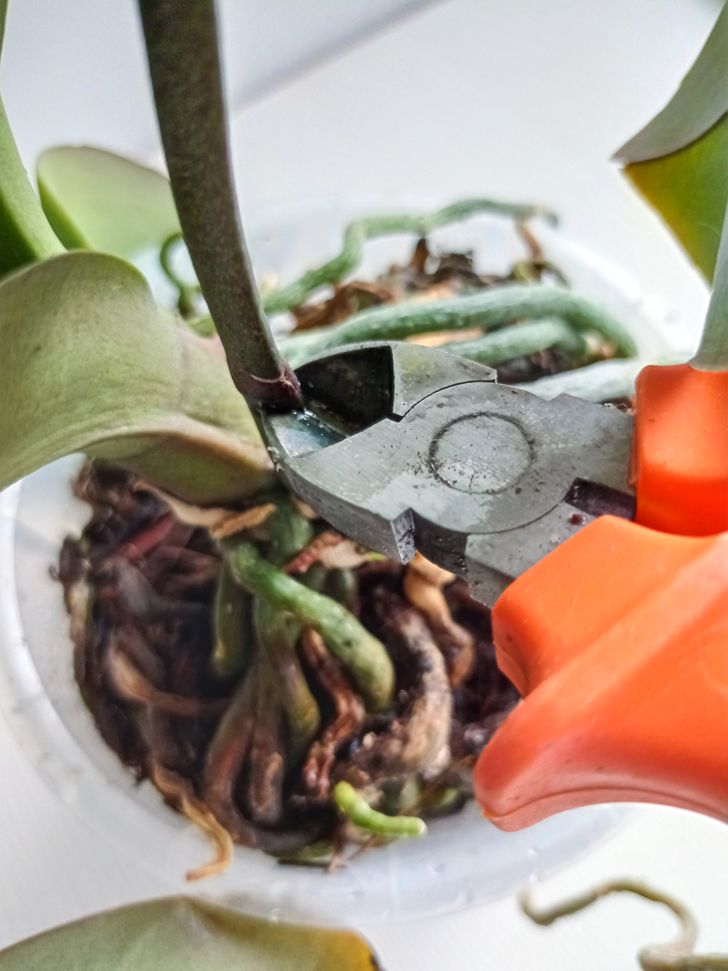
Before cutting, evaluate the state of the spike. If the spike is brown or yellow, it’s most probably unhealthy and requires pruning. If so, it’s best to cut an inch above the base of the stem. If the spike is green and healthy (with no signs of sickness or drying), you should trim the stem just above the notch/node where the first flower has bloomed. This will allow a new shoot to emerge.
Important: When you make the cut, be sure to cut diagonally.
A plantlet called a keiki will sometimes grow on a flower spike. Initially small, it will grow several leaves and then roots, at which time it can be removed to propagate a new plant. Once the roots grow a couple of inches long, gently remove the plantlet with a sterile knife and pot in a container.
