How to Clean an Air Conditioner at Home
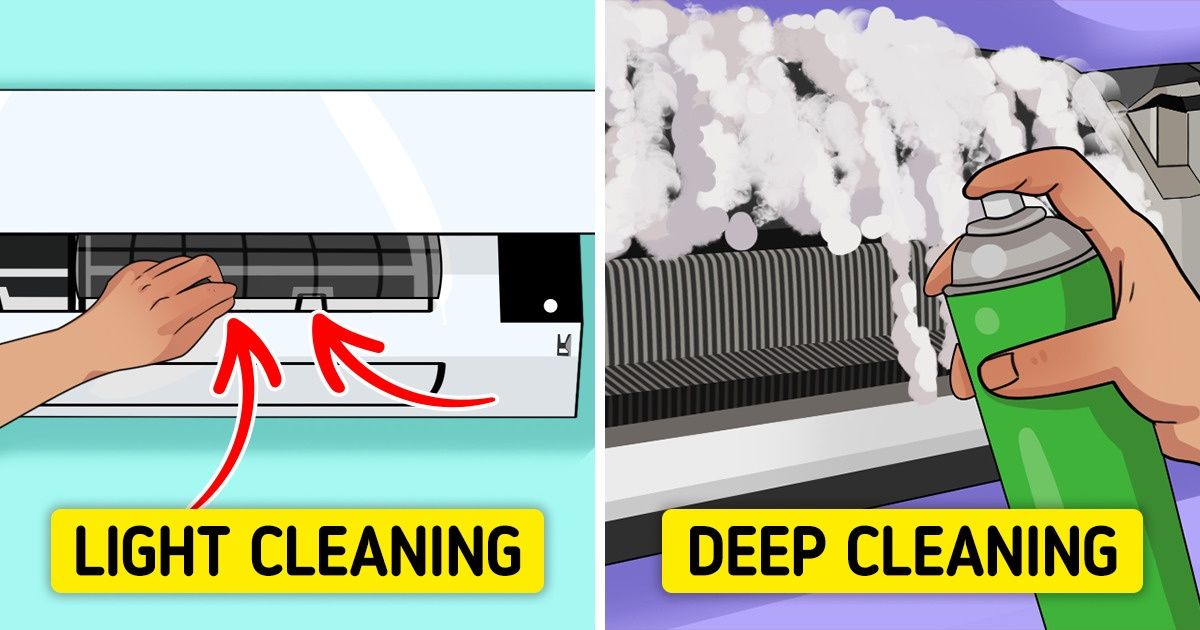
Air conditioners work more effectively if they’re kept clean. There’s no need to call a professional for regular cleaning. This process can be done yourself.
5-Minute Crafts is offering you step-by-step instructions on how to clean an AC on your own, including the external block, which is located on the street.
❗ An important note: Before you start, read the instructions for your air conditioner and the rules for its maintenance. In some cases, manufacturers recommend cleaning only the air filter by yourself and entrusting the cleaning of the external and indoor units with air conditioner specialists.
What you’ll need
- An AC cleaning agent (it’s more convenient to use a foaming agent that doesn’t require rinsing)
- A brush
- A wet wipe or a rag
- A vacuum cleaner
- Pliers
- A crosshead screwdriver
- A protective film or a towel
How to clean the internal block of an AC
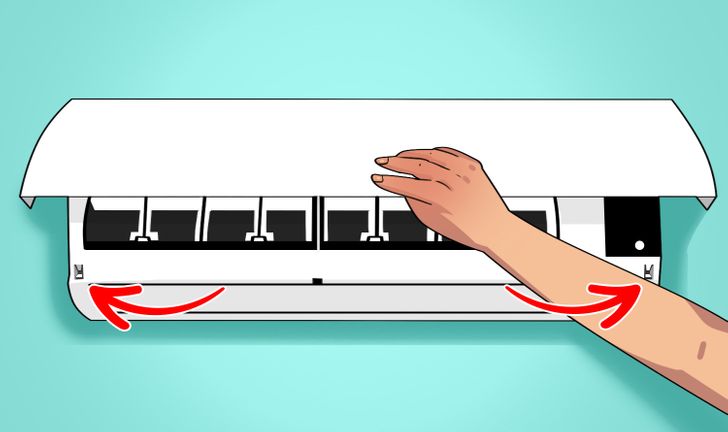
Step #1. Before you start, make sure to turn the AC off and disconnect it from its power source. Place a protective film or a towel on the floor to protect the surface from contaminating it with potential dirt from the AC. Open the internal block’s panel and lift it up. Usually, you’ll only need to lightly pry it from below in the left and right corners where the edge of the panel is attached to the body.
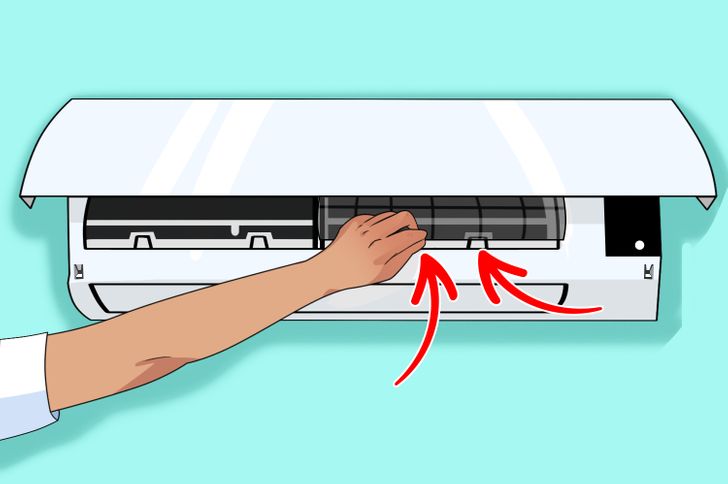
Step #2. There are 2 net slabs under the panel, which serve as air filters. In order to remove them, grab the bottom edge of one slab, slightly lift it — releasing it from the hooks on the sides — then pull it out downward, and remove it.
Study the recommendations of AC producers: rinse the filters with warm water if it’s permissible. If they are very dirty, you can soak them in water having added a dishwashing liquid. Filters should be dried in a natural way. Therefore, you can periodically perform a light cleaning by cleansing the air filters whenever you find that they’ve filled with dirt and dust again.
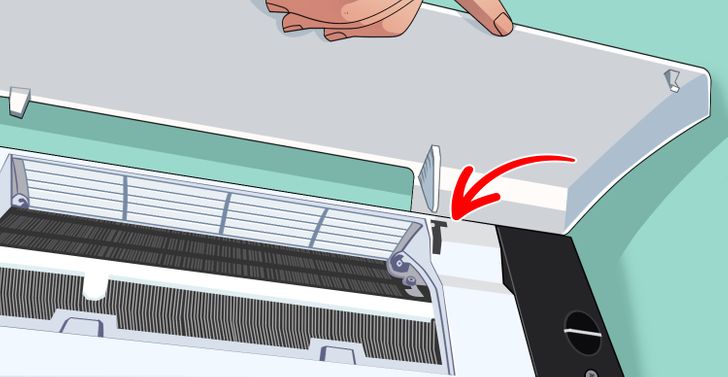
Step #3. Lift the panel up to the position where it stops. Slide the right rotary shaft to the left and release it. Repeat the action on the left side, sliding the shaft to the right side to detach the panel from the unit. Remove the panel.

Step #4. Now you need to release the horizontal blinds. First, slightly lift them and release them from the fixation knob in the center.
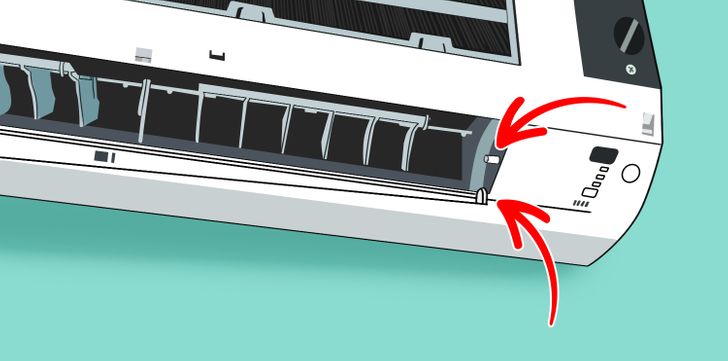
Step #5. Then remove the blinds from the fixation shaft on the right side by first pulling it to the left side, then pulling over. Repeat the same process with the left side. Remove the blinds and put them aside.
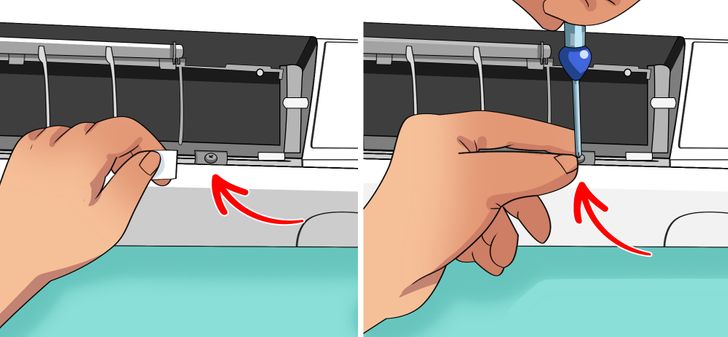
Step #6. There are 2 screws in the emptied space. Open the cover of the screw located on the right side. Remove the screw with the help of a screwdriver. Repeat the same actions with the left side to get the second screw.
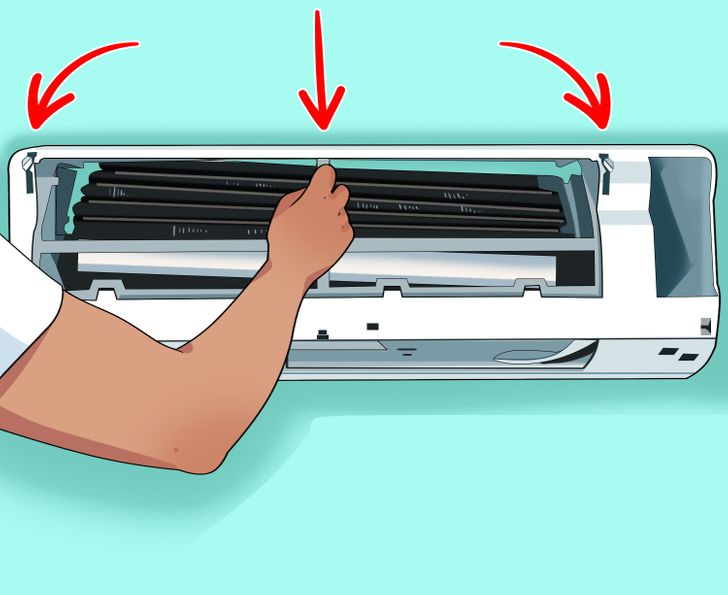
Step #7. Hold the body of the block in the center and slightly lift it to release it from 3 upper fixated points. Pull the body over in order to release it. Put it aside.
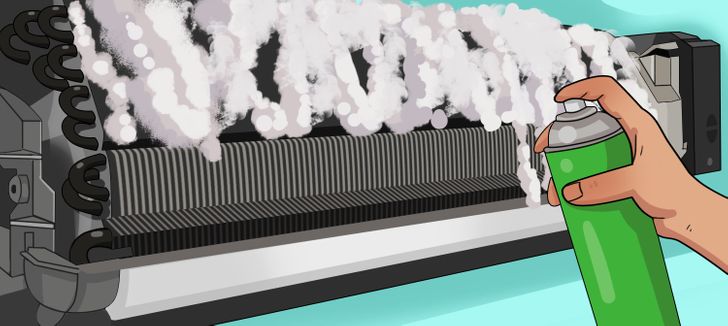
Step #8. Apply a special antibacterial agent to the heat exchanger (evaporator) to clean the air conditioner, following the manufacturer’s instructions.
After cleaning the evaporator, do all the actions in reverse order to put back all the extracted details of the indoor block in their initial places. Don’t connect the air conditioner to the mains if you plan to further clean the external unit outside the room.
How to clean the external unit of an AC
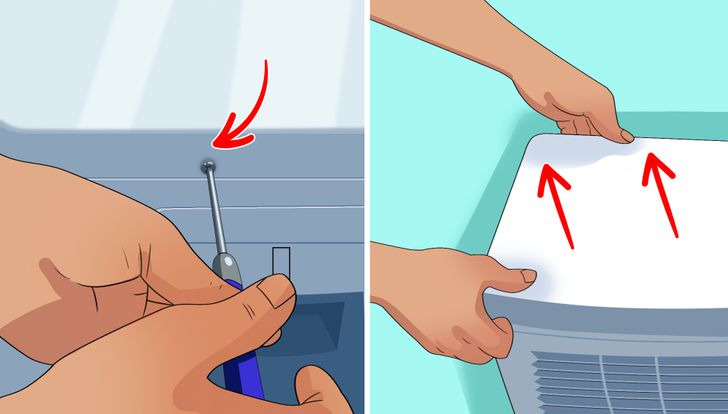
❗ An important note: You can clean the external block by yourself only when you have secure access to it, like when it’s located on the balcony or when it’s installed on the ground floor and you can reach it from the outside. In other cases, it’s necessary to call a specialist.
Step #1. Remove the screws securing the lid with the help of a screwdriver. Take it off and put it aside.
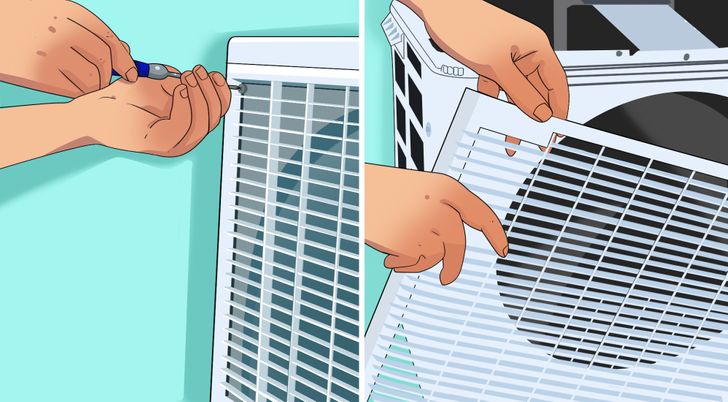
Step #2. With the help of the screwdriver, remove the screws securing the grille behind which the fan is. Remove the grille by slightly pulling it up to release it from the fixation shafts. Clean the grille with a brush or a vacuum cleaner. You can also wash it with water if you feel the need to do so. Let it dry in a natural way.
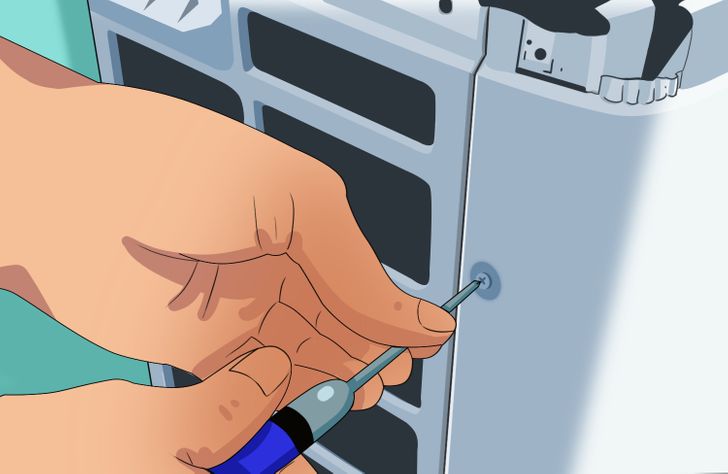
Step #3. Remove the screws located along the perimeter of the frontal panel with the help of the screwdriver.
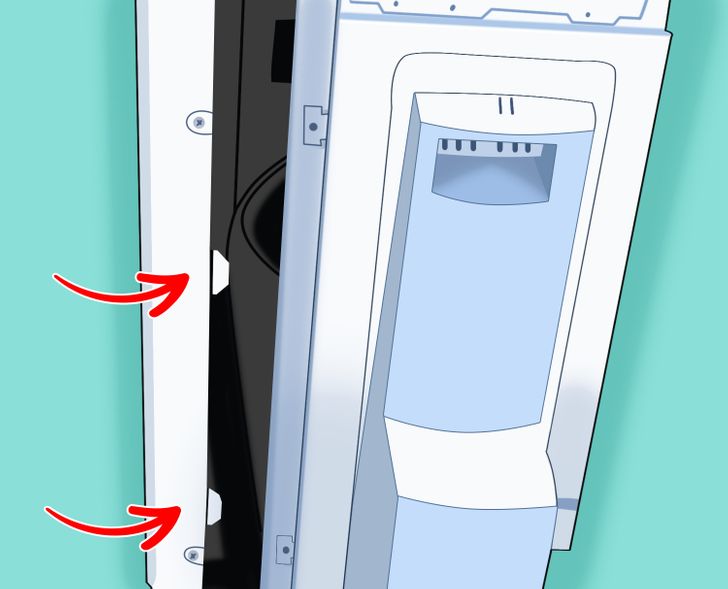
Step #4. Remove the panel by slightly pulling it to release it from fixations.

Step #5. Using pliers, unscrew the nut in the center of the fan. Remove the fan. Wipe its blades with a damp cloth or rag. Let them dry naturally.
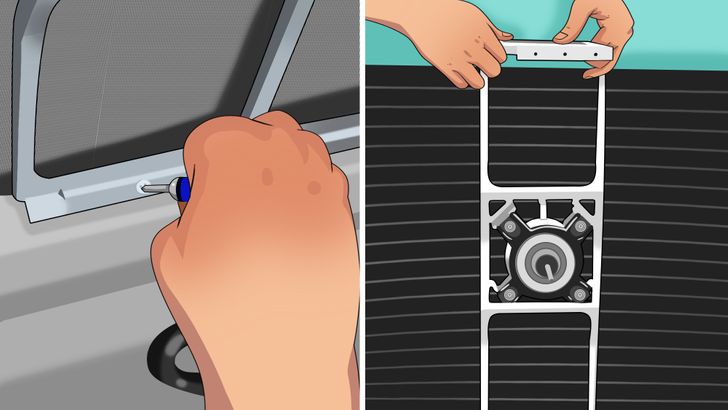
Step #6. There is a frame behind the fan. Use a screwdriver to remove the screw that secures it from the bottom. Then grasp the top edge of the frame and slowly pull it up and toward you to remove it from the lower mounts.
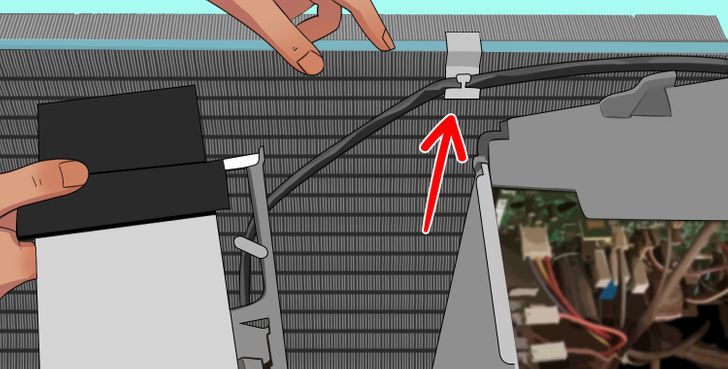
Step #7. Carefully bend the mount to release the cable. Move the frame to the right side to get access to the condenser.
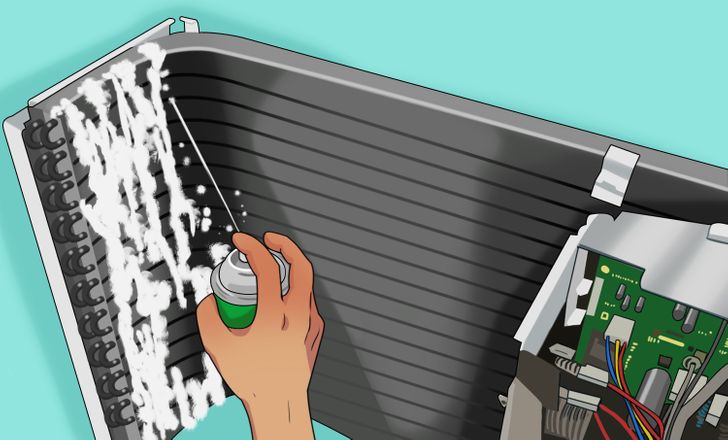
Step #8. Apply the cleansing agent for ACs to the condenser following the instructions of the manufacturer. Wait until it gets dry and then repeat the actions in reverse order to place back all the parts of the external block of the AC to their initial positions. Now it’s ready! After that, connect the AC to its power source and use it as usual.
An important note: We should note that in any case, it’s useful to periodically call a professional AC service. A specialist can check the efficiency of the AC, analyze its noises and vibrations, measure the insulation resistance, test the electronic system, measure the voltage at the compressor and terminals of the air conditioner, check the grounding, charge the refrigerant, and carry out other procedures to ensure that the air conditioner is working properly and safely.