How to Hang Photos on the Wall Nicely

Photos provide us with pleasant memories about the important events of our lives and they can serve as great interior decoration. The photos make homes look really warm and cozy. However, to make photos really work for you, it’s not enough to just hammer a nail into the wall.
5-Minute Crafts is sharing some ideas for how you can place photos in any interior. And at the end of the article, there is a bonus feature about the most common mistakes we make when hanging photos and paintings.
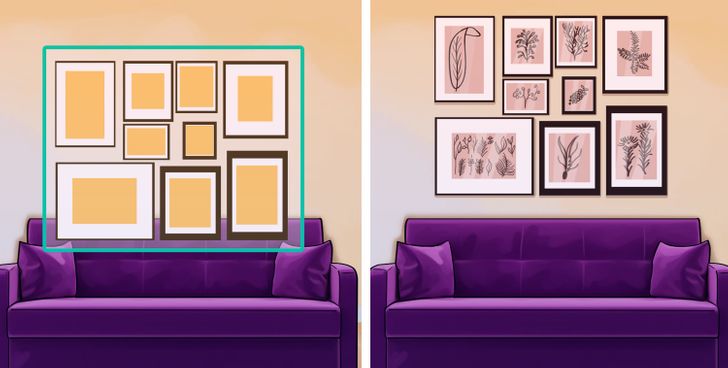
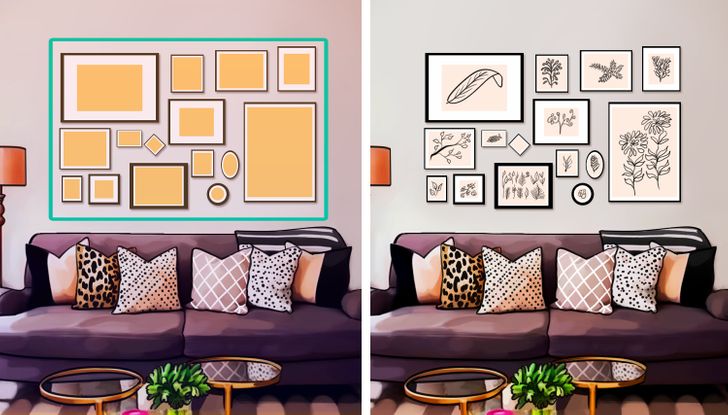
Outer align
Place the photos so that the outer edge of the frames makes a big square or a rectangle. This is why it’s called “outer align.”
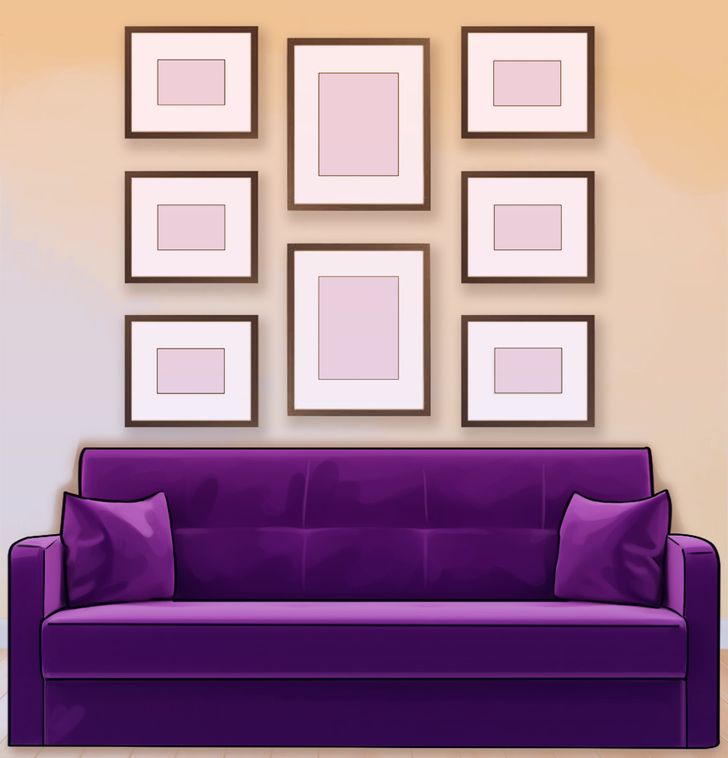
On the center
In order to use this plan, choose 1 or 2 frames to be in the middle, and the photos on the right and on the left should be symmetric.
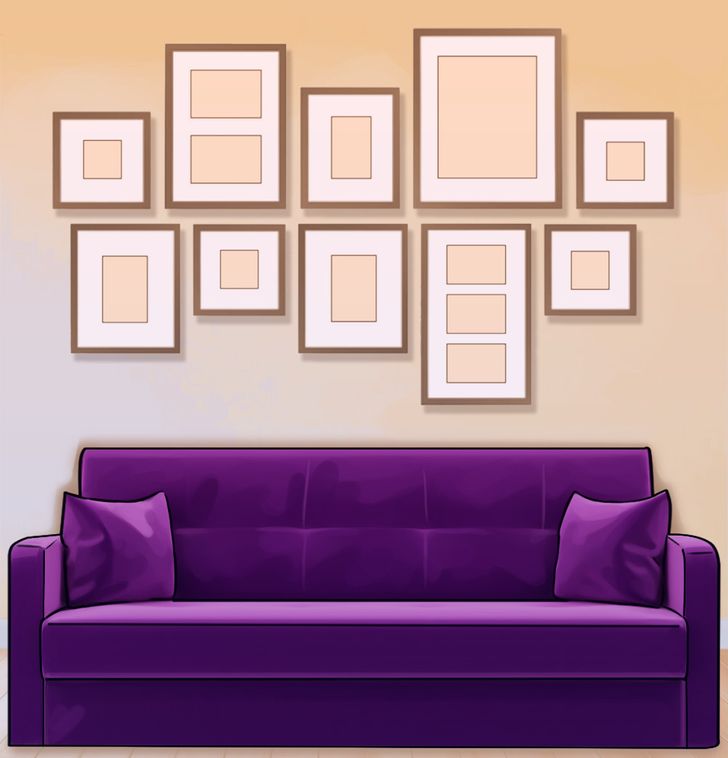
Reflection
Place the photos along the horizontal line below and above it to make them look like reflections of each other.
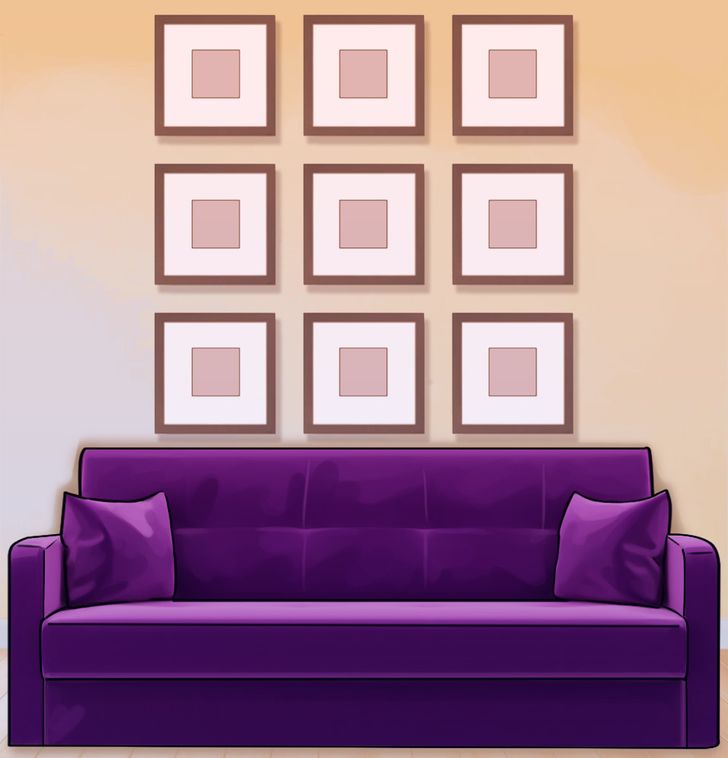
9 squares
This is a popular plan. Just hang 9 photos in identical frames. The frames should be aligned on the outer edge and be at the same distance from each other. This is good for the home or an office.
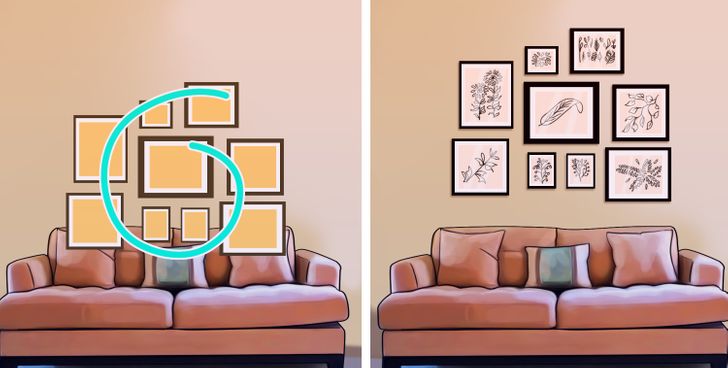
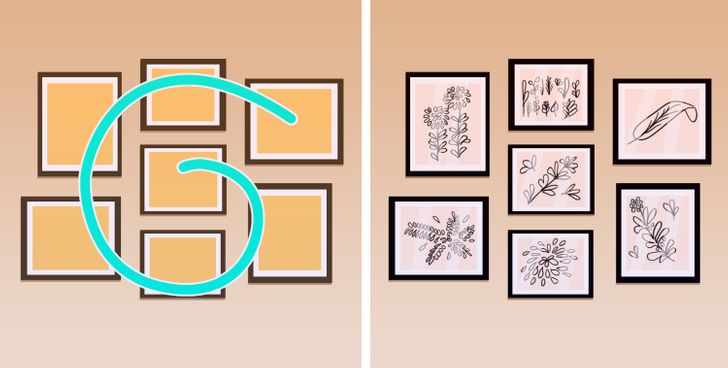
Spiral
Start with the center piece and place the others around it in a spiral. Leave identical gaps between the frames.
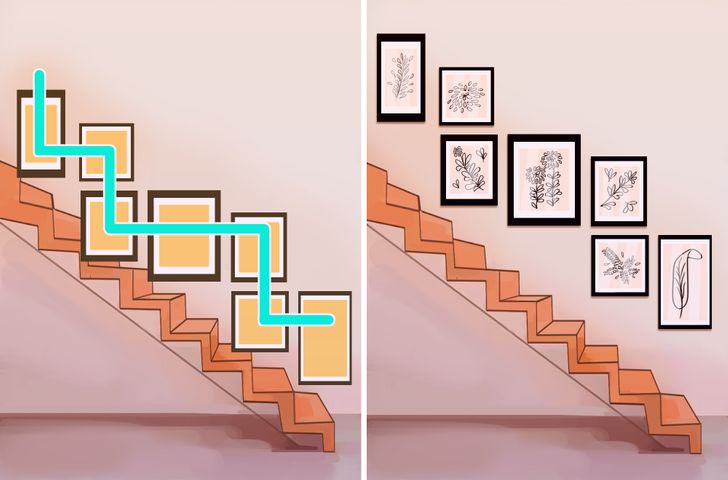
Staircase
Make a staircase of photos...along a staircase.
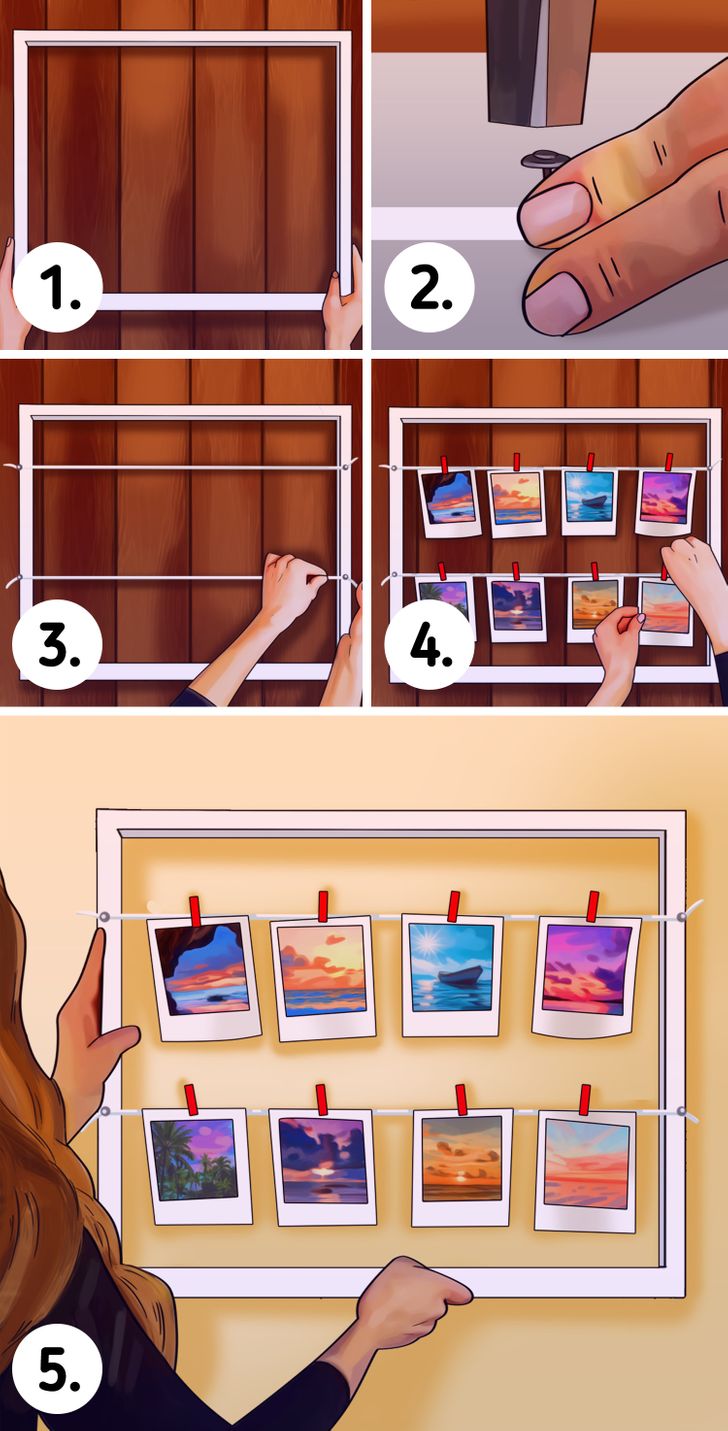
Clothespins
1. Take a big frame.
2. Hammer 2 nails on the edges.
3. Put a rope between the nails.
4. Print out your favorite photos and put them on the rope with small clothespins.
5. Hang the frame on the wall. You can easily change the photos if you get tired of them.
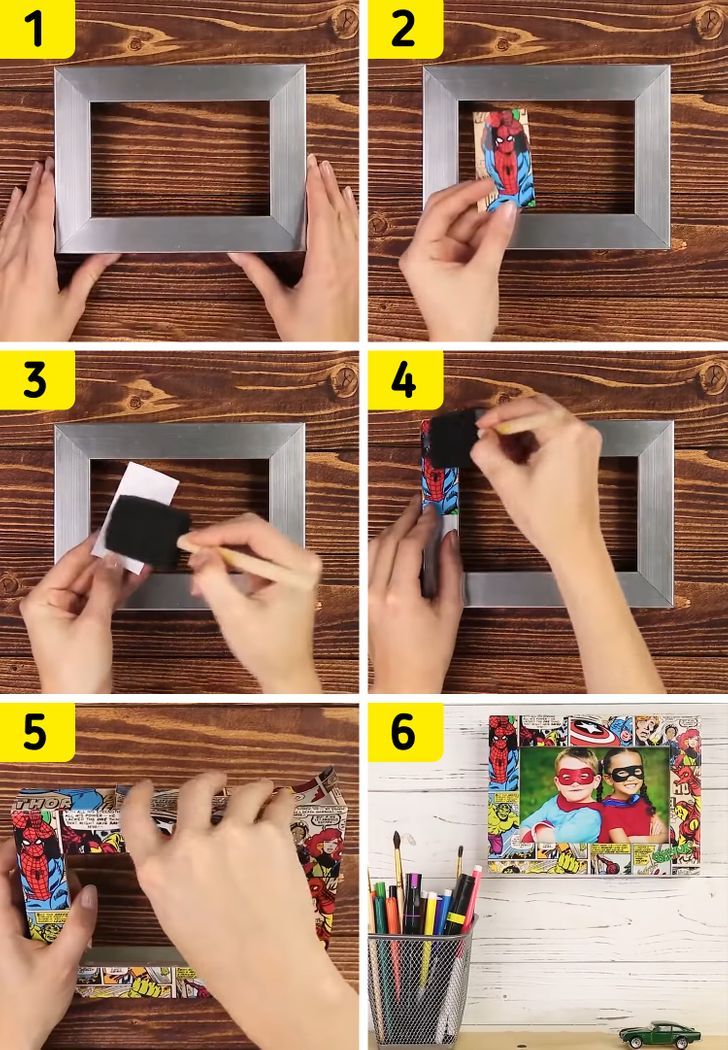
Comic book frame
1. Take a wide photo frame.
2. Cut out comic book strips.
3. Use glue to attach the pictures to the frame.
4. Make sure you cover the entire edge of the frame.
5. Place the photo into the frame. This frame will look great on your kid’s desk.
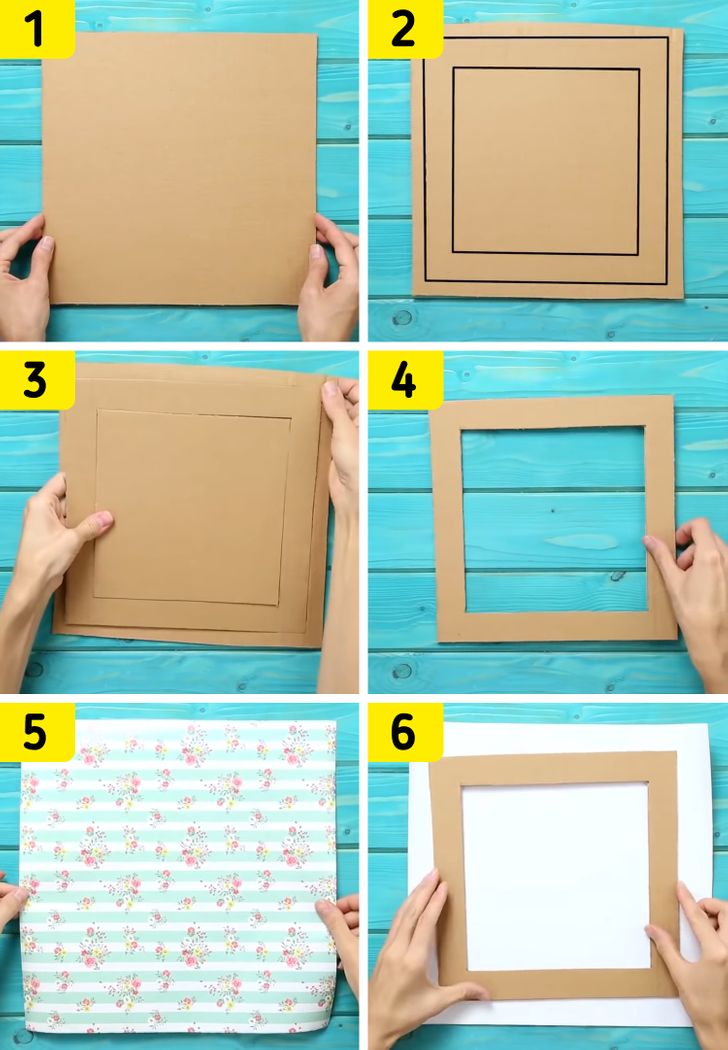
Cardboard frames with wrapping paper on them
1. Take a square piece of thick cardboard.
2-4. Cut out a frame.
5. Pick a piece of wrapping paper in a color and pattern that you like. The paper should be square-shaped as well but a bit bigger than the frame. It should be enough to cover the edges on all the sides.
6. Place the cardboard frame on the back of the paper.
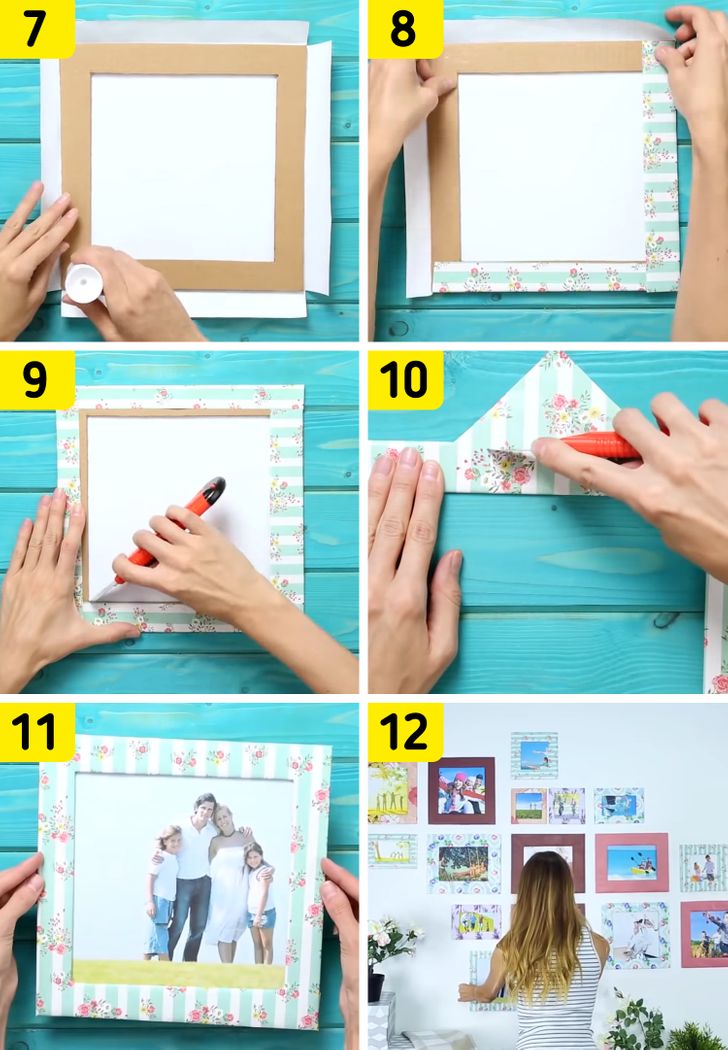
7. Fold the paper around the frame on each side. Cut out the corners of the wrapping paper as the photo shows. Put some glue on each side of the frame.
8. Attach the wrapping paper to the frame.
9. Use a box cutter to cut the frame and make room for a photo.
10. Put some more glue on the back of the frame. Use a box cutter to get rid of the extra wrapping paper.
11. Put a photo into the frame.
12. Decorate the wall with your new frames.
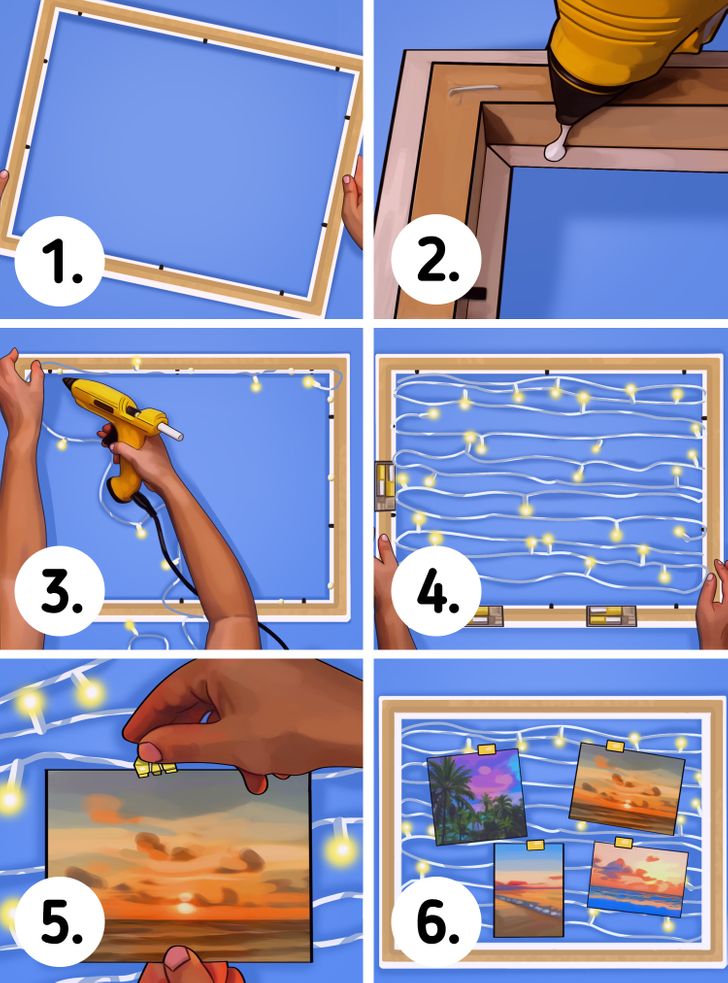
Christmas tree lights
1. Take a big frame and flip it so its back is facing you.
2 and 3. Use a glue gun to attach Christmas tree lights to the frame.
4. The lights should have batteries in them. Fix them to the frame too.
5. Use pins to attach the photos to the lights. Be careful not to damage the wires.
6. Hang the frame on the wall.
Bonus: typical mistakes we make when hanging pictures and photos
- Placing photos and paintings too high on the wall
Photos should be about 145 cm to 150 cm from the floor to the center of the picture. This is a standard distance. It also works if you have several photos or pictures. The group should be treated as one and its center should be 145 cm to 150 cm from the floor. - Placing photos too high above furniture
The lower part of the frame should be about 10cm to 15 cm from the upper edge of the furniture. This distance allows you to keep some connection between the photo and the furniture. - Placing very small photos on big walls
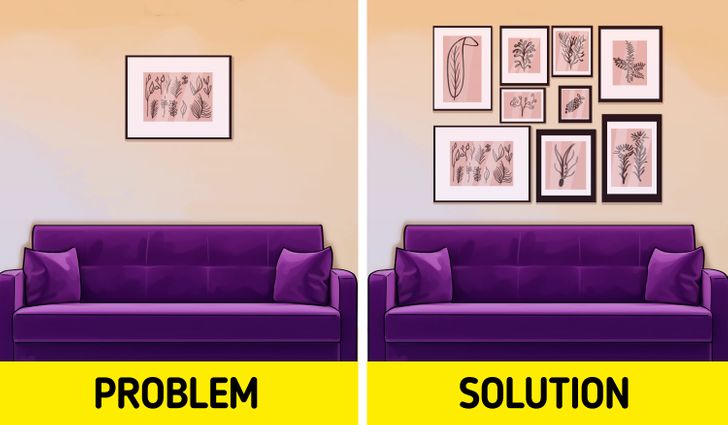
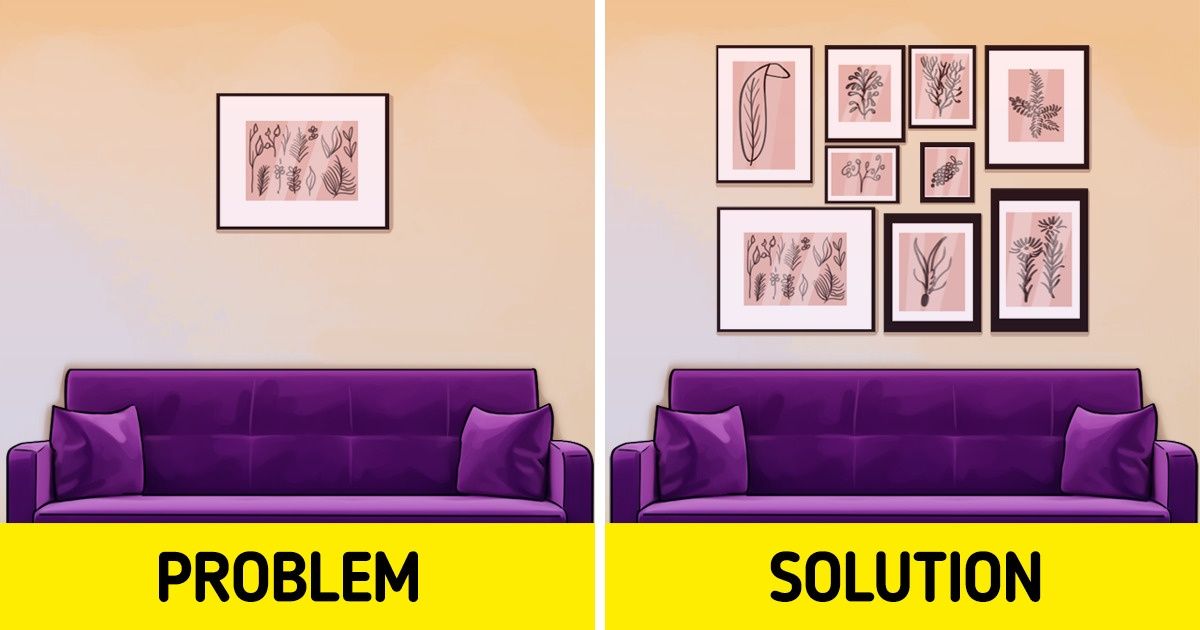
If you have a big wall and small photos, hang several photos in a group. - Placing several photos too far from each other
If you’re hanging several photos on the same wall, treat them as a whole. The distance between each picture should be about 7 cm to 10 cm. - Using black and white photos with colored ones on the same wall
Colored photos attract more attention, so use black and white photos and colored ones on different walls or even in different rooms. - Placing a group of completely different photos on the same wall
This could be classic family photos with pets and retro pictures, for example. Think about the story you want to tell with your photos and group them accordingly.
5-Minute Crafts gets commissions for purchases made through links in this post.
