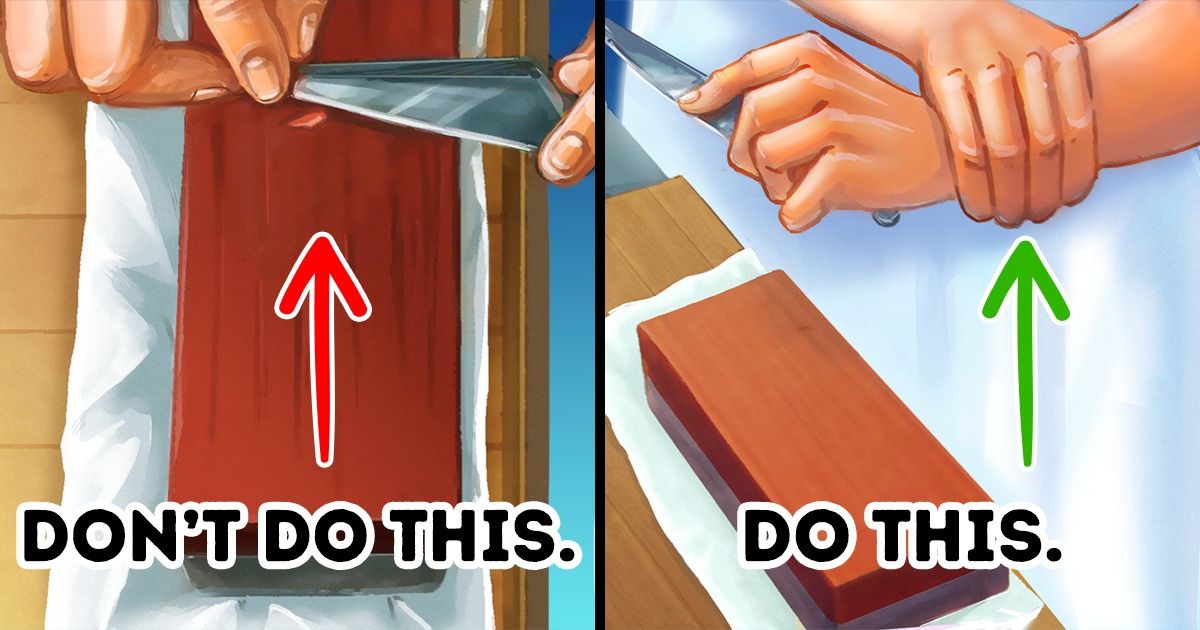
How to Sharpen a Knife
Cooking isn’t just about mixing ingredients in a pot. In fact, it’s an entire process, from going to buy your ingredients at the market to cleaning up after yourself in the kitchen. Cutting ingredients is an essential part of the process, and having sharp knives can make your life easier and safer (dull knives can be very dangerous). That’s why 5-Minute Crafts has put together a tutorial to help you sharpen your kitchen knifes at home.
- There are many techniques to do this. We chose one that doesn’t require too much special equipment and left some tips along the way in case you want to go pro.
- It’s not really recommended to use knife sharpeners or electric sharpeners because they can damage your knives.
1. Gather your supplies.
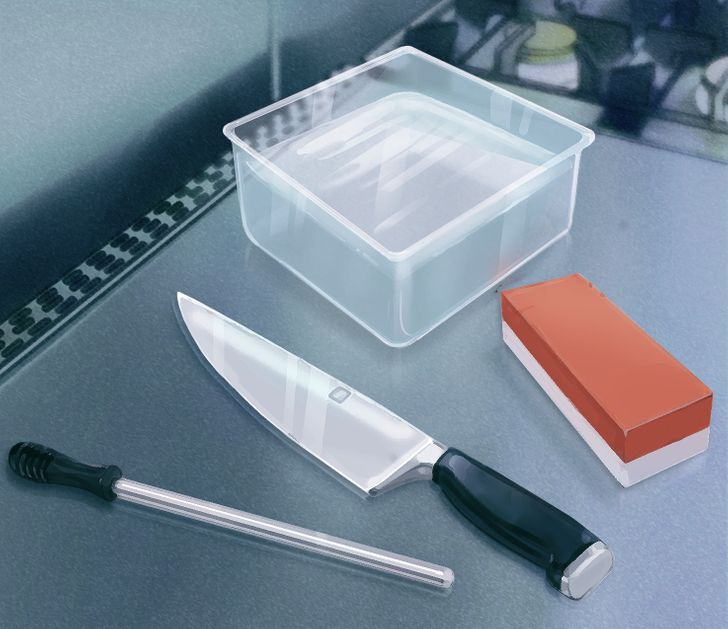
In short, these are the items you’ll need:
- A whetstone (possibly more than one)
- Water
- A honing rod
Note that there are many types of whetstones. Chefs like Brad Leone use kits with several whetstones, each with a different grit expressed in numbers. The lower the number is, the coarser the whetstone is.
- Less than 1,000 grit is typically used to repair knives with chipped edges.
- 1,000 to 3,000 grit are used to sharpen dull knives.
- 4,000 to 8,000 grit are finishing stones and are used to refine your knives’ edges.
For beginners, stones with grit between #3,000 and #6,000 will produce acceptable results. Some whetstones are double-sided and have both a “coarse-grind side” and a “fine-grind side.”
2. Make the whetstone wet.
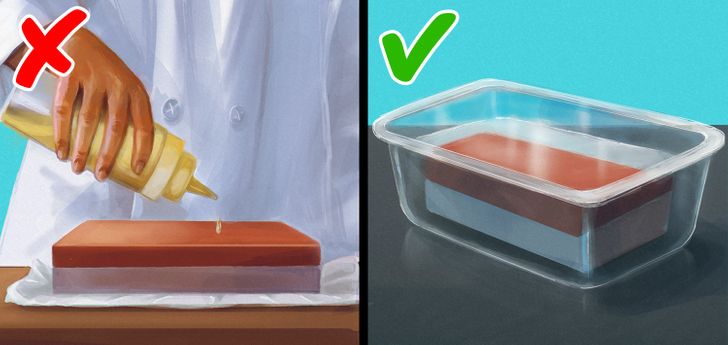
Water is the main lubricant in this process. Some stones need to be soaking in water, while others don’t need to be. Read the instructions of your whetstone carefully to know which kind you have. If yours needs to be soaked, submerge it in water and wait until there are no bubbles rising up. Then wait for 5 to 10 minutes.
- Tip: Never use oil or any other lubricant with a whetstone. If your whetstone seems to be drying out as you’re sharpening a knife, rub more water on it.
3. Put your knife at a 20-degree angle on the whetstone.
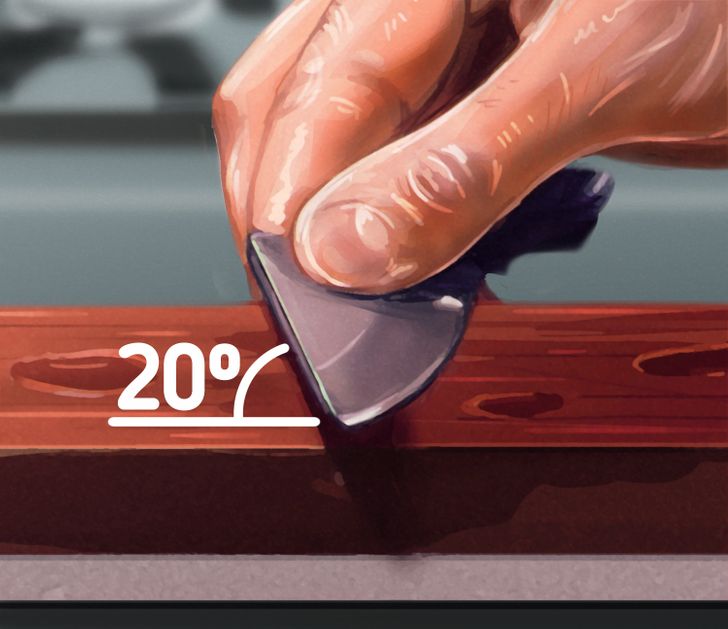
Before actually using the whetstone to sharpen the blade, you need to find the angle at which you will sharpen the knife. Typically, you have to leave, more or less, 20 degrees between the upper part of the blade and the stone.
- Tip: The 20-degree angle is just an approximation that works fine for most knives. Depending on the type of knife you’re working with, the angle may vary. Ideally, you have to find the exact angle for the bevel of your knife by moving the blade up and down until you feel the edge is leveled with the whetstone.
4. Gently move the knife over the coarse grit side of the stone.

To maintain this angle, try to lock your wrists, elbows, and shoulders. Then move the blade across the stone, rotating nothing but your hips. Make sure you move in one direction, only away from you. The most important thing is to make an equal number of even strokes on each side of the blade.
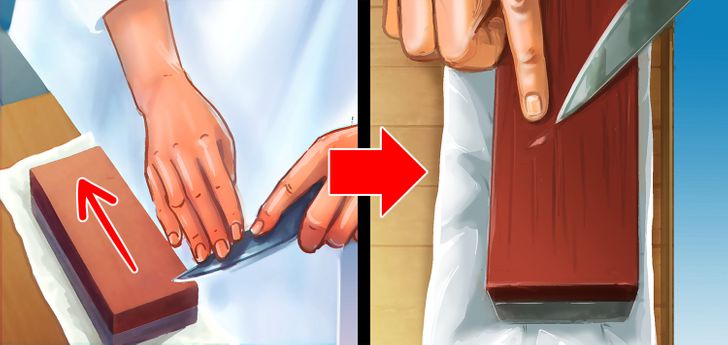
Tips:
- It’s possible to sharpen a knife by going back and forth along the whetstone, but it’s harder to maintain the angle that way. If you’re a beginner, you might end up digging into the stone, which means you’ll have to start the process all over again.
- Apply 6 to 8 pounds of pressure. You can use a scale to press your knife against if you aren’t sure what that feels like.
5. When a burr appears on the edge, move onto a finer grit.
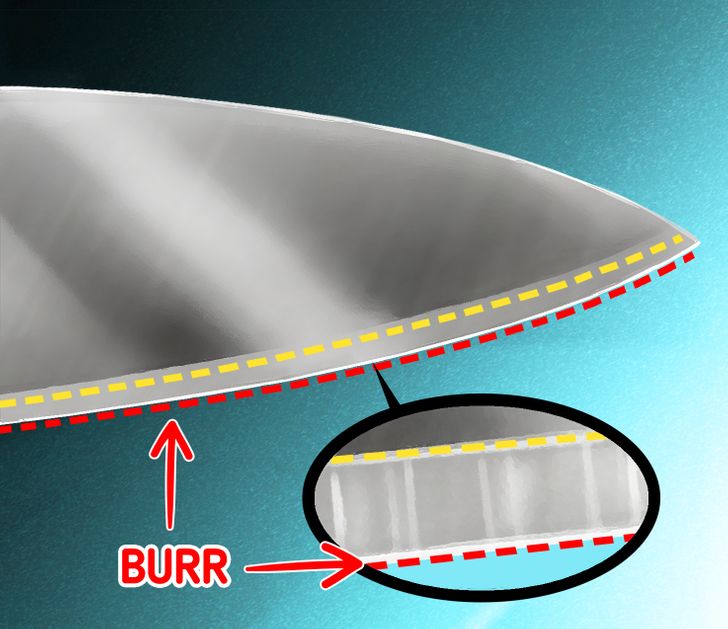
To know if you are ready to move on to a finer grit, you should check if the entire edge of the knife has a burr. A burr is a bit of waste metal forming at the edge. When present, you will feel a slight catch as you move your thumb perpendicular over the edge. Continue working on the coarse grit if you still see any inconsistencies over the blade’s edge or any chips instead of this burr.
Now you’re ready to move on to the finer grit in order to polish the edge. Maintain the same angle and make the same movement as you did in the previous step. Do repetitions of 10 on each side, 3 times.
6. Do a magazine check.
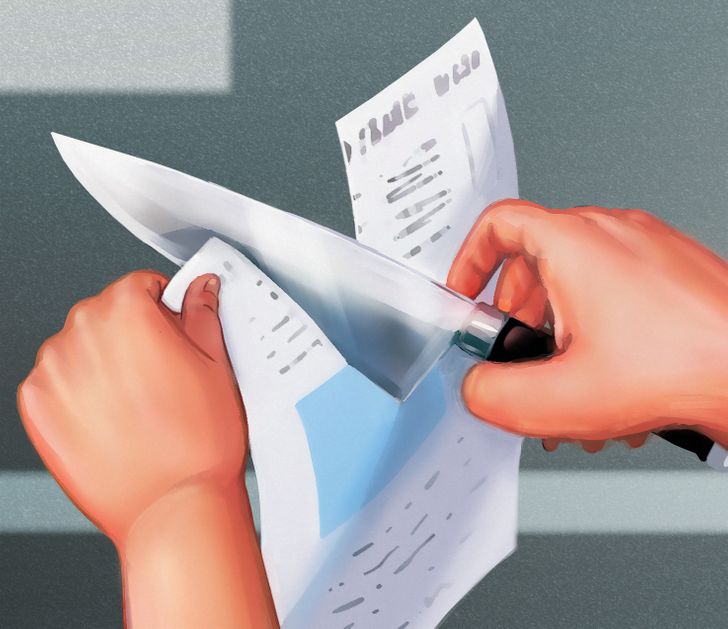
To check if you’ve managed to get a super sharp knife, try to slice a folded magazine page. A sharp blade will easily slice the paper, whereas a dull knife will just rip the paper apart. Another way to check is by trying to cut into a tomato or onion. If the blade doesn’t slide off the edge and no pressure is required to cut through, you’ll know that you’ve reached the right level of sharpness.
Bonus: how to hone a knife

Honing and sharpening are different processes. Honing knives straightens out the cutting edge on the blade to get smoother and safer cuts, but it doesn’t sharpen it. It’s recommended to hone your knives on a weekly basis.
- Find an angle of about 20 degrees between the blade and the honing rod while holding the latter still.
- Starting at the heel of the knife and the top of the hone, pull the knife toward you as you let the blade slide down using very light pressure.
- By the time the blade reaches the bottom part of the hone, you should be at the tip of the knife. Swipe 3 or 4 times per side.
- Tip: Avoid letting the tip of the knife slide off the edge of the hone. Try to stop while it’s still on the hone or you run the risk of rounding the tip over time.