How to Change a Tire
While changing a tire isn’t a very complicated operation, there are a few things you should know in order to do it safely and efficiently. 5-Minute Crafts has put together a step-by-step tutorial for how to change a tire.
1. Find a safe place to pull over.
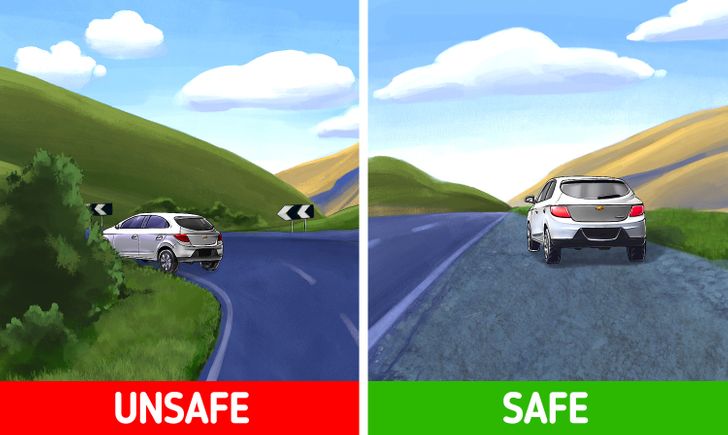
Always make sure your safety is your top priority, not your agenda or the tire. Instead of just pulling over on the side of a busy highway or street, which are fairly dangerous places, you should keep driving, even with a flat tire. Experts recommend slowing down to about 20 mph until you find a quiet side street, a wide shoulder, a parking lot, or a long, straight and, if possible, flat road.
Remember:
- If you suspect you have a flat tire, grip the steering wheel firmly.
- Never slam on the brakes.
- Take your foot off the gas pedal and let the car slow down gradually.
- Never stop in bends in the road.
2. Turn on your hazard lights.

It’s essential to make sure people can see you and your car and know that you’re stopping because of an emergency, and in this case, changing your flat tire. That’s why, no matter where you’re parked, you have to turn on your flashing hazard lights. If you’re changing your tire on the road, it’s extremely important to put reflective triangles or flares behind your vehicle.
3. Check to see if you have everything you need.
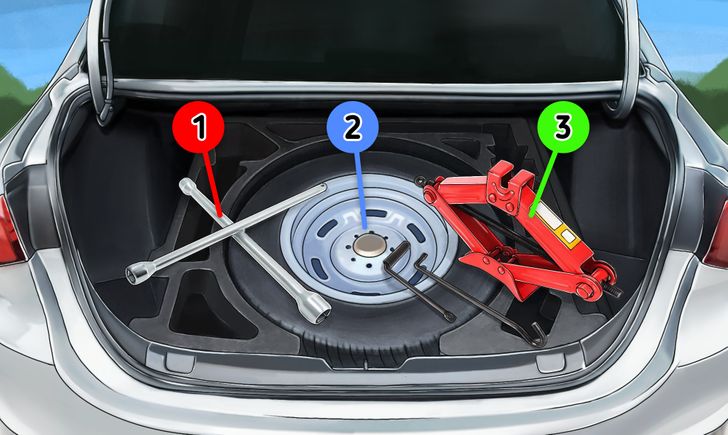
At the bare minimum, you’ll need:
- A wrench
- A spare tire
- A jack
Most cars come equipped with these, so if you’re reading this article because you had a blowout, chances are you’ve got the essentials in the trunk of your car. However, if you’re not in an emergency situation, you might want to consider having the following items in your car as well.
- A flashlight
- Gloves
- A mat for kneeling
- A rain poncho
- A tire gauge
- Your vehicle’s owner’s manual
Make sure all the items you need are easily accessible before you start taking care of the flat tire.
4. Loosen the lug nuts.
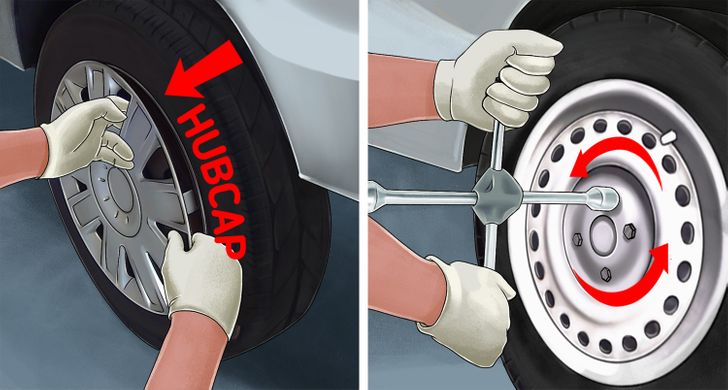
Some car models come with hubcaps to cover the lug nuts. If that’s the case, pry them off before loosening the lug nuts. Once that’s done, secure the wrench onto a lug nut and turn it counterclockwise to loosen it. Do the same thing with all lug nuts until they’re loose enough to turn by hand.
5. Lift your car.
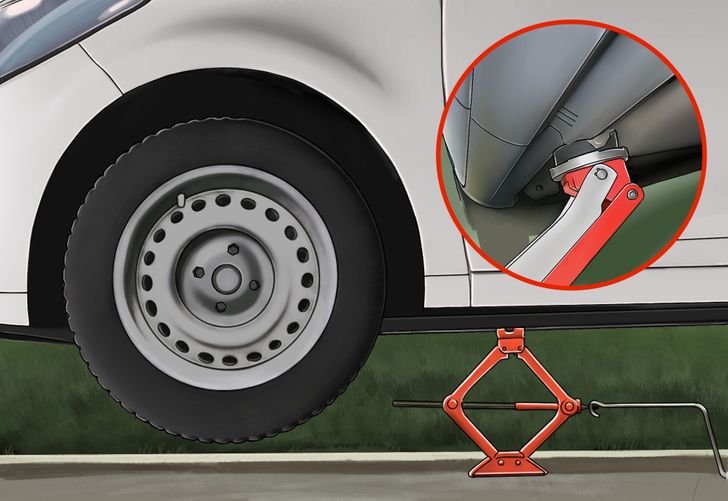
Secure the jack (see note below) and use it to raise the tire you’re about to change off the ground. Make sure that the jack stays perpendicular to the ground at all times (that’s why it’s a good idea to find a flat road, as we indicated in point 1).
- Note: Lifting your car with a jack is a delicate operation. You can’t just place it anywhere under the car and lift it. The right jack placement can vary depending on your vehicle. When looking under your car, you’ll see that some parts are made of plastic, and others, from metal. As a rule of thumb, you should never place the jack under any plastic part or molding. In most cases, placing it under the metal portion of the car’s frame is the way to go. But to be completely sure, your best option is to consult your owner’s manual.
6. Remove the flat tire.
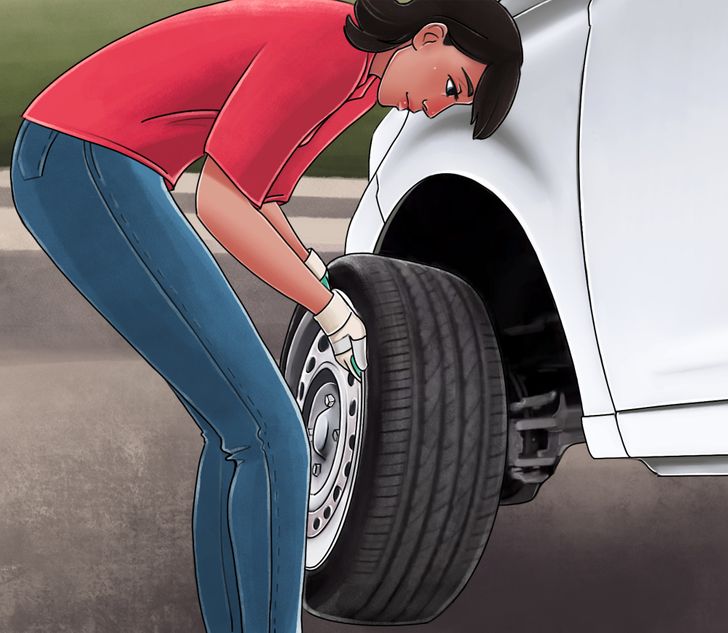
Manually, turn the lug nuts counterclockwise until they’re all very loose and remove them. Keep them all together in a safe spot. Then grip the tire securely and pull it toward your body.
7. Put on the spare tire.
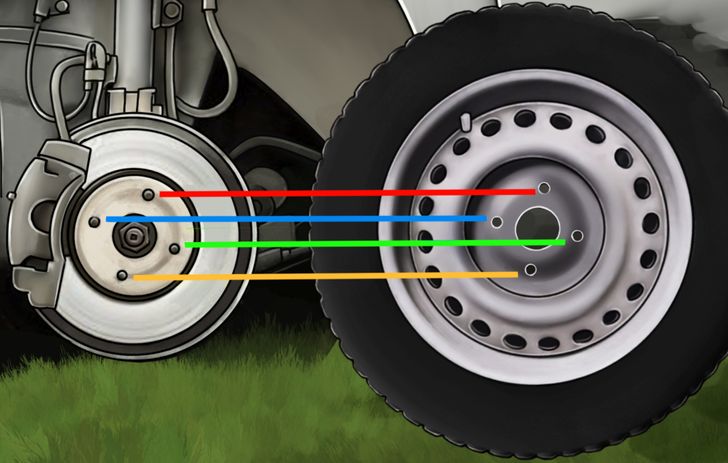
Pick up the spare tire and line up the holes with the lug nut posts. Carefully place the spare on the wheelbase and push it as far onto the wheelbase as possible.
8. Place the lug nuts on without tightening them all the way.
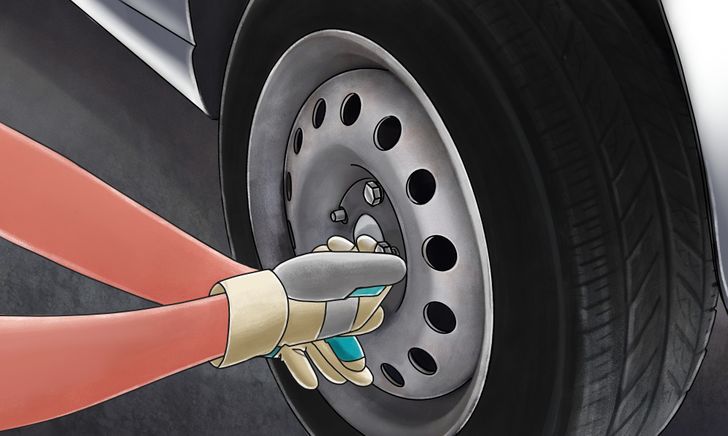
9. Lower your car until the tire touches the ground and tighten the lugs a bit more.
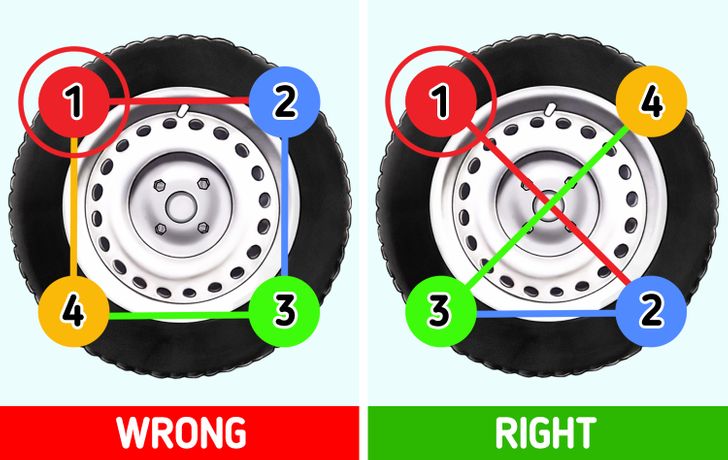
Use the jack to lower your vehicle until your spare tire starts touching the ground. That will help you hold the tire in place as you begin tightening the lug nuts. To ensure an even alignment, tighten the lug nuts in a star pattern. Don’t tighten lug nuts that are immediately adjacent to one another.
10. Lower the car completely and finish tightening.

Once the lug nuts feel equally tight, lower the car to the ground. Then continue tightening the lugs in the same order as you did before. Don’t forget to place the hubcap on again (if possible) and put everything in the back of your car. Try to go to a car shop as soon as possible to either fix the old tire or get a new one.