6 Ways to Locate Where a Picture Was Taken That Will Turn You Into a Geography Expert

A frustrating yet common occurrence is stumbling upon a picture online without any information about where it was taken. This issue can be solved by a multitude of methods, some of which include using coordinates that can be found inside the picture file.
5-Minute Crafts has prepared a guide that goes over this and other information you can use to find where a picture was taken, as well as the tools that will aid you on your way.
What is EXIF data?
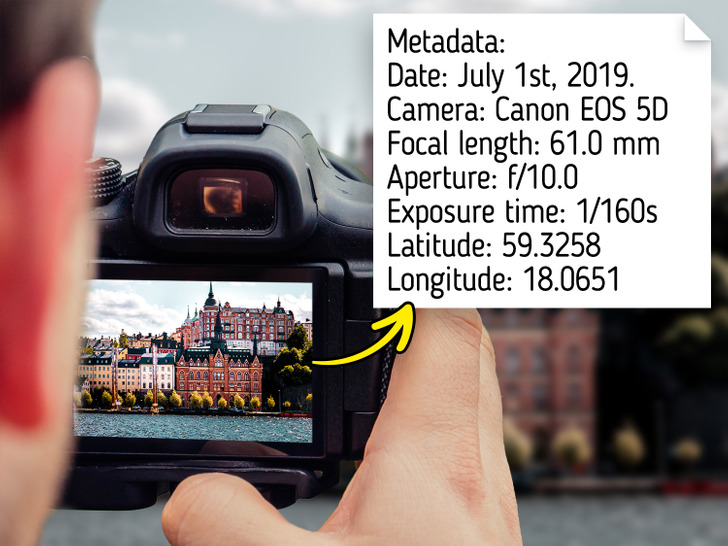
EXIF stands for EXchangeable Image File Format, a standard that stores specific metadata from the moment a modern camera takes a picture. The information that can be obtained from a picture’s EXIF data includes, but is not limited to:
- Model of the camera.
- Lens type.
- Technical settings such as focal length and ISO.
- Date and time.
- Coordinates, if your device has GPS capabilities.
The main practicality of it stems from the fact that you can check the EXIF data of a picture to both replicate what worked as well as improve on what didn’t in a specific setting, but taking full advantage of this data means that you can find out other important details, like where a picture was taken.
Pictures that don’t have EXIF data
While it is true that most modern photos have EXIF data, finding a picture online that has it may be challenging. Many social media services and websites, like Facebook and Instagram, remove EXIF data during the process of reformatting the uploaded images, so any picture from there will not have any EXIF data stored.
A further limitation here is that .JPG—also known as .JPEG—is the only web-friendly format that supports EXIF data, meaning other common image formats like .PNG and .GIF will not work. Finally, EXIF data can be removed from a picture, just like the GPS tracking options can be turned off from your device or camera app.
Where to look for EXIF data.
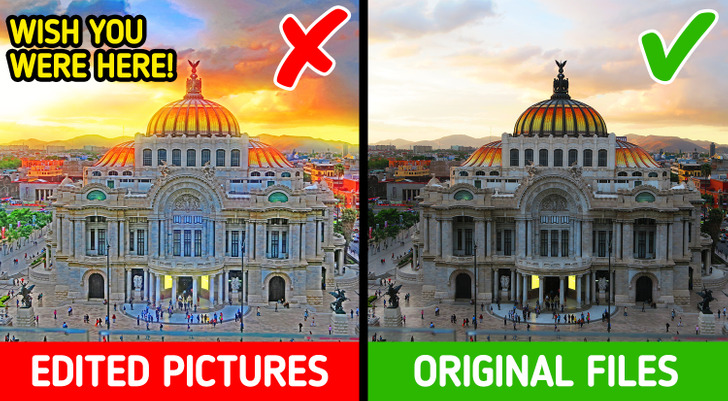
Any sort of overwriting or modification that is done to an image will likely wipe out the EXIF data stored in it, which means that your best bet will be looking for the original version of the image. A good place to find an original file is a photographer’s personal website, provided that the hosting service they use doesn’t delete the image’s metadata.
Even if you stumble across a picture that does have EXIF data, chances are you won’t be able to see it from your web browser. In order to access this kind of information—and see if there are any GPS coordinates—you will need to use different tools that can analyze the image file.
1. Use reverse image search.
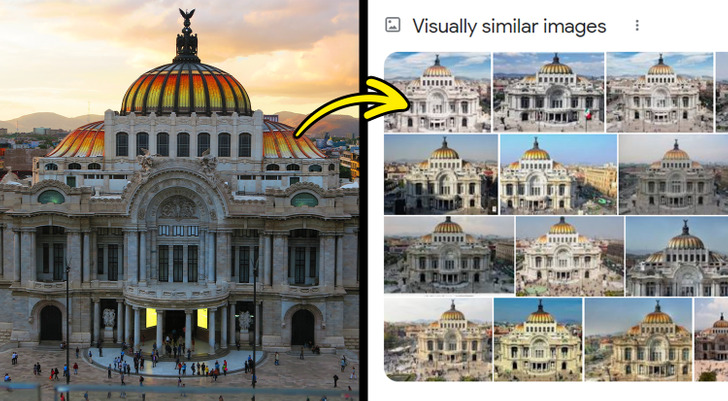
Conducting a reverse image search is a good way to find the original source of an image, which has a realistic chance of either having metadata or valuable contextual information. Additionally, a reverse image search will also yield images that are similar to the one you provide, which is another opportunity to find information with regards to where a picture was taken.
Google Images and TinEye are 2 of the most famous reverse image search engines. However, they work in different ways, which means that they will also provide different results. For this reason, it’s better to be safe and run your image through more than one reverse image search engine.
2. Check websites that natively display EXIF data.
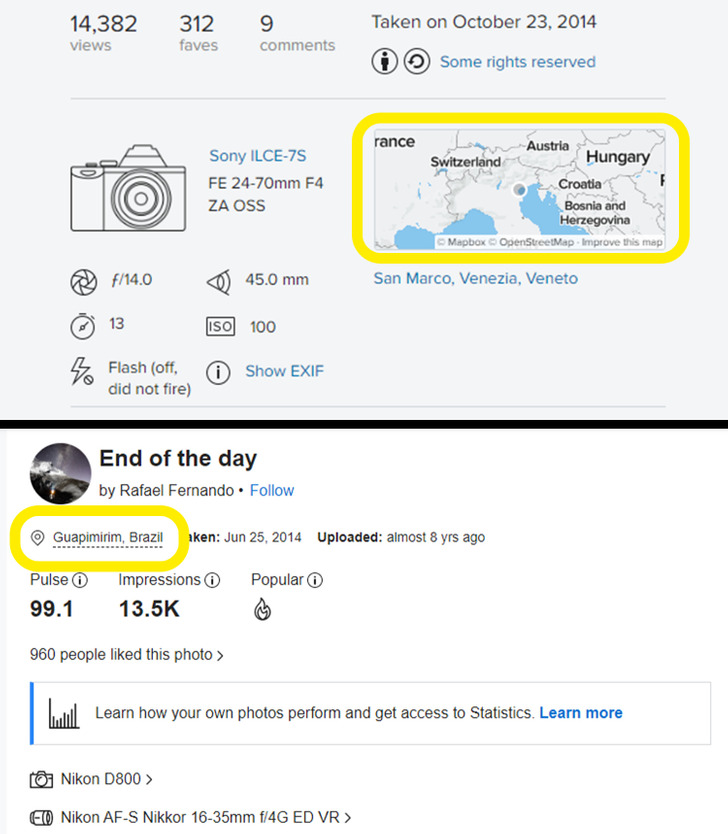
Since EXIF data is likely to be removed when a picture is uploaded to the internet, it’s a good idea to become acquainted with different websites where the metadata may be visible. Flickr, 500px, and WordPress are among the websites that, on occasion, will show the EXIF data from an uploaded picture as a way to share details about the settings that were used. Simply look for the picture’s description and you’ll see any available EXIF data, including location.
Websites like these are likely to be more useful if you are looking for sources through reverse image search. Whether it is by means of displaying the file’s EXIF data or by simply adding in more contextual information elsewhere, websites like these can offer a simple, time-saving solution.
3. Check for EXIF data in your computer.
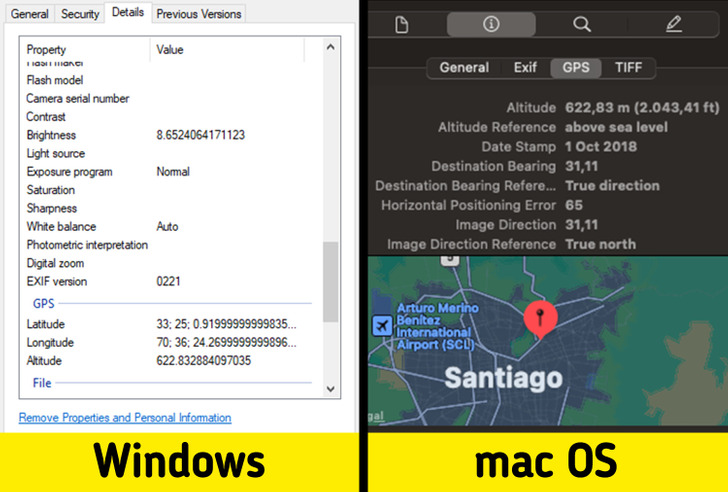
If you already have the file on your computer, you can easily check the file’s EXIF data through your operating system’s capabilities. If you’re using Windows, simply press the right click button on the file, click on properties, and then go to the Details tab. If the picture has EXIF data related to the coordinates where it was taken, you will find it under the GPS section.
If you are using a mac OS computer, you can open a picture with the Preview app, and then click on Show Location Info under the Tools menu, which will take you to a window where you can find the GPS coordinates.
4. Use websites that are online EXIF viewers.
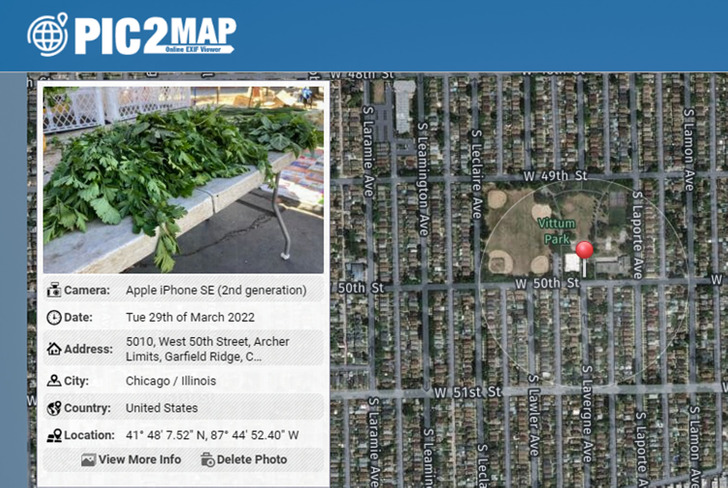
Your computer’s operating system is not the only way to look into a picture’s EXIF data. You can also go to websites whose purpose is to analyze a photograph and let you know if there’s any EXIF data related to the location where it was taken.
5. Input GPS coordinates in Google Maps.
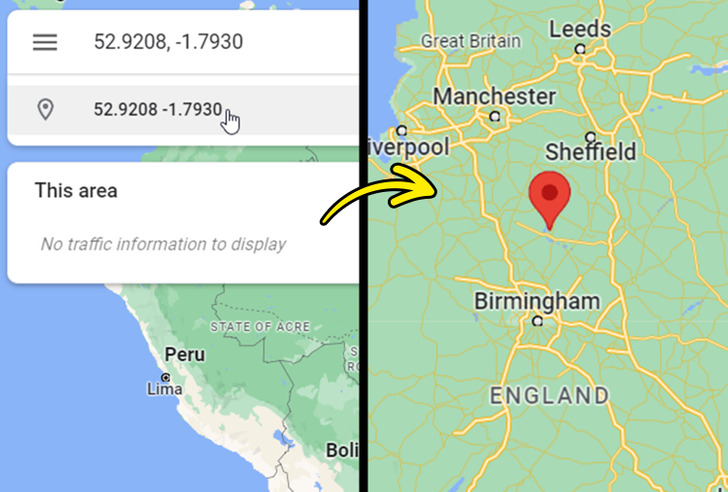
If you were successful at finding a picture’s location within its EXIF data, you will get GPS coordinates. With that information, you can simply head to Google Maps and input the coordinates in the search bar to find out where the picture was taken.
Make sure to input the latitude first and the longitude second, separated by a comma. You can format the coordinates by either using decimal degrees, degrees, minutes and seconds, or degrees and decimal minutes.
6. Use Google Lens for identifiable landmarks.
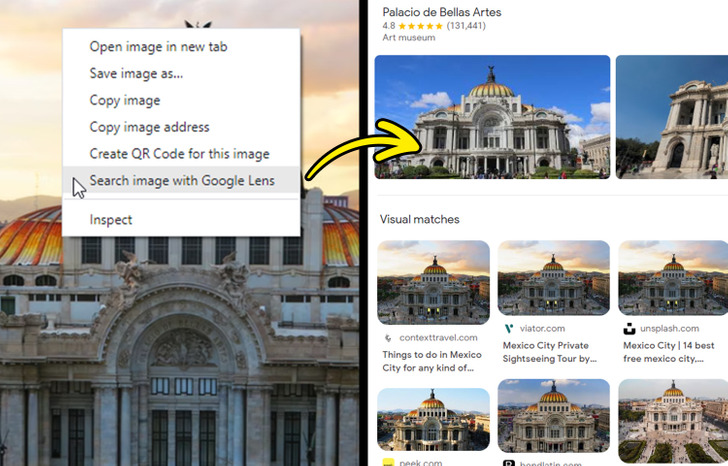
One last technique you can resort to is one that does not involve any EXIF data. If you’re using Google Chrome as your browser, you can use Google Lens to compare a specific element in your picture to other online images, allowing you to potentially find other pictures that were taken in the same place. To use it, simply right-click on an image and choose, “Search image with Google Lens,” which will open a panel on the right side with the most relevant results pulled from other websites.
This method will be particularly useful if the picture that you’re using has any identifiable landmarks or buildings that Google can identify.
