9 Useful Lifehacks for Microsoft Word
It seems there is nothing easier than creating a document in Microsoft Word. You just open the program, type your text, and format it. But usually, this approach slows down your work. The process can be optimized with these simple tricks.
5-Minute Crafts put together 9 lifehacks that will make your work in Microsoft Word easier and save your time.
Lifehack 1: Use templates
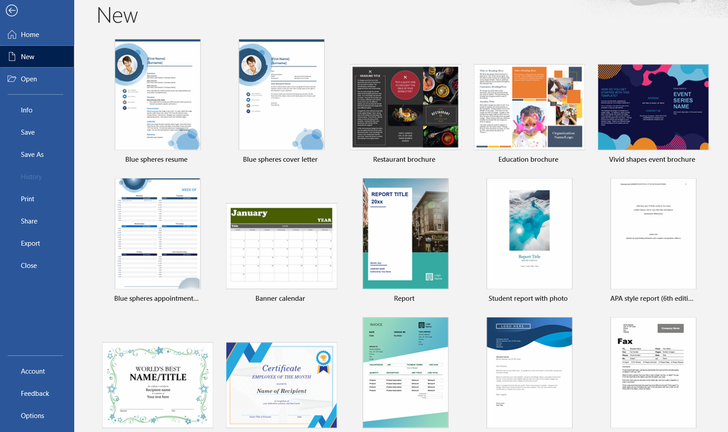
You can find hundreds of helpful templates with various designs for any occasion. Use them if you want to create:
- a calendar
- business cards
- a resume for your job search
- a project presentation
- an ad
- leaflets
- a project report
- a cafe or restaurant menu
- an invitation to a wedding, birthday party, or house party
- a birthday card, and many other things.
Lifehack 2: Remove automatic hyphenation
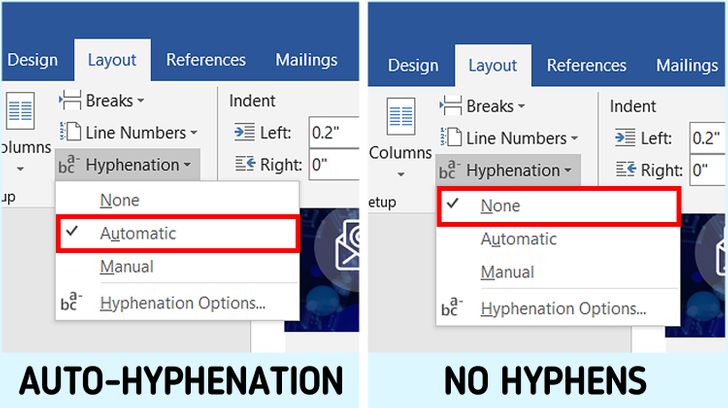
With the help of automatic hyphenation, words are split into parts, one of which is moved to the following line in accordance with the rules of orthography. You can turn off this function if you open Layout on the control panel and choose Hyphenation. Hyphenation is automatic by default. Choose None, and your computer will stop hyphening words.
Lifehack 3: Set tabs
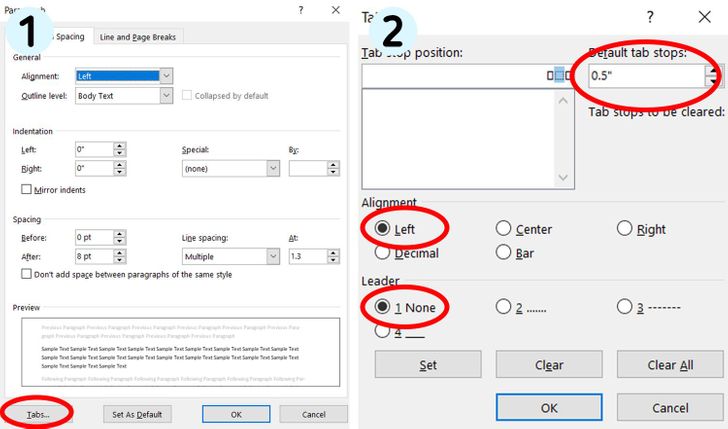
Tabs are a paragraph-formatting feature used to align text and to create a first-line indent. When you press the Tab key, Word inserts a tab character and moves the insertion point to the tab setting, called the tab stop. It’s set on 0.5 inches by default.
To set tabs, right-click on Paragraph menu. Click on the Tabs button at the bottom. Choose indentation size, its position in the text, and special symbols. For the latter, we usually choose None, but you can mark indents with dots, dashed lines, or a long underline.
Now if you need to have an indent in your first paragraph, you can press the Tab key, and the cursor will be set in the necessary spot automatically.
Lifehack 4: Replace words
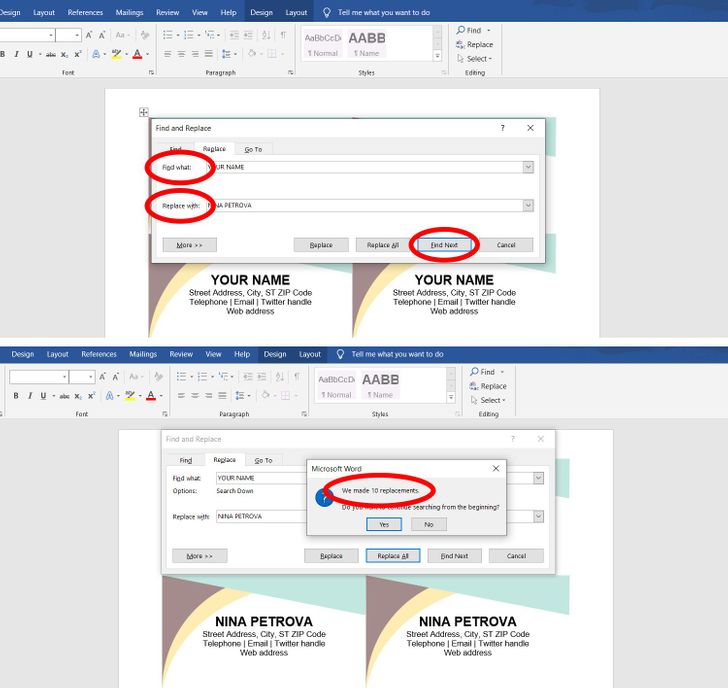
Let’s say you are designing your future business cards. You are using a template, and you need to change your name and contacts in the document. You can do it manually or use Find and Replace.
Choose Replace on the panel above or open the dialog box with Ctrl + H shortcut keys. Open the Replace section and type in the words that you need to change in “Find what.” Then type in words that you want to see in the final document in the “Replace with” line. Press “Replace all.” You will see new data in all the necessary spots after that.
Lifehack 5: Find any necessary data in a document
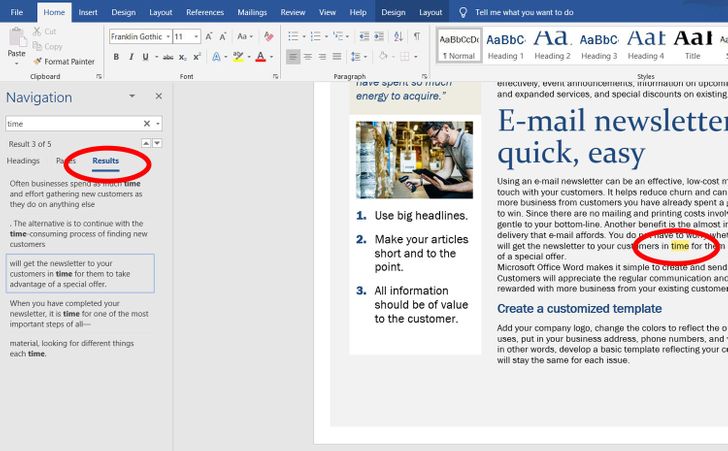
Use the Ctrl + F shortcut keys to find any words or sentences in a document. It’s convenient if the document is a few pages long and you’d otherwise have to spend a lot of time looking for the necessary words manually. Ctrl + F shortcut keys make this process easier and help you find what you need in just a short time.
When you press these keys, you will see a navigation pane appear on your left. Type in the keywords, and the program will find all the spots these words were used in the document. The results will be shown under the search line, while the keywords will be marked yellow in the text.
Lifehack 6: Change between styles
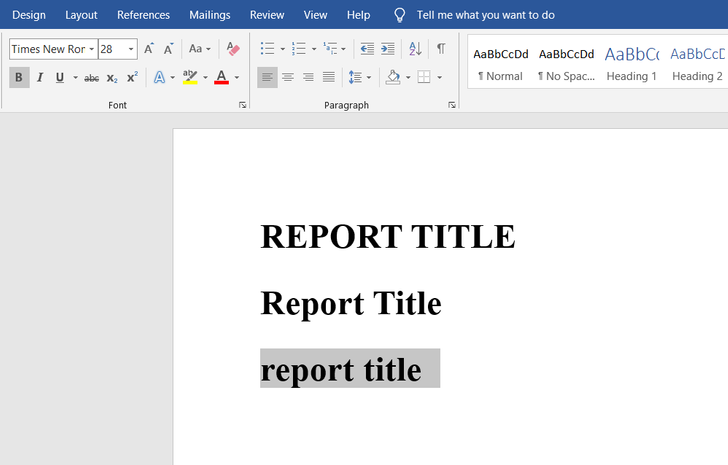
Sometimes you need to change the font style of words or sentences when working on a document. Like when a sentence is typed in uppercase letters, and you need them to be lowercase.
To avoid manual work, you can select the necessary word or sentence and then press the Shift + F3 shortcut keys. If the word has uppercase letters, they will become lowercase. By pressing the shortcut keys again, only the first letter will be capitalized. If you press the keys again, the uppercase will return.
Lifehack 7: Make your work faster with shortcut keys
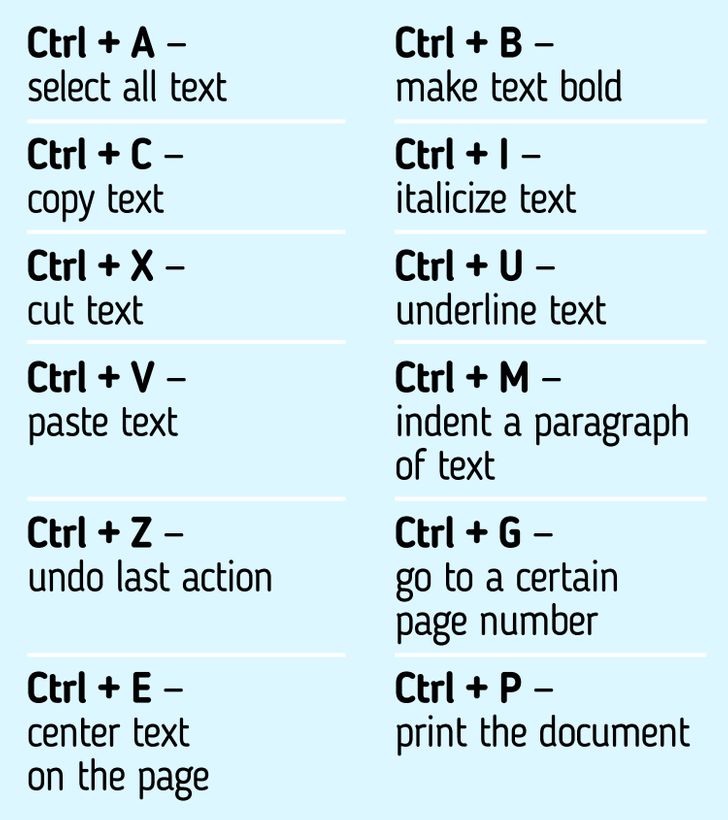
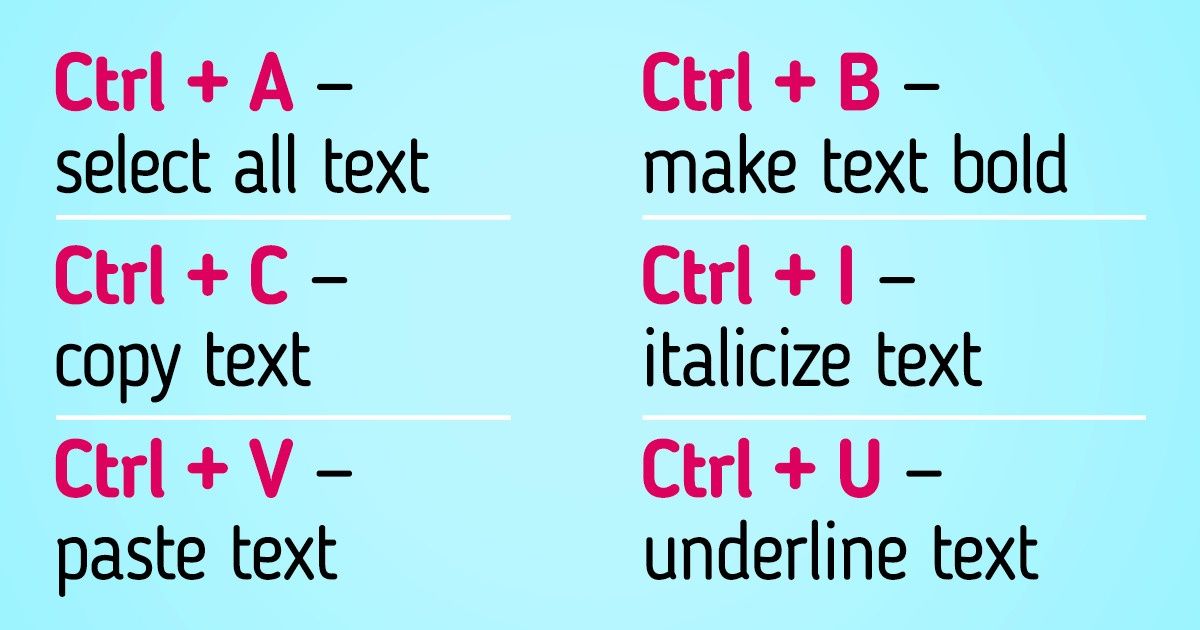
There are many shortcut keys that help you work in Microsoft Word faster. Here are the most popular ones:
-
Ctrl + A — select all text
-
Ctrl + C — copy text
-
Ctrl + X — cut text
-
Ctrl + V — paste text
-
Ctrl + Z — undo last action
-
Ctrl + E — center text on the page
-
Ctrl + B — make text bold
-
Ctrl + I — italicize text
-
Ctrl + U — underline text
-
Ctrl + M — indent a paragraph of text
-
Ctrl + G — g to a certain page number
-
Ctrl + P — print the document
Lifehack 8: Saving changes
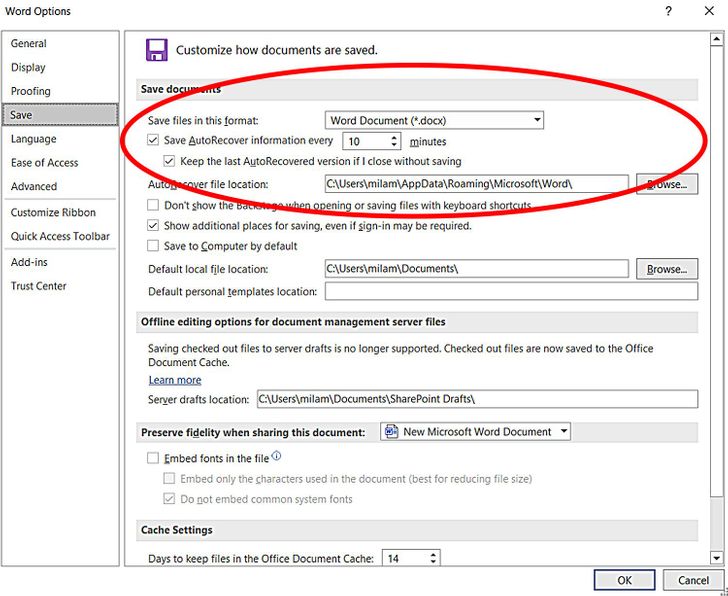
At least once, you’ve probably found yourself in a situation when you were typing a lot of text, and suddenly your computer freezes and has to be restarted. You also didn’t save the changes, so you had to try and remember and retype the text all over again. To avoid this issue, you can set up the AutoSave function. This will help you save all the changes after a certain period of time and return to them if your computer fails.
To set up AutoSave, click the File tab, then Options, and open the Save section. Check the boxes for “Save AutoRecover information every X minutes” and “Keep the last AutoRecovered version if I close without saving.”
Lifehack 9: Protect your document
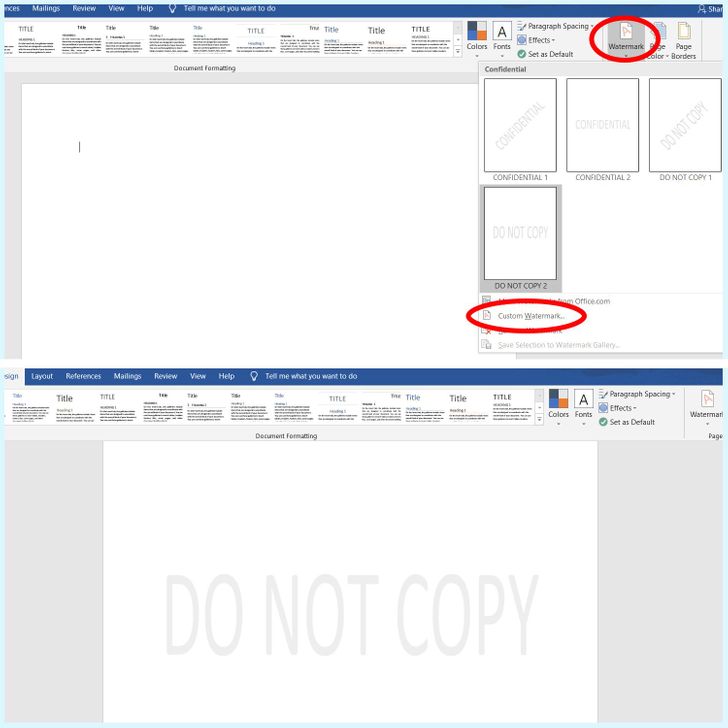
In order to protect your document from unwanted copying, insert a watermark. Open the Design tab on the control panel and click on “Watermark” in the right upper corner. The program will let you choose one of the templates or create a watermark by yourself.
Don’t forget to restrict access to editing the document in the end and save it as Read-Only. In this case, the recipients of the file won’t be able to change the document.
