How to Change Your Wi-Fi Password

You never know when you might need to change your home Wi-Fi password. A neighbor might be stealing your wireless internet connection, or you may have guests over and can’t remember the complicated password you currently use. It might seem confusing at first, but 5-Minute Crafts has prepared some hacks for you to change your password easily and swiftly.
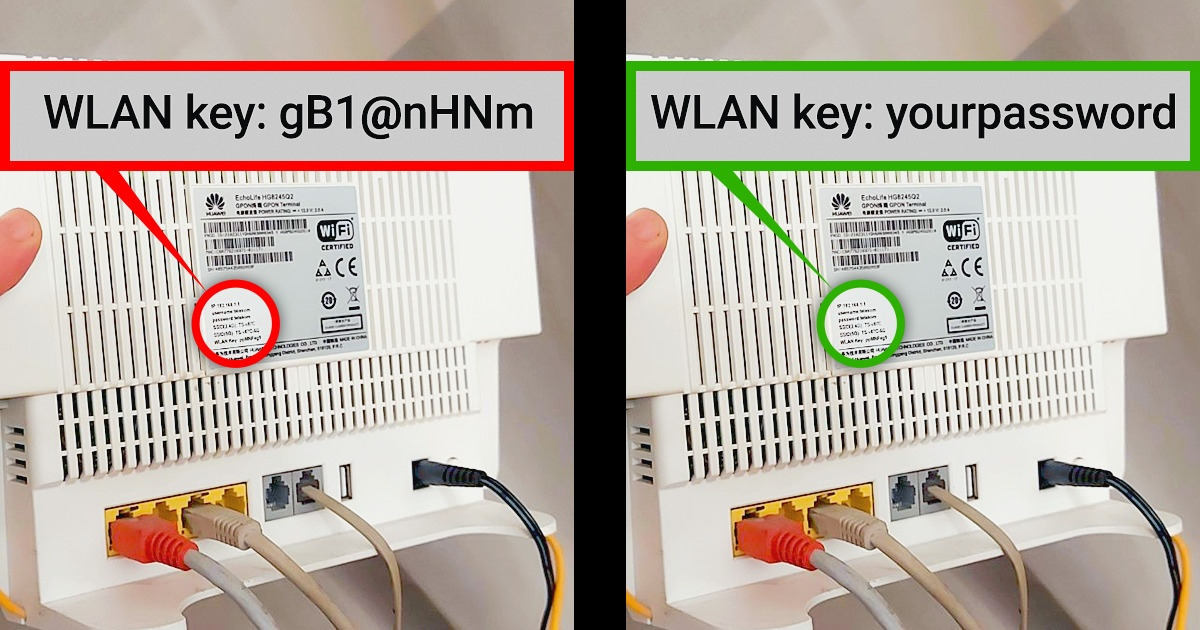
Why you should change the generic password
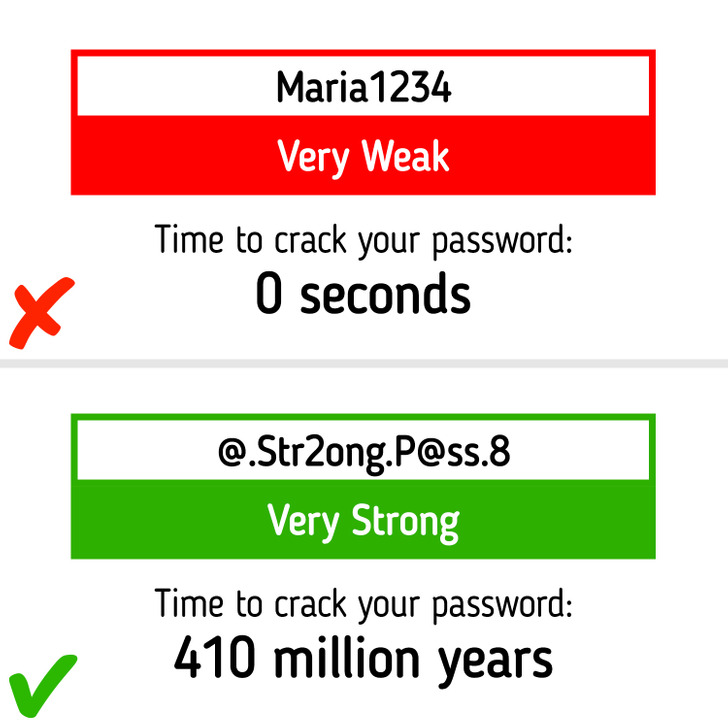
When you first install your router, it is highly recommended to change the generic password of your Wi-Fi connection for cyber security reasons. For example, if a hacker breaches your password, they’re likely to get access to any devices that are connected to your Wi-Fi network, get your personal information, or track you. Thus, you should invent a strong password yourself or create one using an online password generator. Check the tips on how to do it here.
Step 1. Check if your device is connected to the router.
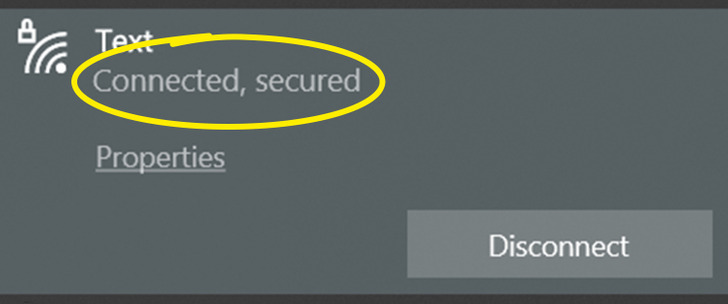
First, make sure that the device you want to use to change your Wi-Fi password is already connected to your router. If you are connecting your computer to the router for the first time or you simply don’t know the current password, you will need to do it using the Ethernet cable.
Step 2. Open a web browser.

Open any web browser (Google Chrome, Firefox, Safari, Mozilla, Opera, or Internet Explorer).
Step 3. Type your router’s local IP address.
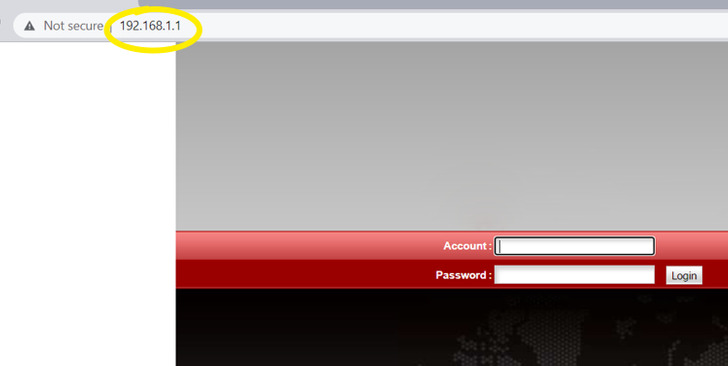
Type the local IP address of your router into the webpage bar and press “Enter.” What you need to know here is that the majority of routers use the same local IP address: “192.168.0.1”, “192.168.1.1” or “10.0.0.1”. Try out these options.
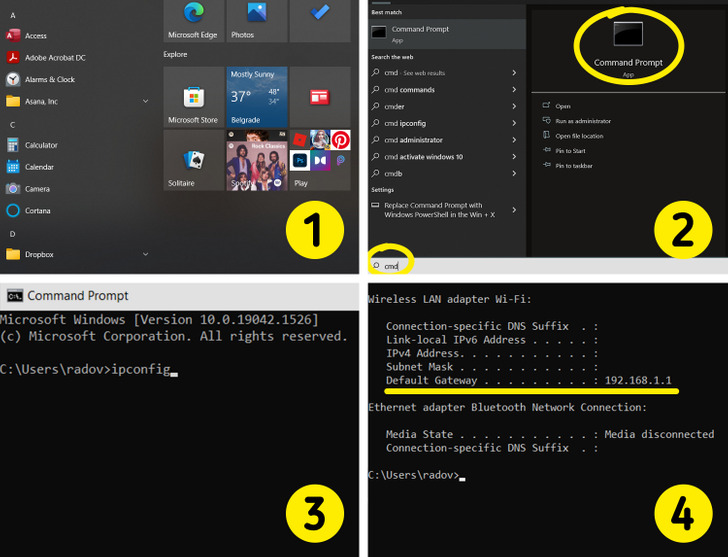
⚠️ If none of these work, use Command Prompt to find out your exact local IP address by following these steps:
- Click on the Windows Search bar in the “Start Menu.”
- Type “cmd” in the Search box. Press “Enter.”
- Type “ipconfig” in the command line. Press “Enter.”
- Find your router’s IP address in the Default Gateway line.
⚠️ If the warning “The connection is not private” pops up, you can disregard it. That is because your router is secure due to its local network and built-in security. Click “Advanced” and then “Continue” or “Proceed.”
Step 4. Type the credentials and sign in.
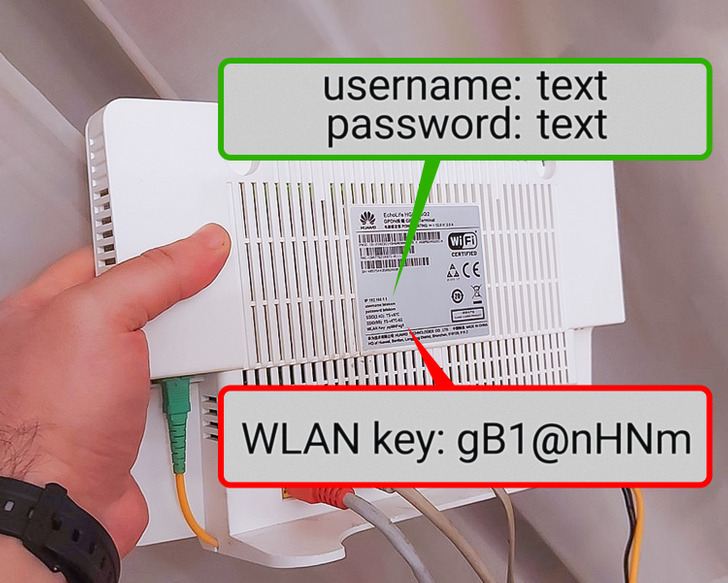
After you type your router’s user profile credentials (username and password), click the “Sign In” button. You will find them printed on the router or in the router’s manual. Actually, you should know that the username is often “admin” and the password is “password” or “admin,” but this can vary with different manufacturers.
If none of these options work, Google your router’s model to find out the exact log-in credentials.
⚠️ Please note that the username and password of your router differ from your Wi-Fi username and password.
Step 5. Find the “Wireless” tab.
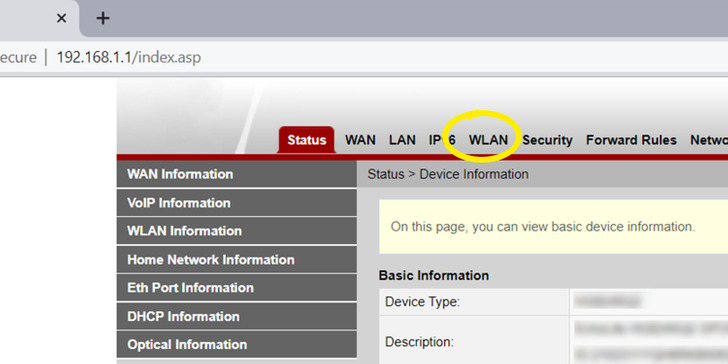
Click the “Wireless” tab. It can be named differently, it really depends on the router. If there is no such tab, you might need to look for the settings for your wireless router.
Step 6. Type your new Wi-Fi name and password.
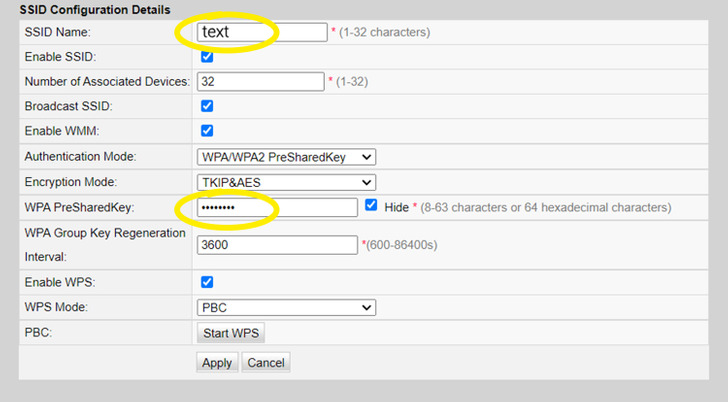
Find the text box next to “Name” or “SSID” (Service Set Identifier) and type your new Wi-Fi name and password.
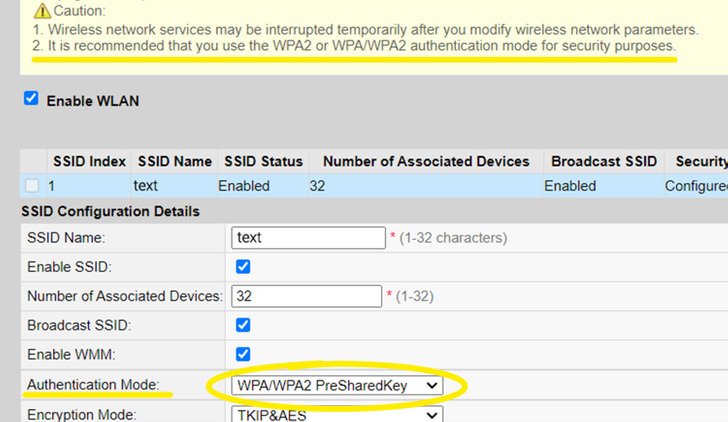
Step 7. Choose a security option.
Step 8. Save your changes.
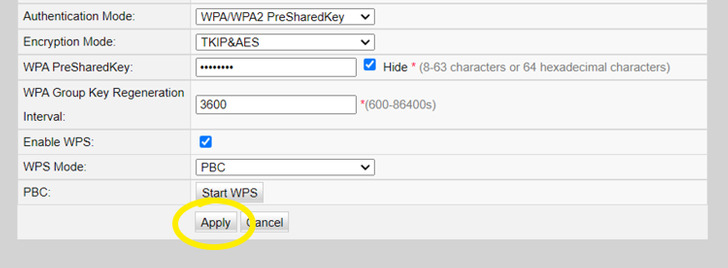
To finish the procedure, click the “Save” or “Apply” button. Otherwise, your router’s Wi-Fi password changes will not be implemented.
All your devices will get automatically disconnected after you apply the changes. You will need to reconnect them to your Wi-Fi network by signing in with the Wi-Fi password that you created.