How to Make a Backup Copy of Your Data in Windows

When we encounter serious problems with our PC, we often need to reinstall the operating system. All data gets erased in the process and, as a result, we have to then re-install programs and upload personal files to the hard disc. Fortunately, there’s an easier solution. A full Windows backup allows us to completely restore the system to what it was before the crash!
We at 5-Minute Crafts have prepared a guide for how to make a backup copy of all of your data on Windows 10. It will include all settings, installed programs, applications, and personal files present on the PC at the time you copy the system!
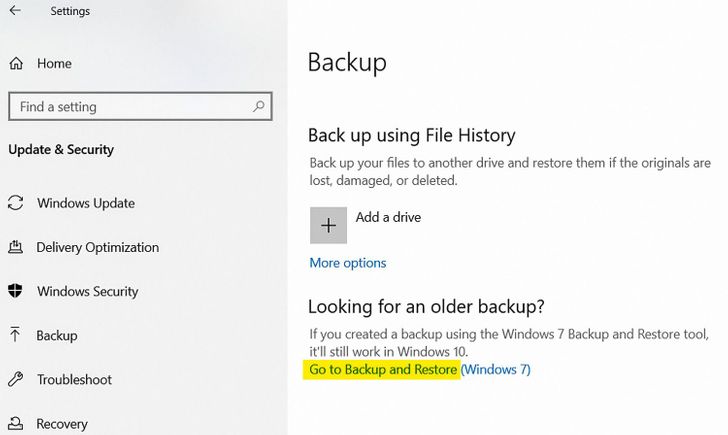
Step #1. Go to ’Settings’ and open the tab ’Update & Security.’ Select the ’Backup’ option. Then click ’Go to Backup and Restore’ at the bottom of the window.
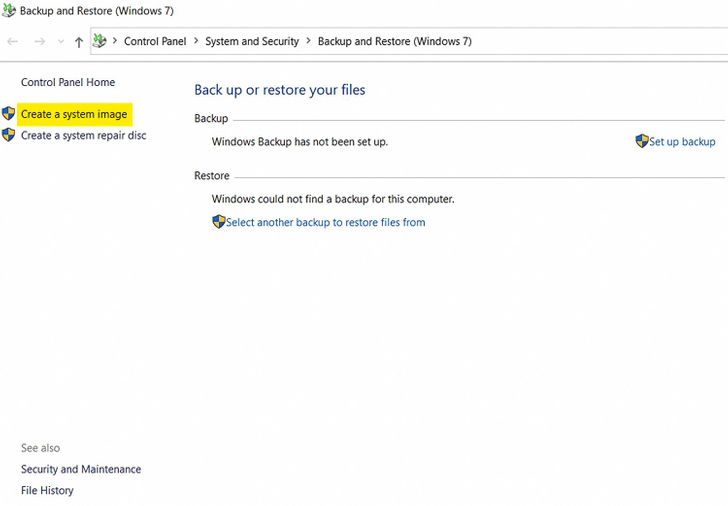
Step #2. In the window that opens, click ’Create a system image.’
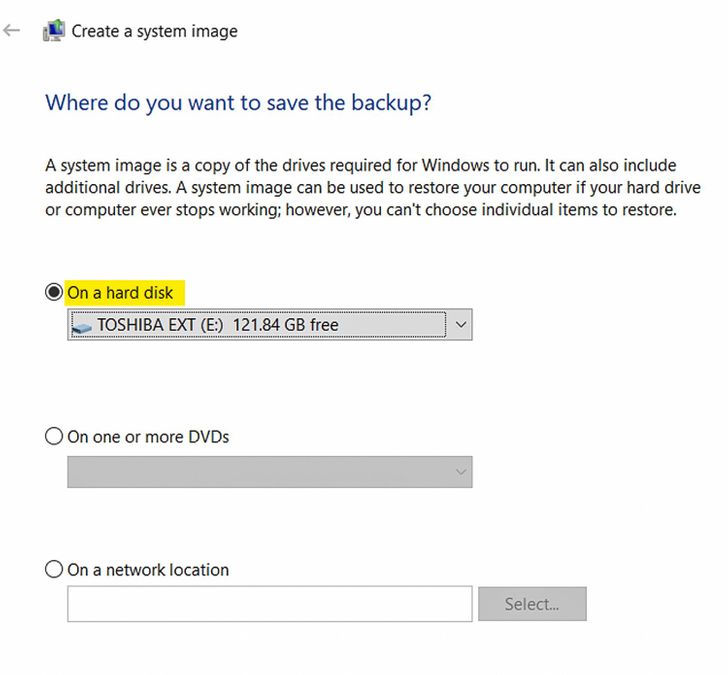
Step #3. In the next window, select where you want to save the system data: on an external storage device, a DVD, or a server. Most likely, the first option will prove the most convenient. Before you select this, don’t forget to plug in an external hard drive or a USB device.
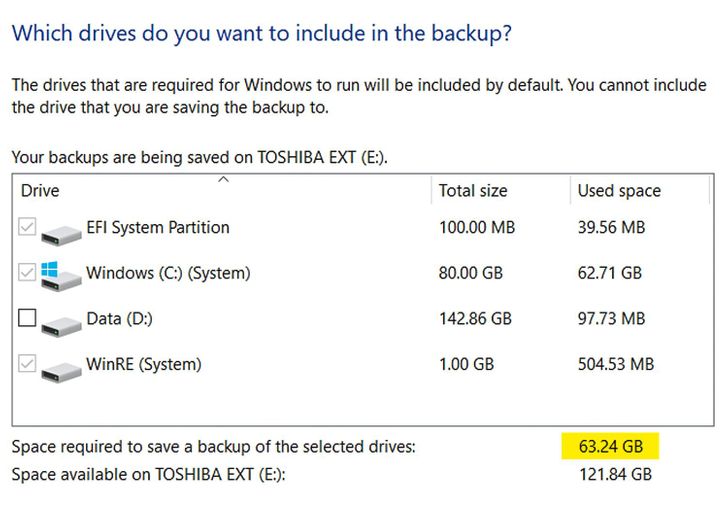
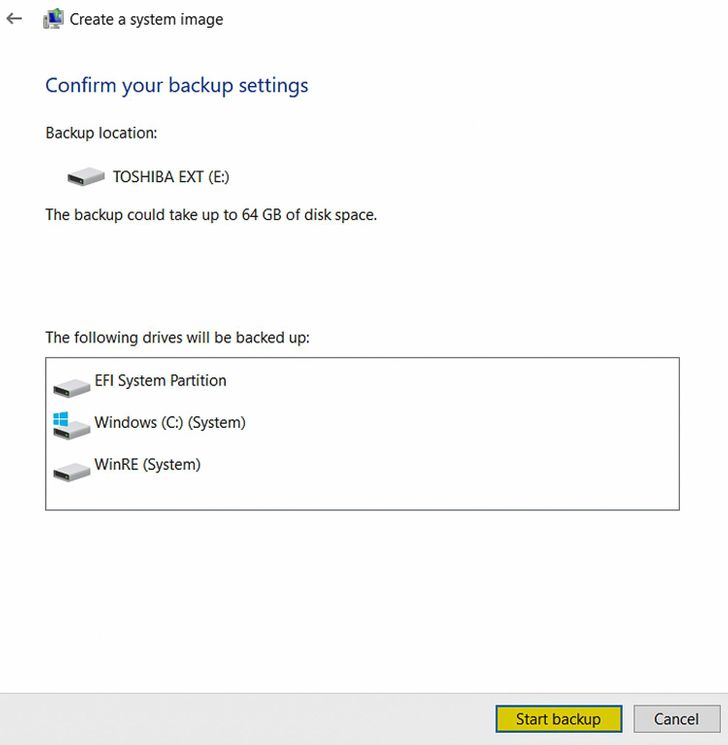
Step #4. Select the data to copy and click ’Next.’
Step #5. Check everything one more time, then click ’Start backup.’
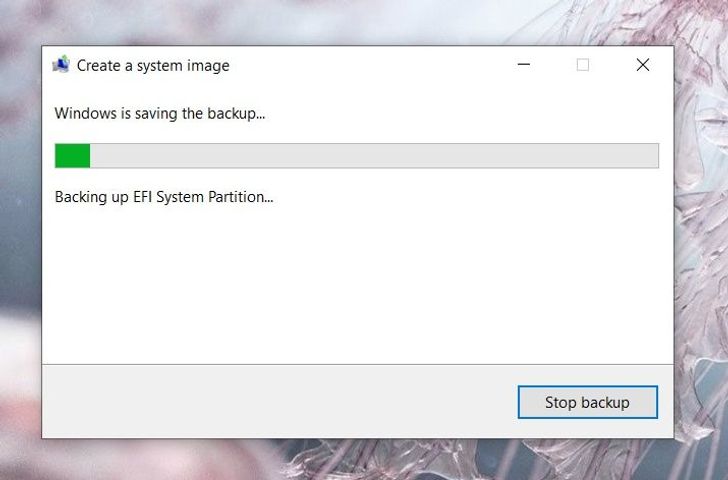
Step #6. Wait until the data is fully copied. This usually takes from 30 to 40 minutes. Do not disconnect the external device during the entire process of copying.
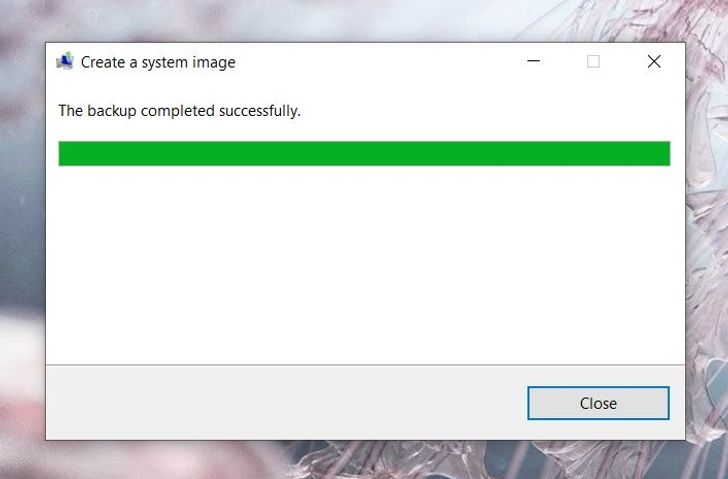
Step #7. When copying is complete, click ’Close.’
Update your system image regularly — once every couple of months would be advisable (depending on how often you modify/create files).
To restore the system when reinstalling Windows, plug in the storage device with the system image and click ’Restore your computer’ instead of ’Install.’ In the next window, select ’Diagnostics’ and ’System image recovery,’ then follow the onscreen directions.

