How to Take a Screenshot on a Mac
Taking a screenshot on a MacBook isn’t as simple as pressing one button. Additionally, there’s also a few ways you can choose to do it. We at 5-Minute Crafts will tell you all about them.
1. Taking a simple screenshot

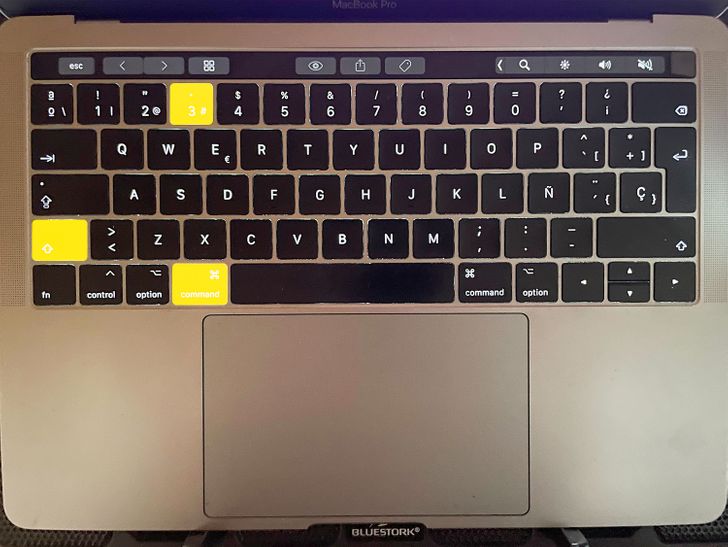
- Hold down Shift + Command + 3 all at the same time.
Note: If a thumbnail appears in the corner of your screen, you can click to edit the screenshot you’ve just taken. Otherwise, you can wait until it saves to your desktop.
2. Screenshotting part of your screen

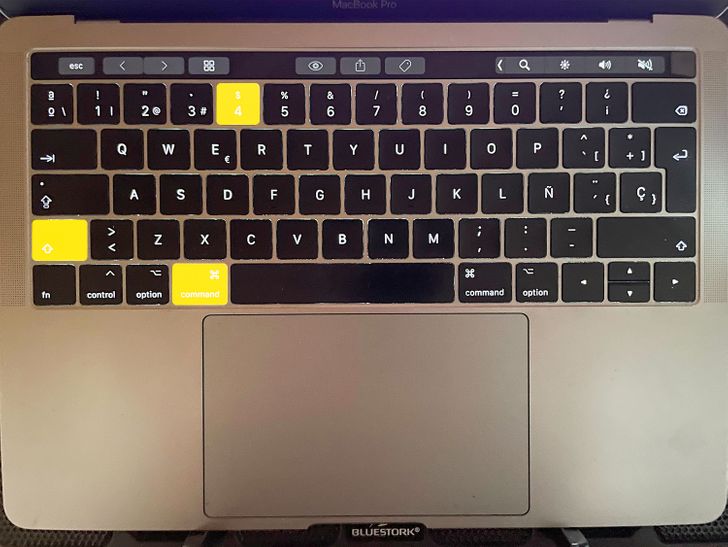
- Hold down Shift + Command + 4 all at the same time.
- Then, drag the crosshair around to whatever area of the screen you wish to screenshot. You can move the selection by pressing and holding the space bar while dragging it (to cancel it, press the escape key).
- Afterward, simply release your mouse or trackpad button.
3. Screenshotting a window or a menu

- First, you’ll need to open the window or menu that you wish to screenshot.
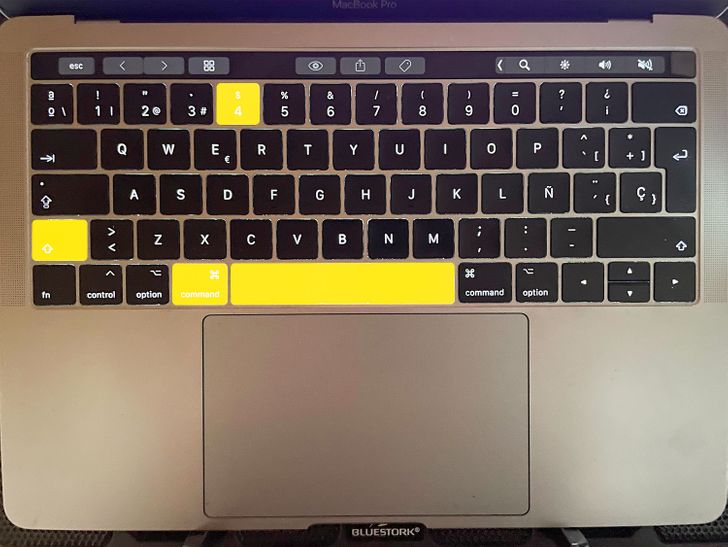
- Then, simply hold down Shift + Command + 4 + Space Bar at the same time.
- Your mouse pointer will turn into a camera icon (here, you can press the escape key to cancel the screenshot).
- Lastly, simply click on the window or menu to finish taking the screenshot (if you wish to get rid of the window’s shadow after you’re done, press and hold down the Option key while you click).
Share This Article