How to Take Cool Pics With Your Phone
Everyone today takes photos with their phones. But many people are sure that a mobile phone’s camera is just a camera with one button and that’s why most photos are taken automatically. Oftentimes, this assumption prevents us from getting cool pics.
5-Minute Crafts is going to tell you how to take a good quality photo with the help of your phone.
1. Wipe the smartphone’s camera.
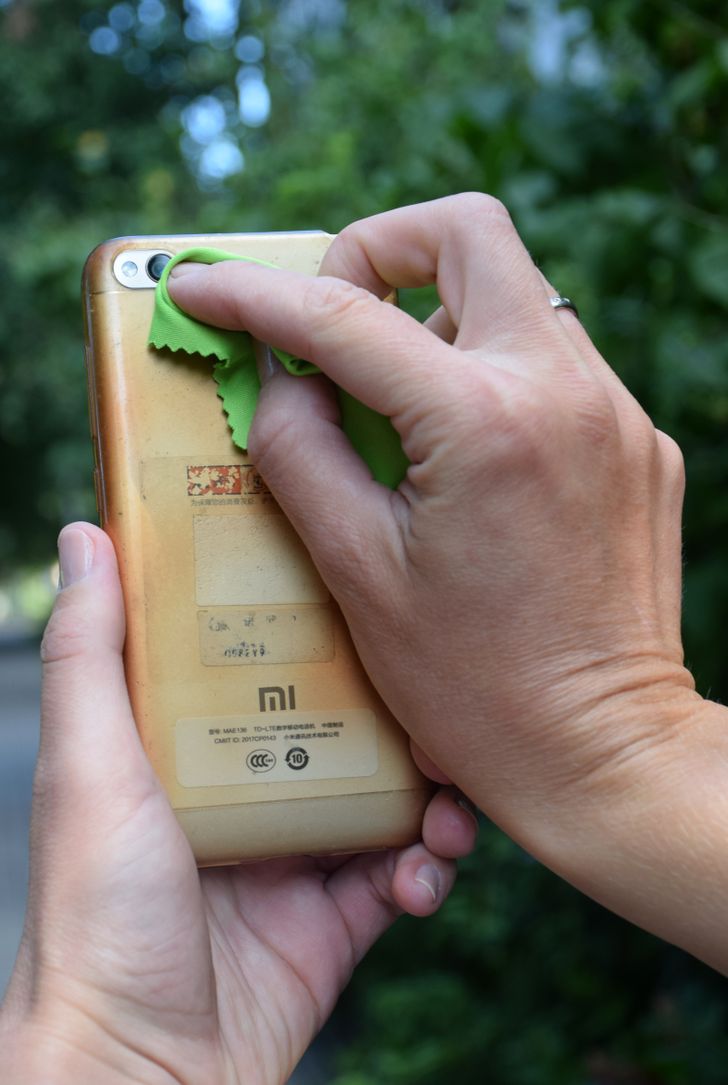
Dust and dirt from your bag or pocket might get on the camera of your phone or you might accidentally touch the lens with your finger and it will be enough to make your photos look “foggy.” That’s why you should make sure to wipe the camera before every photoshoot. You can use a microfiber wipe for this.
2. Switch on the “Grid Lines” function in the settings of your camera.
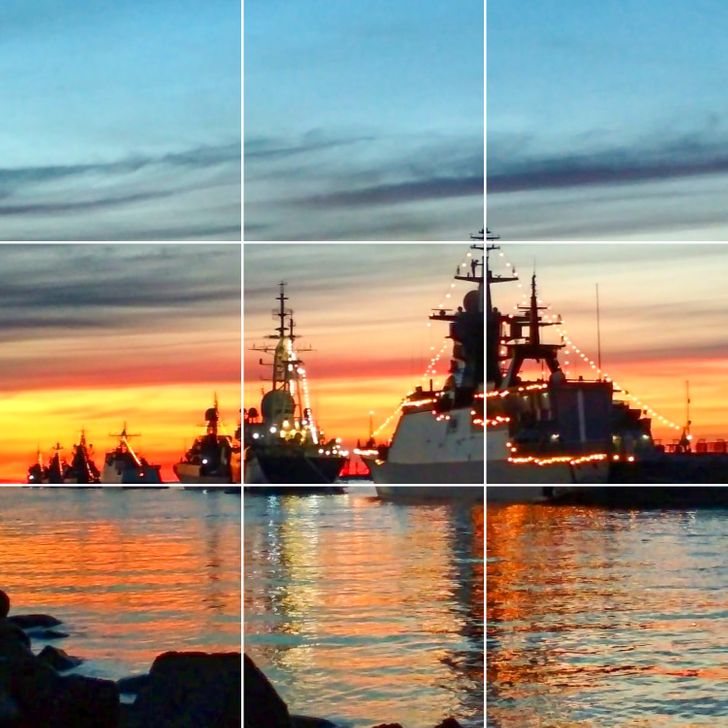
Thanks to this function, the screen will have overlaying lines that will split your future photo into 9 parts — 2 horizontal lines and 2 vertical lines.
Compose your shot so that the most important elements of your photo’s plot are located on the intersections of these lines. This will help create a well-balanced composition. The horizon line should go along one of these lines, not along the center of the pic.
How to switch on this function:
- On an iPhone: go to settings, go to the “Photo and camera” section, and switch on the “Grid” parameter.
- On Android: start the “Camera” app, open its settings, and activate this function.
3. Set the lowest ISO possible in your shooting conditions.
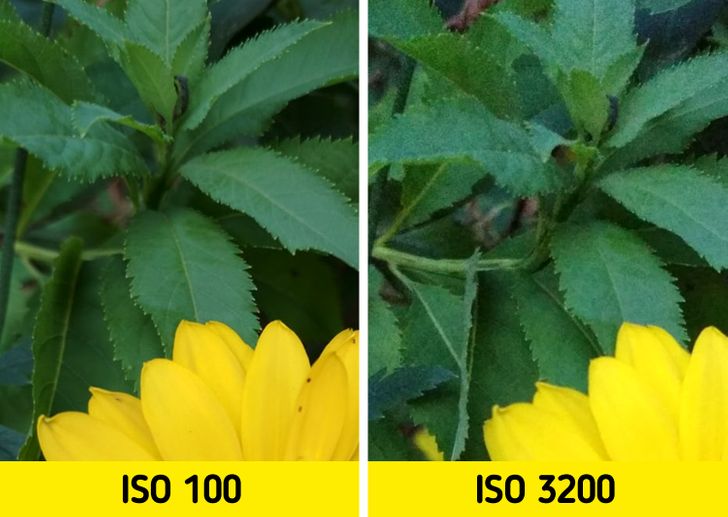
ISO is the camera’s sensitivity to light, or in other words, the ability of the camera’s matrix to sense light. This parameter is automatically set by default in smartphones. But the automation doesn’t always work correctly, so you can set this parameter manually in settings. Choose the proper ISO in the cases when:
-
it’s too dark during a photoshoot;
-
it’s too light.
The higher the ISO is, the lighter your pic will be. But at the same time, the photo will be “grainier” and “noisy” (like in the right photo). The lower the ISO is, the darker but better in quality a photo will be. Therefore, it is advisable to take photos at the lowest ISO — the lower the ISO, the higher the pics’ quality will be.
Increase ISO manually (from 400 to 1,600, or more) in cases where you are taking a photo in low light conditions, in a dark room, for example. It will help you get a lighter pic. If you plan to take a light photo of scenery, conversely, make sure to decrease ISO to 100-200 and you’ll get a good image without overexposure.
4. Focus on the object you need.
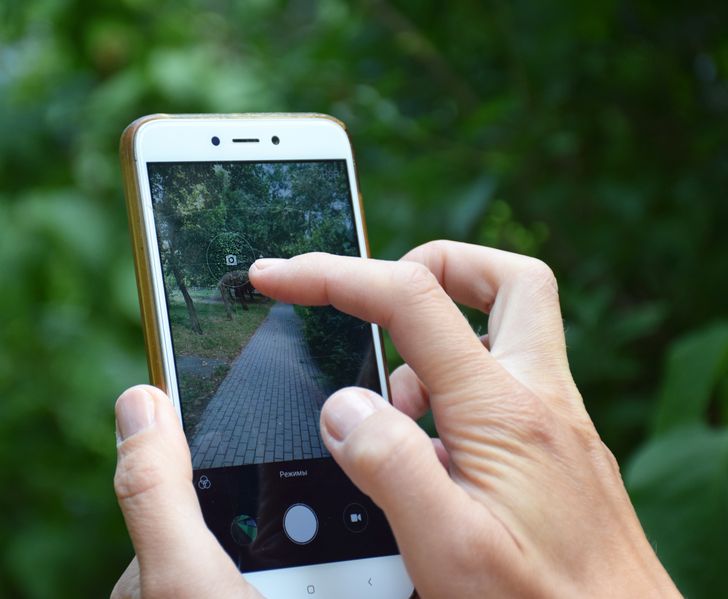
You can do this by simply touching the screen in the right place with your finger, be it a rose, a face, a tree, or a road that goes into the distance.
5. Help your smartphone choose the optimal exposure.
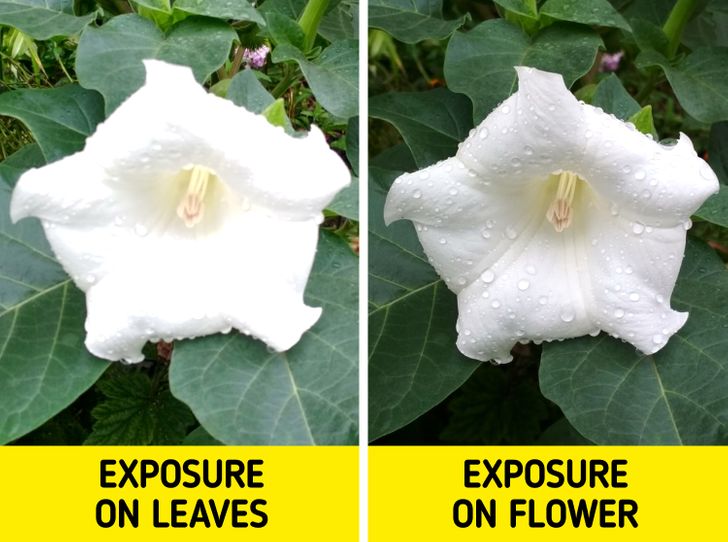
Keep in mind that the camera will set the exposure on the place where you touched the screen with your finger to focus. Thus, if you touched a dark place on the screen with your finger, the camera will measure the exposure at the specified place and brighten the whole image, which can lead to the overexposure of bright areas (like in the left photo). Make sure to touch different parts of the screen with your finger to select the best exposure and get an image without overexposure or excessively dark areas.
6. Use exposure compensation.
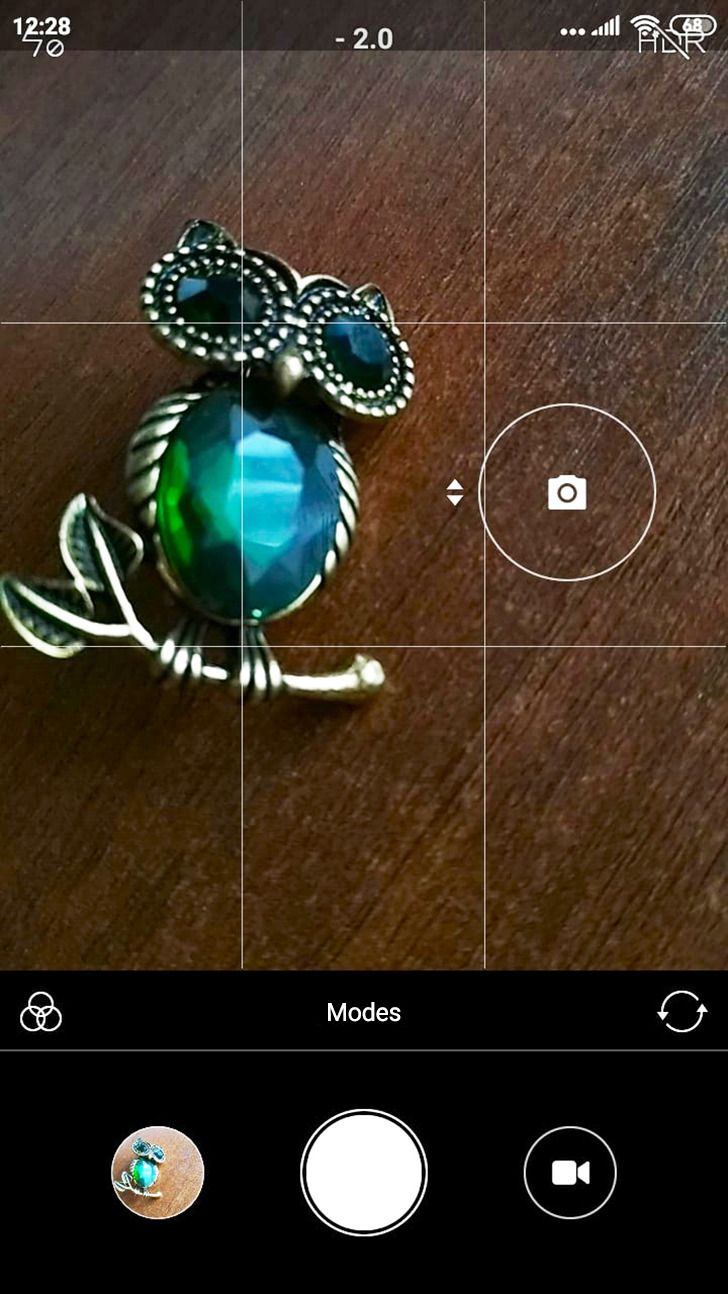
In order to make a pic darker or brighter, use the exposure compensation. This can be done using the exposure compensation arrows. They are located to the left (or to the right) of the focus area circle. One arrow is pointing up, the other one is pointing down. Swipe up your finger in the indicated area along with the screen and the pic will become brighter, if you swipe your fingers down, the pic will become darker.
7. Use HDR in contrasting lightning.
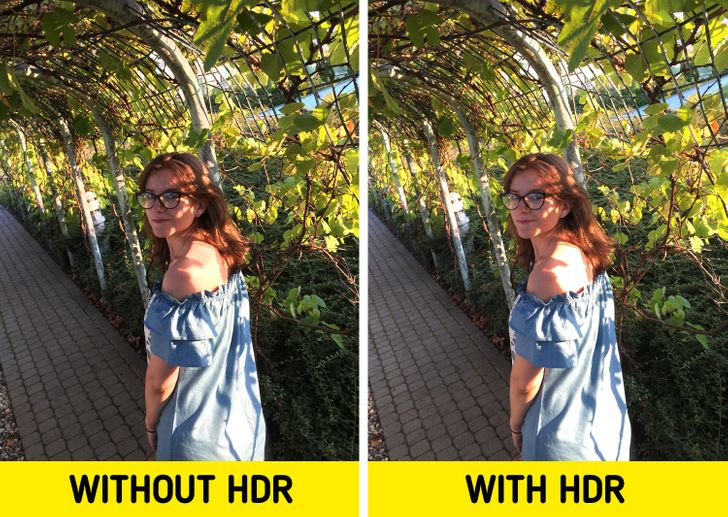
HDR (High Dynamic Range) is a technology that helps significantly increase the detalization of dark and bright image areas in the conditions of contrasting lighting. When the HDR function is on, a smartphone takes 3 photos: overexposed, normal exposure, and underexposed. After that, these pics are joined into one image.
Activate HDR when you take photos in contrasting lighting conditions. For example, when taking photos of architecture against the background of a sunset or of a person, when a bright sun glare falls on their face and certain areas of the skin remain in the shadow.
Keep in mind that HDR has the following limitations:
-
Moving objects become blurry.
-
The shooting process slows down because a series of photos are taken.
8. Turn off the flash.
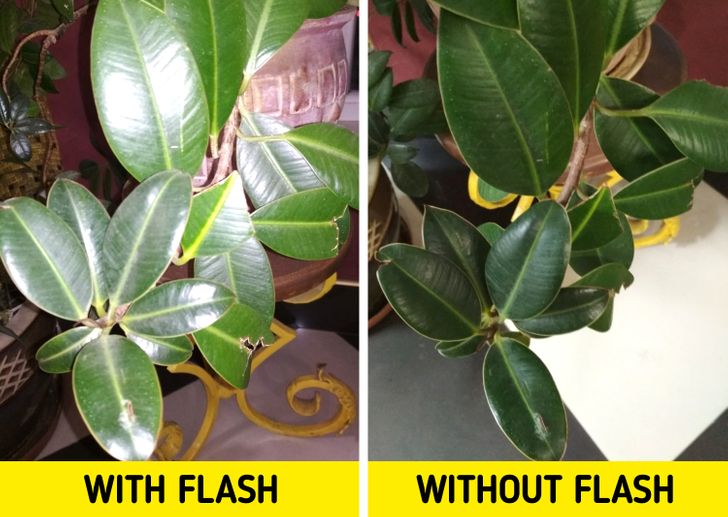
Turn off the automatic flash — it makes your photos look unnatural, kills the skin texture (creating doll-like portraits) and makes other objects look flat. In order to switch off the flash, click on the lightning bolt icon in the Camera app.
9. Don’t use digital zoom.
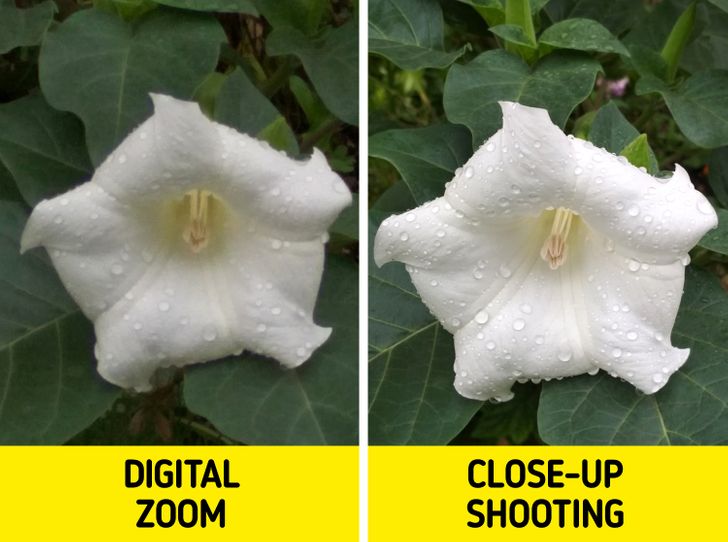
A smartphone’s camera can enlarge the objects that we shoot and oftentimes we use digital zoom for this. This function seems attractive because of its simplicity, but it significantly reduces the quality of the resulting photo. It’s better to get closer to the object you are taking a photo of if you have the opportunity.
10. Don’t forget to edit your images.
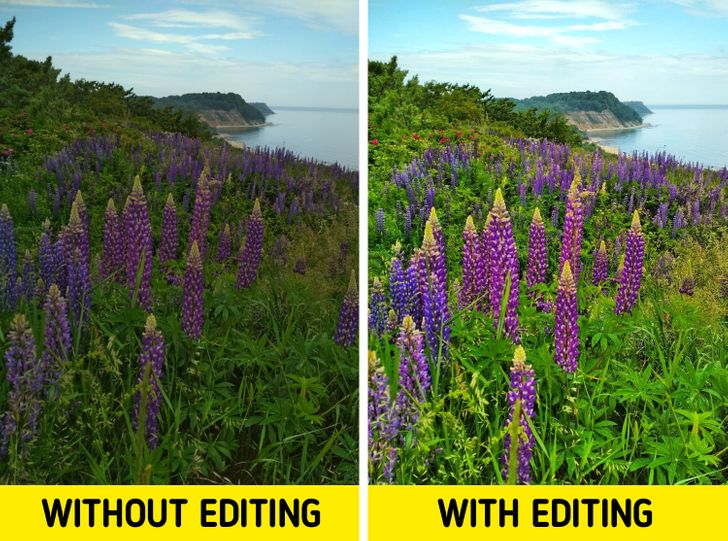
Editing your photos slightly can make them look brighter and more interesting. There are many photo editing apps, like VSCO, Snapseed, Facetune, Enlight Quickshot, etc. One of the simplest ways to edit a photo is to use the in-built Instagram editor.
In order to make an image look better on Instagram:
-
Turn on your phone’s backlight at full power — it will help you to see the photo better.
-
Press the sun icon (Lux tool) at the top of the image and your photo will become better and brighter. Slowly move the cursor to the left and to the right, and watch the details — your photo shouldn’t become unnatural or look over-Photoshopped.
-
Press the “Edit” button and remove the canted angle (the Dutch tilt) with the help of the “Adjust” tool.
-
If the photo is not bright enough, increase the brightness. You can also try moving the “Shadow” (if the details in the shadows are not seen clearly) or “Highlights” tool sliders.
-
If you want to have more focus on details, use the “Details” tool.
-
In order to give your photo brighter colors, move the slider of the “Saturation” tool.