How to Take Photos With a Reflex Camera With Manual Settings
Any camera, including a professional one, has an “auto” mode, which means that all settings are set automatically and the photographer doesn’t need to intervene. However, the results oftentimes are not that good and don’t correspond to the initial idea. That’s why if you’re going to buy a reflex camera, you’d better learn to set the settings manually.
5-Minute Crafts has prepared detailed instructions that will help you learn to take photos with manual settings.
Set the shutter speed.
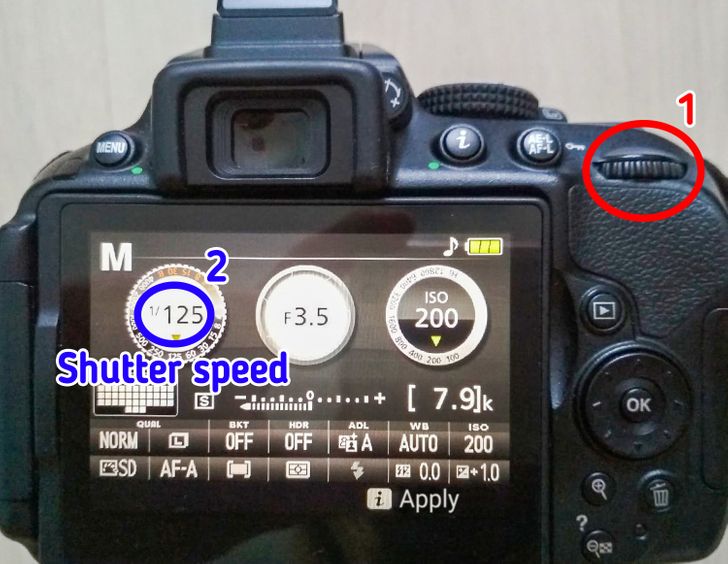
Shutter speed is the time in which the film or the photosensitive matrix is exposed to light. During this time, the shutter is open when taking a photograph. The bigger the shutter speed is, the more light comes to the camera, and the lighter your pic will be.
The shutter speed is measured in seconds and fractions of a second, sometimes in minutes or even hours. Thus, the shutter speed of 1/1000 is 1/1000 of a second, 1/600 is 1/600 of a second, and 1″ is 1 second. The smaller the value is, the darker the photo will be; the bigger the value is, the lighter the photo will be. Keep in mind that in some cameras, the shutter speed can be indicated with the denominator only. This means you won’t see 1/125 but 125 instead.
In order to choose a shorter shutter speed, rotate the shutter speed dial (indicated as #1 in the photo), which regulates this function. For a longer shutter speed, rotate the disc to the left. You’ll see the shutter speed value on the display (indicated as #2 in the photo).
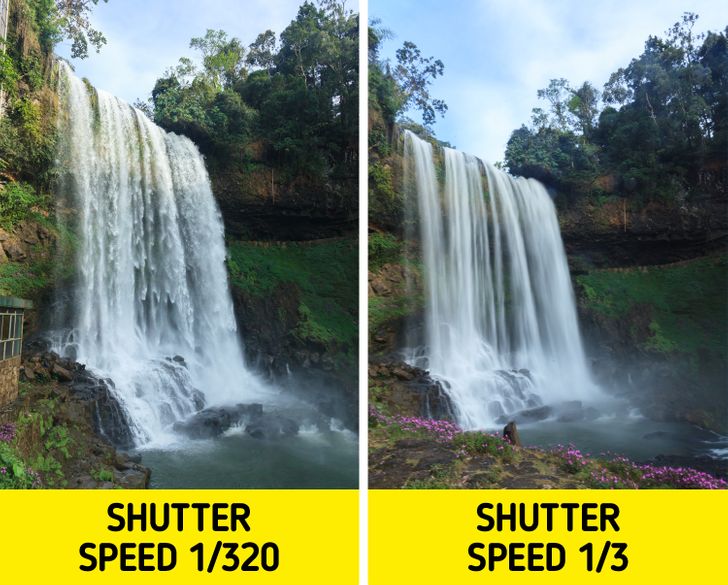
Shutter speed also affects the way motion is displayed in photographs.
-
Choose a short shutter speed for photographing fast-moving objects. For example, set the shutter speed at 1/500 or shorter for sporting events. In this case, the object you’re taking a pic of will have defined borders and won’t be blurred.
-
Set longer shutter speeds for the intentional blurring of a moving object, such as running water, for example. In this case, make sure to use a tripod because the camera must be absolutely static when taking a photo. It’s difficult to achieve it at slow shutter speeds due to the photographer’s breathing and micro-movements of the hands — the image can turn out to be blurry.
Choose the aperture.
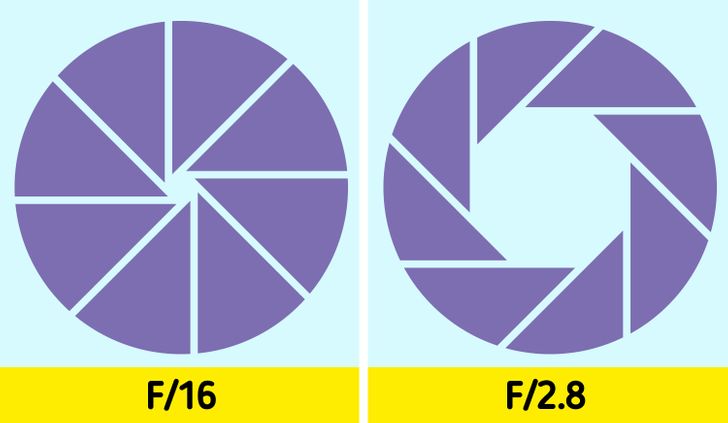
Aperture is a hole in the lens through which the light comes to the sensor of the camera or the film. The smaller the aperture value is, the more open it is, and the lighter the frame will be, and vice versa. For example, an aperture of 3.5 lets more light in than one of 16.
-
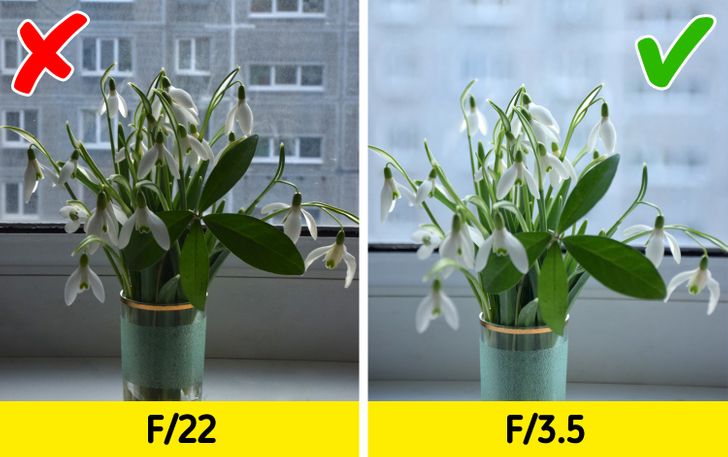
“Shut” the aperture (set a bigger number) if you want to get a darker picture and if you want to avoid overexposed areas in the photo when shooting in the sunlight. Also, the details are drawn better, and the depth of field is greater when the aperture is closed.
-
Use a lower aperture value to get a brighter pic, a blurred background, and a shallower depth of field (for example, to make an insect look precise and the flowers around it blurry). For example, in our case (see the photo), it’s better to opt for a more open aperture to blur that not-so-aesthetically pleasing background.
-
Portrait photos should also be made with an open aperture (a smaller number) to make the background blurred and less distracting.
-
Choose minimal values for the aperture for shooting in gloomy weather, in poorly lit rooms, or in the evening.
-
Choose the “A” mode on the camera for shooting at aperture priority. Some photo equipment manufacturers indicate aperture priority with “Av.”
-
When photographing at aperture priority, you manually set the required aperture value in terms of lighting conditions and your creative idea, and the camera automatically selects the shutter speed in accordance with the data of the built-in exposure meter.
-
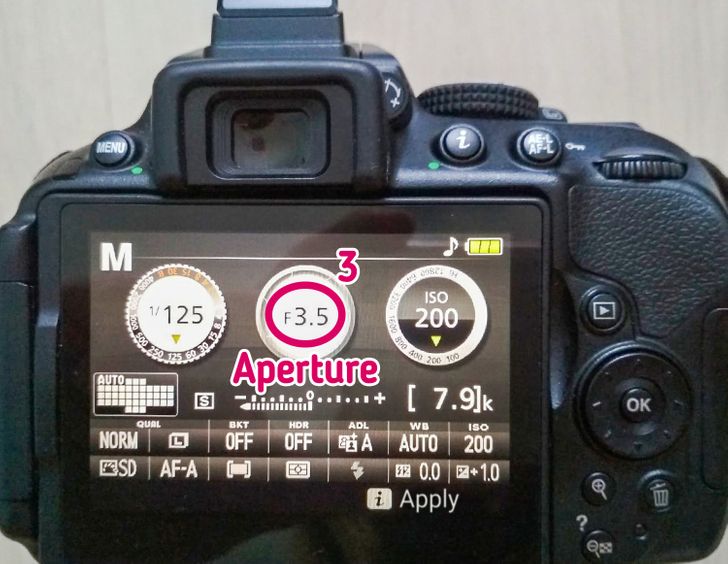
In order to set both the shutter speed and the aperture manually, choose the “M” mode (manual). Then check the instructions of your camera — the way of setting the aperture manually differs among various manufacturers. You will see the aperture value in the window on the display (indicated as #3 in the photo).
Set the ISO.
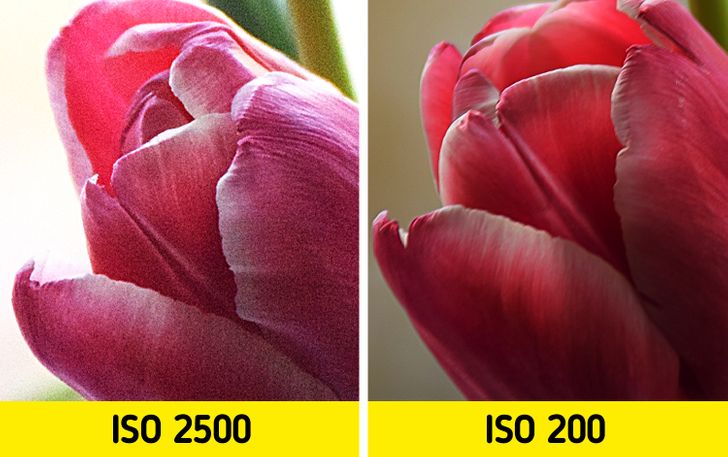
ISO is the sensitivity of the camera’s matrix or film to the light. Setting the ISO makes the photo lighter or darker. The higher this parameter is, the lighter the pic will be. However, photos made with high ISO value will have more digital noise, appear grainy, and can affect the quality of the picture.
Increase the ISO only when you can’t make the pic lighter with the help of the shutter speed or the aperture (like, for example, if using a longer shutter speed will lead to blurring the objects).
General things to keep in mind when choosing the ISO:
-
Opt for ISO 100 for taking photos on a sunny day with bright light.
-
ISO 200 is best for partial shadows and on a bright day.
-
ISO 400 is good if you’re taking pics in cloudy weather or in a bright interior.
-
ISO 800 is best for taking photos during twilight and with dim lights.
-
ISO 1600 is good for at night or when you’re in a dark room.
Adjust the white balance.
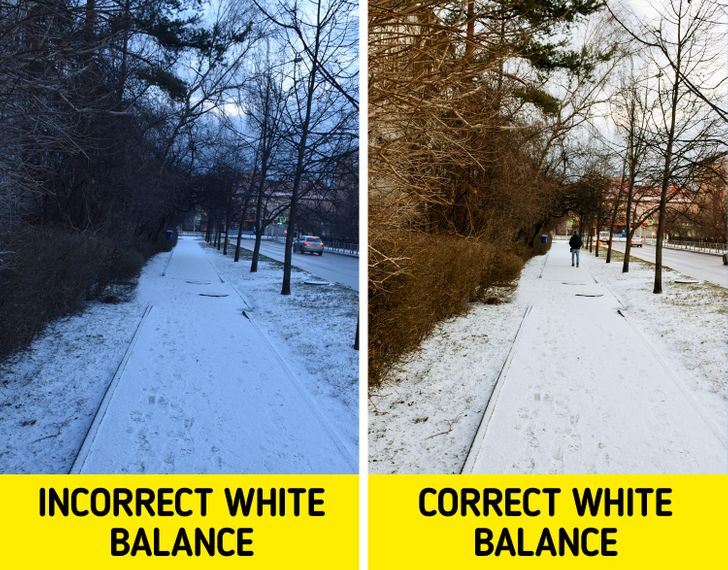
White balance allows you to adjust the color balance of the picture so that white objects appear white rather than colored.
The human eye is good at detecting white color in various light conditions, but digital cameras have difficulty with this, and a photo taken in “auto” mode under incandescent lamps can turn out yellow-orange, or snow might appear dark or light blue instead of white.
Modern cameras have a set of modes corresponding to different conditions of lightning when taking a photograph. Choose the right mode for you, such as daylight, fluorescent, cloudy, tungsten, etc. However, when the light conditions are poor (mixed lightning), these modes don’t always work correctly. In this case, you can use the manual white balance adjustment.
For adjusting the white balance manually:
1. Select the “white balance” from the menu of your camera, then “preset manual,” and “set.”
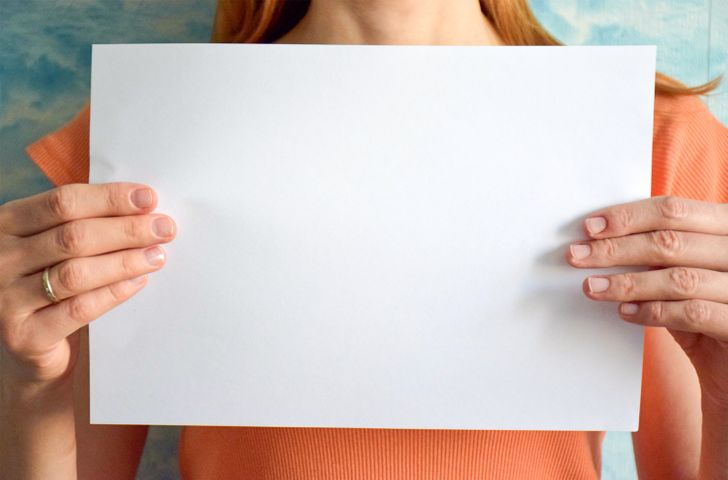
2. Place a neutral white or gray object in the lighting conditions that will be used for taking photos. In the first case, you can use a sheet of white paper. And in the second case, it’s better to use a special “gray card” that is sold in camera stores.
3. Take a pic of this object so that it fills the entire square of the frame. You won’t get a photo, but you will be able to measure the white balance. Your camera will use this reference photo to set the white balance correctly.
It’s important to remember the following:
- Make the adjustments of the white balance in the same light conditions that you’ll be using for taking photos. Otherwise, the adjustment won’t be correct.
- Adjust the white balance right before shooting.
- If you plan to change the shooting place, or if the lighting has changed (like, for example, if the sun hides behind the clouds), you’ll have to adjust everything all over again.