How to Do Hairstyles Fast: 9 Ways
You don’t have to spend hours styling your hair to look gorgeous. There are quick and easy hairstyles you can wear anywhere and you don’t need any special skills to recreate them. And 5-Minute Crafts will teach you how to do them at home.
1. Romantic bun
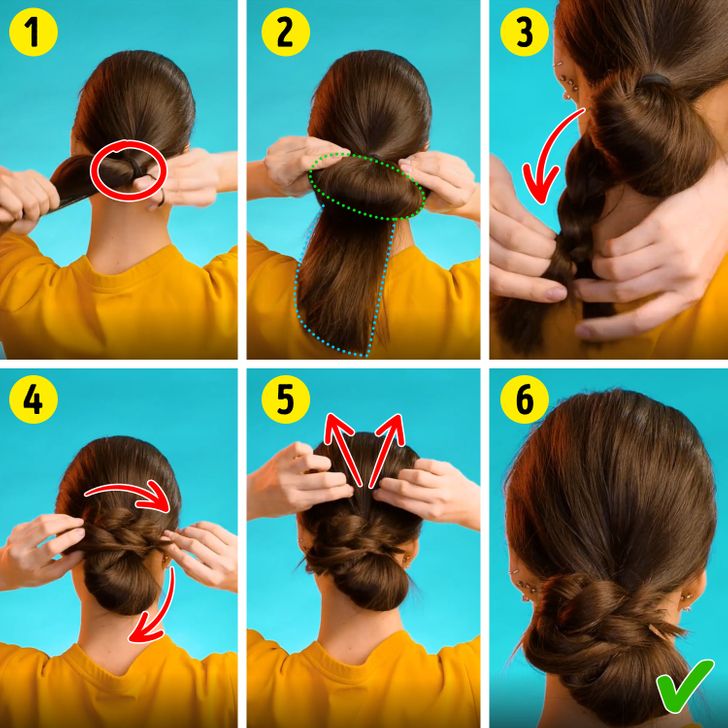
1. Start by making a low ponytail and securing it with an elastic band.
2. Turn it into a half-bun leaving about half of your hair out. You’ll be braiding this under-bun hair section. The length of the hair for the braid should be long enough to wrap around the half-bun.
3. Take the hair you sectioned off, divide it into 3 equal parts, and do a basic hair braid. Secure the end of the braid with a small elastic band.
4. Wrap the braid around your bun and secure it with a pin.
5. Gently pull some of the hair strands at the foundation of the bun to add more volume.
6. Your hairstyle is ready!
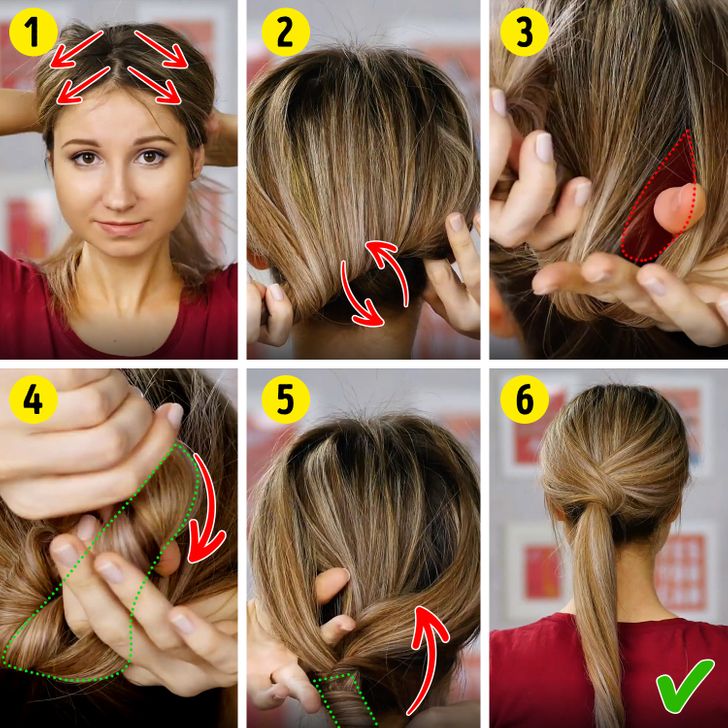
1. Make a ponytail, but don’t secure it with an elastic band.
2. Twist your hair until you get a tight twist.
3. Make a hole at the base of the twisted hair closer to the right.
4. Pull the ends of your hair through it.
5. Make a hole at the base of the twisted hair, closer to the left, and pull the ends of your hair through it.
6. Your hairstyle is ready!
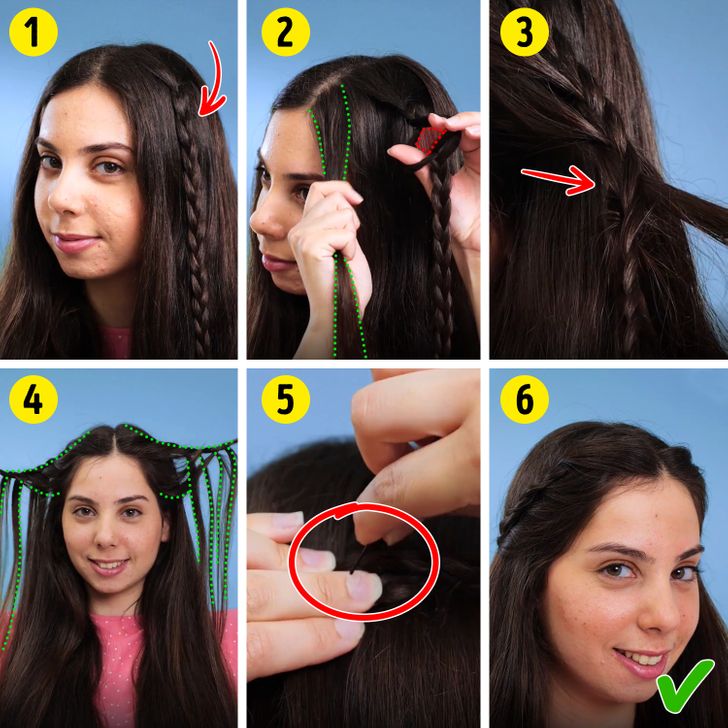
1. Do thin basic braids on the left and on the right sides of your head. Keep the rest of your hair loose.
2. Make a hole in one of the braids, take a thin strand of hair from near your face, and pull it through the braid.
3. The strand should go from your face to the back of your head.
4. Repeat this process until there’s no loose hair left near your face. Do the same on the other side.
5. Secure the braids behind your head with a pin.
6. Your hairstyle is ready!
4. Scarf bun
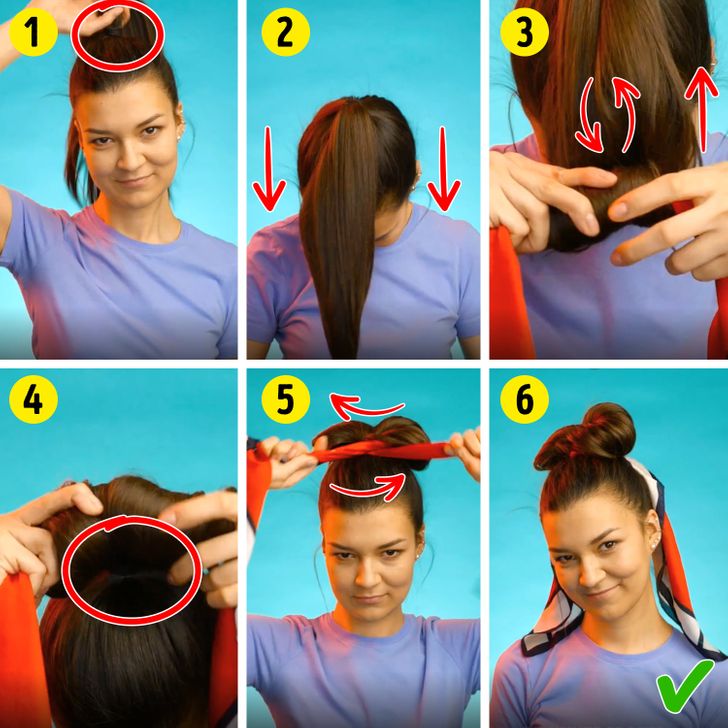
1. Put your hair in a high ponytail and secure it with an elastic band.
2. Flip your hair forward and bend over a little.
3. Take a scarf, place it at the end of your ponytail, and wrap your hair around the scarf. Roll it all the way up to the base of your ponytail, keeping the scarf inside your hair.
4. When you reach the foundation, make sure that your scarf is wrapped pretty tight and that your hair is secured around it.
5. Take the ends of the scarf and wrap them around the elastic band as many times as it takes to get the desired scarf length. Your right hand should move counterclockwise, and your left hand — clockwise. When you’re done, tie the scarf at the back of the base of your ponytail (now bun).
6. Your hairstyle is ready!
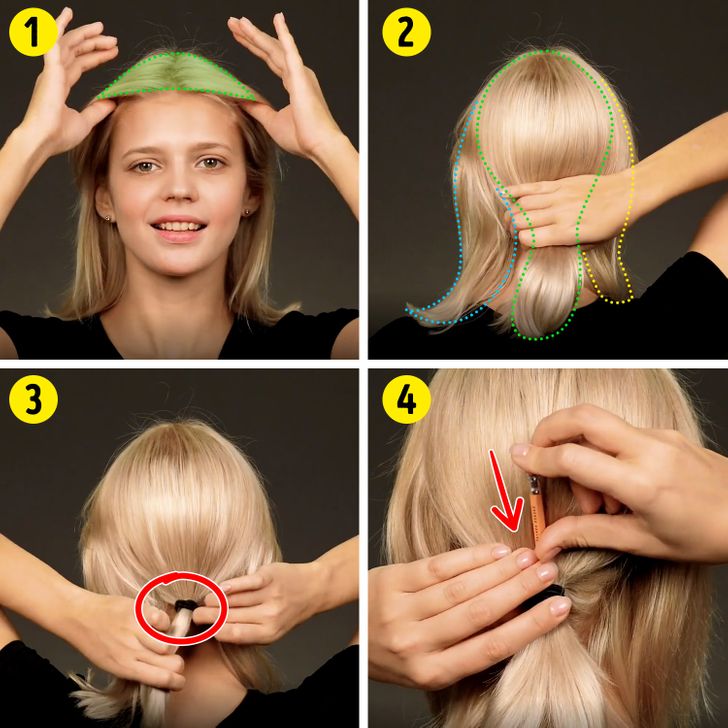
1. Separate the top layer of your hair.
2. Divide the rest of your hair into 3 parts and add the top layer to the middle part.
3. Put the middle into a low ponytail, securing this middle hair part with an elastic band.
4. Insert a pencil in your hair above the elastic band.
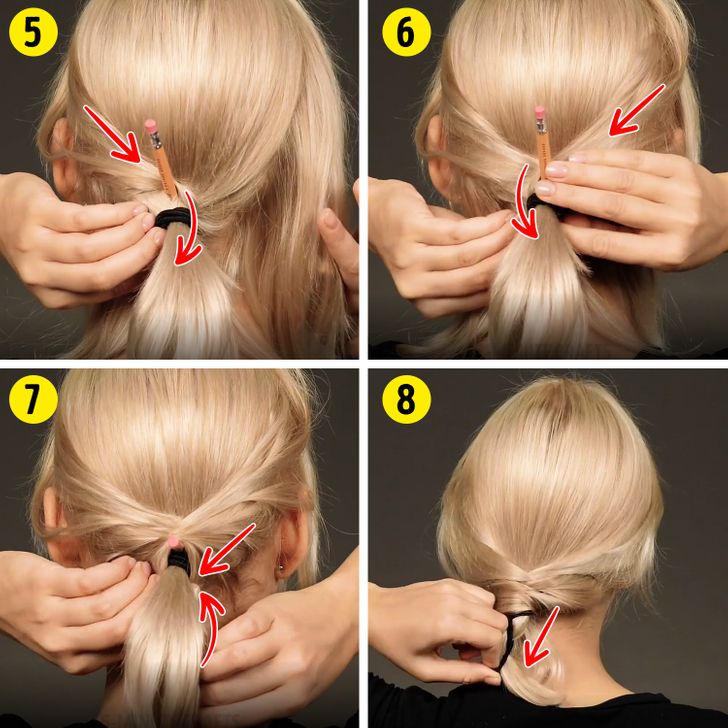
5. Take a strand of hair from the left and put it above the pencil and under the ponytail.
6. Do the same for the right side.
7. Repeat until there’s no loose hair left. When you’re done, remove the pencil and secure the hair you’ve added with a tiny transparent elastic band, below the first ponytail.
8. Gently remove the main elastic band and tighten up the ponytail a bit.
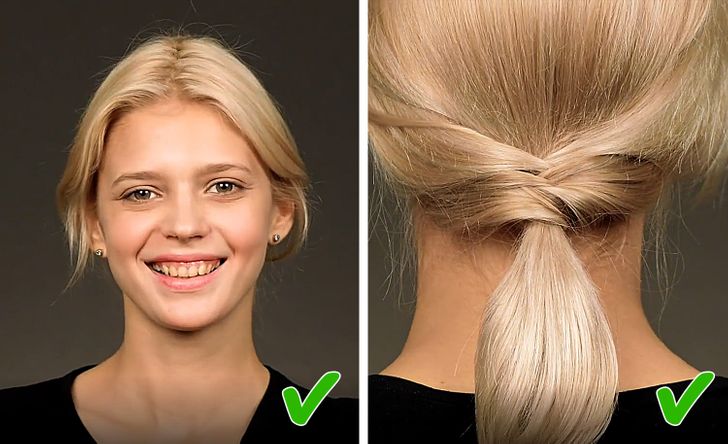
Your hairstyle is ready!
6. Double buns
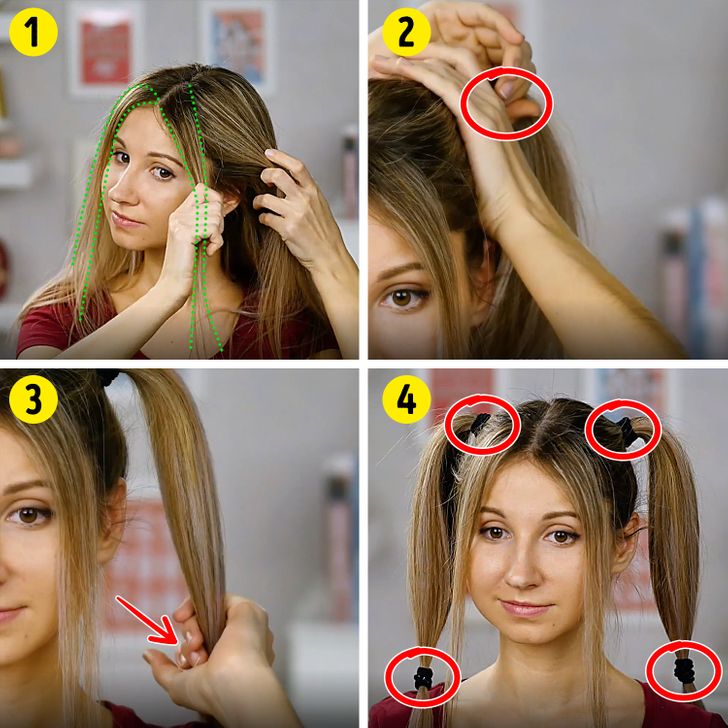
1. Separate 2 thin strands of hair near your face — they should be symmetrical, on the left and on the right side, and divide the rest of your hair into 2 equal parts.
2. Put the 2 equal parts into ponytails.
3. Imaginarily separate the hair of one of the ponytails into 3 parts, from the base of the ponytail to its end, and secure an elastic band about 1/3 of the way from the end of the ponytail.
4. Repeat the process on the other side.
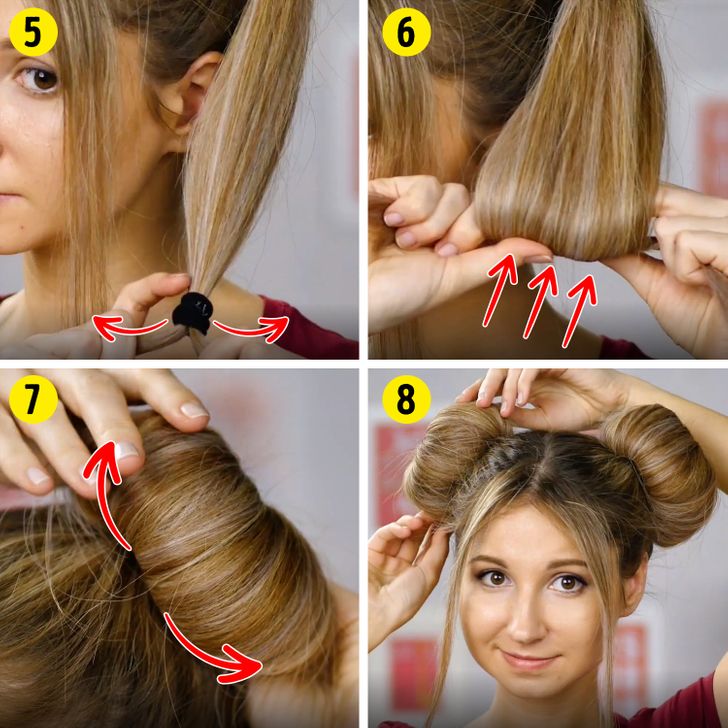
5. Divide the small 1/3 ponytail into 2 parts and pull them to the sides.
6. Roll your hair up, keeping the strands from the small ponytail to the sides.
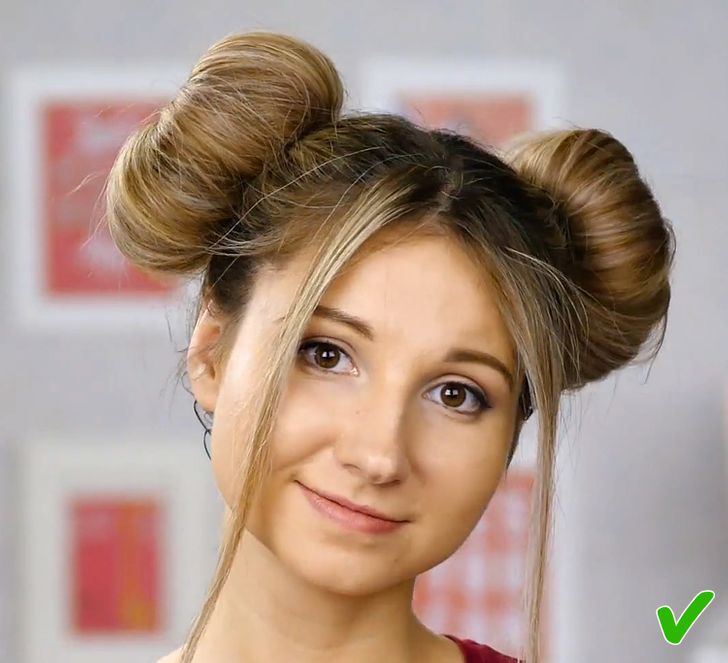
7. Roll it all the way up, secure the ends of your small ponytail with a pin, and distribute the hair evenly, so the bun looks voluminous and neat.
8. Repeat on the other side.
Your hairstyle is ready!
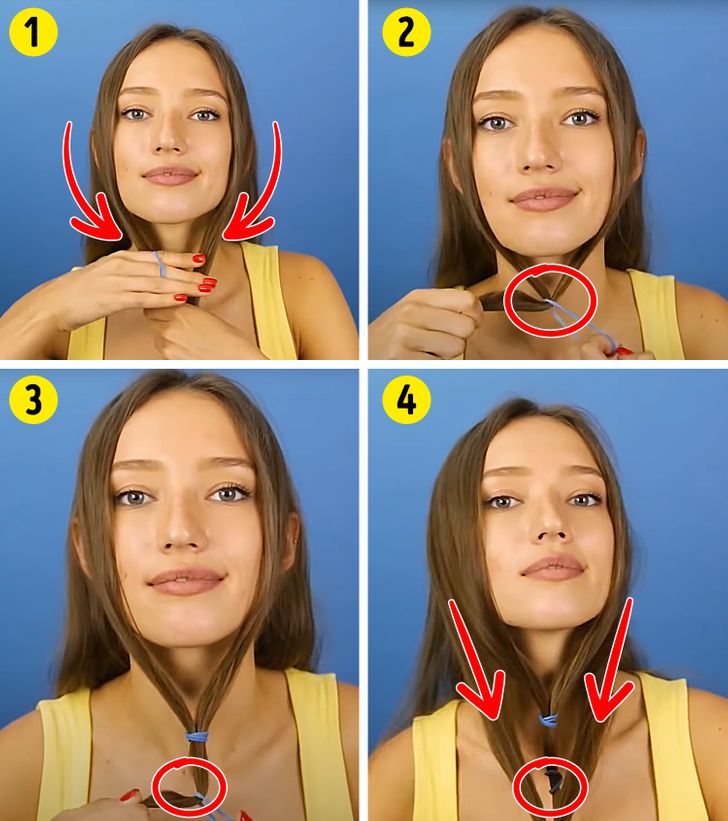
1. Grab 2 thin strands of hair near your face
2. Secure them with an elastic band under your chin, leaving some free space.
3. Add another elastic band a bit lower than the first one.
4. Take another 2 strands of hair and join them together.
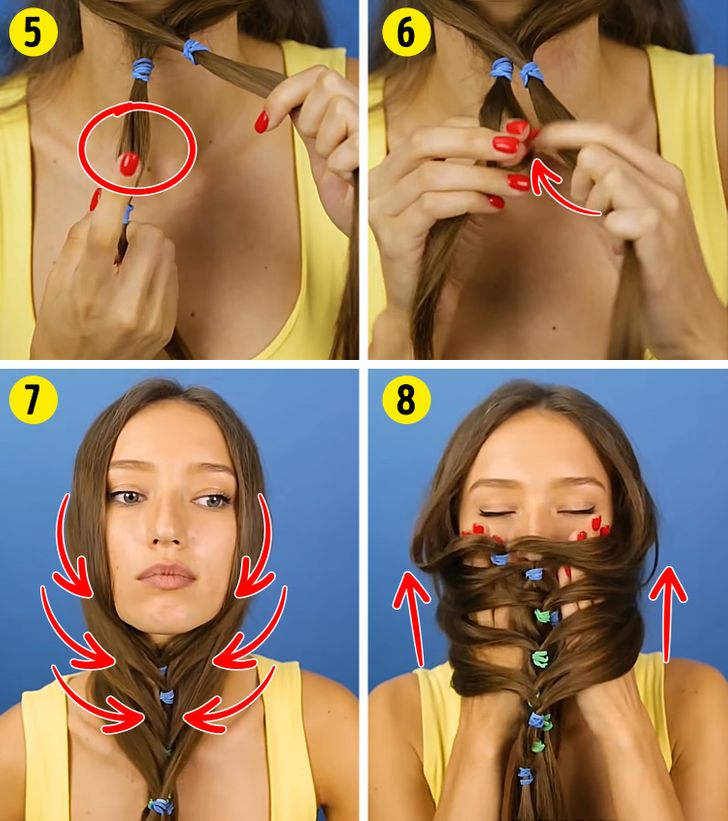
5. Go back to the first pair of strands and make a small hole between the elastic bands.
6. Pull the second pair of secured strands through it.
7. Take another 2 strands and repeat the process until there’s no loose hair left.
8. Gently put your hands under your hair and flip your hair back.
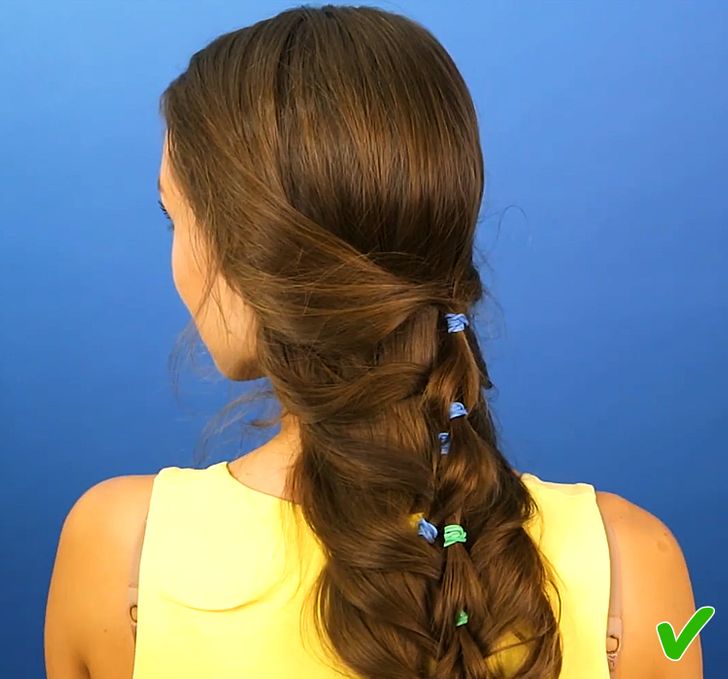
Your hairstyle is ready!
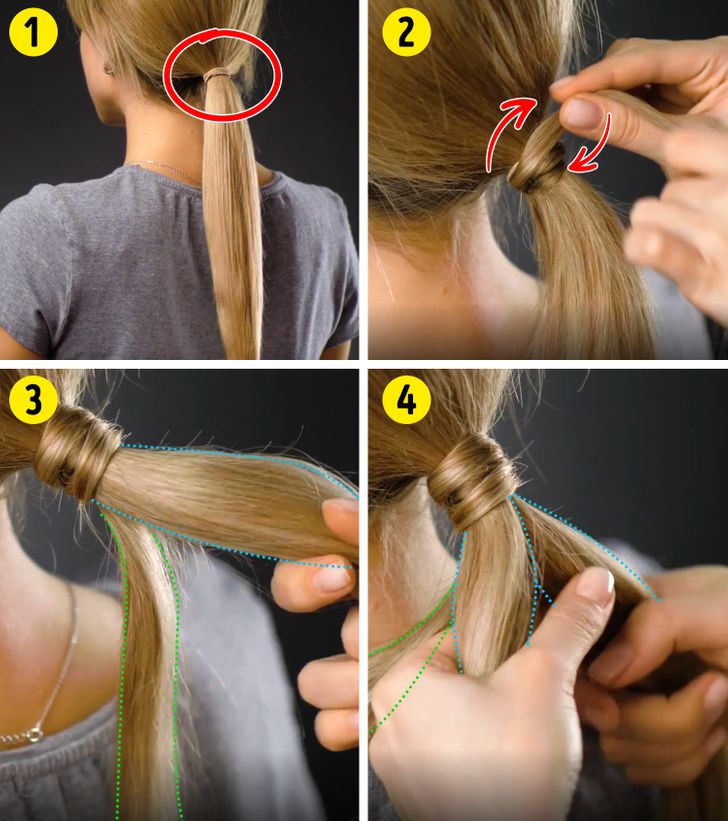
1. Put your hair in a low ponytail and secure it with an elastic band.
2. Take a strand of hair and cover the elastic band with it to hide it.
3. Separate another thin strand of hair — at the bottom of the ponytail.
4. Divide the remaining hair into 2 equal parts.
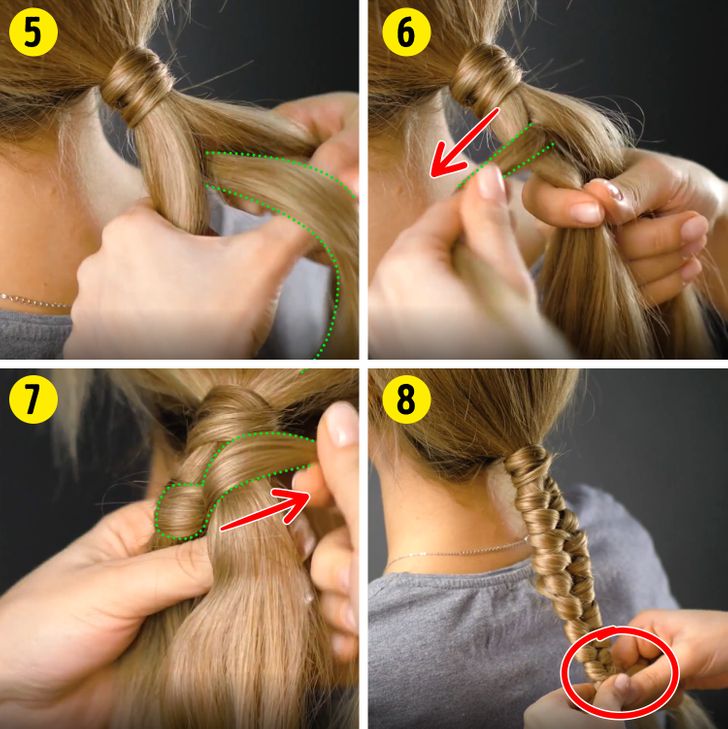
5. Take the thin strand and place it between the 2 thicker parts of the hair.
6. Tightly wrap the thin strand around the left thicker part.
7. Repeat for the right thicker part.
8. Go on like this until there’s no loose hair left and secure the ends with an elastic band.
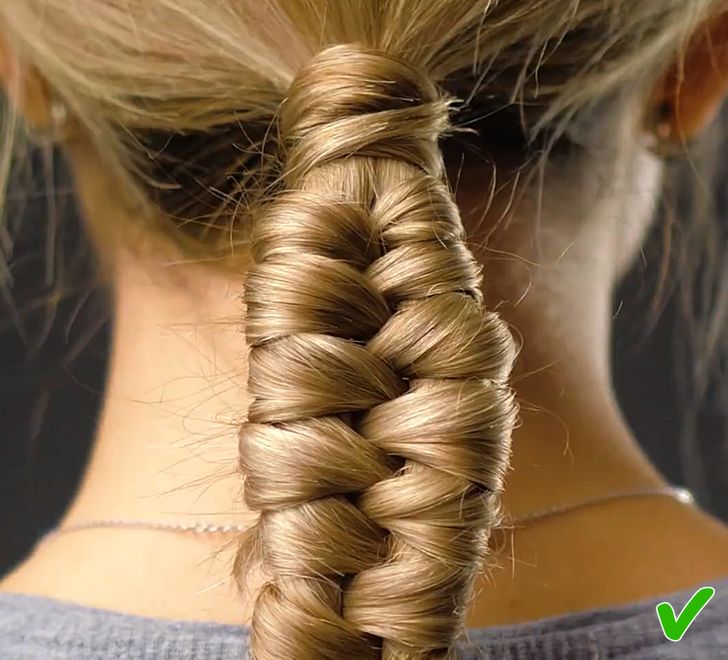
Your hairstyle is ready!
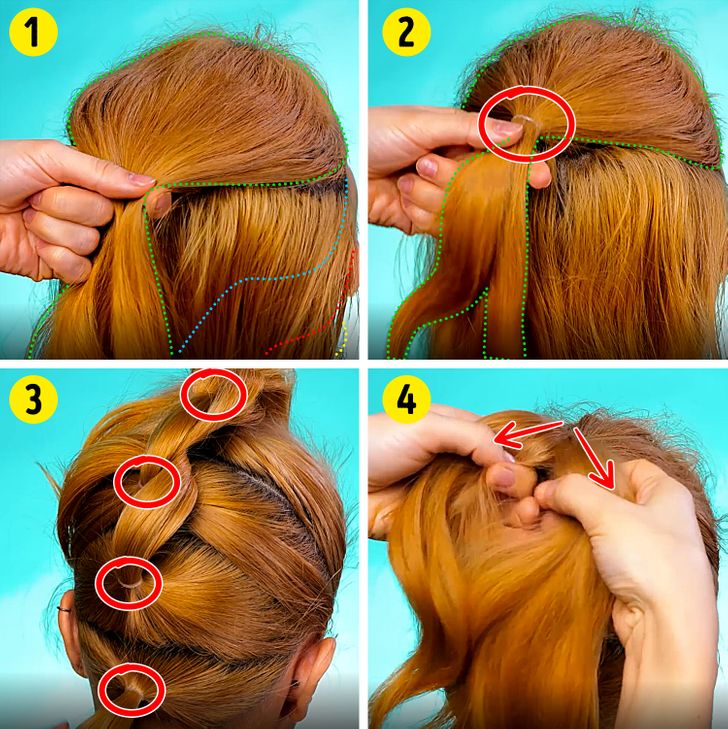
1. Divide the hair into 5 parts, starting from the top of the head.
2. Put the top section in a ponytail at the top of your head and secure it with an elastic band.
3. Do 4 more ponytails under the first one.
4. Take the first ponytail and divide the hair into 2 equal parts.
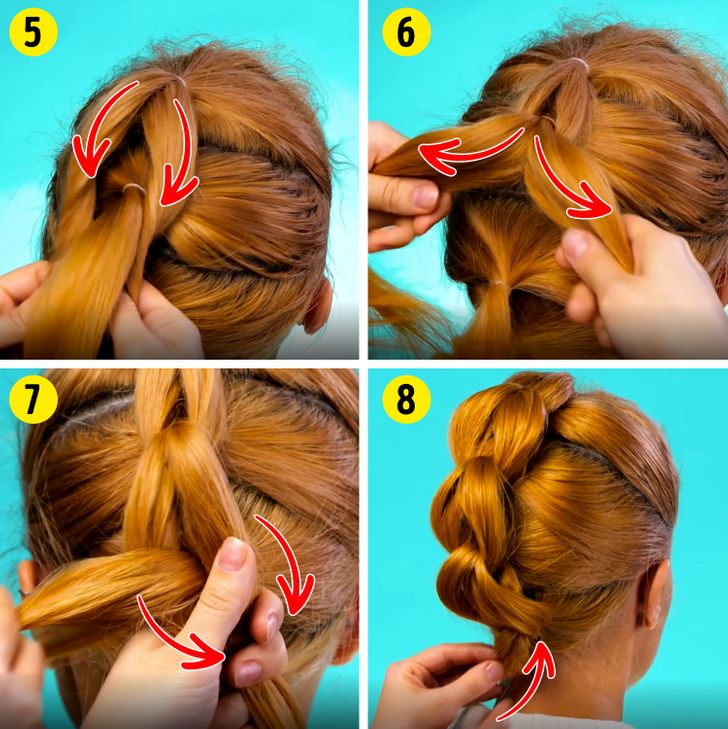
5. Put the hair under the base of the second ponytail and secure it with an elastic band.
6. Take the second ponytail, add the loose hair from the first ponytail, and divide the hair into 2 equal parts.
7. Put the hair under the base of the third ponytail, and secure it with an elastic band.
8. Repeat the same for the third and the fourth ponytails. Fix the ends of the fifth ponytail with an elastic band and hide it with a pin.
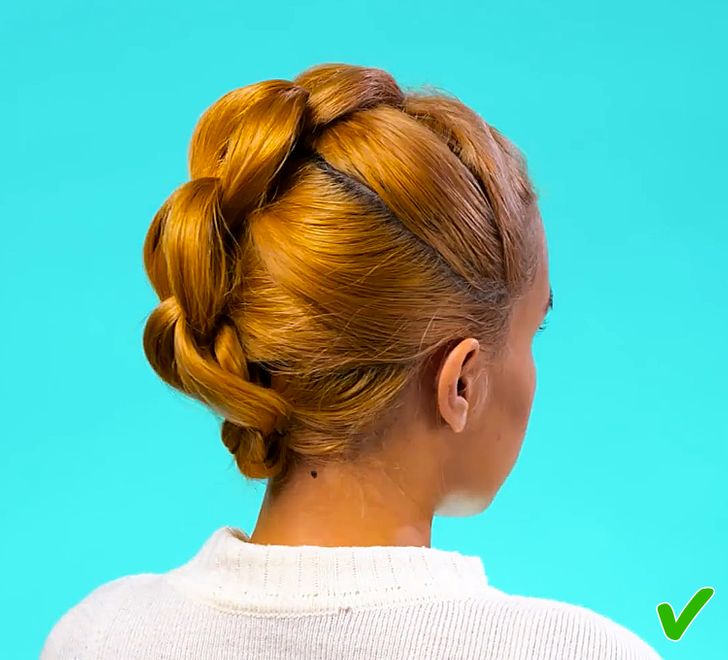
Your hairstyle is ready!