How to Graft an Apple Tree in Spring
Spring is the best time for grafting plants because they take root very well, with the start of the ascent of sap. Stems are grafted in March and April when it’s not cold and buds are grafted in April and May. These periods are also great because if nothing survives, you can try again in the summer — and you won’t lose the entire year.
5-Minute Crafts describes 3 simple ways of grafting an apple tree in spring.
Scion and rootstock
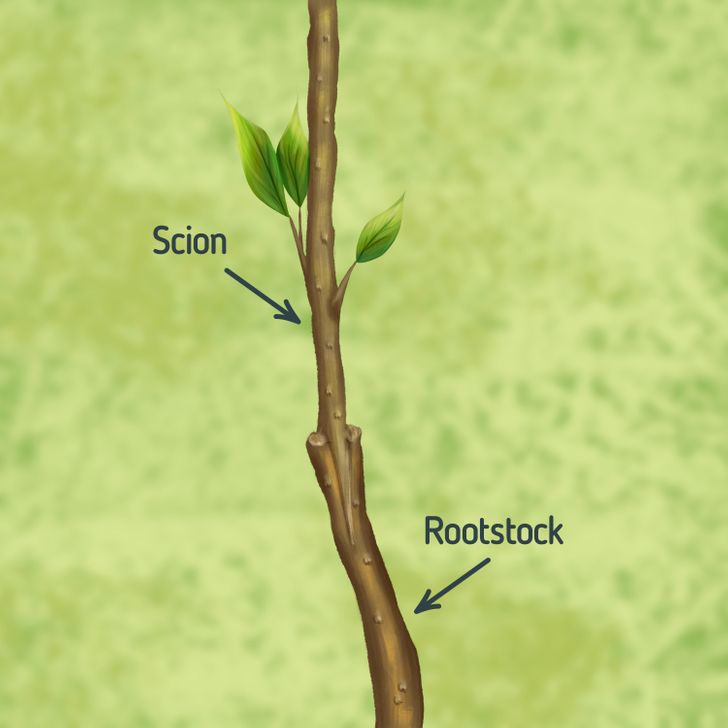
A scion is a young twig, cut from a tree. They are cut during the winter, when the tree is dormant, and kept refrigerated and wrapped in plastic bags to keep them from drying out. They are usually grafted in early spring, just as the buds begin to open.
You can buy a scion or cut it by yourself. A typical scion is about 8-10 inches long and it has about 8 buds. You have to prevent them from drying out. It will play a crucial role in the following process.
Rootstock is the trunk and roots that you graft the scion onto. Rootstocks vary in terms of desirable traits, like disease resistance, dwarf size, cold tolerance, or early fruit production.
You can buy rootstock and graft onto it, or buy a young tree that is already grafted onto the rootstock and add more varieties onto that tree by grafting a few onto the branches each year. You can take an older tree, cut off branches, and graft onto the stumps.
Prepare the materials and tools
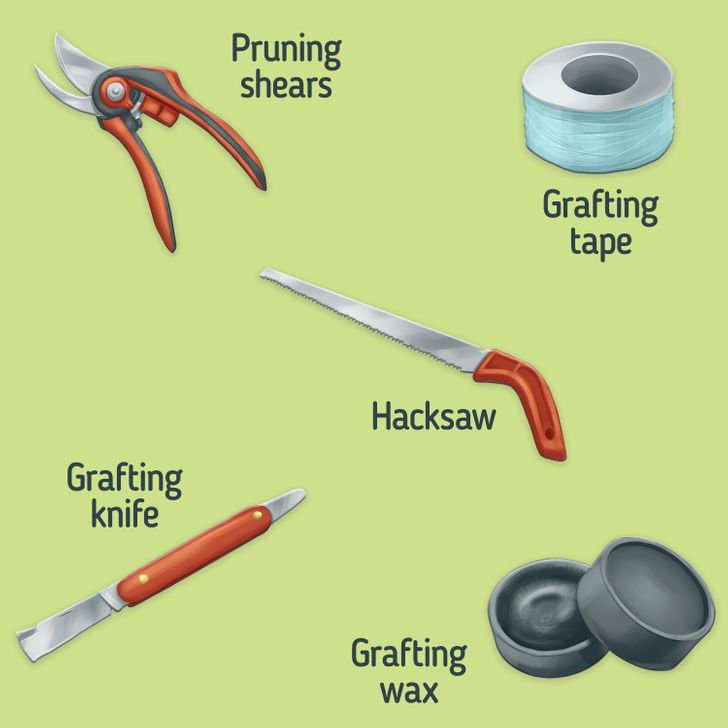
- Pruning shears and a hacksaw. You need these to cut and saw the rootstock. There are special pruning shears, but you can do without them.
- Knife with a sharp or straight blade. You can even use a box cutter. It’s better to use a specific grafting knife. It’s serrated on one side while the other one is completely flat.
- Grafting tape. You can use all kinds of tape (even the tape you use to wrap grafts), ranging from masking tape, electrical tape (sticky side out), strips of plastic bags, special grafting tape, and wide rubber bands.
Way № 1: Shield budding
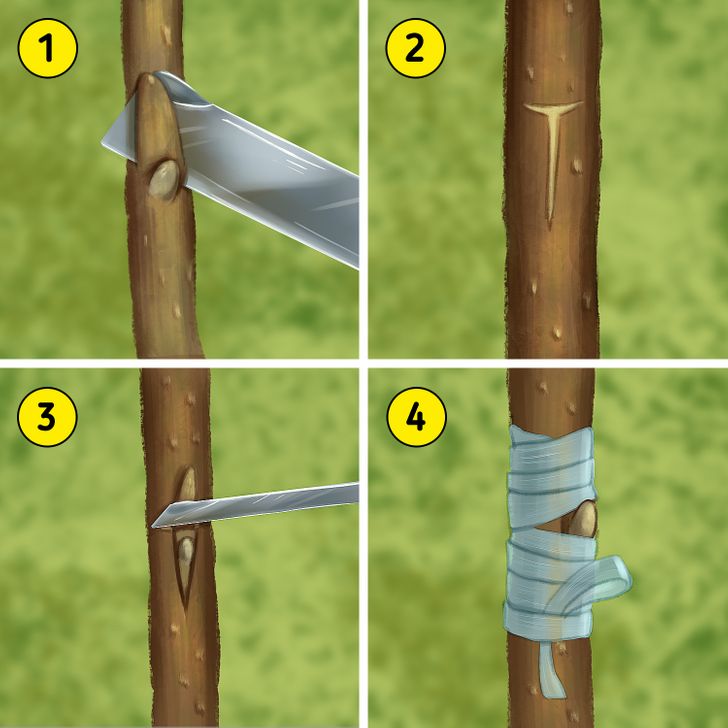
Fruit tree budding is done when the bark “slips,” which is when the cambium is moist and actively growing.
What to do:
- Cut the healthy bud away with a strip of bark extending about 2.5 cm (1 in) above and below the bud. Don’t let the bud dry out.
- Cut the rootstock just deeply enough to pierce the bark and make a T-shaped incision at a height of 15-30 cm (6-12 in) from the base. It should be wide enough for the bud to get in. Ease the flaps of the T outward to reveal the cambium layer.
-
Insert the bud behind the bark flaps with the bud just below the cross-stroke of the T.
-
Fix the bud with any material you have.
💡The percentage of “take” of the buds depends on the natural compatibility of the stock and scion, the sharpness of the knife, and the skill of the budder — even the experts will have some buds die.
Way № 2: Cleft grafting
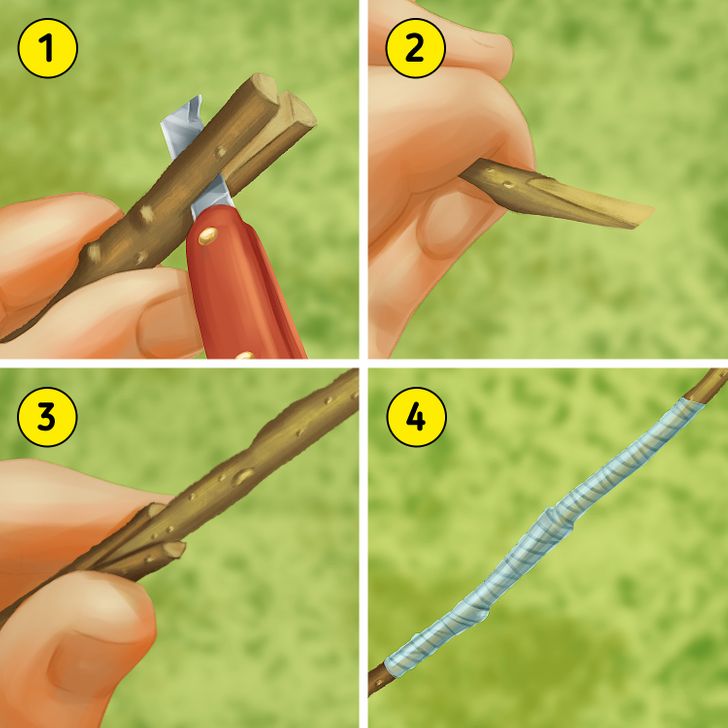
This is probably the easiest style of grafting. It is often used when the understock (rootstock) is larger than the scion.
What to do:
- Cut off the rootstock in the spot where the new piece will be. Carefully cut it in half for the scion to fit in.
-
With the grafting knife, carve the scion to a 2-inch long wedge. Be sure the cuts are flat, not curved.
-
Gently wedge the scion into the stock. Make sure the cambium lines up as much as possible. The healing process depends on this.
-
Wrap the entire graft area with Parafilm. Gently stretch the Parafilm before wrapping. One layer is fine. Be sure to completely wrap the graft to seal in the moisture.
💡 You can use 2 scions in the same crack so that the cambium lines up on one side of each scion
Way № 3: Tongue graft
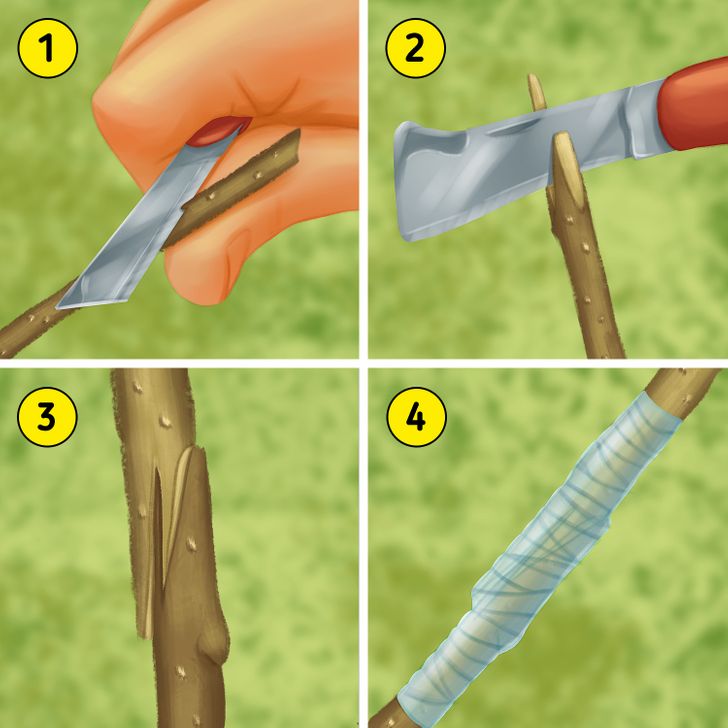
This is a modification of the relatively simple (but not as strong) whip graft. In a whip graft, the scion and stock are simply cut at an angle and taped together. In this case, you need an additional “tongue” to make the entire thing more stable.
What to do:
- With the grafting knife, cut the stock and scion at the same angle. The cut surface should be about 1 1/2 inches long. The cut surfaces should be flat, not curved or uneven.
- Cut the tongue. This cut should be identical on the scion and stock. Start the cut about 1/3 of the way from the tip, or “toe” of the cut surface. This is the most dangerous cut. Be aware of where the blade will go if you accidentally slice all the way through the wood, or if the wood suddenly splits.
- Make sure nothing is out of place.
- Wrap the entire thing with Parafilm.
Caring for your grafts
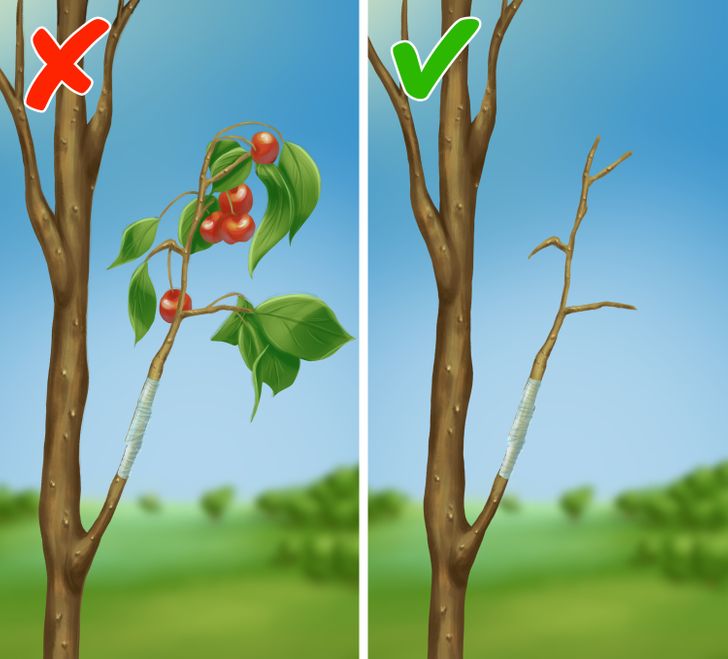
- Label your grafts. You will know where you have what.
- Wait. Usually, the leaves and buds will start to appear after several weeks. It’s better if it happens earlier than that or it might lose all the moisture it has. If the leaves appear before the cambium of the scion connects with the rootstock, the scion will dry out. Don’t worry if nothing happens after one month. Sometimes, the growth won’t start until next year.
- Remove the tape. Leave the wrapping on for at least the first month. But you do need to remove the splicing tape eventually because if the graft grows too much, the tape can squeeze the vascular tissue and choke the scion like a tourniquet. You should remove the rubber splicing tape in mid-late summer, and re-wrap the graft area in Parafilm to keep it moist.
- Cut. Don’t let the scion produce fruit. It happens rarely but it does. The connection with the rootstock is not strong enough to hold the weight. Many gardeners wait 2-3 years before allowing new apples to grow.
- Remove the empty scion. If it doesn’t give fruit the second year, get rid of it. 2 branches growing parallel to each other are going to cause problems later. As they grow larger, they will get a layer of bark trapped between them. This will limit the growth of the branches and weaken the graft junction.
Not every scion will be good, especially if you are a beginner. It’s normal. Your skills will improve with practice.