A guide for DIY notebook covers to brighten your school days
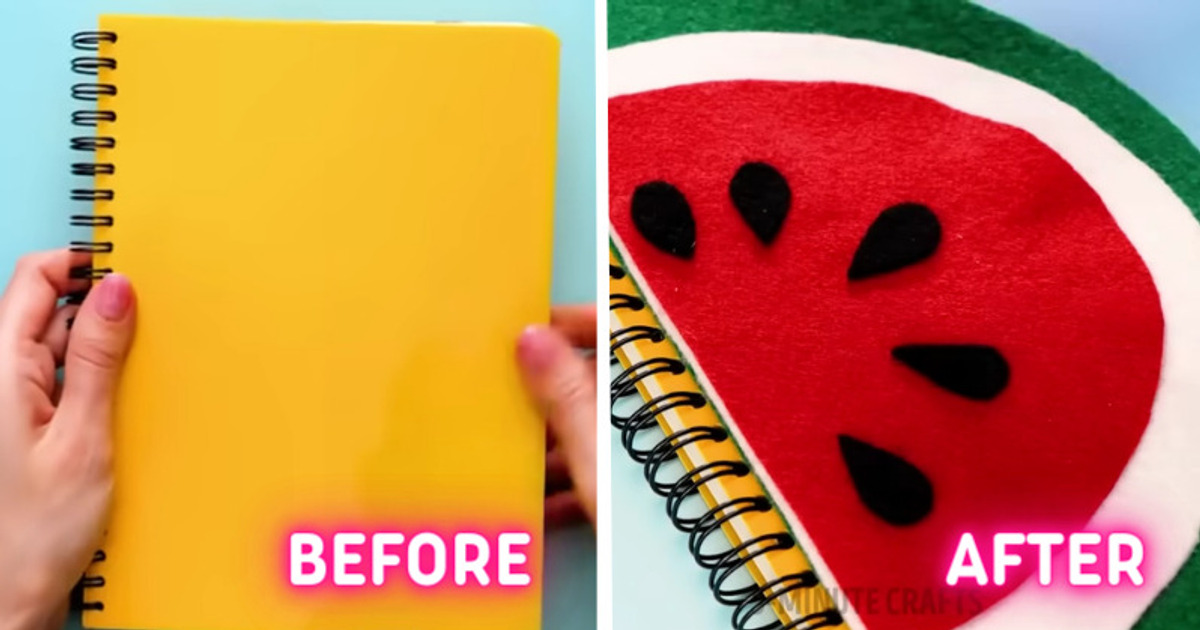
There’s something undeniably satisfying about a fresh notebook ready to capture your thoughts and ideas. But why settle for a plain, ordinary notebook when you can infuse a little creativity and personality into your study tools?. Let’s dive into the world of do-it-yourself notebook covers that reflect your unique style and, at the same time, work as clever and functional embellishments.
1. Custom happy stickers for your notebooks
Things you’ll need:
- White paper and color markers
- Baking paper
- Transparent tape
How to do it:
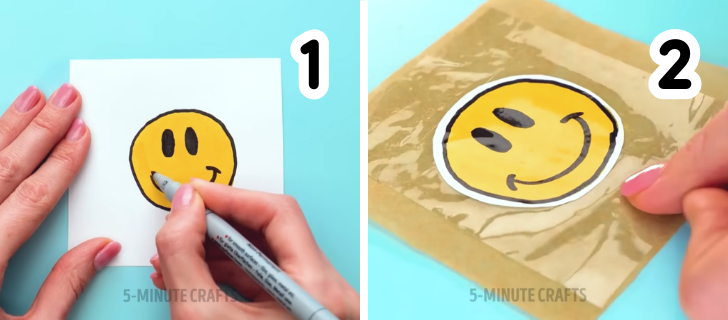
- Draw on the paper your preferred images. Rainbows, happy faces and unicorns are a great option
- Cut the images and put them on the baking paper
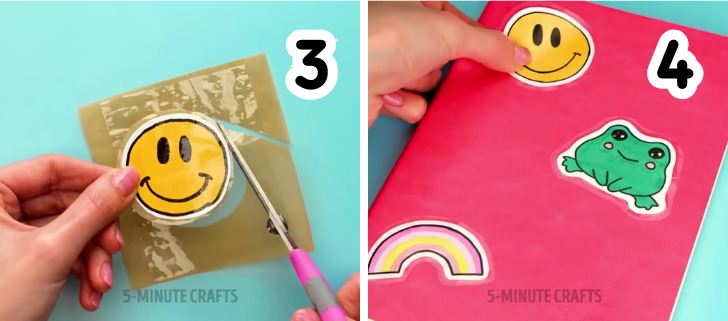
- Cover the images on the baking paper with transparent tape
- Cut out the images, peel the baking paper off the back and stick them to your notebook covers
2. How to make a watermelon notebook
Things you’ll need:
- Felt of colors: Green, white, red and black
- A hot glue gun
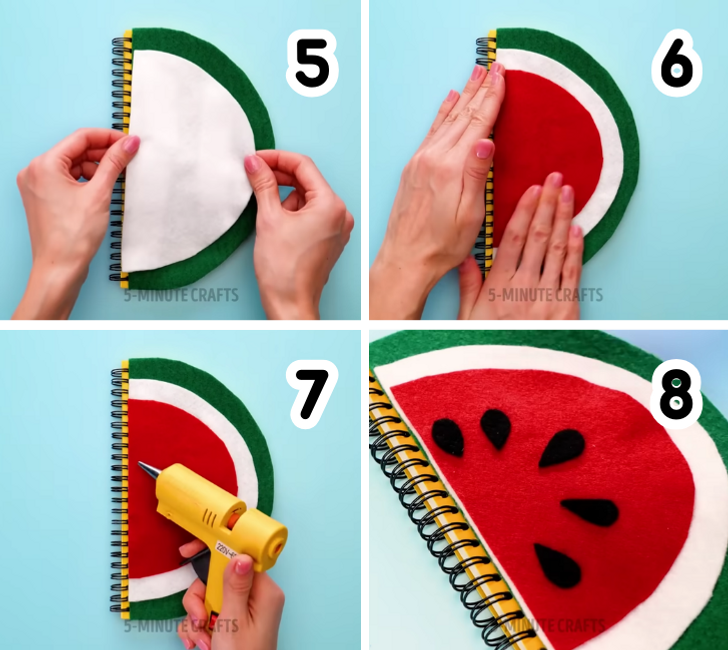
How to do it:
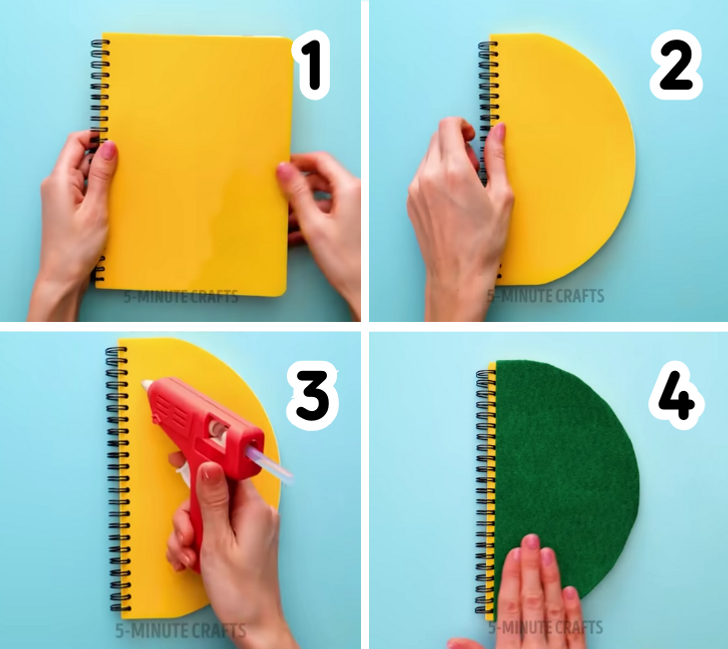
- Cut your notebook in the shape of a semicircle
- Cut semicircular felt pieces of each color
- Glue the felt pieces to the cover, starting with the green, then white, and then red
- Cut small black felt pieces to simulate watermelon seeds and stick them to the red felt
3. Rainbow pompoms cover
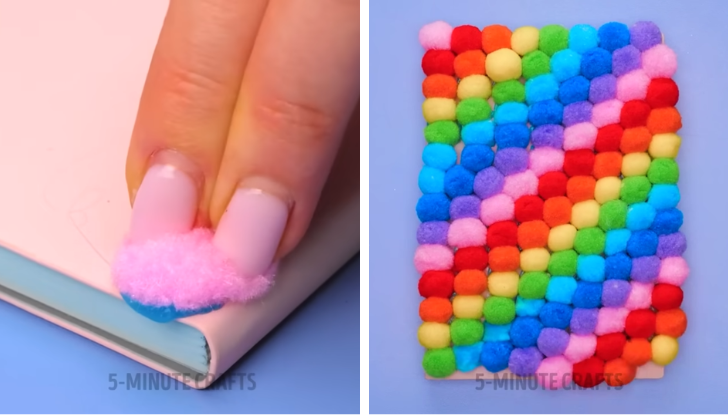
For this craft, you’ll just need pompoms of various colors and a hot glue gun:
- Glue the pompoms to the cover of your notebook
- You can create color patterns, like a diagonal or go in gradient
4. A tie-dye look for your notebooks
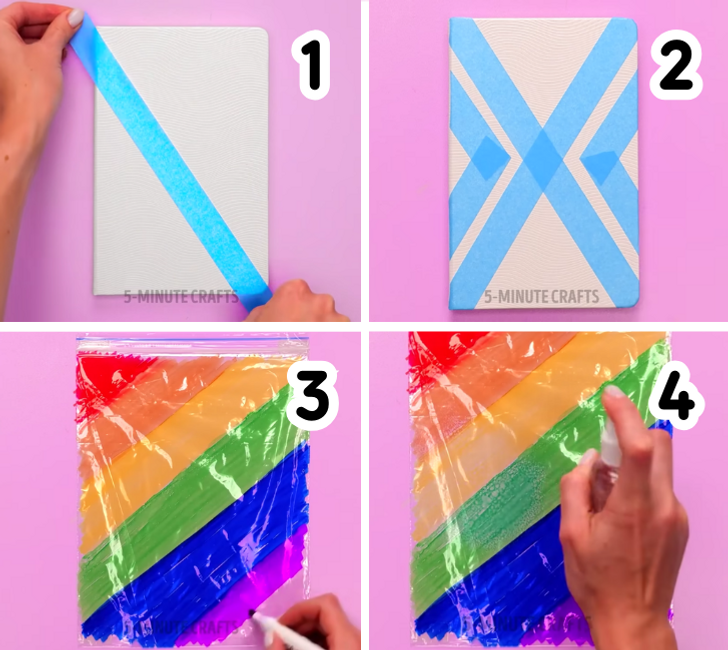
Things you’ll need:
- Masking tape
- A plastic bag
- Color markers
- Alcohol
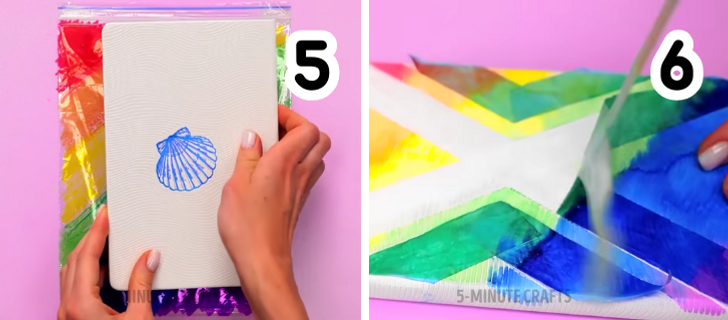
How to do it:
- Stick the masking tape on the notebook cover
- Paint the plastic bag with the markers
- Spray alcohol on the bag
- Press the cover of the notebook on the wet bag
- Remove the tapes
Check the video for more colorful crafts for your everyday life
Preview photo credit 5-Minute Crafts / YouTube
Share This Article