How Start Mountain Skiing
Mountain skiing is a sport you can do non-professionally and still have a lot of fun. But beginners have a lot of questions, like what they need to try skiing, how to start, and if it’s hard or not.
We at 5-Minute Crafts realize that simply reading this article won’t teach you how to ski. But we want to give beginners recommendations on where to start.
❗ This article is for informational purposes only. Before attempting mountain skiing, consult experts.
Equipment
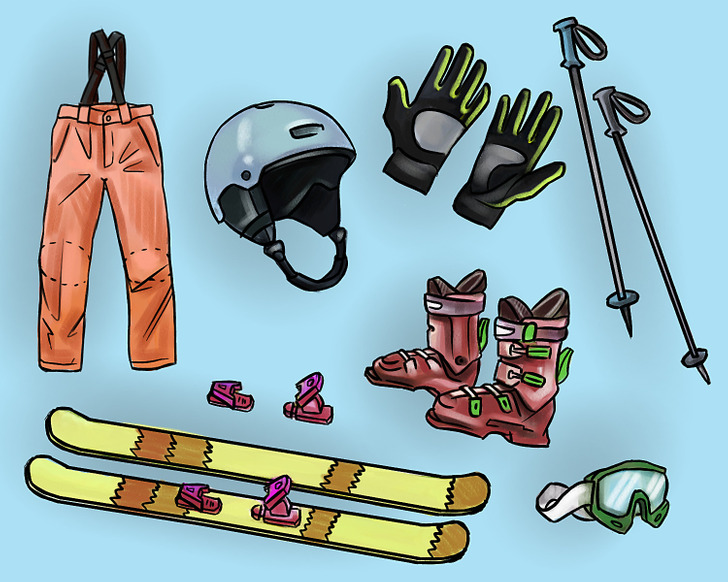
Beginner skiers don’t need to have the best equipment in the world, expensive accessories, or the best skis. But there are some things you can’t go skiing without, and it doesn’t matter if you buy your own gear or rent it.
Clothes for the weather:
- A jacket with a membrane that doesn’t let wind and moisture through is important. Don’t forget that different models of ski jackets are meant to be used in different temperatures. Also, such jackets usually have a lot of pockets, which are really great if you need to put a lot of stuff somewhere, such as a phone, cash, a ski pass, some kleenex, lip balm, or other things you might need.
- Make sure you have pants with a membrane that doesn’t let wind and moisture through.
- You can wear overalls instead of a jacket and pants.
- The middle layer of clothes should be made of fleece or should be a woolen sweater or a hoodie.
- The base layer should be thermal underwear for certain temperatures. Usually, people wear turtlenecks or long sleeves with leggings that are comfortable to wear under ski pants.
- Socks for mountain skiing are something you shouldn’t skimp on. Mountain skiing socks support the foot, keep you warm, and, what’s really important, help compensate for the pressure of the boots on the shins.
- Gloves or mittens, and they must be waterproof and warm.
Sports equipment:
- Skis should have the right-sized bindings.
- Ski boots are the most important part of a skier’s equipment. The boots should be the right size and quite tight to keep the leg supported. Consult an expert when buying your boots.
- Ski poles should be of the right size.
- Wear a helmet.
- A mountain skiing mask or glasses are an important accessory you can’t ski without. The cold wind and snow may distract you when you’re going at high speeds, and it’s really dangerous.
Parts of mountain skis
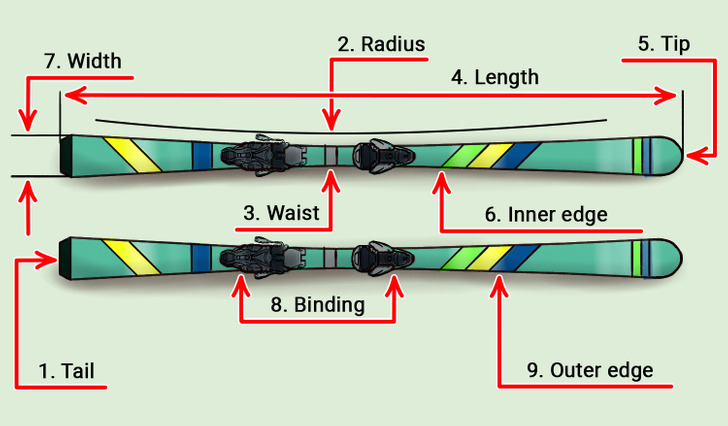
The main terms a beginner should know:
- The tip — the front part
- The tail — the back part
- The waist — the middle
- Radius
- Length
- Width
- Inner edge
- Outer edge
- Bindings
The edges of the skis may be short and when skiing, they might work as a steering wheel, cutting through the snow and changing the direction of movement.
Check the binding.
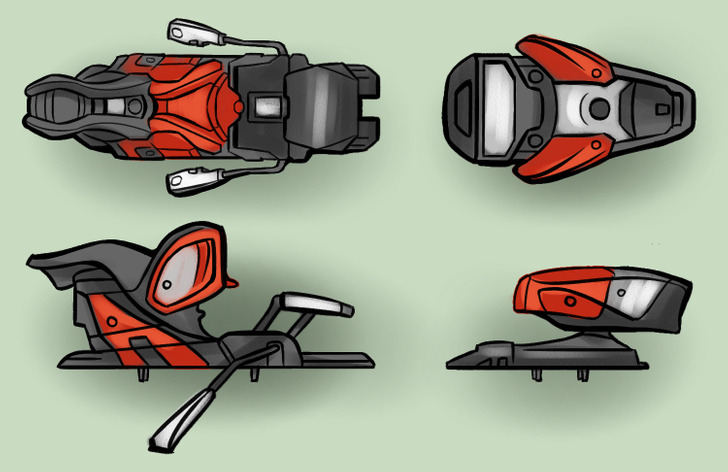
Mountain ski bindings should be adjusted according to the height and weight of the skier. If you are renting skis, make sure the bindings match your individual parameters. This is a safety matter.
How to check your bindings (you need the help of an experienced technician):
- Install the bindings of the right size, matching the boot and the ski size.
- Check and adjust DIN settings depending on the weight, experience, and size of the skier.
- There are visual indicators to show each measurement, and the technician sets the values and torque according to the industry standards. The toe and the heel gears are fitted with a tension adjustment system to check the ease with which the ski binding will release.
Skier stance
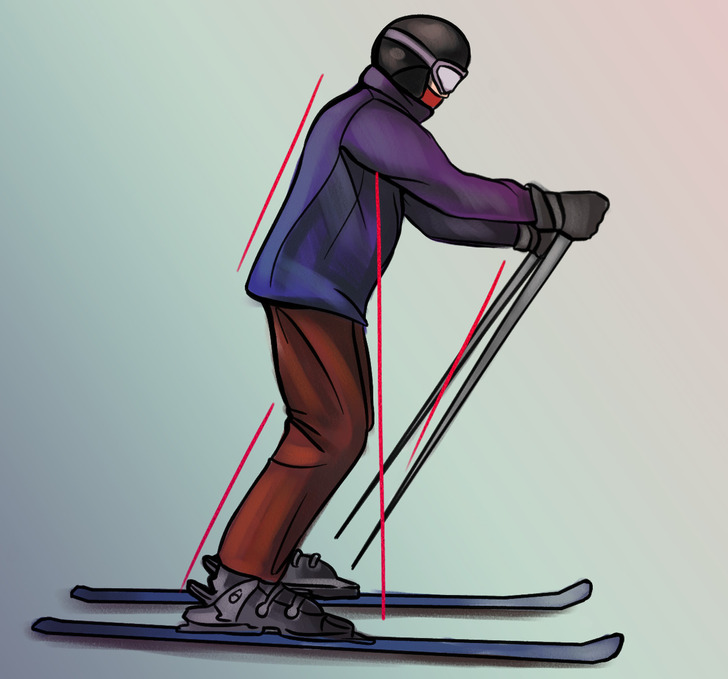
The right stance is an important element in many kinds of sports. A beginner skier needs to learn the right stance before anything else. It ensures that you will do all other things correctly.
In skiing, the stance changes all the time because an athlete is moving. But there are some aspects that remain unchanged.
- Bend your knees, as it will help with amortization.
- Put the skis on correctly. They should be parallel to each other at shoulder width. Later, the ski position will depend on the direction of movement and the maneuver you are doing.
- Lean your body forward a little. It will help distribute the body weight.
- Make sure you are comfortable.
- Keep your arms in front of you, bent at the elbows.
First steps
How to put on ski boots:
- If you are renting your boots, wear them for at least 20 minutes. Try bending your knees and squatting to make sure the boots really fit you.
- Change your boots when it’s warm before going outside: warm boots remain flexible, so they are easier to put on, and your legs will remain warm for a longer time.
How to attach the boots to the bindings:
- Make sure the soles of the shoes are clean and that there’s no snow on them.
- Place the skis parallel to the slope so they don’t slide down accidentally.
- Stand next to the lower ski — the ski that is positioned closer to the valley — and push the ski boot, toe first, into the binding.
- Slowly press the heel downward until the binding has clicked into place and is securely fastened onto the boot.
- Repeat with the second foot — using ski poles or someone giving a helping hand can help the skier stay stable and balanced.
Do a warm-up:
You can do it in ski boots, with skis or without them. It’s recommended to do each exercise for at least 1 minute. A good warm-up can reduce the risk of injury.
- Bend and straighten your knees.
- Squat and straighten your body.
- Move your bent legs to the sides imitating the positions you can be in while skiing.
- To warm up your upper body, do rotating movements with your arms. You can do this exercise with your arms bent and when they are straight. Do the movements forward and backward.
- Lift your right leg forward, keep this position for a few seconds, move it back, then hold the position. Repeat this on the left leg.
- Bend the leg at 90 degrees, move it back, and hold the position for a few seconds. Repeat with the other leg.
- Do lunges. One leg should be straight and to the side, and the other one should be bent at the knee.
How to choose a slope

Ski slopes are different in terms of difficulty. In different countries, there are differences but, in general, the terms are similar:
- A slope for learning is flat and wide.
- A green slope is for rookies.
- A blue slope is for amateurs.
- A red slope is of medium difficulty.
- A black slope is very steep and is for experienced skiers only.
Types of ski lifts
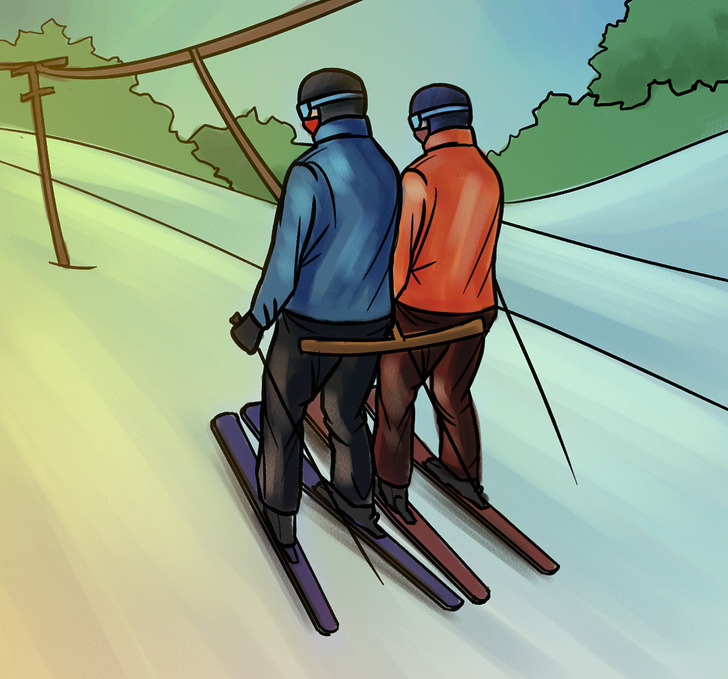
There are several types of ski lifts.
Aerial:
- Chairlifts
- Gondolas
- Combined lifts
Surface lifts:
- T-bar
- Poma
- Rope tow
- Magic carpet
What you should know when using a surface lift:
- When entering a surface lift, a skier should stand parallel to its motion.
- Make sure the skis don’t cross or you might fall.
- Keep the poles in 1 hand.
- If there’s a lift with a plate, you need to hold it and keep it between the legs.
- If you’re using a pull, place it in the back, like a seat.
- When going up, make sure the skis are parallel and the legs are bent.
- If you fall down when going up, just step to the side, go down, and try again. When you’re at the summit, remove the left and quickly step aside.
What to do on a chairlift:
- When you’re in a line, keep the poles in 1 hand.
- When the lift is near, sit on it.
- Put the safety bar down.
- Before arriving, lift the safety bar.
- At the summit, push from the seat and quickly step aside to make way for other people.
Plough exercise
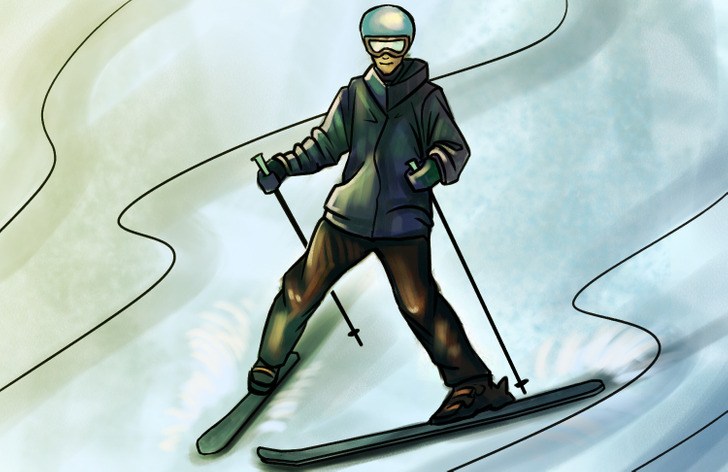
The “plough” exercise is necessary for all beginners.
- Learn the plough technique on a flat surface, then on a learning track, as it helps you go down any slope safely.
- Direct the tips of the skis to each other with your heels wide. This way, the position of the skis will look like a V, or like a plough.
- Turns come next. Start with sliding down slowly. Remember that if you put the skis parallel to each other and direct them down the slope, you will quickly reach a very high speed. It’s dangerous if you are a beginner. So keep the skis in a plough position. To turn right, press on the left ski, and to turn left, press on the right one. The knees should be looking inward. To change the direction of the turn, distribute the weight to the opposite side.
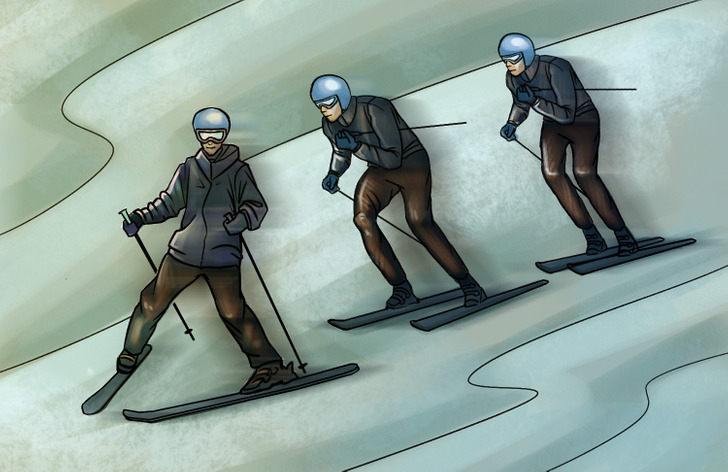
4. To brake, put the heels wide. Direct the knees inward and remember that your legs should be bent. Make sure the skis don’t cross. This way, the skis turn on their inner edge, and then braking starts.
Travers
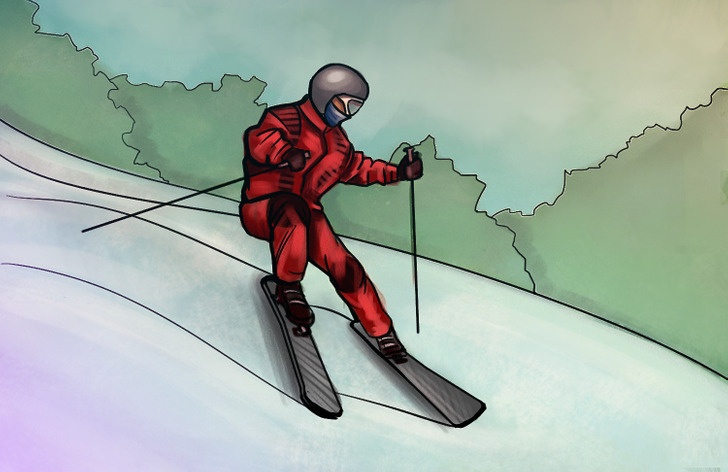
Traversing is for more experienced skiers. During the traverse, the skies are parallel to each other and you are going not down the slope but perpendicular to it.
Here is what you need to do to traverse:
- Put the skies across the slope in the direction you want to move. Stand on the edge to prevent the skis from sliding.
- Direct the weight of the body on the lower ski. The body, the knees, the shoulders, and the hips should be in the direction of the movement.
- Start sliding down the slope directing the skis diagonally down.
- When going down the slope, control your speed, directing the skies down the slope to speed up or up the slope to slow down. To slow down, put the skis on the edge.
- To turn, put the skis parallel to the slope and put your weight on the opposite leg.
- To stop when traversing, direct the skis up the slope.
Going from traverse to plough and back
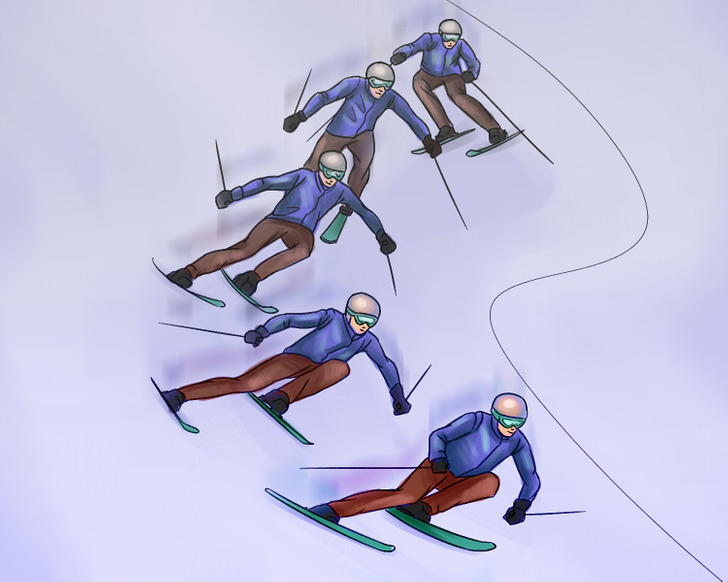
To feel more confident, move down the slope on the traverse and turn with the plough. It will help you avoid crazy speeds and control the process better.
Braking
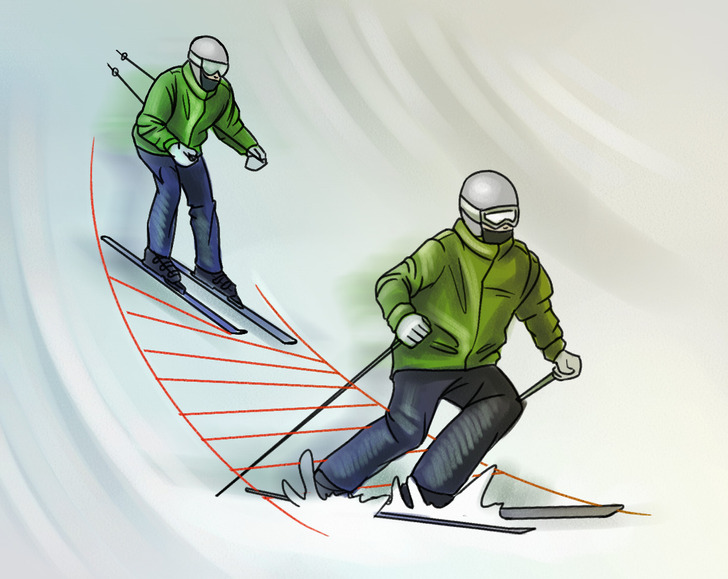
To slow down when going down the slope, do this:
- Brake with the plough.
Or:
- Go to traverse.
- Put the skis parallel to the slope.
- Put the skis on the edge.
- To slow down even faster, direct the skies a bit up the slope.
