How to Make the Quality of Photos Better
If you want your photos to be creative, you don’t have to use ready-made filters in photo editors, apply masks on Instagram, or use expensive professional equipment. You can improve the quality of your images and make them stand out with the help of having certain things on hand and particular camera features.
5-Minute Crafts would like to share 10 simple methods that will help you to improve the quality of your photos without using photo editors or professional equipment.
Method 1
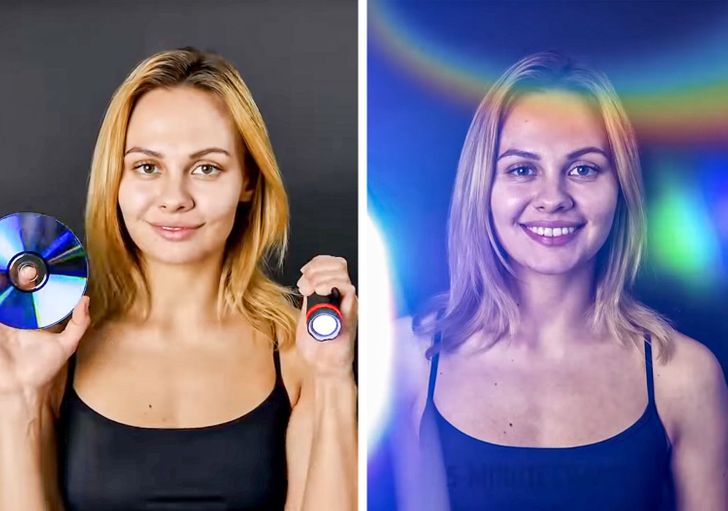
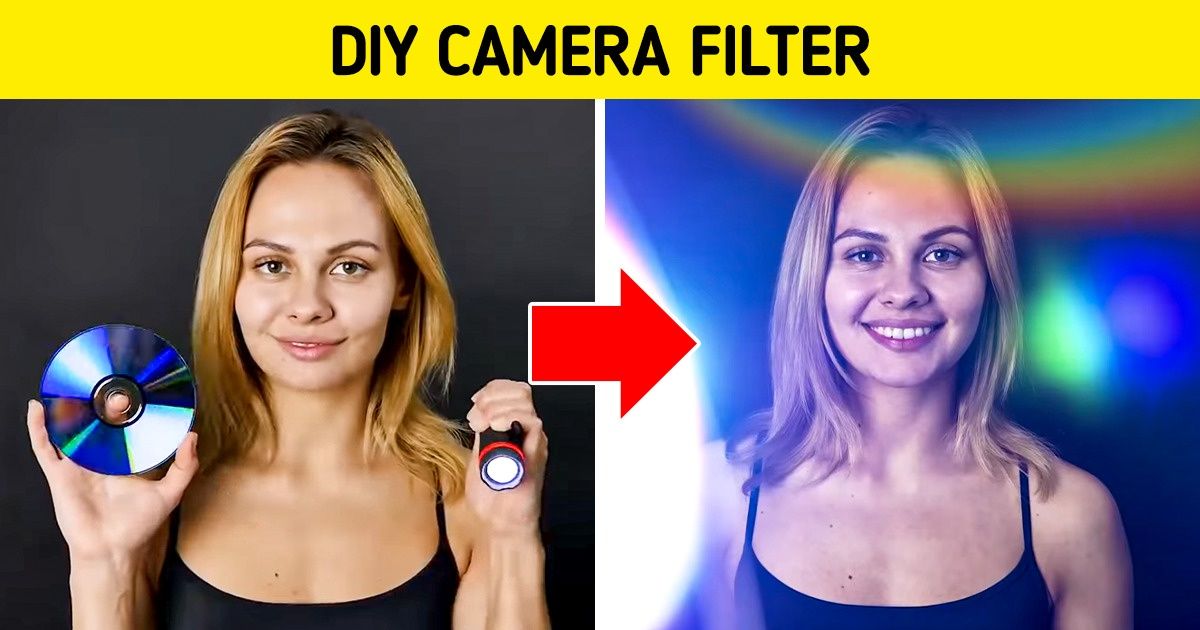
For this, you’ll need a photographer and a photographer’s assistant. Take a laserdisc and a flashlight, and hand them to the photographer’s assistant. Ask them to stand close to you and direct the light of the flashlight to the disk so that the reflected rays fall on you. Make sure that the space you’re standing in is quite dark. Now, strike a pose. With this method, you’ll get photos with unusual effects.
Method 2
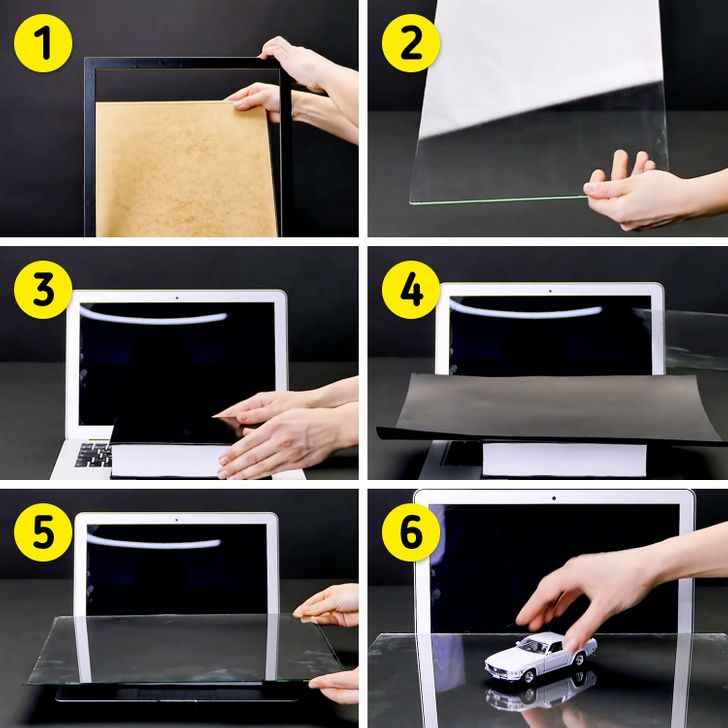
1 and 2. Take a picture frame and remove the glass.
3. Put a book on top of the keyboard of your laptop.
4. Put a piece of black cardboard on the book.
5. Put the glass from the picture frame on top.
6. Place the object you want to take a photo of on top of this construction.
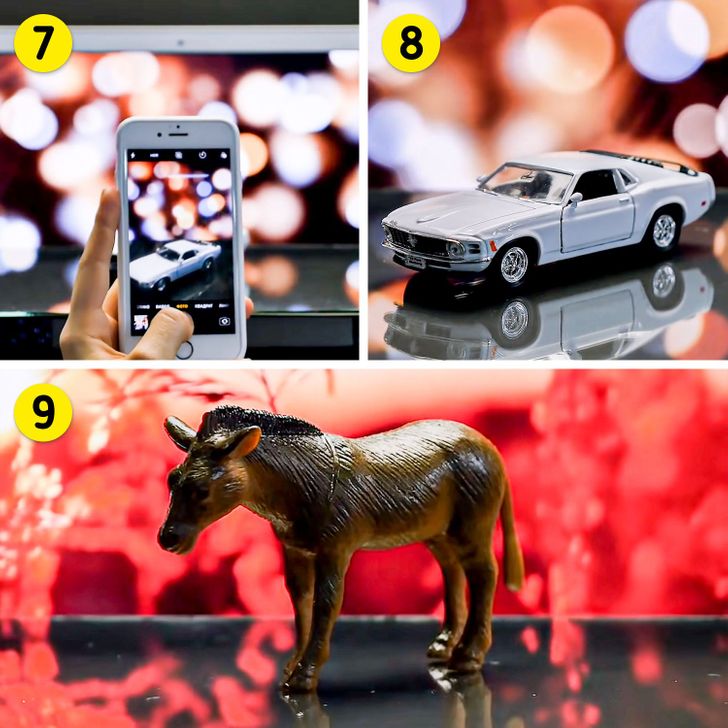
7. Play the background video that suits your theme on the screen.
8 and 9. Choose different background videos depending on the object you want to take the photo of.
Method 3
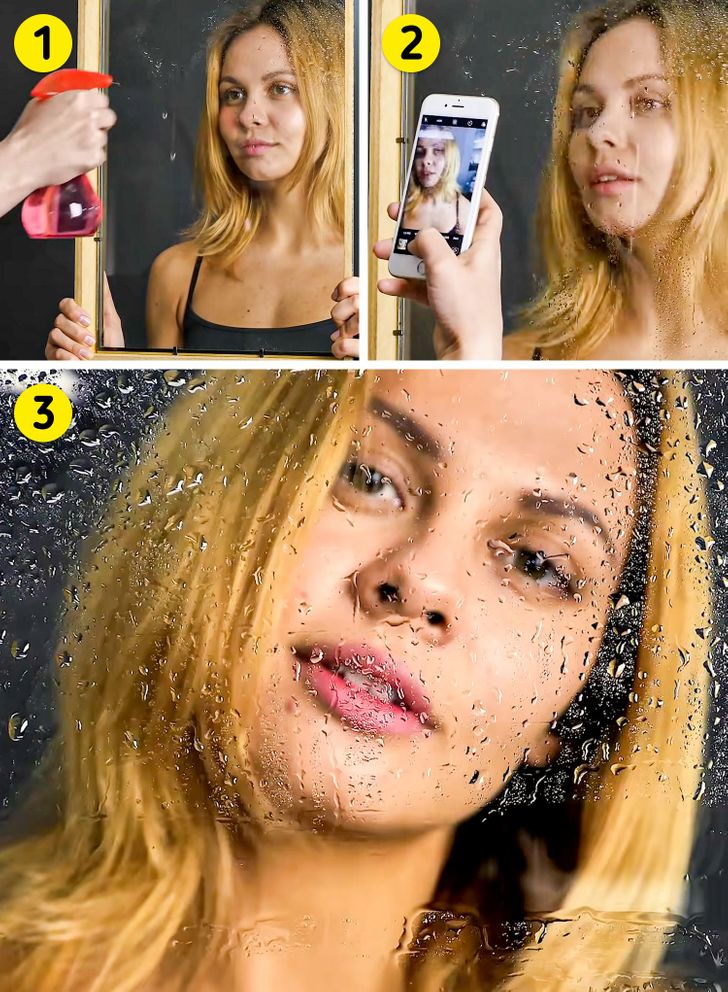
1. Let your model hold a picture frame with glass in front of their face. Spray the glass with water.
2. Take photos.
3. You’re doing great!
Method 4
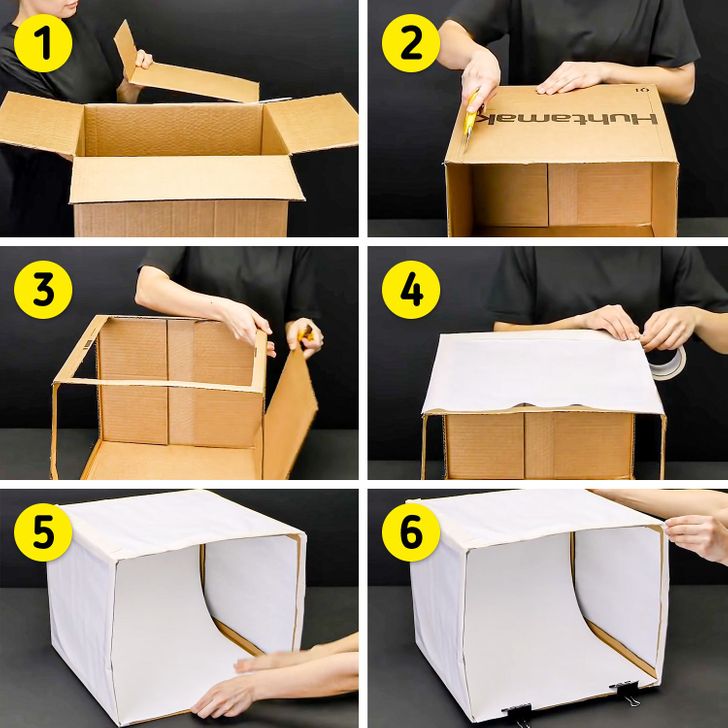
To take a photo of an object, you’ll need a DIY lightbox.
1. Take a home appliance packaging box and cut off the side flaps that are used for keeping it closed.
2 and 3. Cut out the top and sides of the box, leaving approximately 1-inch rims on each side. The backside and the bottom of the box should remain in place.
4. Attach tissue paper to the rims with paper-backed tape.
5 and 6. Put a piece of filter paper inside the box and secure it.
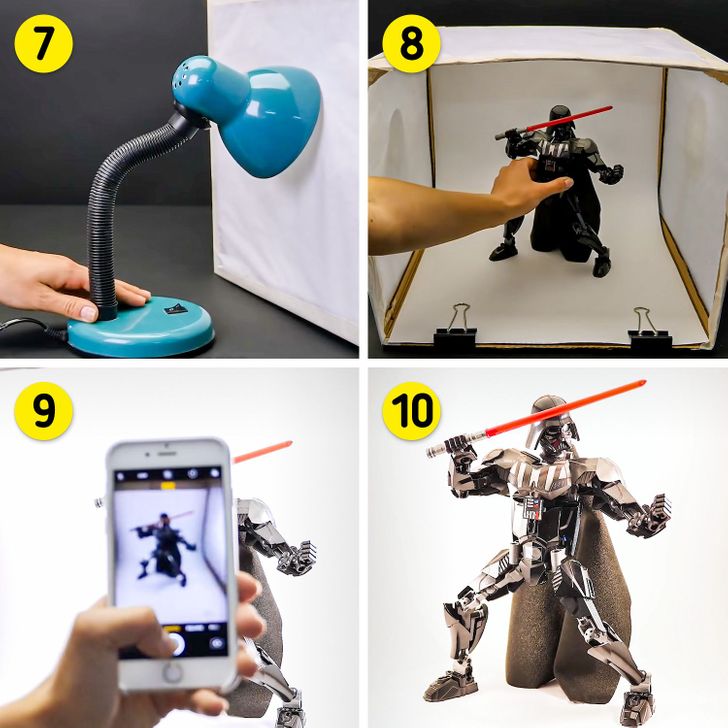
7. Place table lamps to the right and to the left of the lightbox.
8. Put the object you want to take the photo of inside the lightbox.
9. Switch on the lamp and take the photos.
Method 5
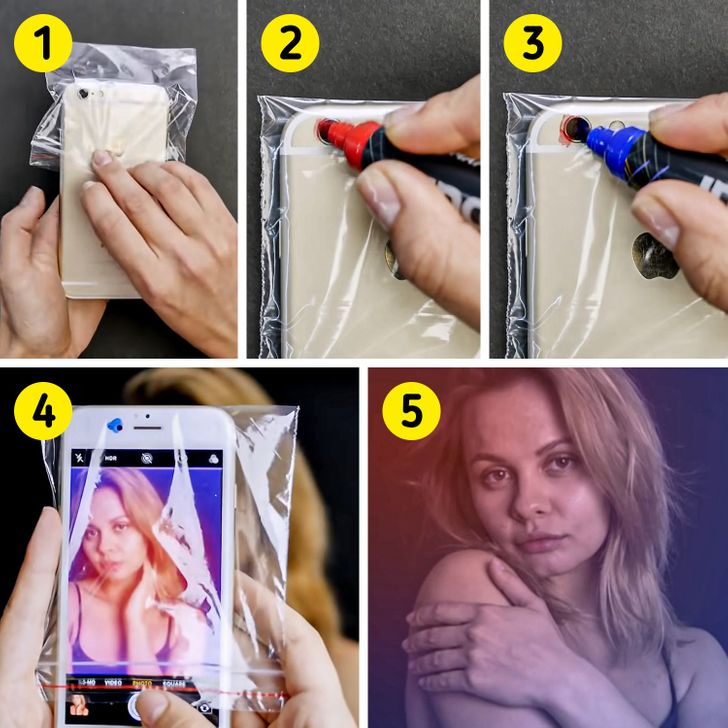
1. Put your smartphone inside a Ziploc bag.
2 and 3. Paint the spot of the bag against the camera lens with a marker. Half of the circle should be painted red and the other half should be painted blue.
4. Take some photos.
Method 6
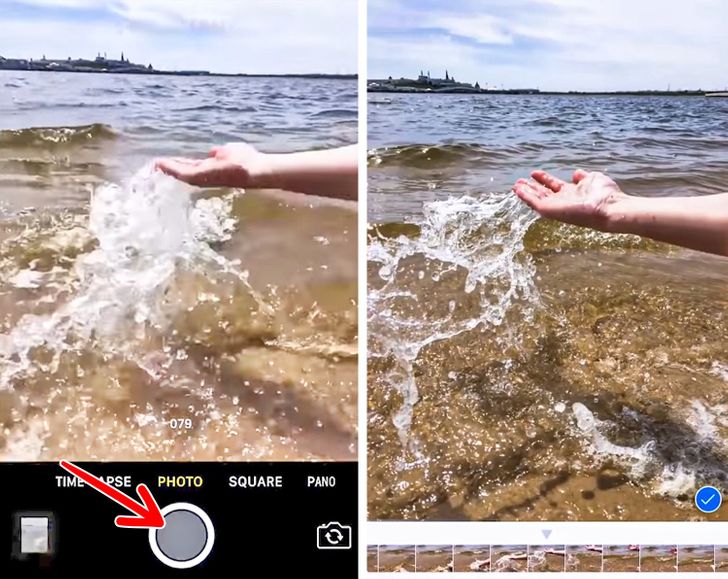
Press and hold the shutter button to take a good photo of a repetitive action. This way, the burst mode starts. After that, choose the best image from the series of photos that were taken.
Method 7
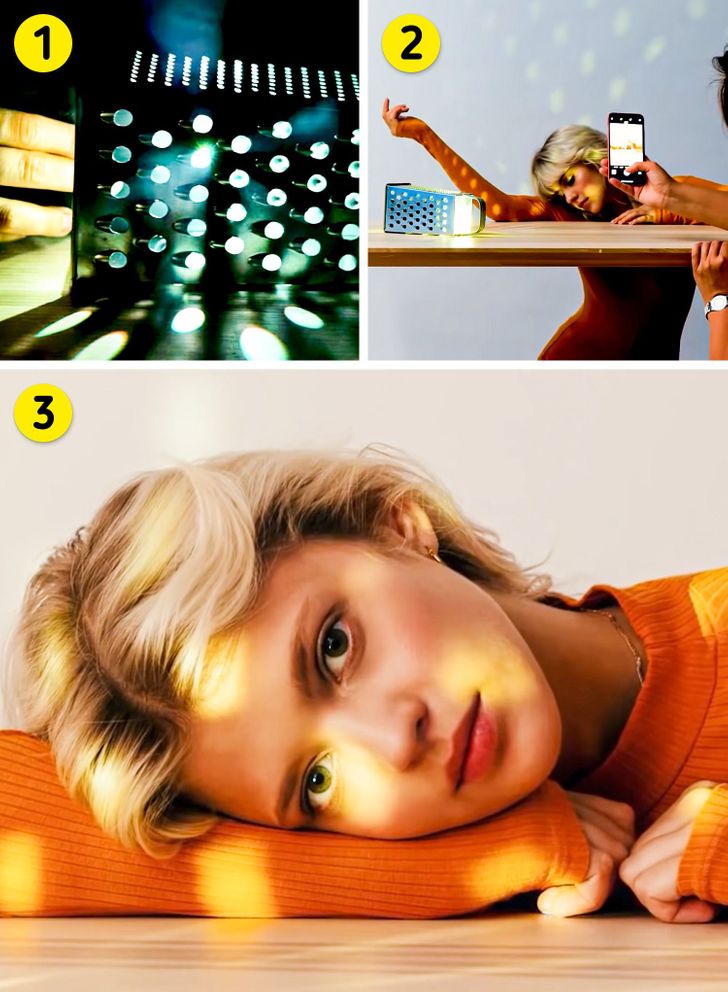
1. Place a flashlight inside a rectangular grater.
2. Place your face next to the grater and pose to the photographer.
3. You look wonderful!
Method 8
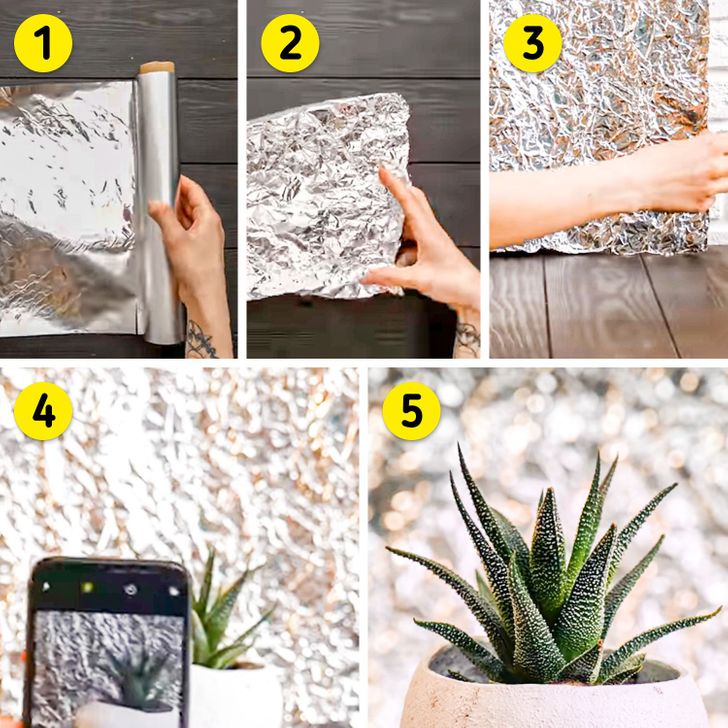
1. Take a piece of aluminum foil.
2. Crumple it before flattening it out again.
3. Put the foil against the wall.
4. Place the object you want to take a photo of against this backdrop and take a photo.
Method 9
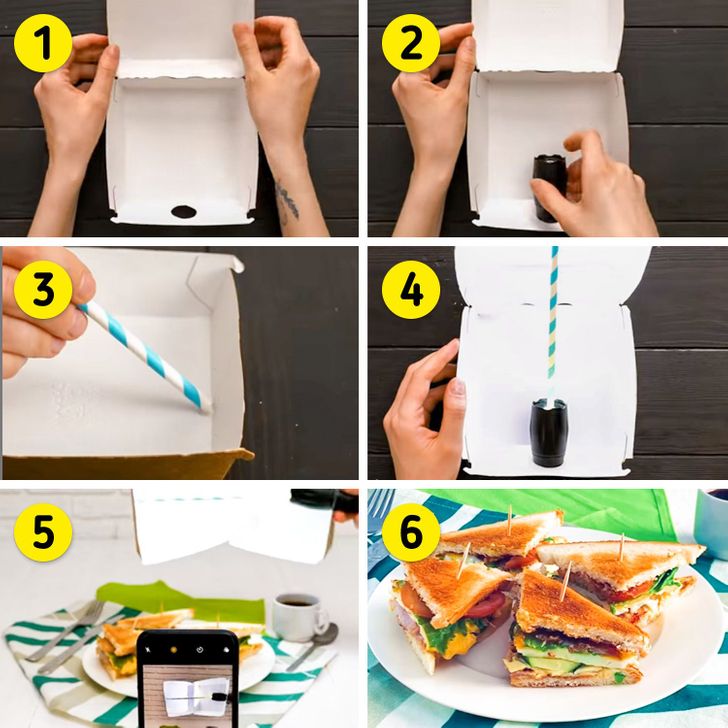
1. Take a hamburger box. Make a hole in one of its sides that can handle a small flashlight.
2. Place the flashlight inside this hole.
3. Glue a straw to the other side of the box.
4. Press the other end of the straw against the flashlight and switch it on.
5. Illuminate the objects you want to take photos of with one hand, and take photos with the other.
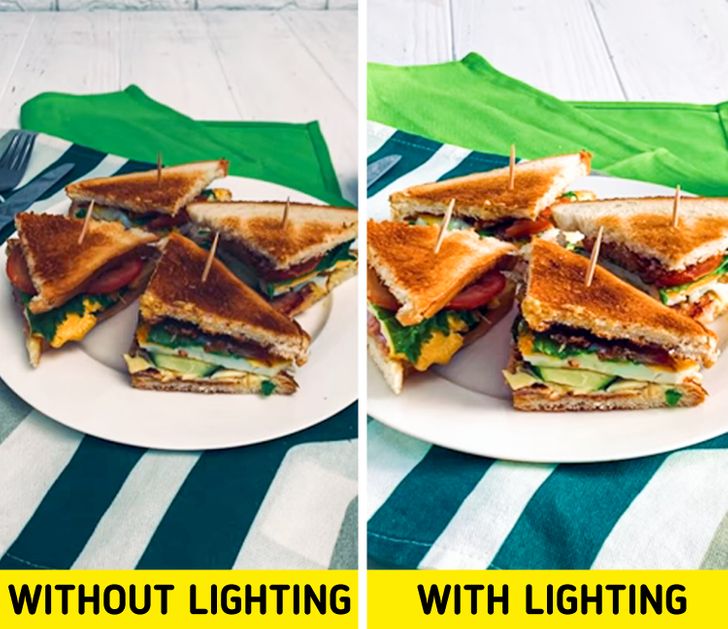
You can see the difference between the photos, both with and without additional lighting, with the naked eye.
Method 10
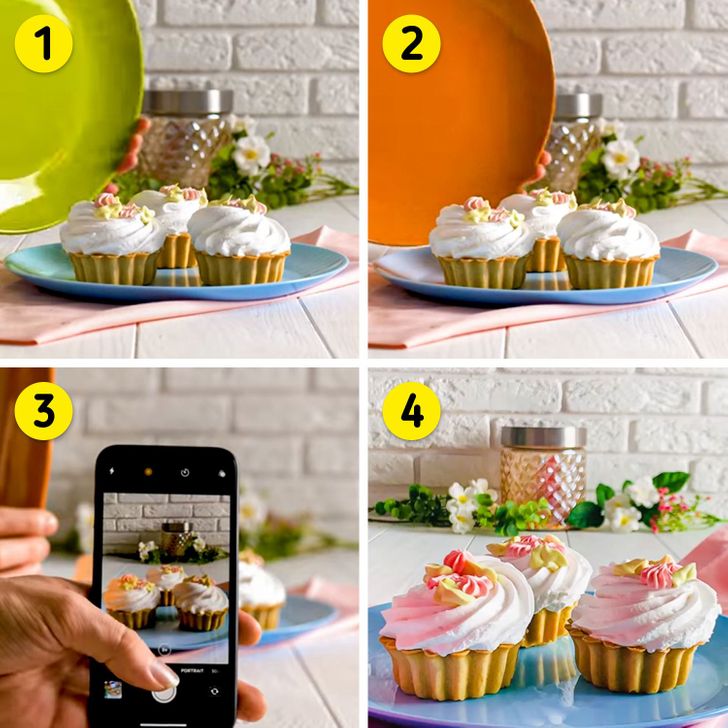
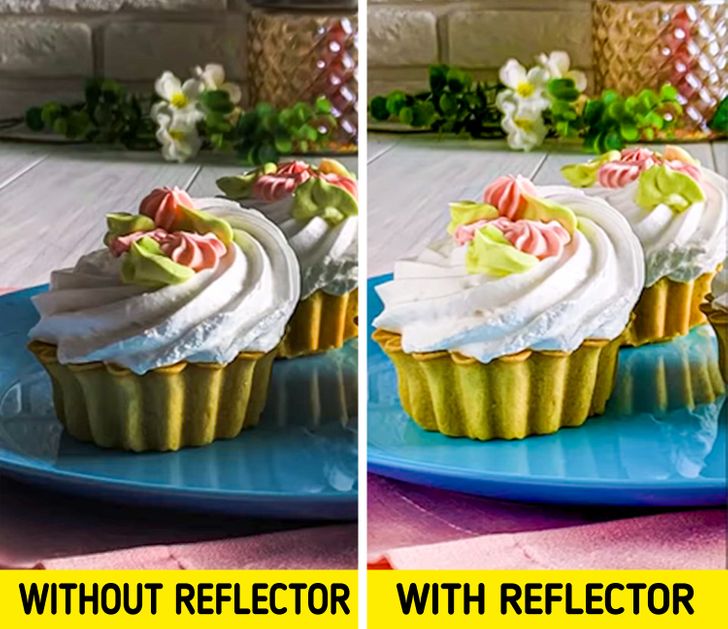
When taking a photo of still life, use plates of different colors as reflectors to get the best result possible.
