How to Run: 12 Tips
According to research, the proper technique is a key component of running and performance. There are many things that come together when thinking about technique, ranging from footstrike to breathing and posture.
5-Minute Crafts is showing you some tips to achieve the best performance while running.
A. Posture
You probably know that your posture should be erect with your head up, your back straight, and your shoulders level. However, sometimes this posture may change when you’re tired. In this section, we’ll go through a few tips to help you correct your posture while running.
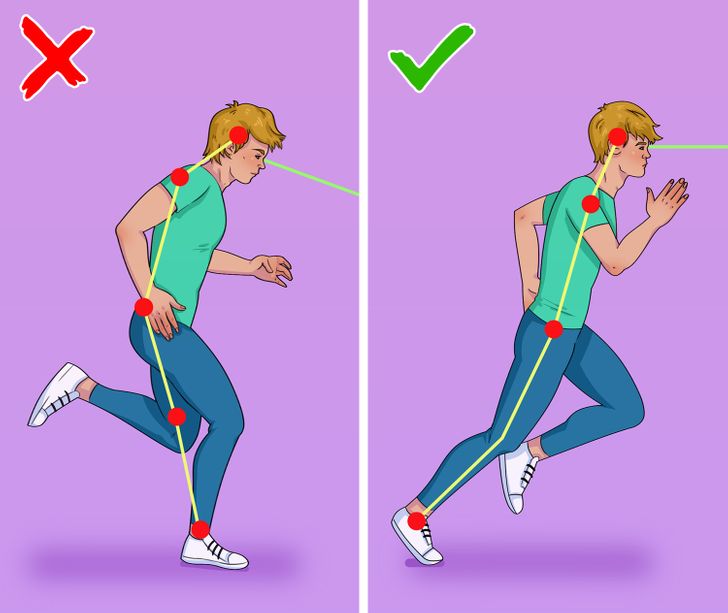
- Always look ahead. Your eyes should be focused on the ground about 10 to 20 feet ahead of you at all times instead of at your shoes. Make sure you’re not leaning forward with your head when you’re running by holding it so that your ears are right over the middle of your shoulders. Imagine yourself as a puppet on a string as you run, with your entire body held long and straight.
- Keep your hands at waist-level and your arms at your sides. When runners get tired or tense, their hands start to move up toward their shoulders, shortening the distance between the upper arm and forearm. If you notice this happening, allow your arms to drop by your sides and shake them out. Then reposition your arms at a 90-degree angle. Remember to avoid side-to-side arm swinging, as you’re more likely to slouch, which means you’re not breathing efficiently. That can lead to side stitches or cramps in your abdominal area.
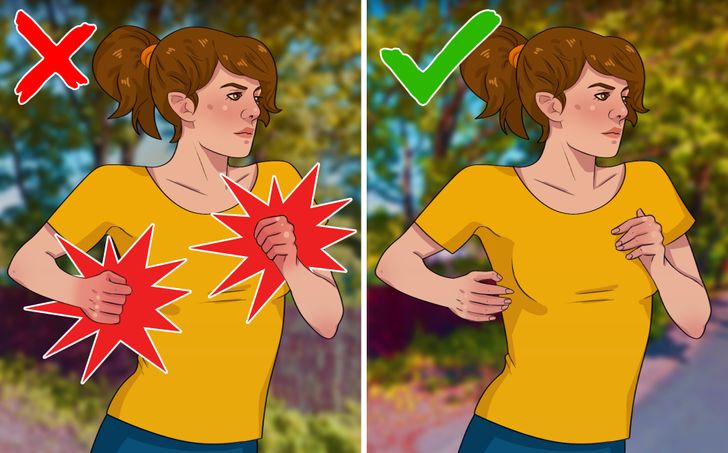
- Relax your hands. When running, keep your arms and hands relaxed. Don’t tighten your hands into fists because the tension can move from there all the way up your arms to your shoulders and neck. A good way to avoid this is to pretend you’re holding an egg in each hand, trying not to break them.
- Rotate your arms from your shoulders. Think of your arm as pendulums. They should swing back and forth from your shoulder joint, not your elbow joint. In fact, your hands should be almost grazing your hips as your arms come back in front of you.
B. Footstrike
There is no such thing as a universal footstrike pattern: there are arguments both in favor of and against each technique. Additionally, there are different ones that are valuable for various terrains, elevation changes, the specific section of a race, etc. This is why knowing different footstrike patterns can come in handy.
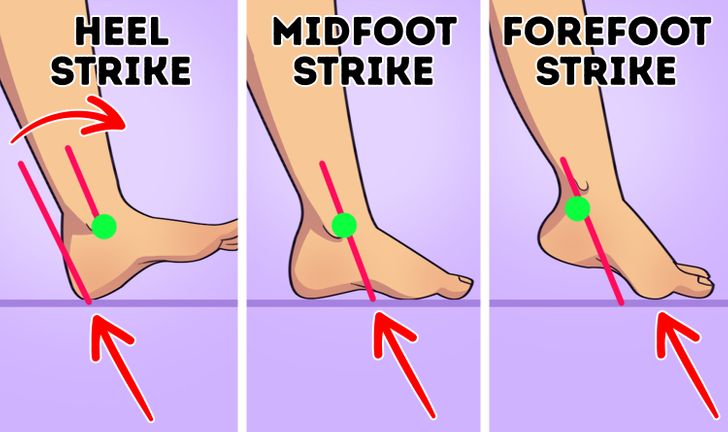
- Find your footstrike pattern. To determine what type of footstrike you have, it’s best to take a video of yourself running. There are 3 footstrike patterns.
- Heel strike: This is when the heel hits the ground before the rest of the foot follows suit to land. This is also known as a rearfoot strike.
- Midfoot strike: This is when most of your foot hits the ground at once, with your weight balanced right about even on top of your hips, knees, and ankles.
- Forefoot strike: This is when your weight is heavily focused onto the ball of the foot and the toes, your heels are likely not hitting the ground between steps, and your upper body may be a little bent forward from the hips.
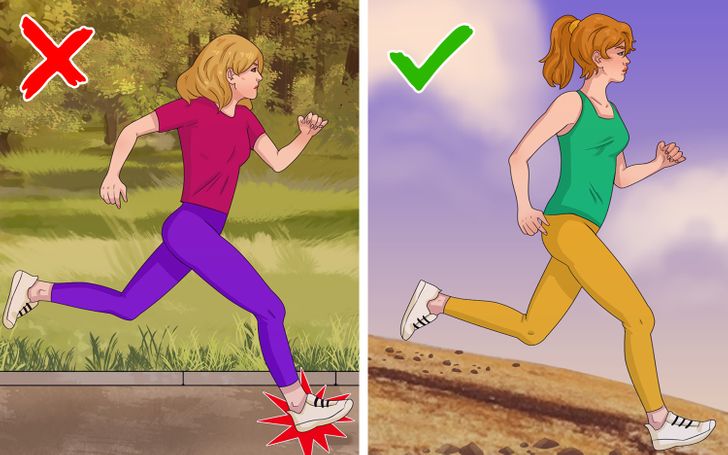
- If you’re more of a rearfoot runner: Most runners use a rearfoot strike because it often feels more natural compared to forefoot or midfoot running. However, striking with the rear foot can make some runners more prone to overstriding, which can lead to pain or injury in the knees and hips. You might be better off sticking to this method on a downhill or sharp turn where it will act as a brake system. In those cases, it could actually help minimize the risk of injury.
- If you’re more of a midfoot runner: This technique might shorten the amount of time the foot is making contact with the ground, which could help to speed up the pace. On the other hand, it could increase your chances of getting injured. In this case, increasing the total number of steps you take per minute (cadence) can make your running style lighter since the quicker you can get your landing foot off the ground, the lighter the load it will have to bear.
- If you’re more of a forefoot runner: Research shows you run less of a risk of developing running-related injuries. However, this technique can also lead to bouncing, so your head and body are moving up and down too much, meaning you’re wasting a lot of energy. To minimize bounce, take short, light steps as if you’re stepping on hot coals.
C. Breathing
Your breath is always important, but when you’re running it’s even more crucial. To maximize your performance, it’s essential to tune in with your breath and make the appropriate improvements if you want to boost ease and efficiency.
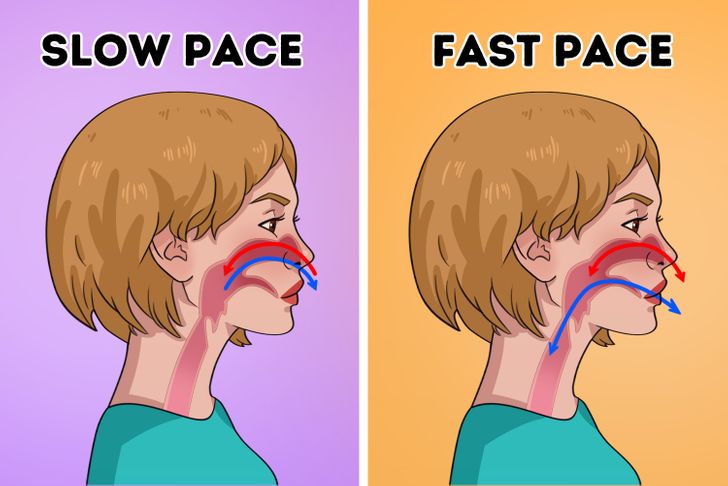
- Use both your nose and mouth. If you’re going out for a casual run at a slower pace, you may use nasal breathing, and during high-intensity runs or sprints, you could try breathing through your mouth since it’s more efficient. But using only your mouth can have a hyperventilating effect, while using only your nose won’t provide you with enough oxygen. In most cases, breathing through both the mouth and the nose will keep your oxygen intake steady and allow you to expel carbon dioxide quickly.
- Try diaphragmatic or belly breathing. This technique strengthens the muscles that support breathing and allows you to take in more air. Not only will you be able to use oxygen more efficiently, but you’ll be less likely to experience side stitches.

- Choose the right time to run. This might seem unrelated to breathing, but doing so will make it easier to breathe, as inhaling clean air is better for running. If you plan to run outdoors in an urban area with air pollution, choose the time of day when traffic is at its lowest. Avoid the busiest roads and choose streets that are less congested.
- Time your breathing with your cadence. Breathing in a rhythmic pattern allows you to take in more oxygen and put less stress on your body. Alternating your exhales between your right and left foot is a good way to balance the stress of the impact between both sides of your body. You can try, for example, a 2:1 breathing pattern in which you inhale for 2 steps and exhale for 1.